Free graphing transformations worksheets with translation, rotation, reflection and dilation cases on coordinate grids. Letter/A4 PDF and editable SVG answers included.
Choose Letter or A4, then download a student sheet first. Keep the separate reference or answer file closed until you have attempted the case. Every worksheet, SVG and answer is free without signup.
Choose your paper and download
Download paper size
Every worksheet and answer is free. No signup.
Free original resourceTR01
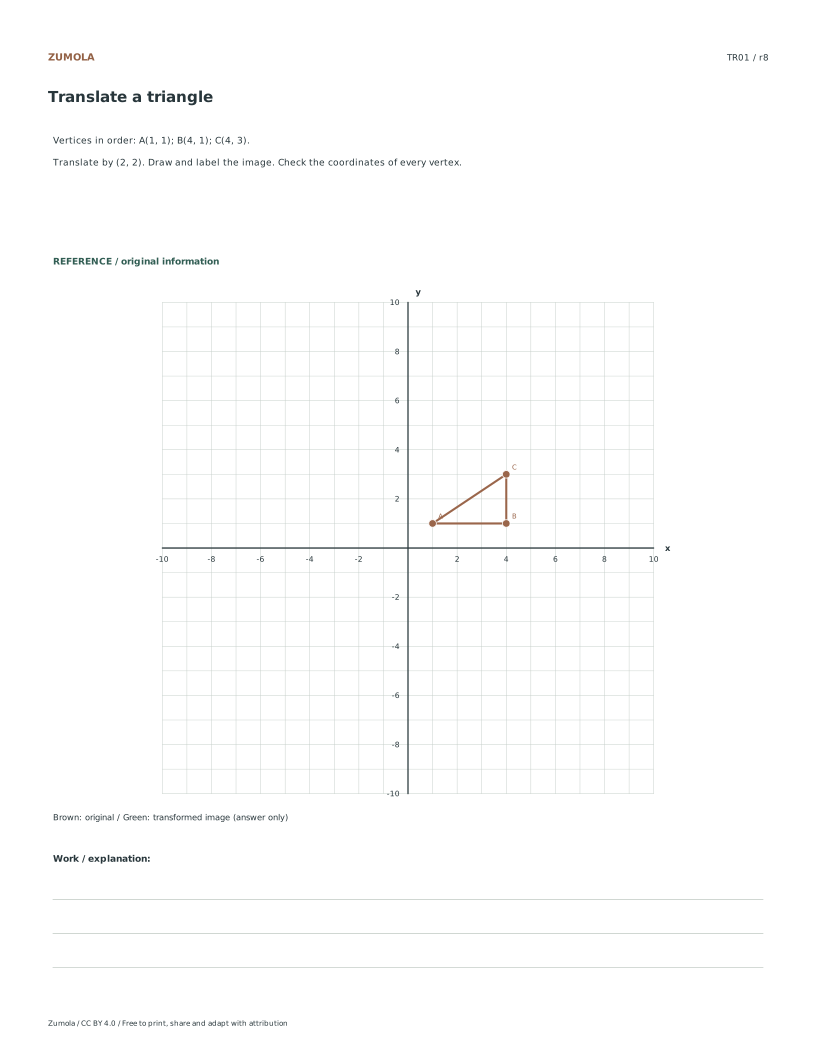
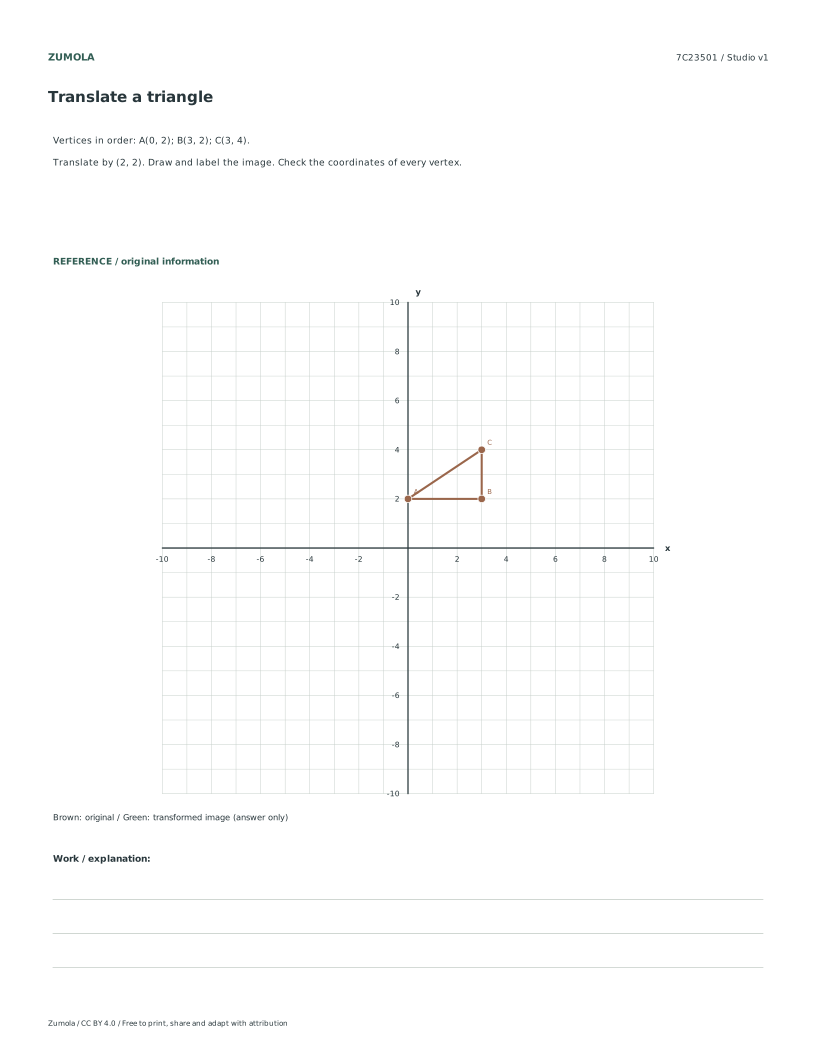
Translate a triangle
Original worksheet collection. Letter or A4 PDF and editable SVG.
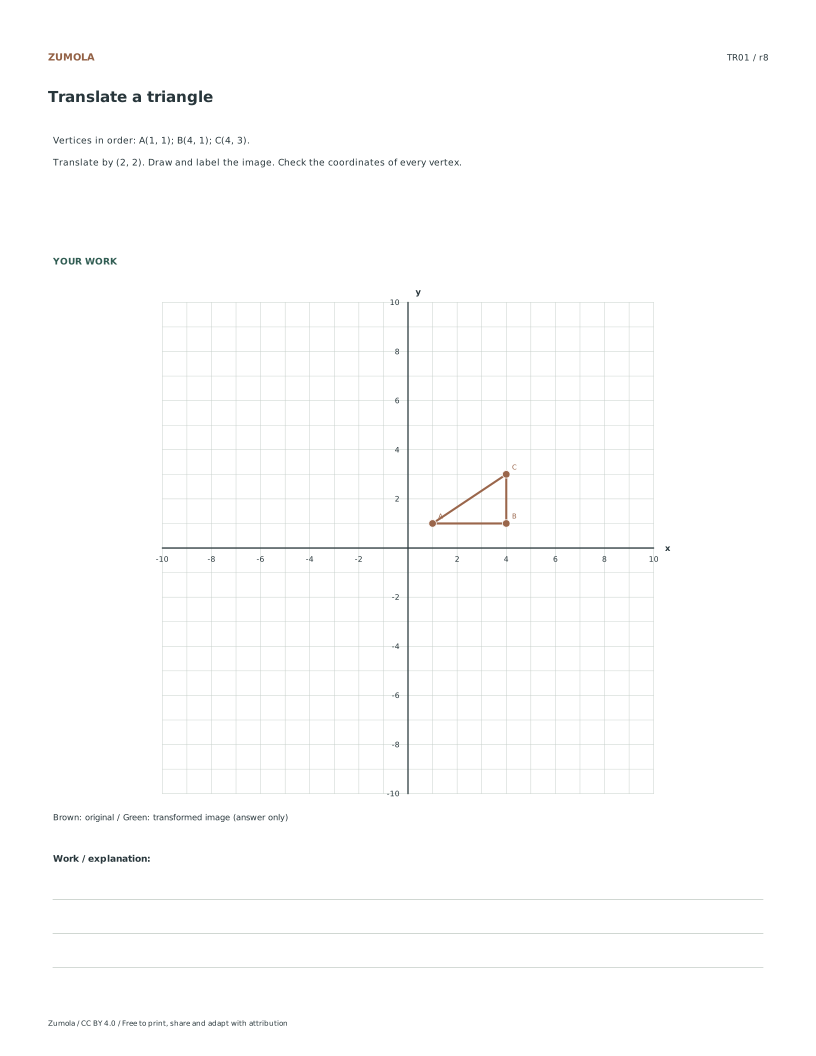
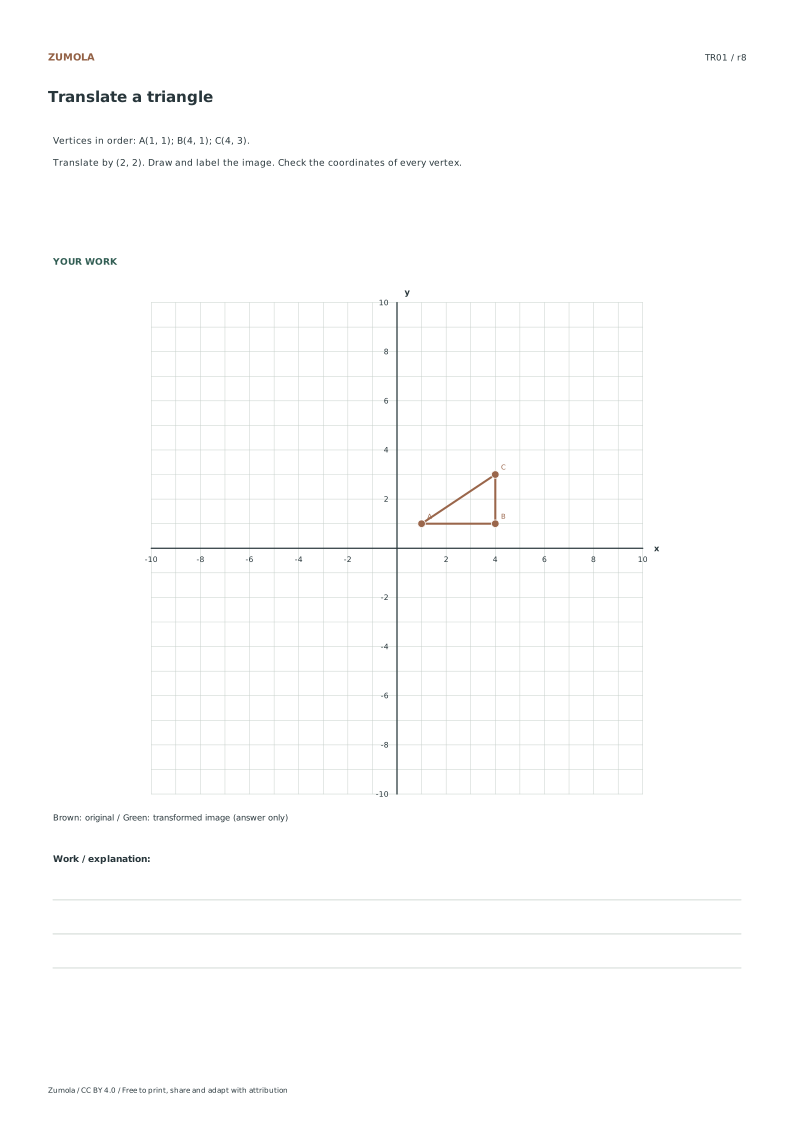
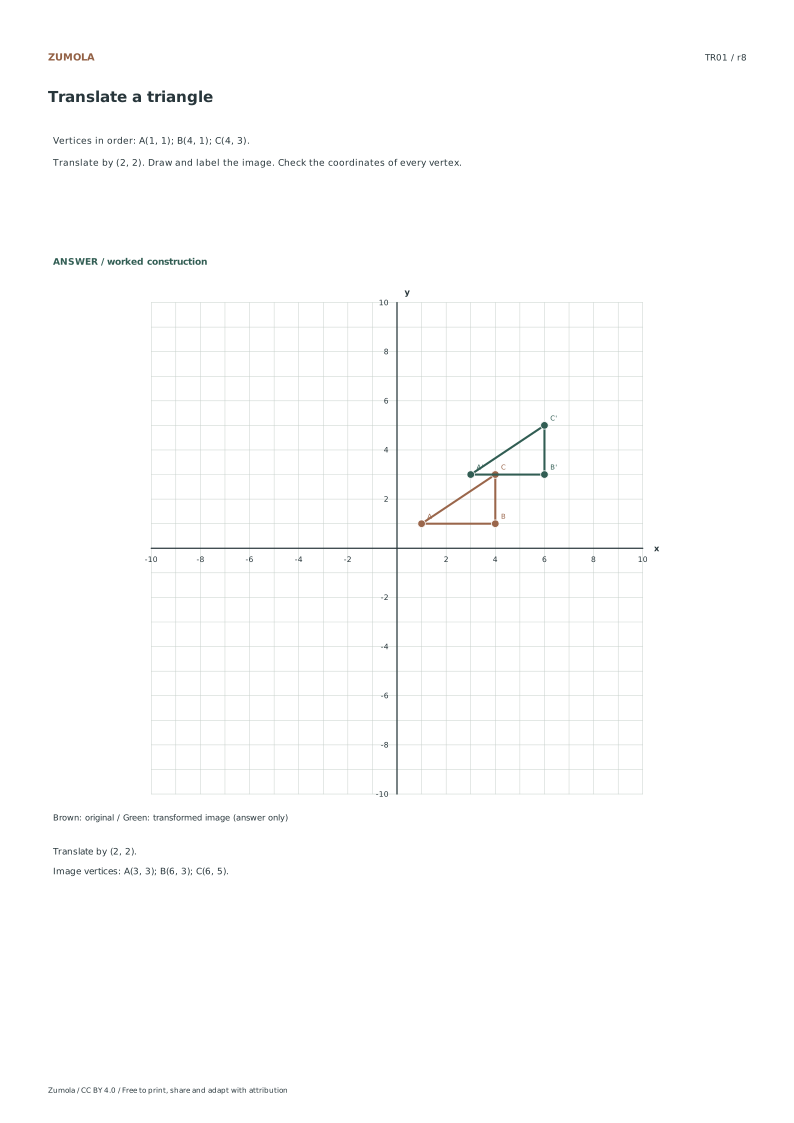
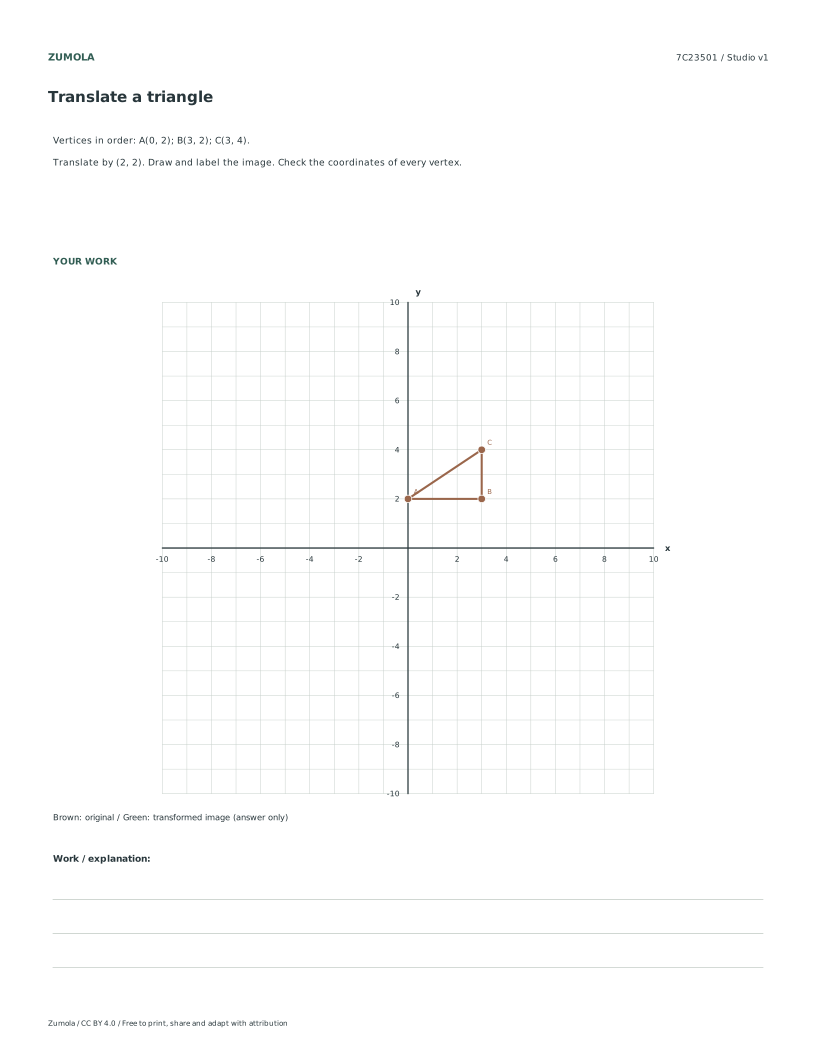
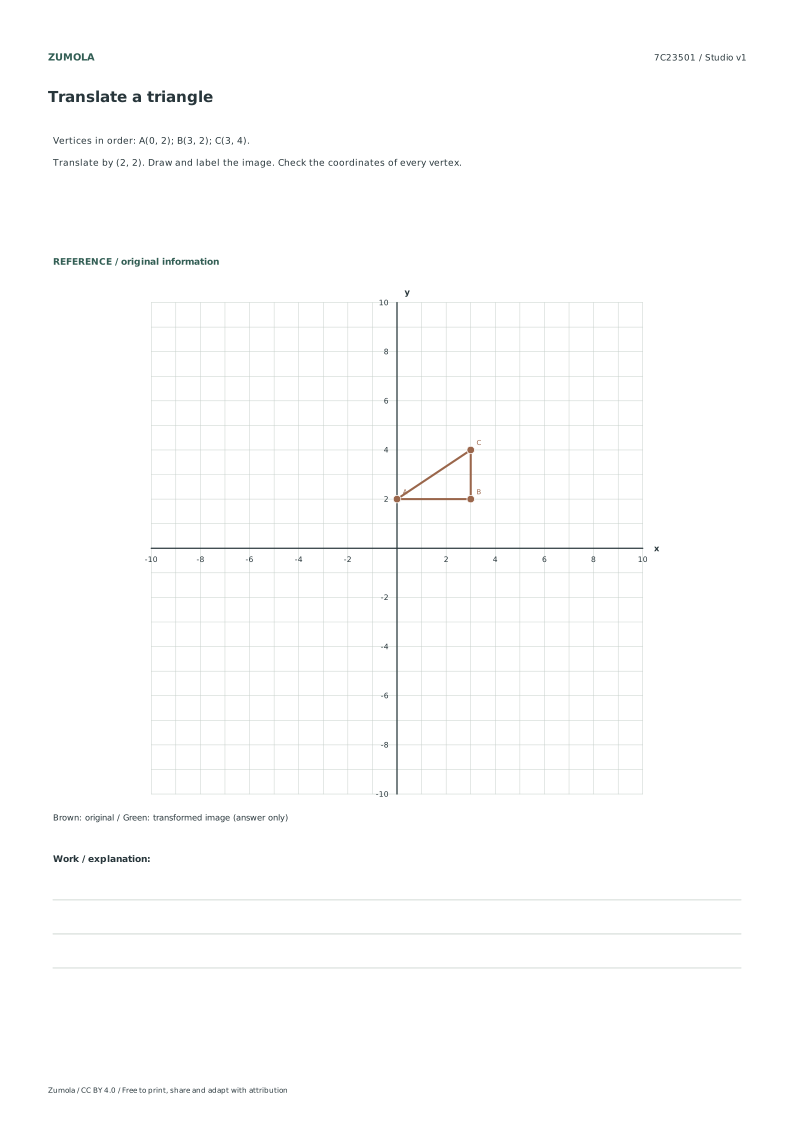
Translate by (2, 2). Draw and label the image. Check the coordinates of every vertex.
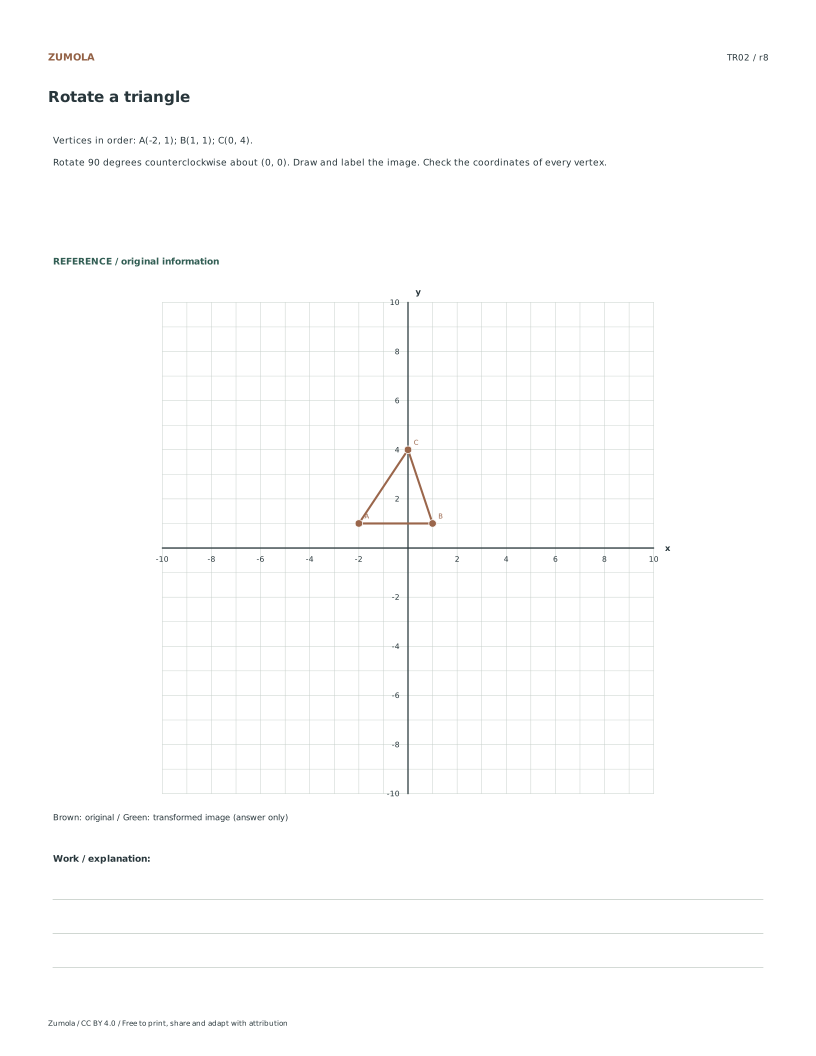
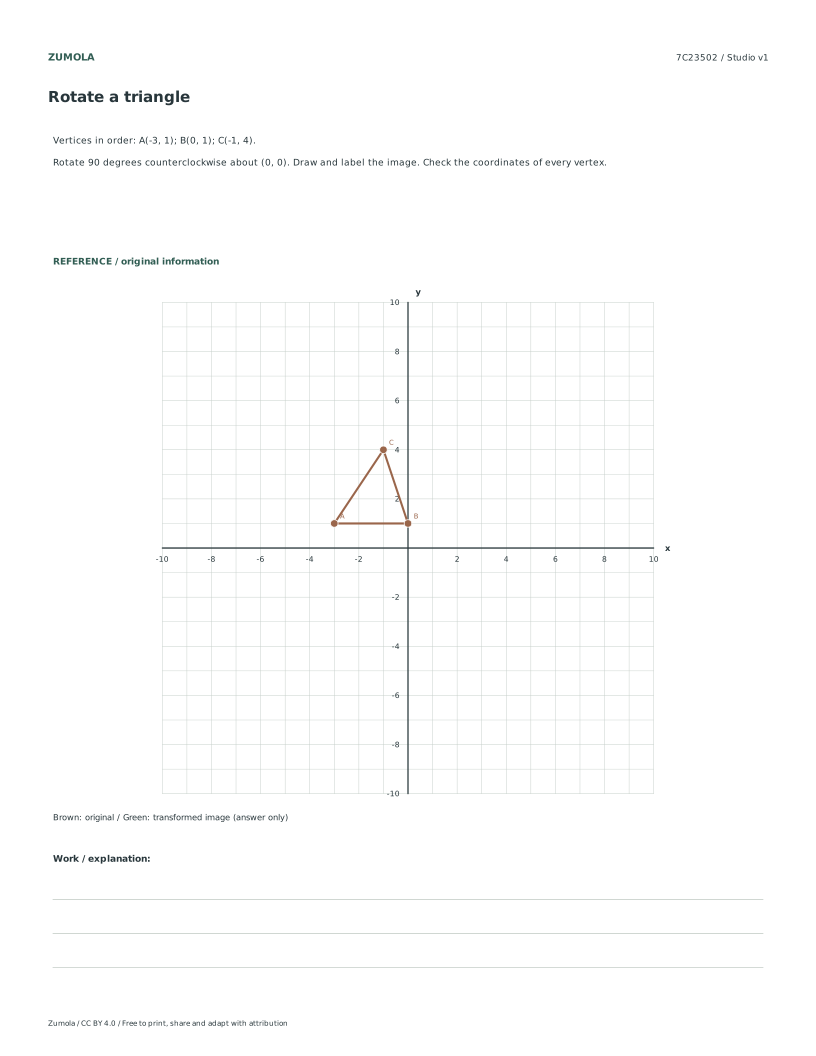
TR02
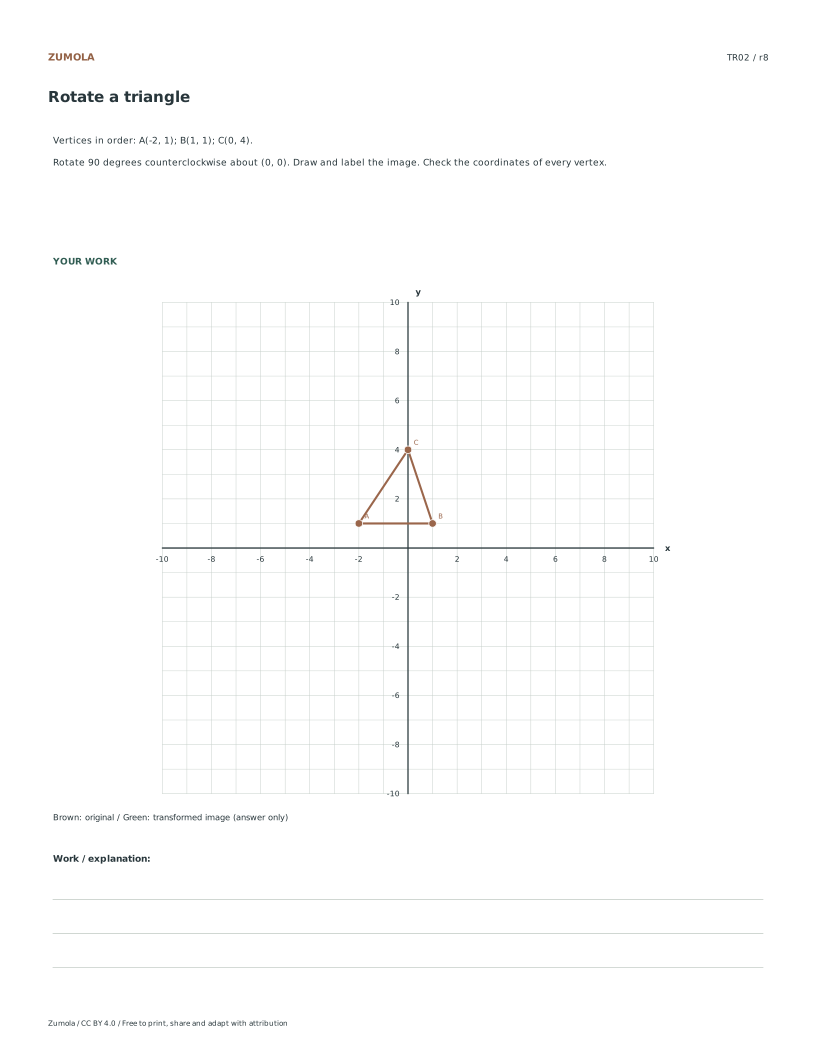
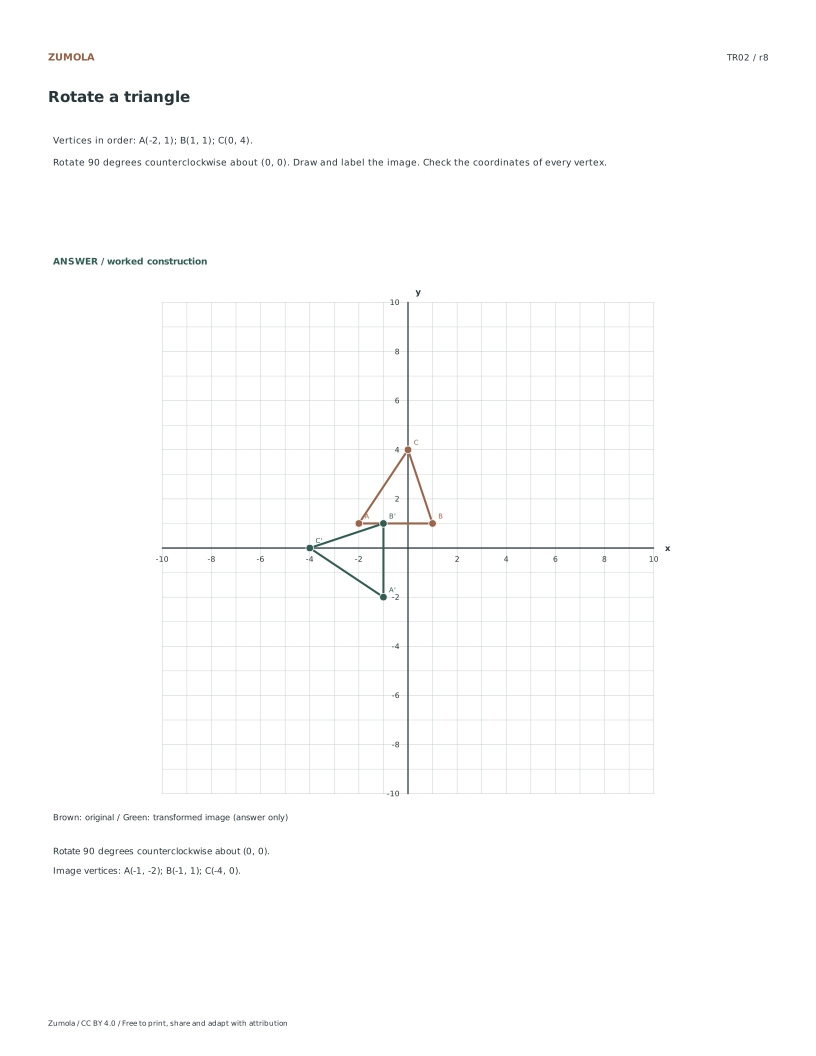
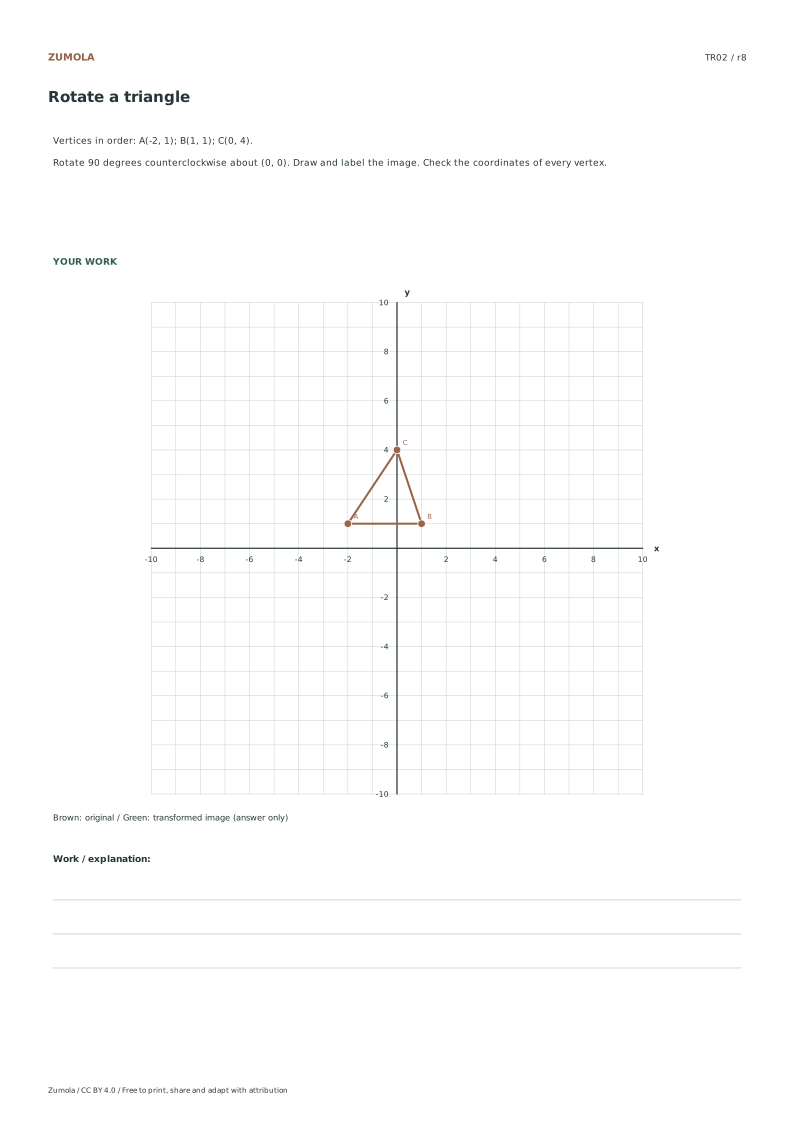
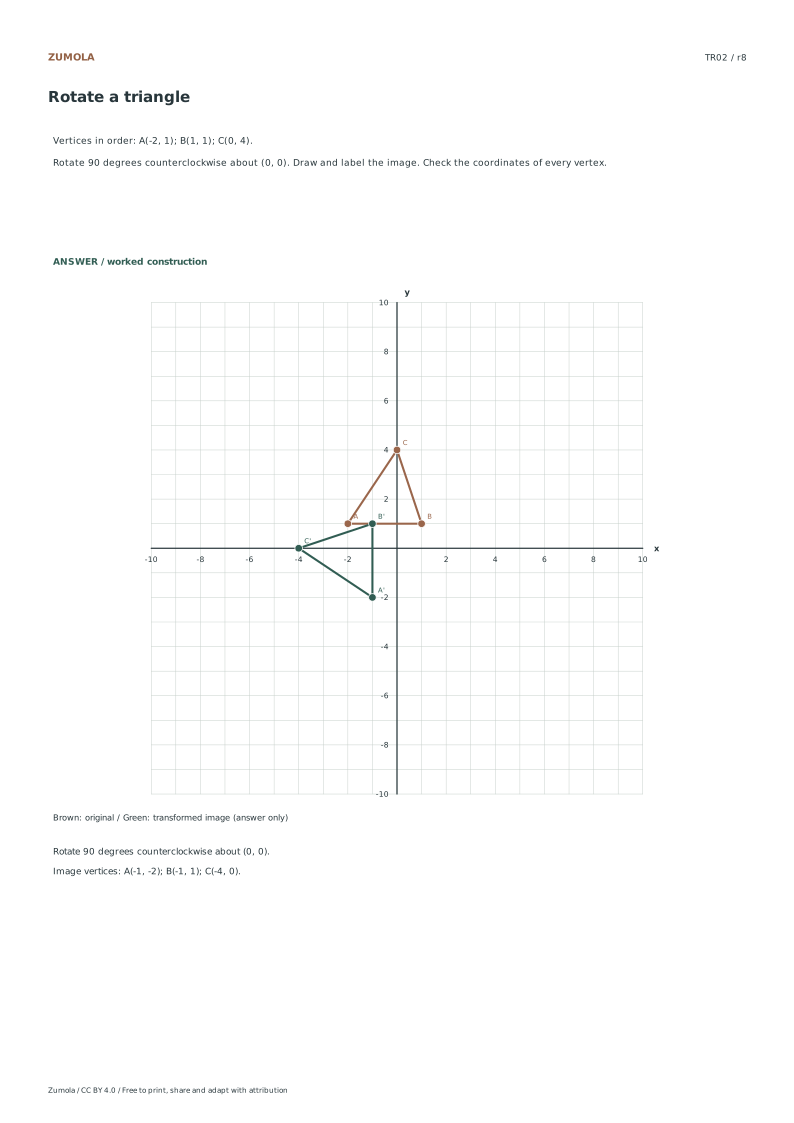
Vertices in order: A(-2, 1); B(1, 1); C(0, 4).
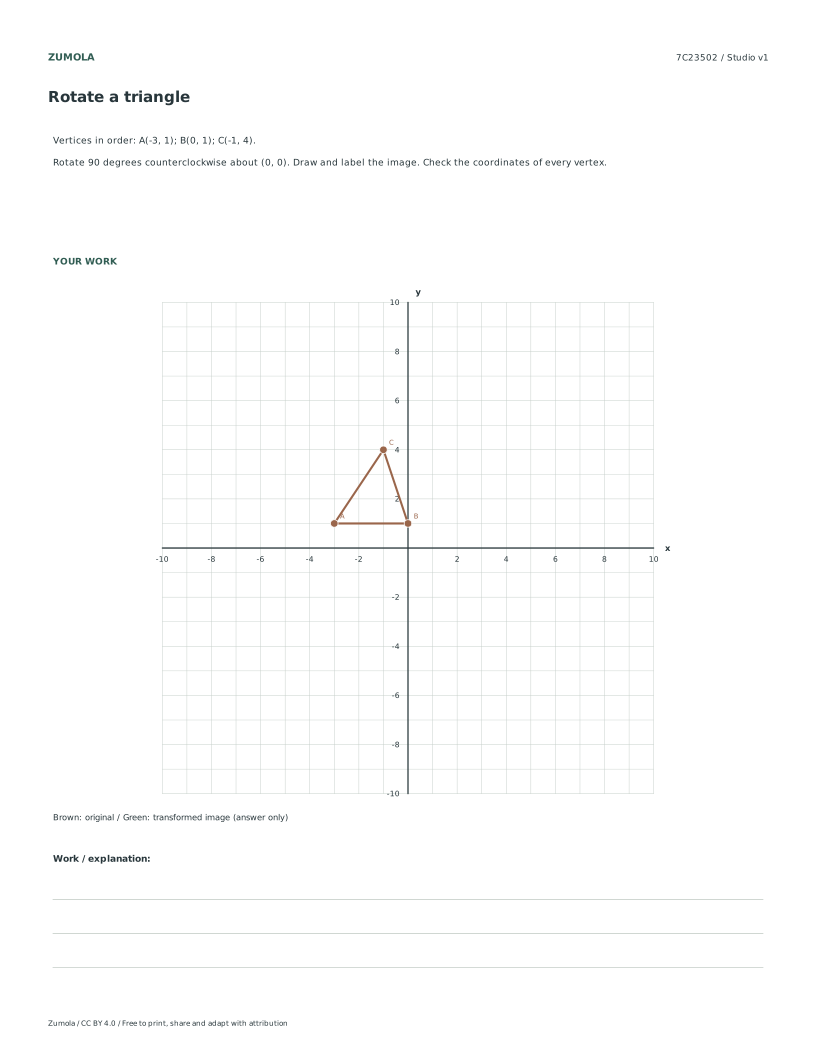
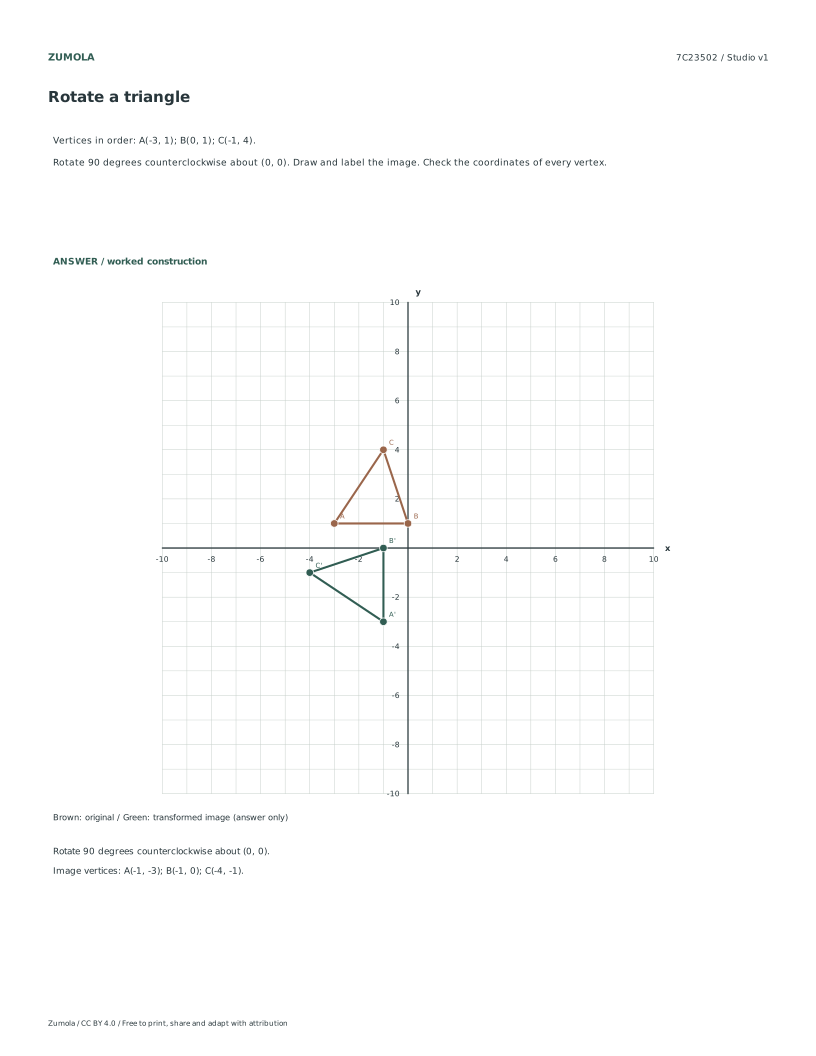
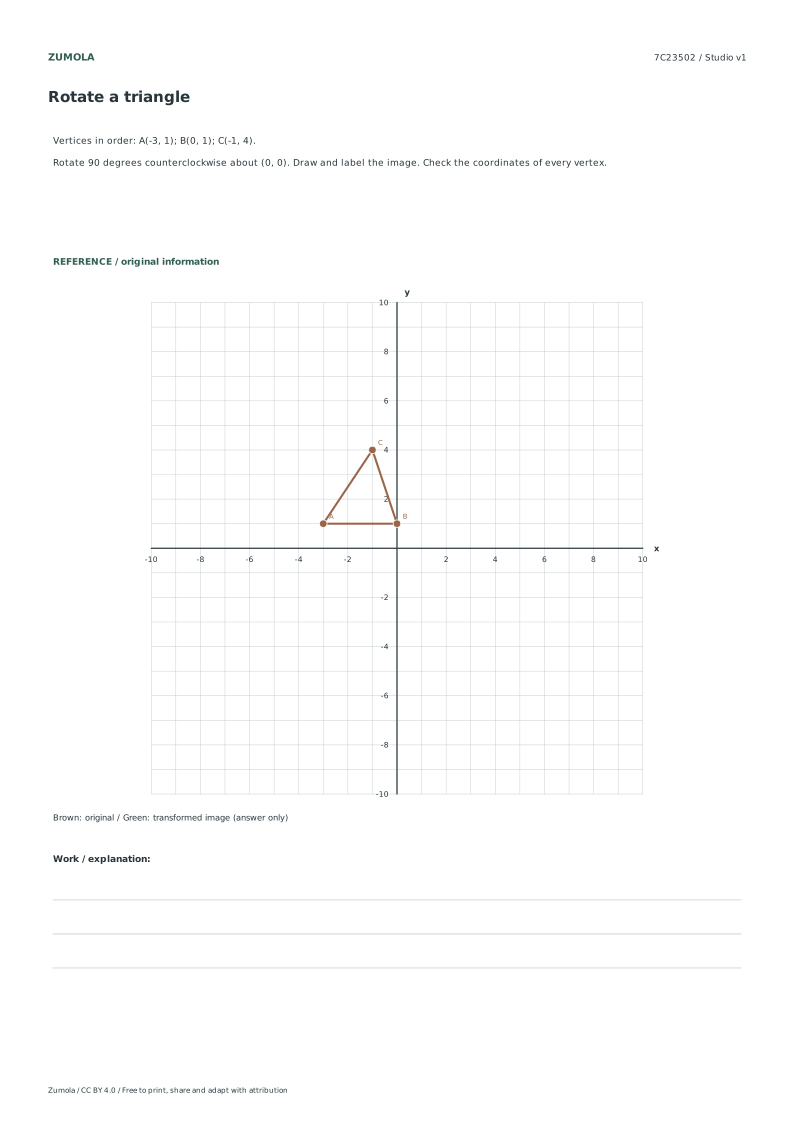
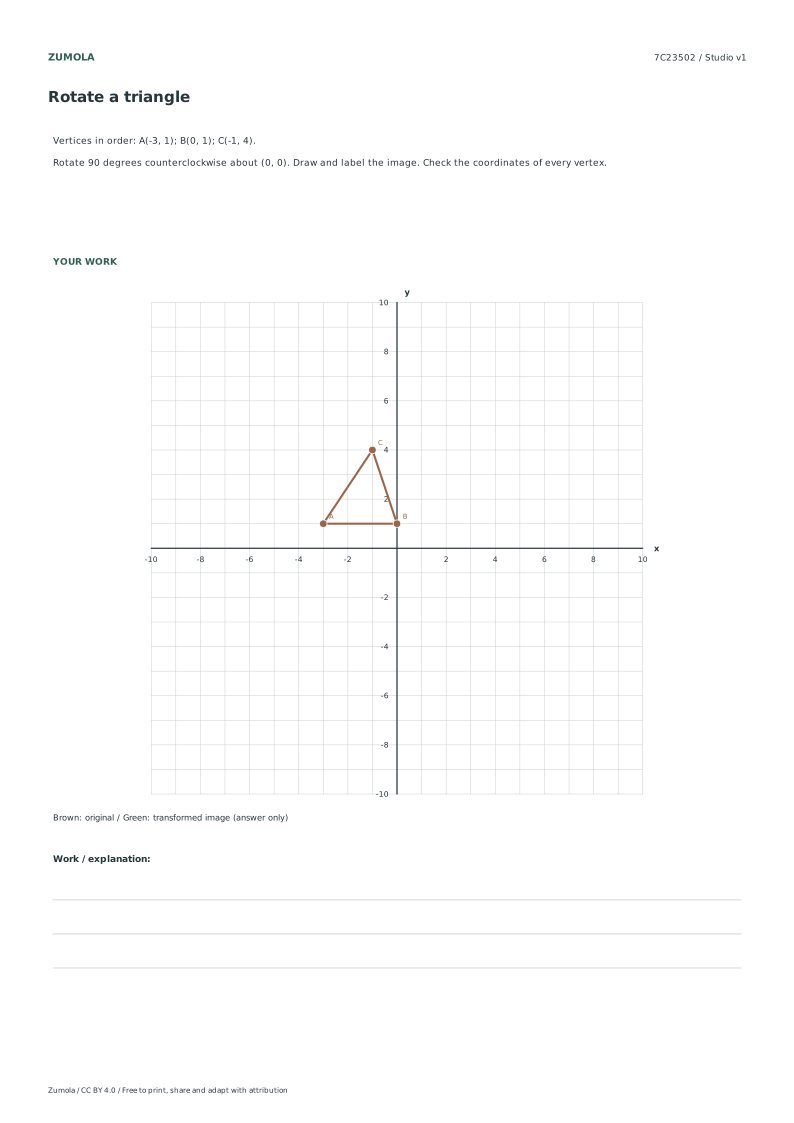
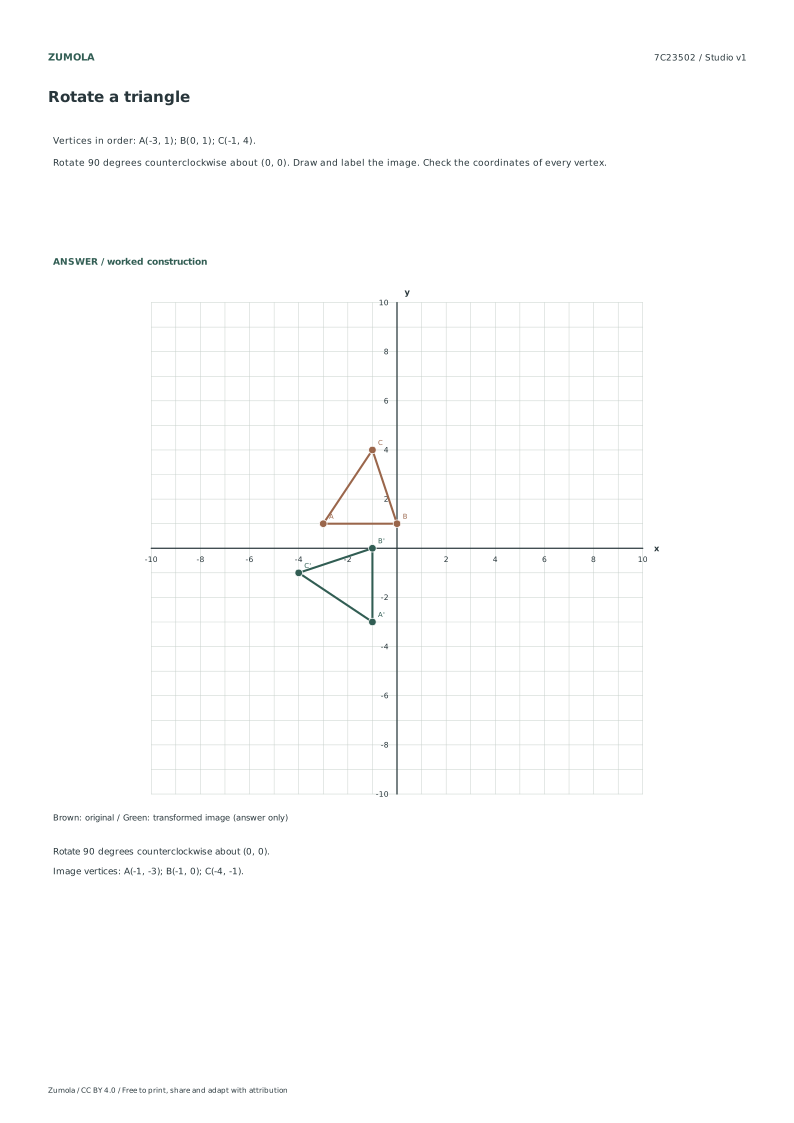
Rotate 90 degrees counterclockwise about (0, 0). Draw and label the image. Check the coordinates of every vertex.
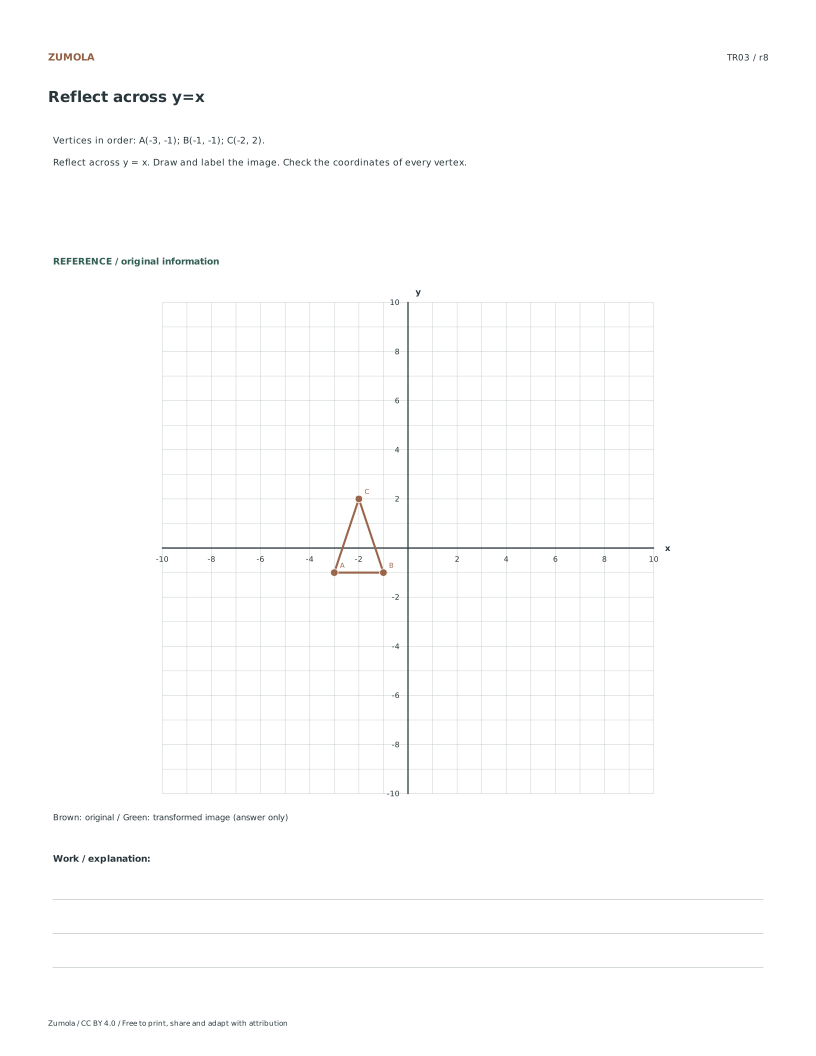
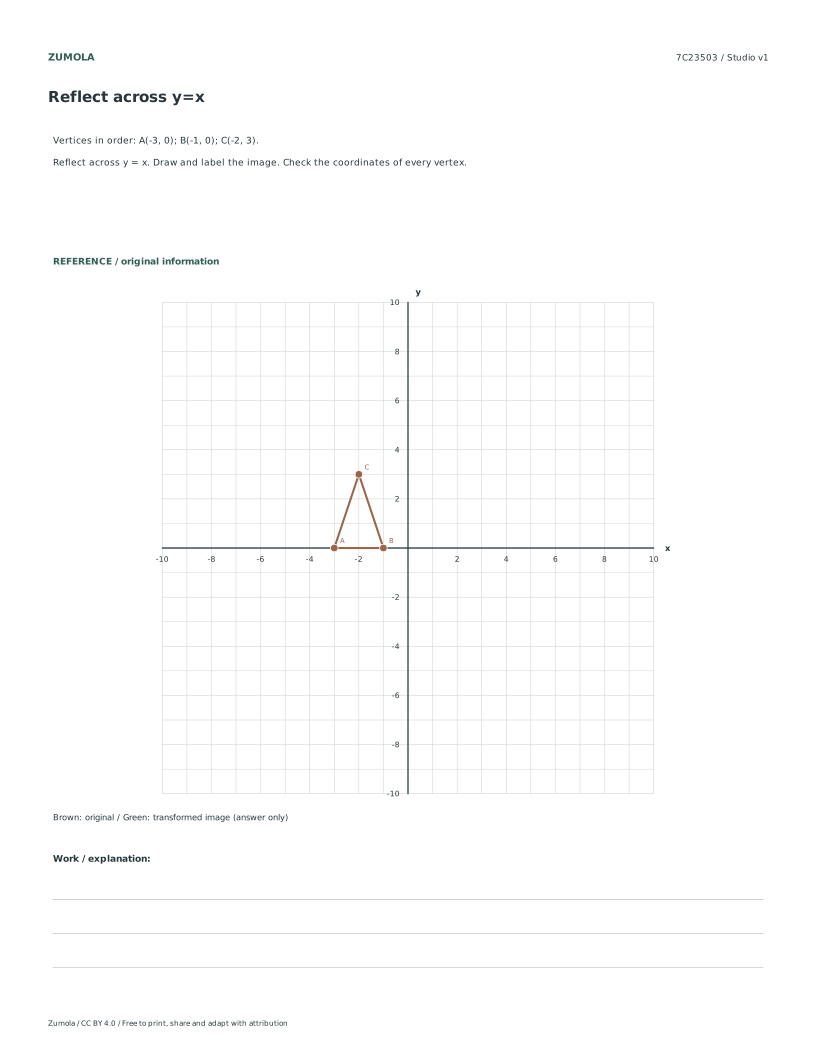
TR03
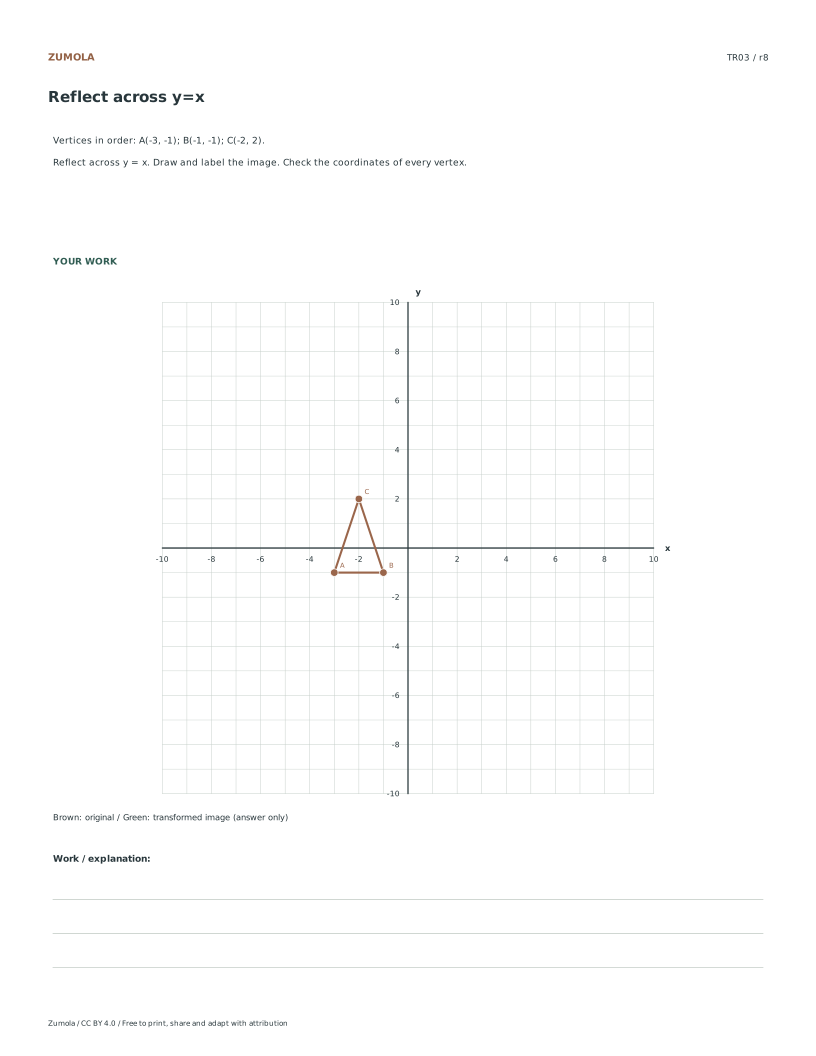
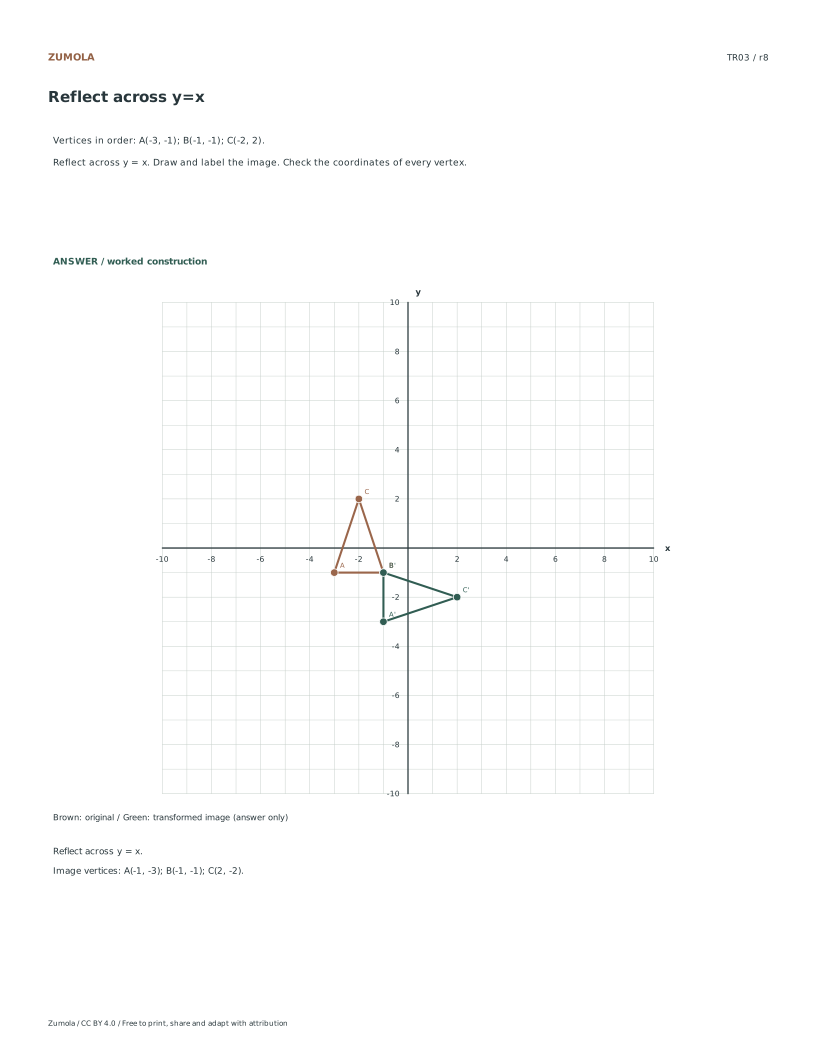
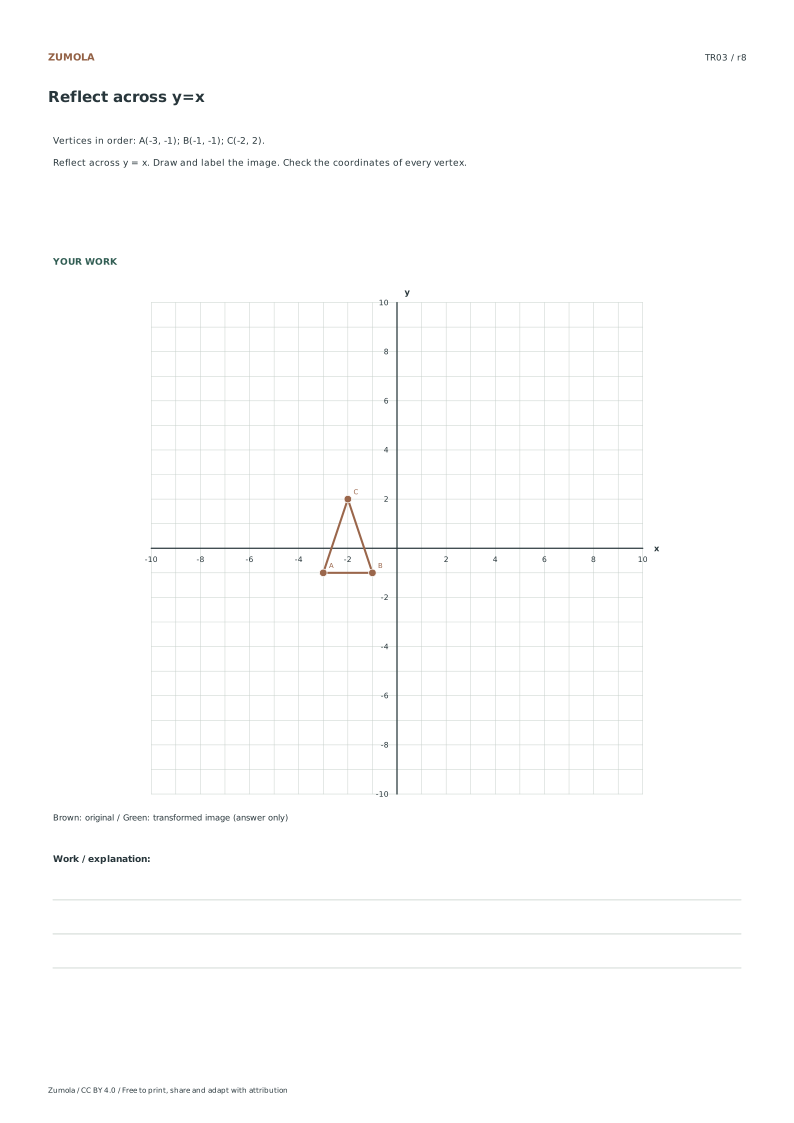
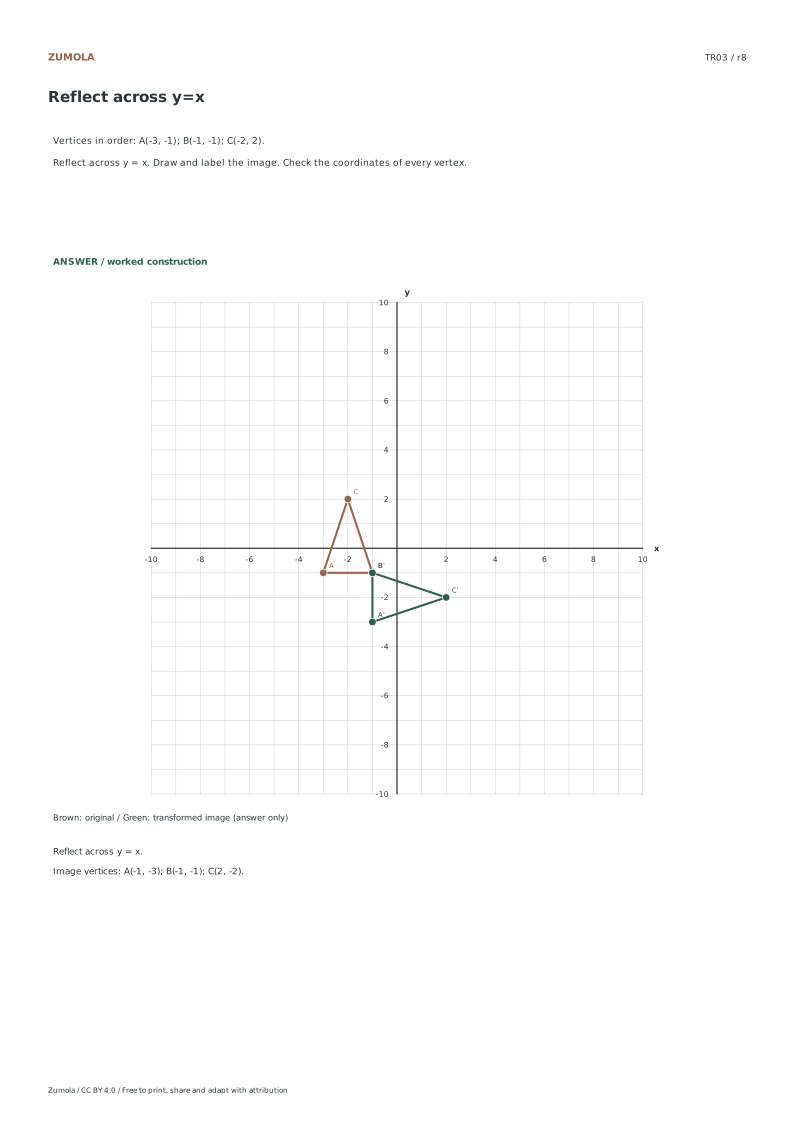
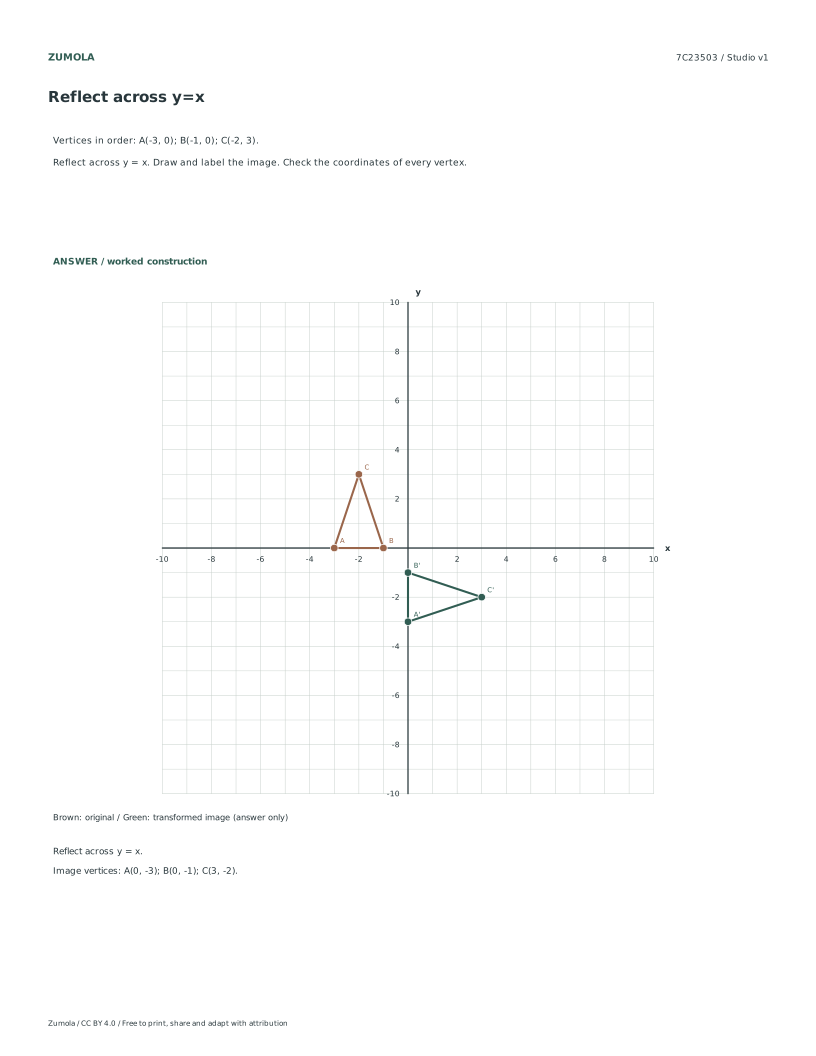
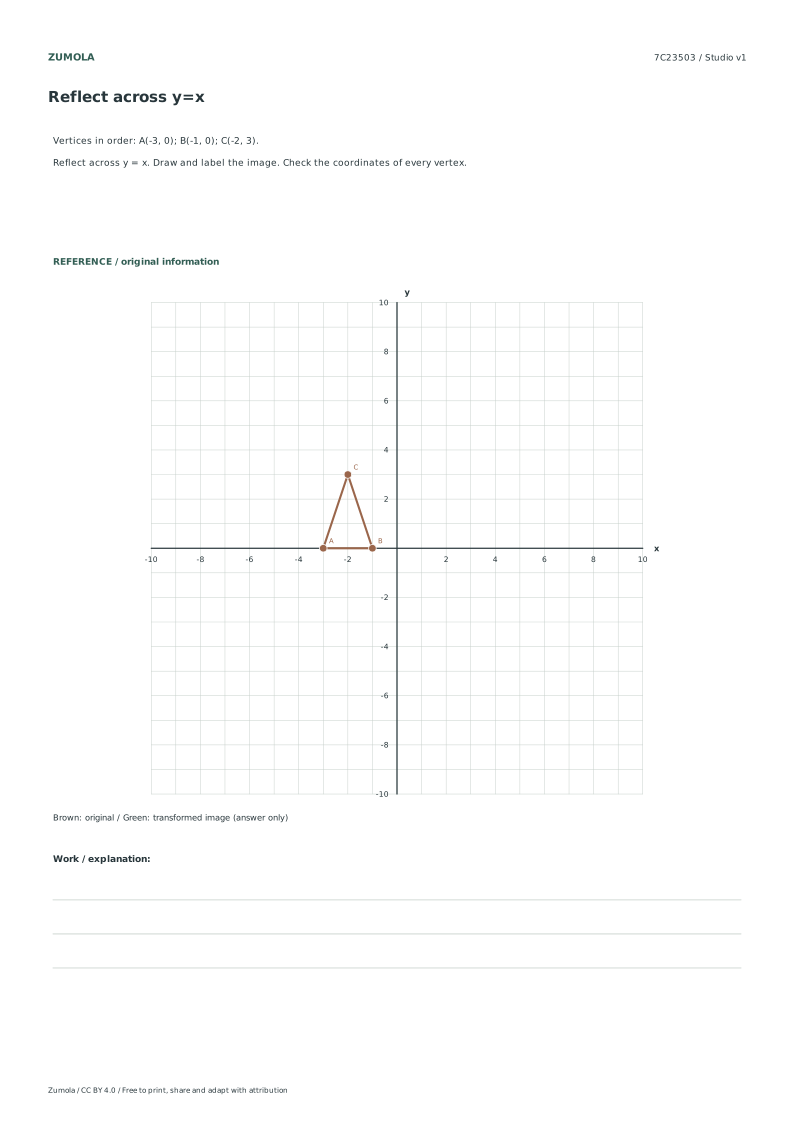
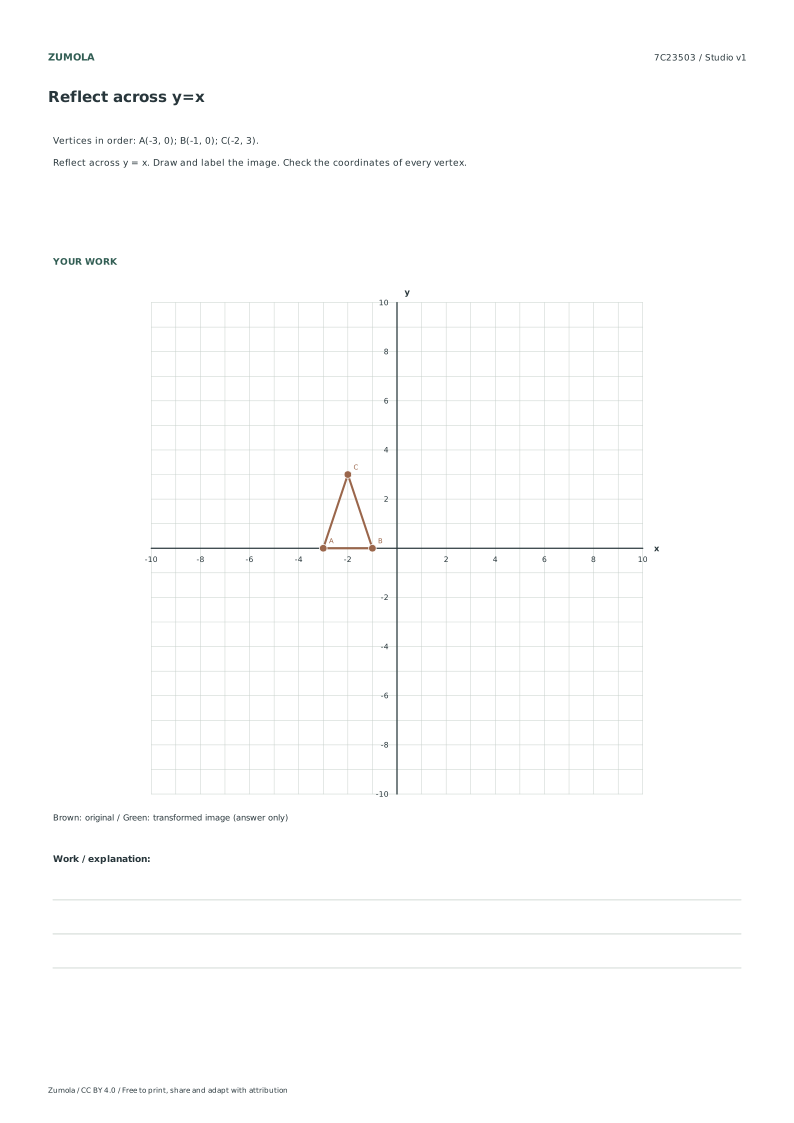
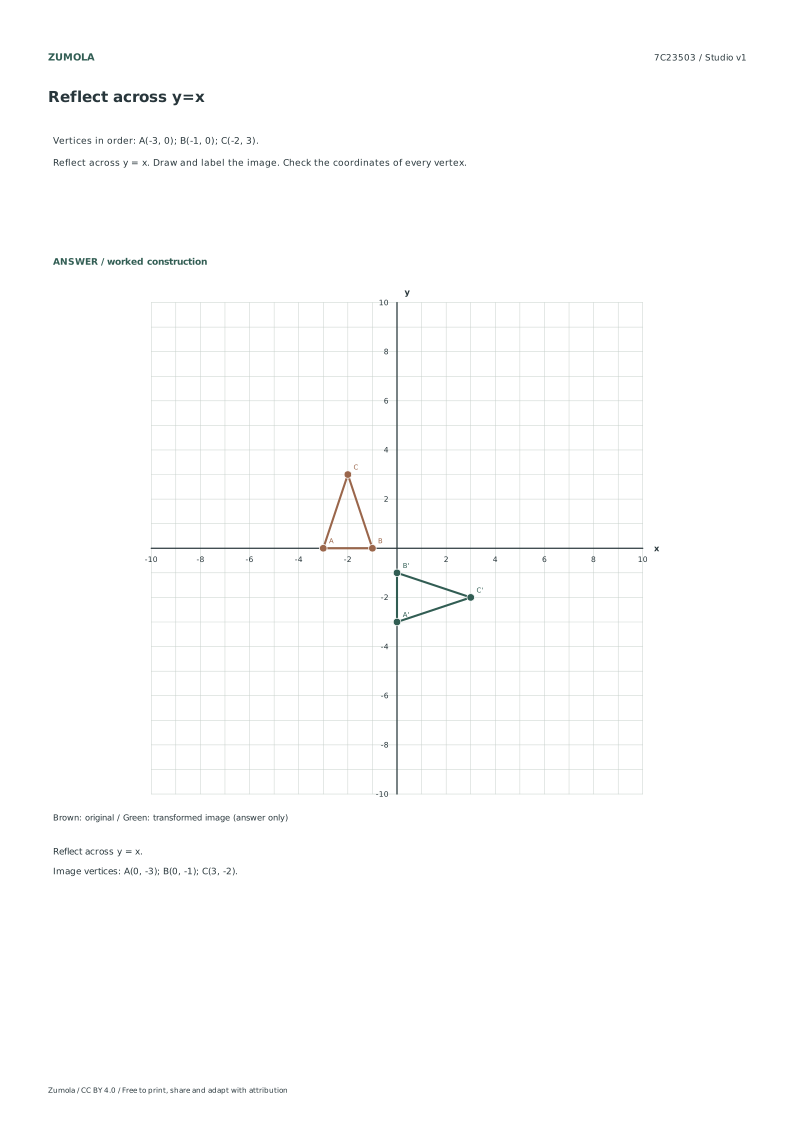
Vertices in order: A(-3, -1); B(-1, -1); C(-2, 2).
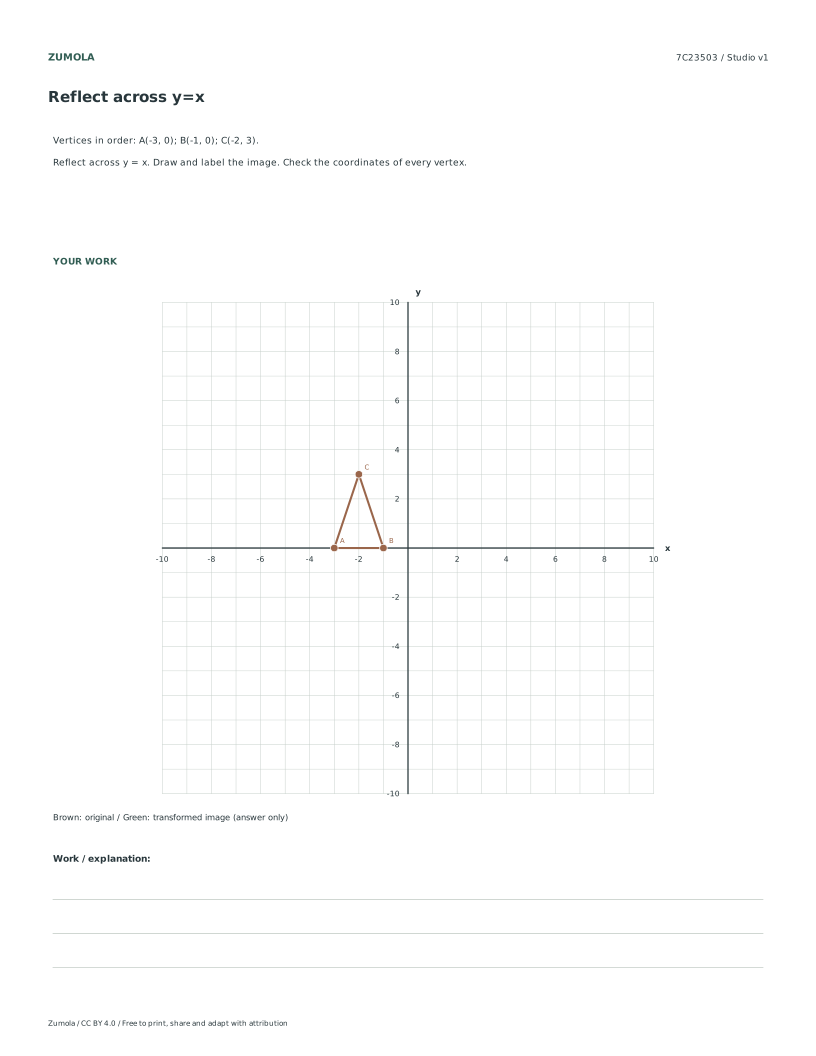
Reflect across y = x. Draw and label the image. Check the coordinates of every vertex.
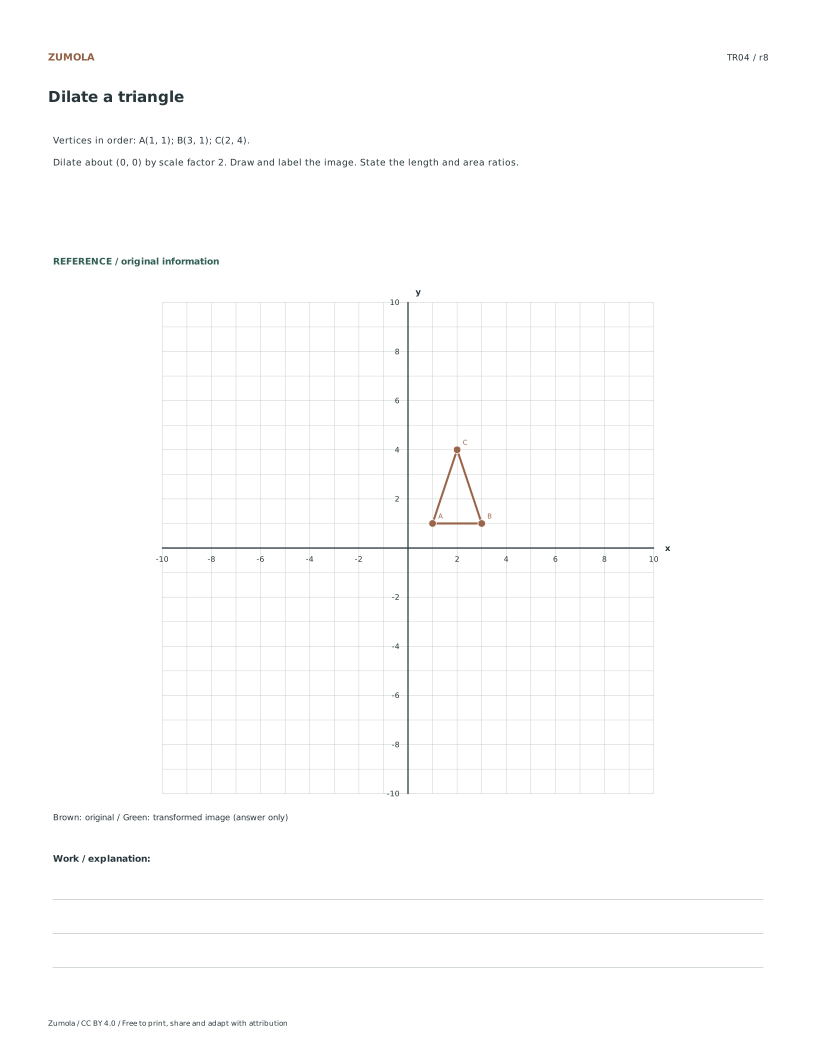
TR04
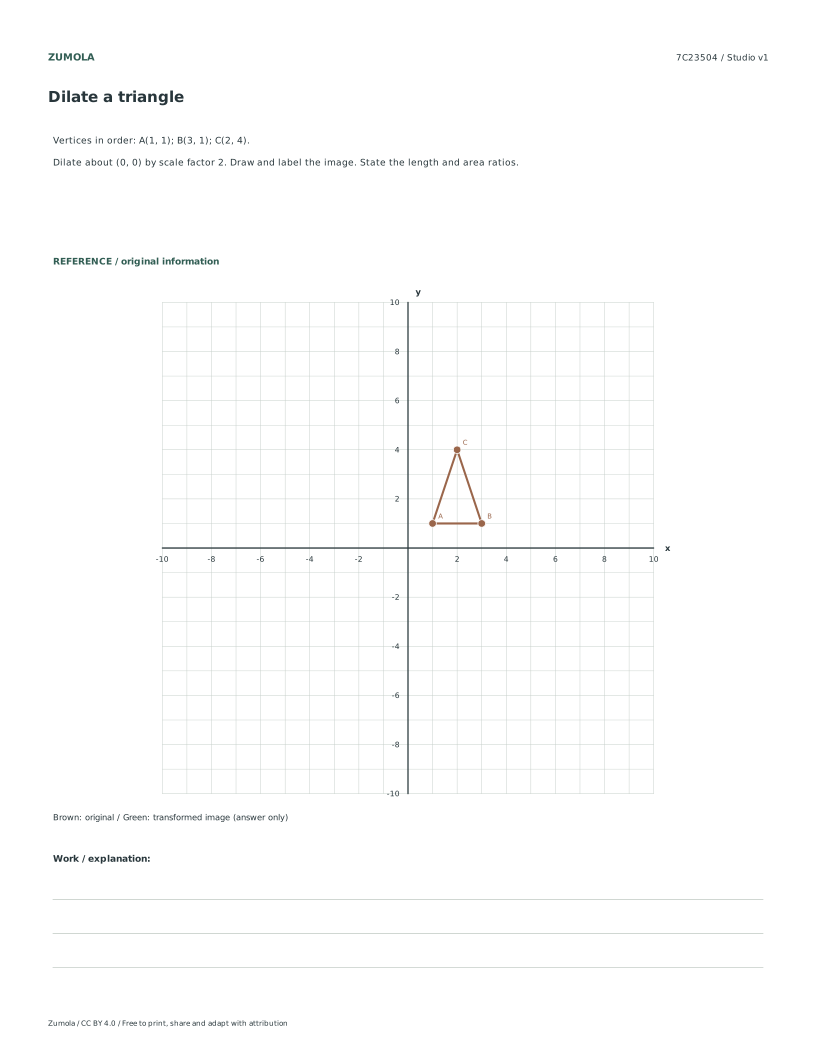
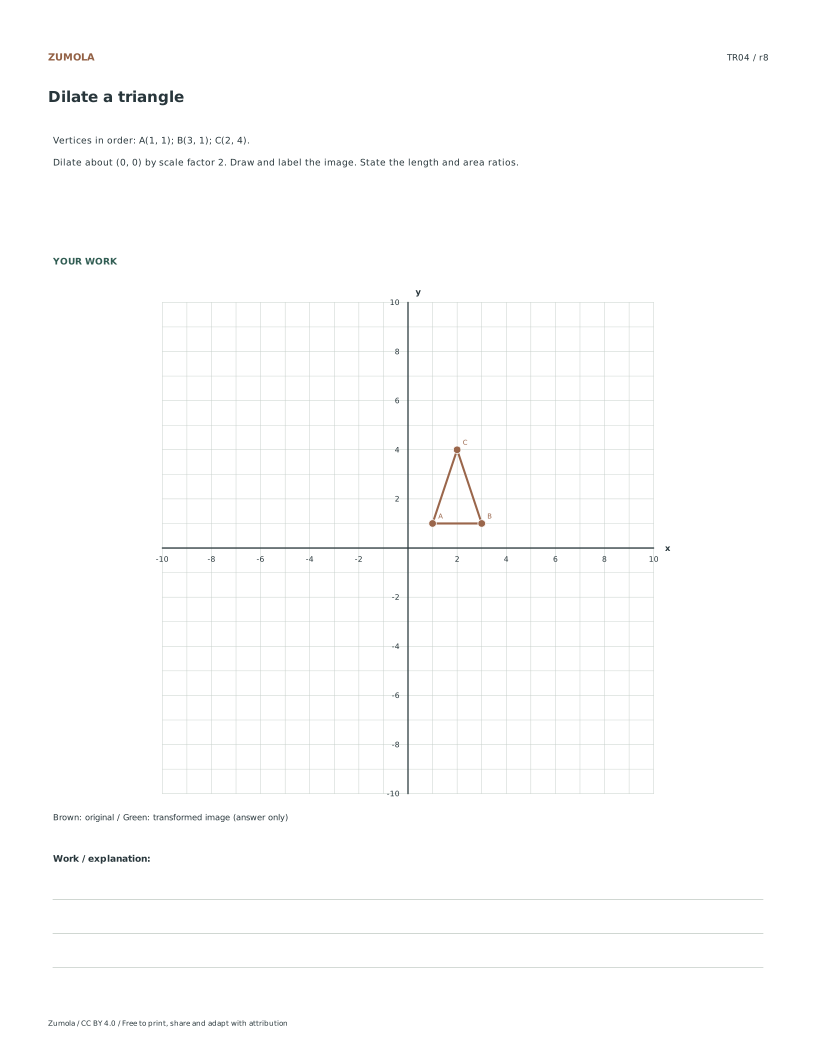
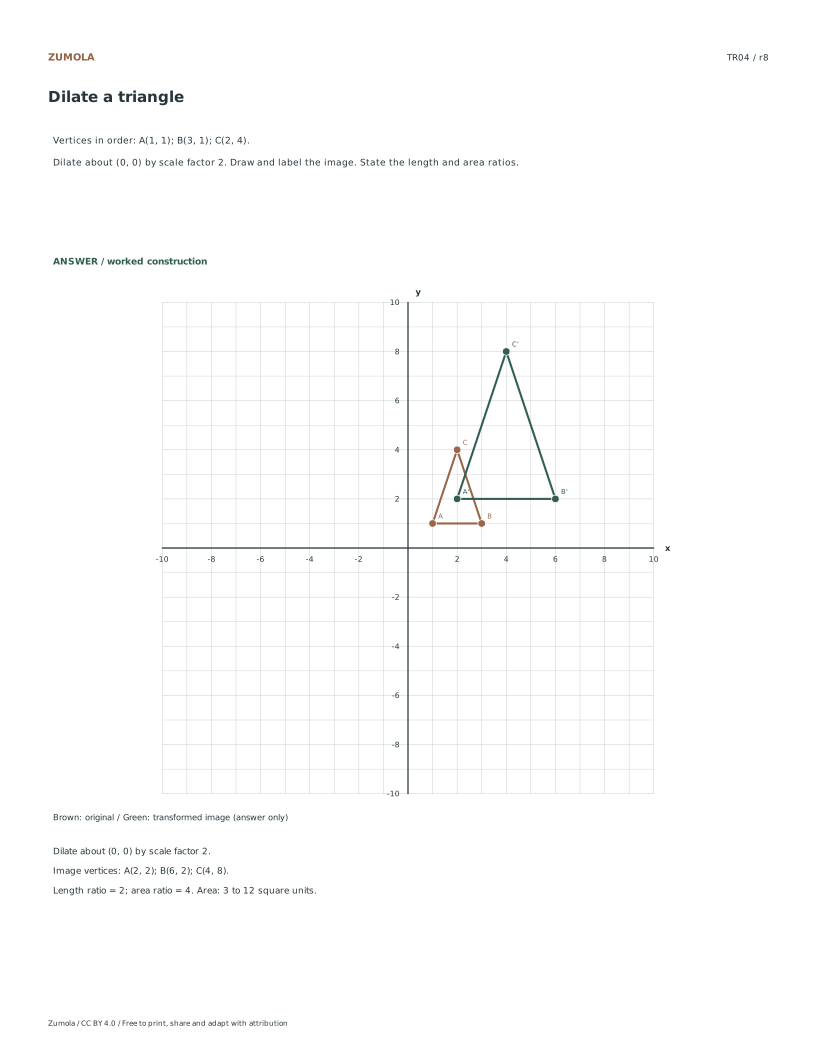
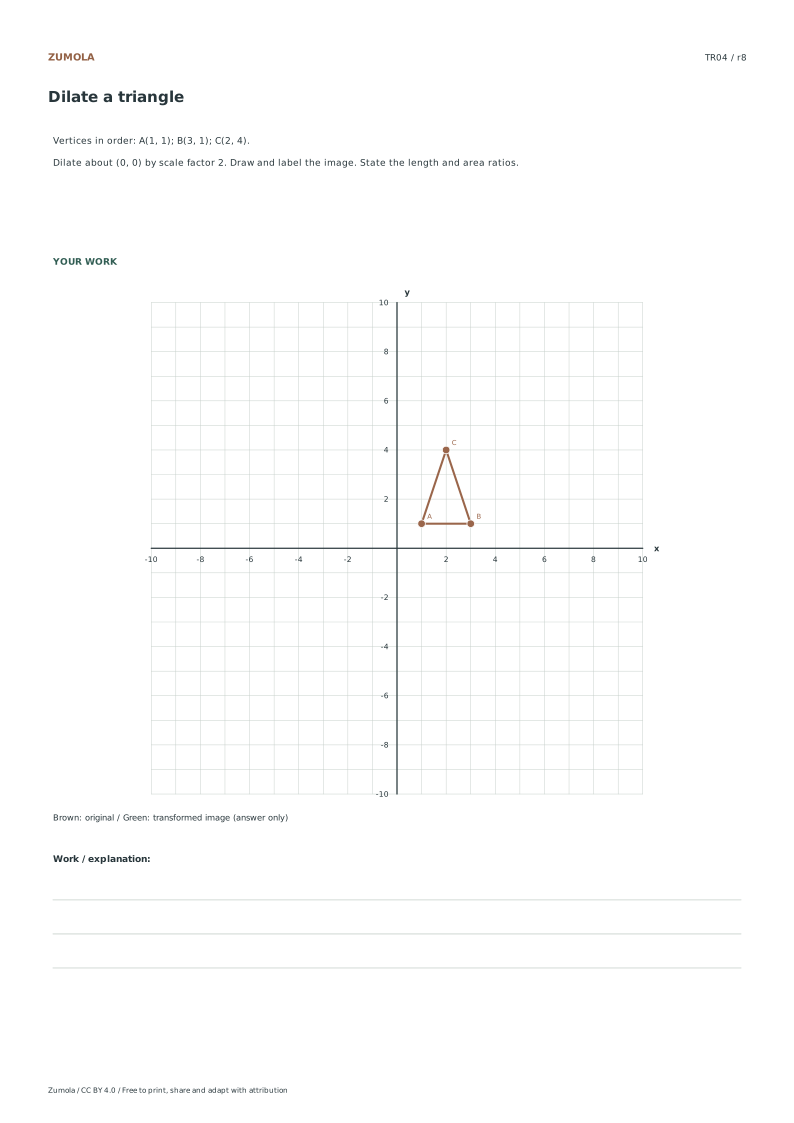
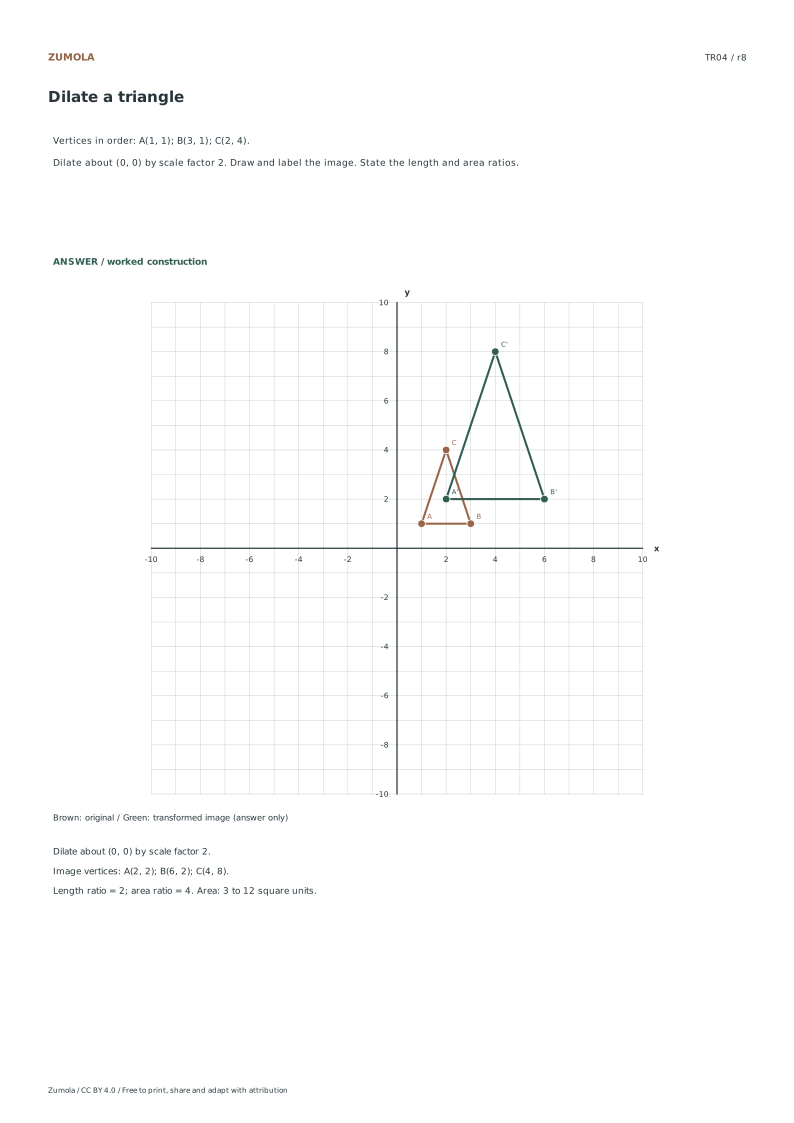
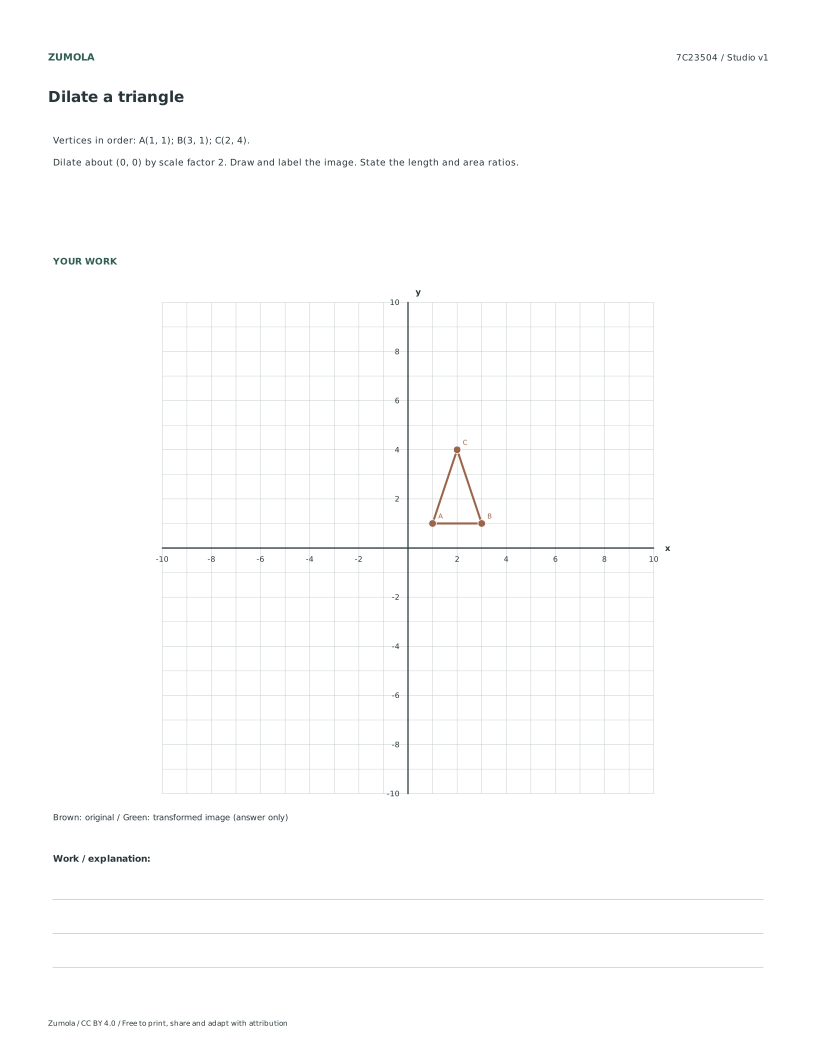
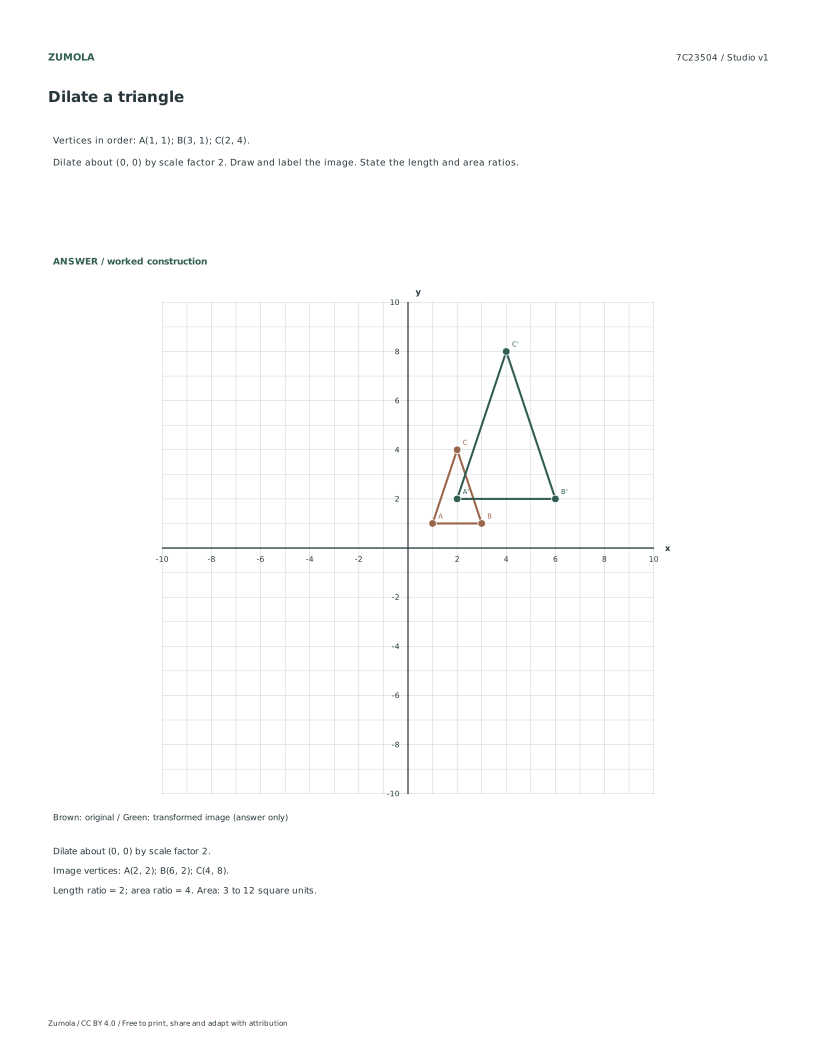
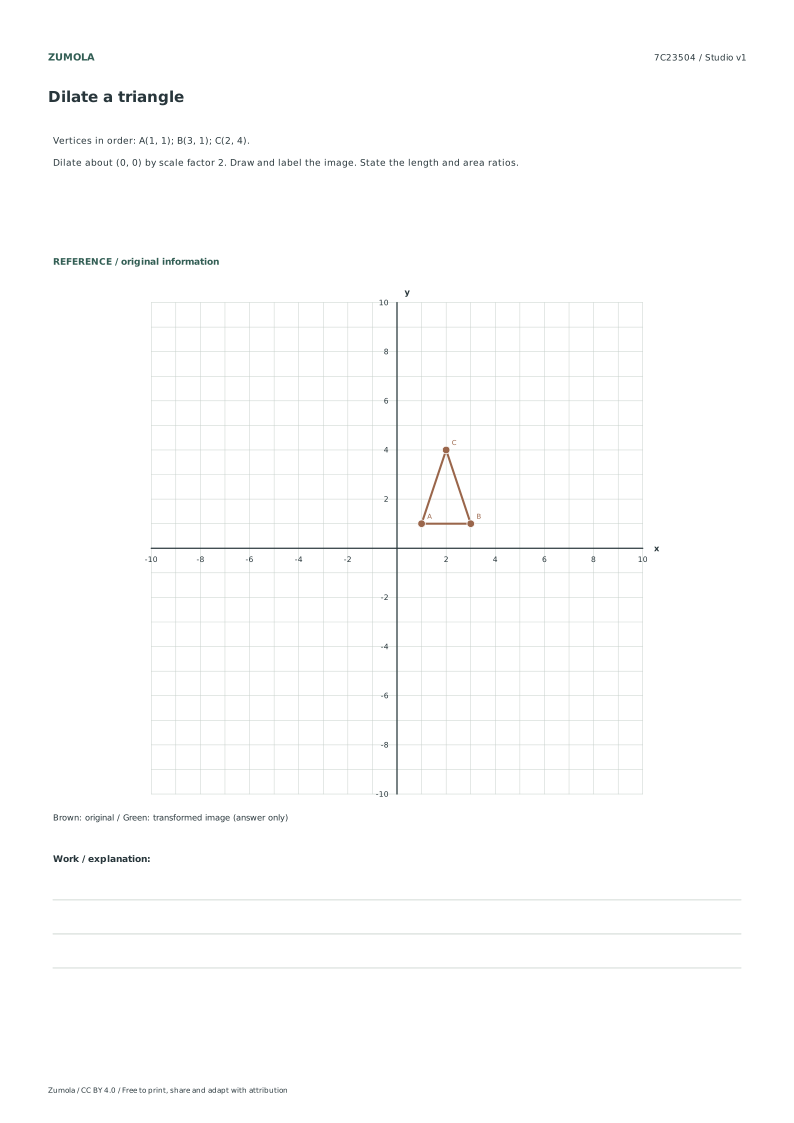
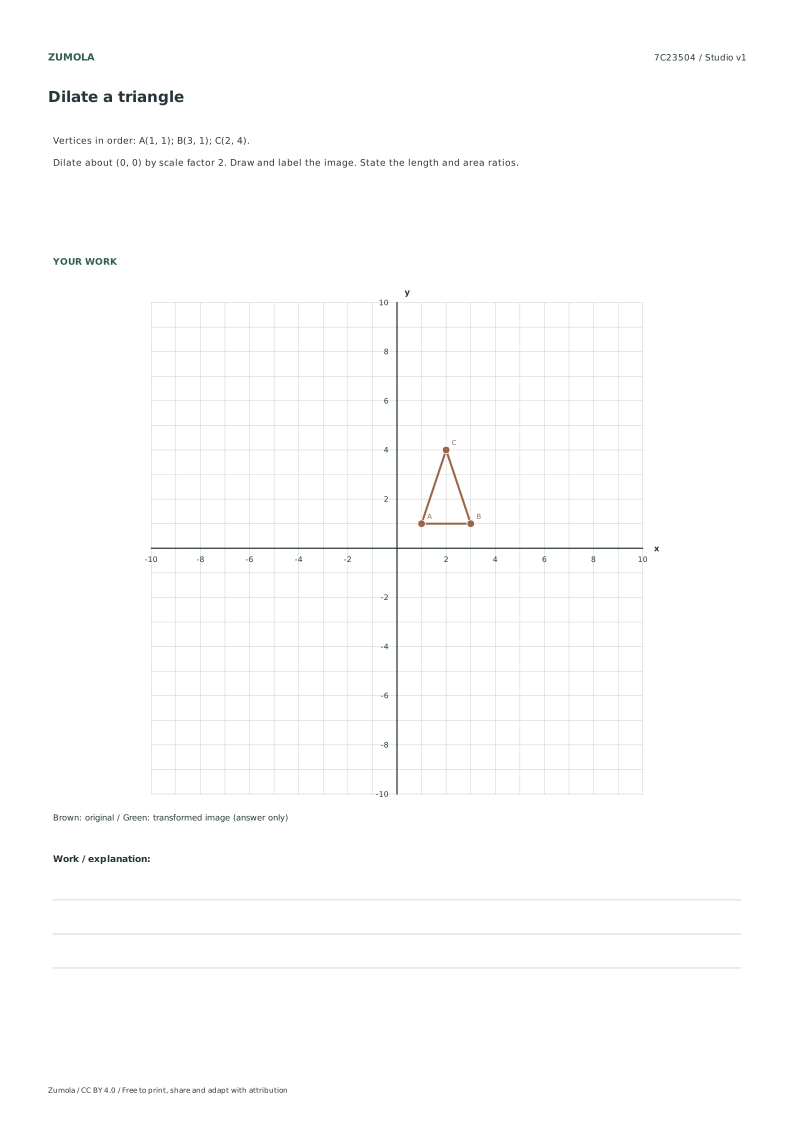
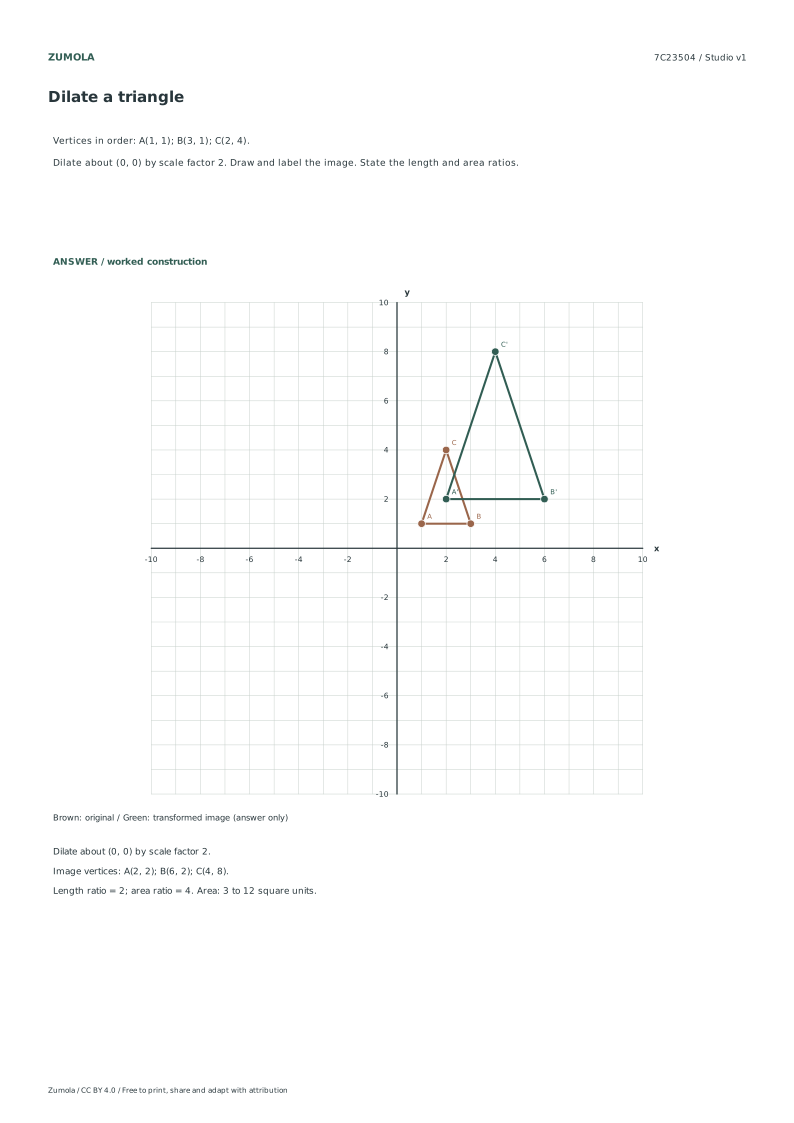
Vertices in order: A(1, 1); B(3, 1); C(2, 4).
Dilate about (0, 0) by scale factor 2. Draw and label the image. State the length and area ratios.
Use the coordinates, dimensions and rules given for each case. Distances and areas are measured in grid units.
Check the first case
TR01: Translate a triangle
Step
Worked result
1
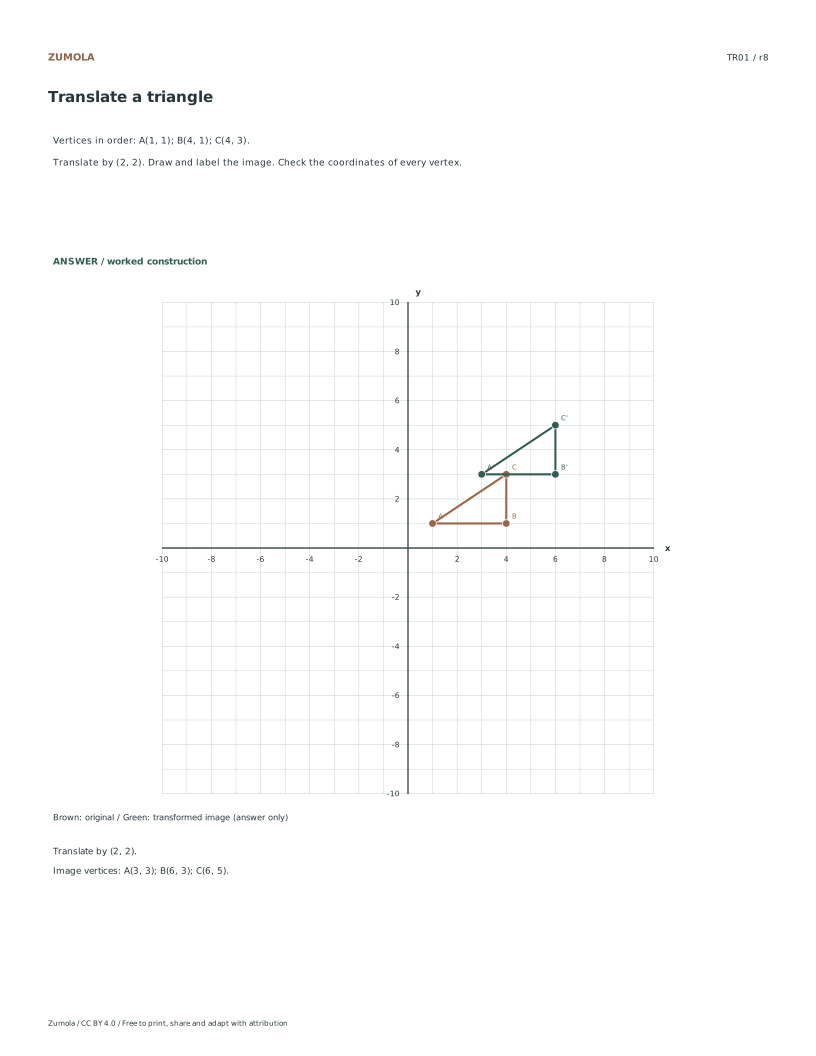
Translate by (2, 2).
2
Image vertices: A(3, 3); B(6, 3); C(6, 5).
The first case shows the checking pattern. Individual answer files contain the completed graph or net and result for every case.
Work through the graph
Translate and Check Every Vertex
For a translation by (2, 2), add 2 to each x-coordinate and 2 to each y-coordinate. Starting with A(1, 1), B(4, 1), C(4, 3), the image vertices are A(3, 3), B(6, 3), C(6, 5). Plot these points in order and connect them to form the image. Verify each coordinate by counting grid units from the original point: move right 2 and up 2. The original area is 3 square units and the image area is also 3 square units, because translation preserves size and shape. Label all vertices clearly.
Rotate 90 Degrees Counterclockwise
A 90-degree counterclockwise rotation about the origin maps (x, y) to (-y, x). Apply this to A(-2, 1): (-1, -2). For B(1, 1): (-1, 1). For C(0, 4): (-4, 0). Plot A(-1, -2), B(-1, 1), C(-4, 0) and connect them in order. Check that each image point is the same distance from the origin as its original. The original area is 9/2 square units and the image area is also 9/2 square units, since rotation preserves area. Label the image vertices with primes if needed.
Dilate by Scale Factor 2
A dilation about the origin by scale factor 2 multiplies each coordinate by 2. For A(1, 1), the image is A(2, 2). For B(3, 1), it is B(6, 2). For C(2, 4), it is C(4, 8). Plot and connect these points. The length ratio is 2, meaning each side of the image is twice the corresponding side of the original. The area ratio is the square of the scale factor, so it is 4. The original area is 3 square units and the image area is 12 square units. State both ratios clearly.
Checks that catch common errors
Watch for
Check instead
When translating by (2, 2), adding 2 only to the x-coordinates and leaving y-coordinates unchanged.
Add 2 to both coordinates: (x, y) becomes (x+2, y+2). For example, A(1, 1) becomes A(3, 3), not A(3, 1).
For a 90-degree counterclockwise rotation, using the rule (x, y) -> (y, -x) instead of (-y, x).
The correct rule is (x, y) -> (-y, x). Check with A(-2, 1): (-1, -2), not (1, 2).
After a dilation by scale factor 2, stating the area ratio is 2 instead of 4.
The area ratio is the square of the scale factor: 2^2 = 4. The original area 3 becomes 12 square units, so the ratio is 12/3 = 4.
Keep labels and margins readable
Choose the PDF that matches your paper. Print at Actual size / 100% and turn off Fit, Shrink and browser headers. SVG is editable but an editor can rescale it; the PDF is the simpler print route.
Useful answers
How do I check that a rotation is correct?
Verify that each image point is the same distance from the center of rotation as its original point. For a 90-degree counterclockwise rotation about the origin, also confirm that the angle between the original and image position vectors is 90 degrees.
Why does a dilation change the area by the square of the scale factor?
A dilation by scale factor k multiplies every length by k. Area depends on two dimensions, so it is multiplied by k times k, which is k^2. For k=2, area becomes 4 times larger.
What stays the same under a translation, rotation, or reflection?
Translations, rotations, and reflections preserve distances and angles, so the image has the same area and perimeter as the original. Dilations preserve shape but change lengths by the scale factor and area by the square of the scale factor.
Are the answer files and editable graphs free?
Yes. The individual student, reference and answer files plus collection packs are free without signup. Credit Zumola under CC BY 4.0 when sharing or adapting.
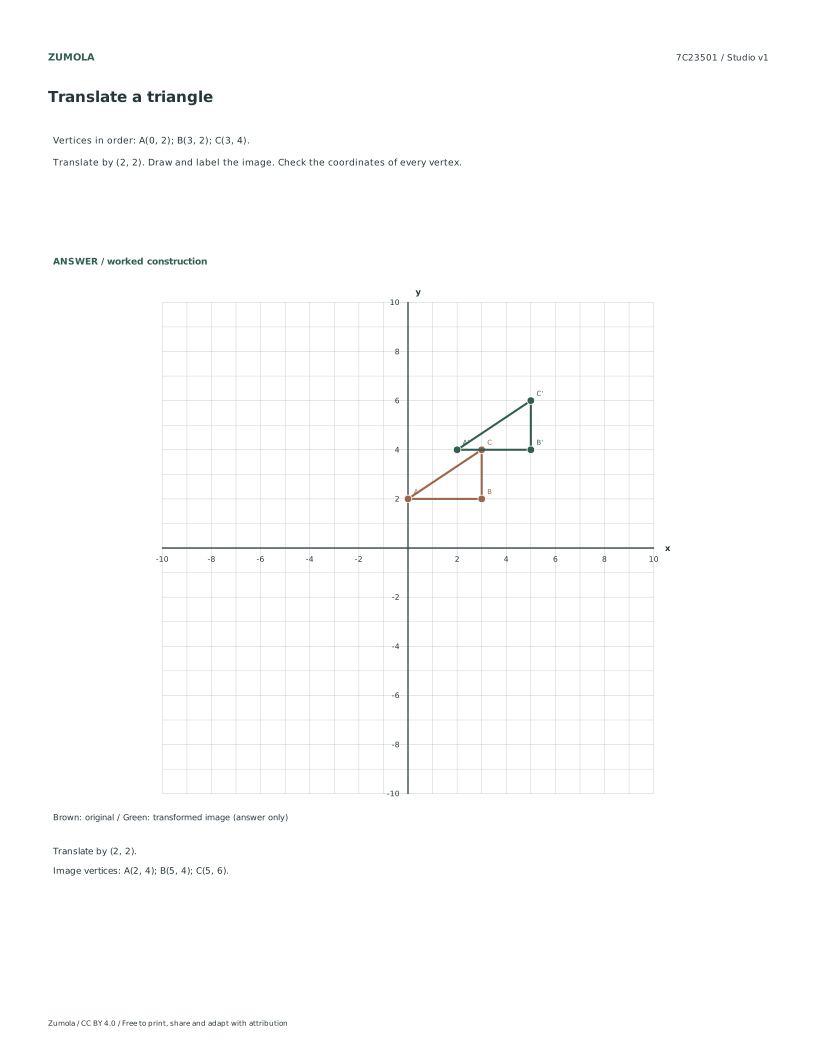
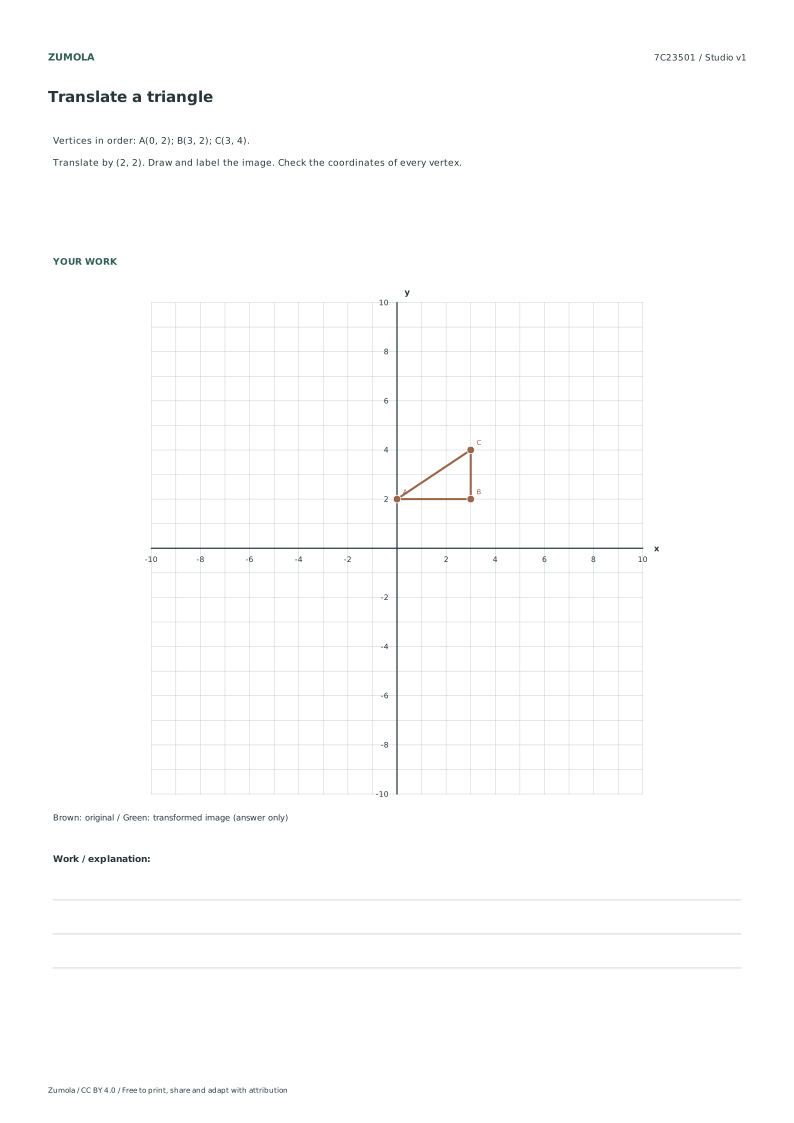
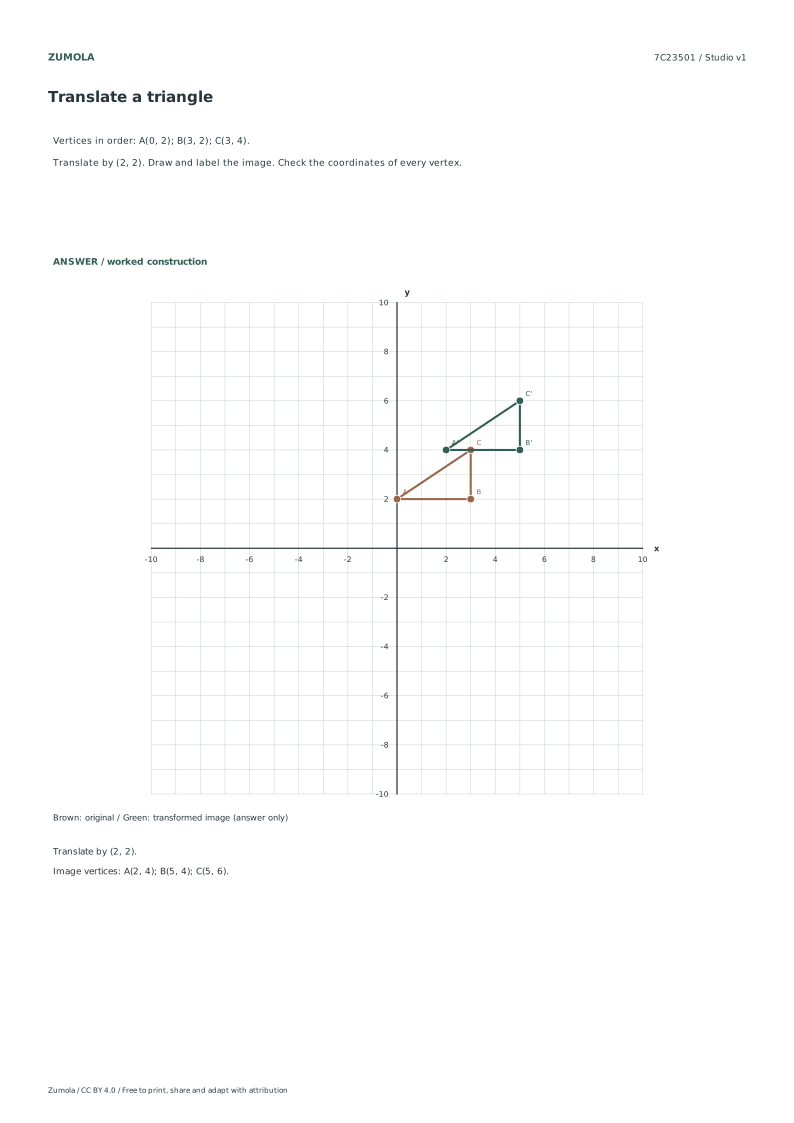
To translate a figure, add the horizontal shift to every x-coordinate and the vertical shift to every y-coordinate. For example, given A(0, 2), B(3, 2), C(3, 4) and translation (2, 2), compute A'(0+2, 2+2) = (2, 4), B'(3+2, 2+2) = (5, 4), C'(3+2, 4+2) = (5, 6). Plot and label each image vertex. Check that corresponding sides remain parallel and equal in length. The area stays 3 square units. Always verify every vertex coordinate after drawing.
Check the first new case
Vertices in order: A(0, 2); B(3, 2); C(3, 4).
Translate by (2, 2).
Image vertices: A(2, 4); B(5, 4); C(5, 6).
The answer PDFs include the completed drawings and checks for all four cases. Free original resources, CC BY 4.0. No signup required.
More ways to practice
Apply rules one at a time, not all at once
A composite transformation is a chain. Treat each named rule as a separate pass over the vertex list. After the first pass, you have a real set of coordinates you can check before continuing. Combining two rules mentally invites sign errors, especially when a reflection and a translation both change the same coordinate.
Write the vertex order once at the top of your work, for example A, B, C. Use primes to mark stages: A, B, C for the original; A′, B′, C′ after the first rule; A″, B″, C″ after the second. This notation keeps the correspondence obvious and makes it easy to spot a vertex that was skipped.
List the original vertices in order with their coordinates.
Write the first transformation as a coordinate rule, such as (x, y) → (x + 3, y − 2).
Apply that rule to every vertex and record the intermediate coordinates.
Write the second rule and apply it to the intermediate coordinates, not the originals.
Plot original, intermediate and final figures, labelling each vertex with its stage mark.
Check side lengths or slopes that a rigid transformation should preserve.
Distinguish rigid moves from dilations in a chain
Translations, rotations and reflections are rigid: distances and angles stay the same, so the image is congruent to the original. A dilation changes lengths by the scale factor while angles stay fixed, so the image is similar but not congruent unless the factor is 1. In a chain, note which stage is rigid and which is not, because that tells you what to verify at the end.
If the chain includes a dilation, the final side lengths equal the original side lengths multiplied by the scale factor, regardless of where the dilation sits in the order. Angles, however, are preserved throughout. Use these facts as independent checks rather than trusting the drawing alone.
Mark each rule as rigid or scaling before you begin.
For a rigid chain, confirm corresponding side lengths match the original.
For a chain with dilation factor k, confirm each final side equals k times its original length.
Confirm all angles match the original, since no listed rule changes angles.
State the order explicitly in your answer so a reader can reproduce it.
Keep the drawing readable when figures overlap
Composite images often overlap the original, which makes vertex labels hard to read. Use a consistent convention: solid lines for the original, dashed for the intermediate, and a distinct style for the final image. Place labels slightly outside each vertex so they do not sit on a grid intersection shared by two figures.
If two vertices land on the same point, note it rather than hiding it. A shared vertex is a legitimate result of the transformation and is worth recording, because it shows the chain was applied correctly.
Choose one line style per stage and keep it consistent across the sheet.
Offset vertex labels away from the figure's interior.
Record any coincident vertices explicitly in your working.
Recheck the final coordinates against the last rule before finishing.
Try this example
Triangle with vertices A(1, 1), B(4, 1), C(1, 3). First translate by (x, y) → (x + 2, y + 1), then reflect across the x-axis using (x, y) → (x, −y). Find the final vertices.
Show the worked explanation
After translation: A′(3, 2), B′(6, 2), C′(3, 4). After reflection across the x-axis: A″(3, −2), B″(6, −2), C″(3, −4). Check: original side AB has length 3 and final A″B″ has length 3, consistent with two rigid moves. Original angle at A is 90 degrees and the final angle at A″ is also 90 degrees.
Common mistakes
Applying the second rule to the original vertices instead of the intermediate ones. Rewrite the intermediate coordinates in a fresh row and apply the second rule only to that row.
Reversing the order of a reflection and a translation and expecting the same image. Follow the order given in the task; if unsure, test one vertex both ways and compare results.
Assuming a dilation preserves side length because the shape looks similar. Multiply each original side by the scale factor and compare with the final side.
Check your work
Vertex order is listed once and preserved through every stage.
Each transformation is written as an explicit coordinate rule.
Intermediate coordinates are recorded before the second rule is applied.
Original, intermediate and final figures are visually distinguishable.
Rigid versus scaling stages are identified and checked appropriately.
Final coordinates are verified against the last rule.
Questions before you start
Does the order of two transformations change the final image?
Often yes. Translation and reflection generally do not commute, so apply the rules in the stated order and record each stage.
How do I check a composite transformation without redrawing?
Apply the coordinate rules arithmetically to each vertex in sequence and compare the resulting coordinates with your plotted points.
What stays the same after a dilation in a chain?
Angles are preserved and the shape remains similar; side lengths scale by the dilation factor, so congruence holds only when that factor is 1.
Optional Google Analytics helps us understand which free resources are useful. It is off until you allow it. Drawing tools and downloads work with either choice. Privacy details