Square grid / 01
Half-inch
graph paper.
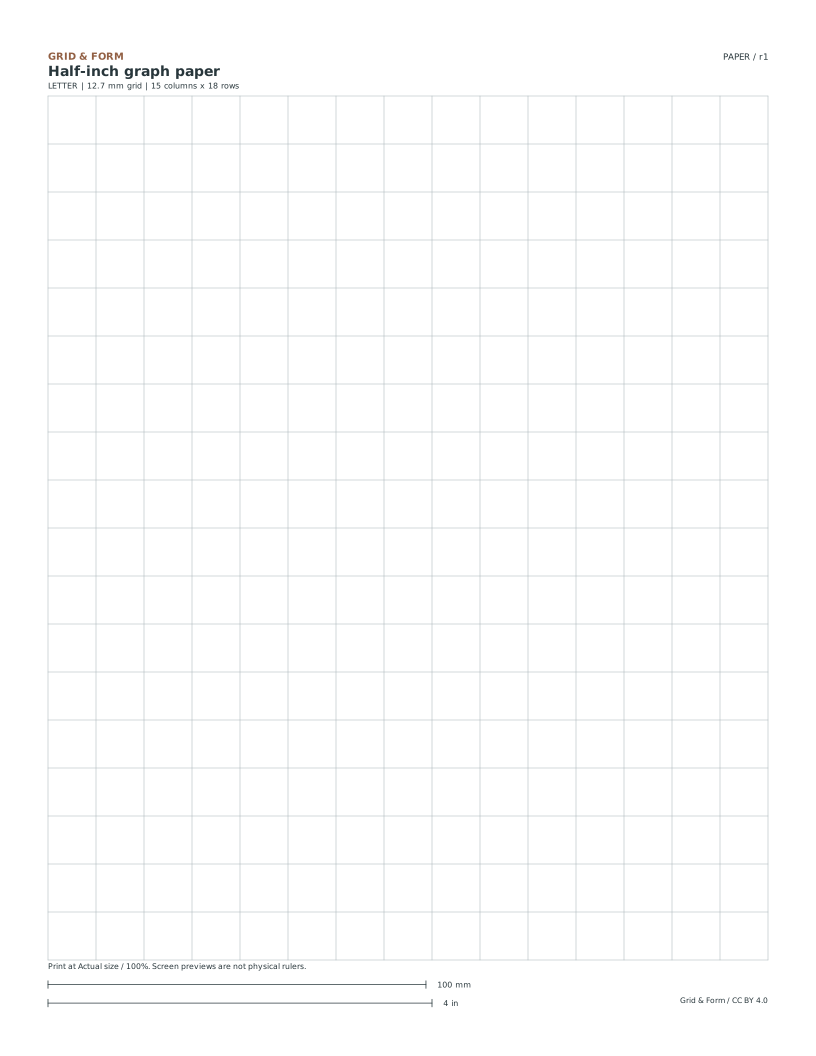
A bigger cell for a clear first mark. Print 1/2-inch graph paper for large grid drawings, block patterns, labeled diagrams or a simple enlargement exercise.
Portrait Letter & A4.
Free PDF and SVG.
Your next blank sheet.
Ready to print
Two squares per inch.
The line-to-line interval is 12.7 mm. Lines are light gray, with a 0.15 mm vector stroke. A 100 mm bar and a 4 inch bar sit below the grid for a quick print check.
All paper sizes & editable formats
- PDF: US Letter PDF · editable SVG

- PDF: A4 PDF · editable SVG
What is on each sheet?
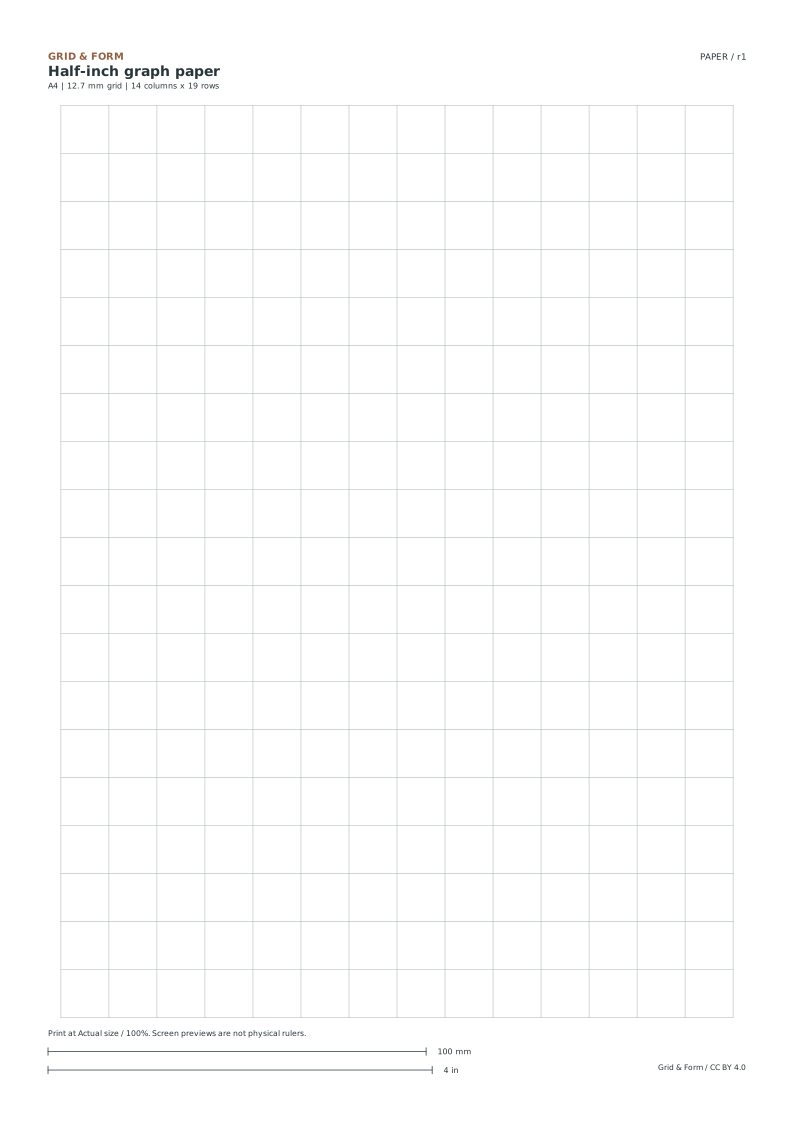
| Specification | US Letter | A4 |
|---|---|---|
| Sheet dimensions | 215.9 × 279.4 mm / 8.5 × 11 in | 210 × 297 mm |
| Square spacing | 12.7 mm / 0.5 inch | |
| Complete cells | 15 columns × 18 rows | 14 columns × 19 rows |
| Grid inset | 12.7 mm at the sides; 25.4 mm at top and bottom, plus centered leftover space | |
| Download formats | Single-page vector PDF and editable SVG | |
The count describes cells, not lines. A grid with 15 columns has 16 vertical boundary lines. The outermost line is the edge of the last complete square.
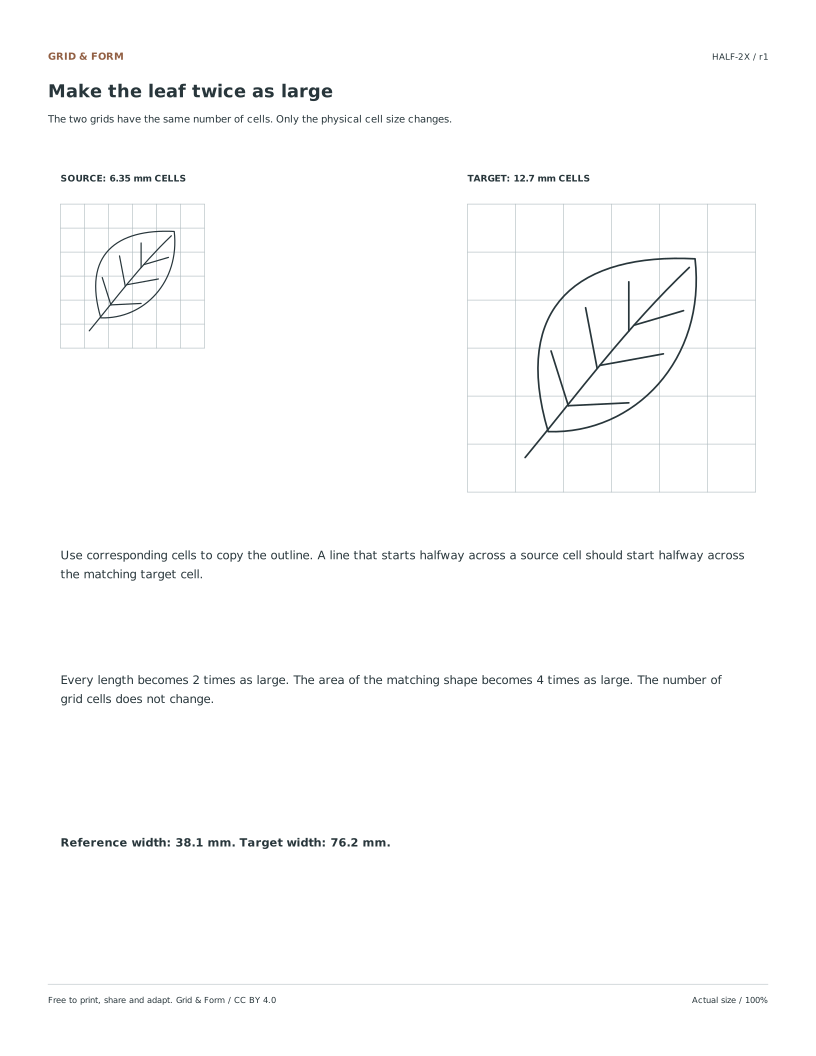
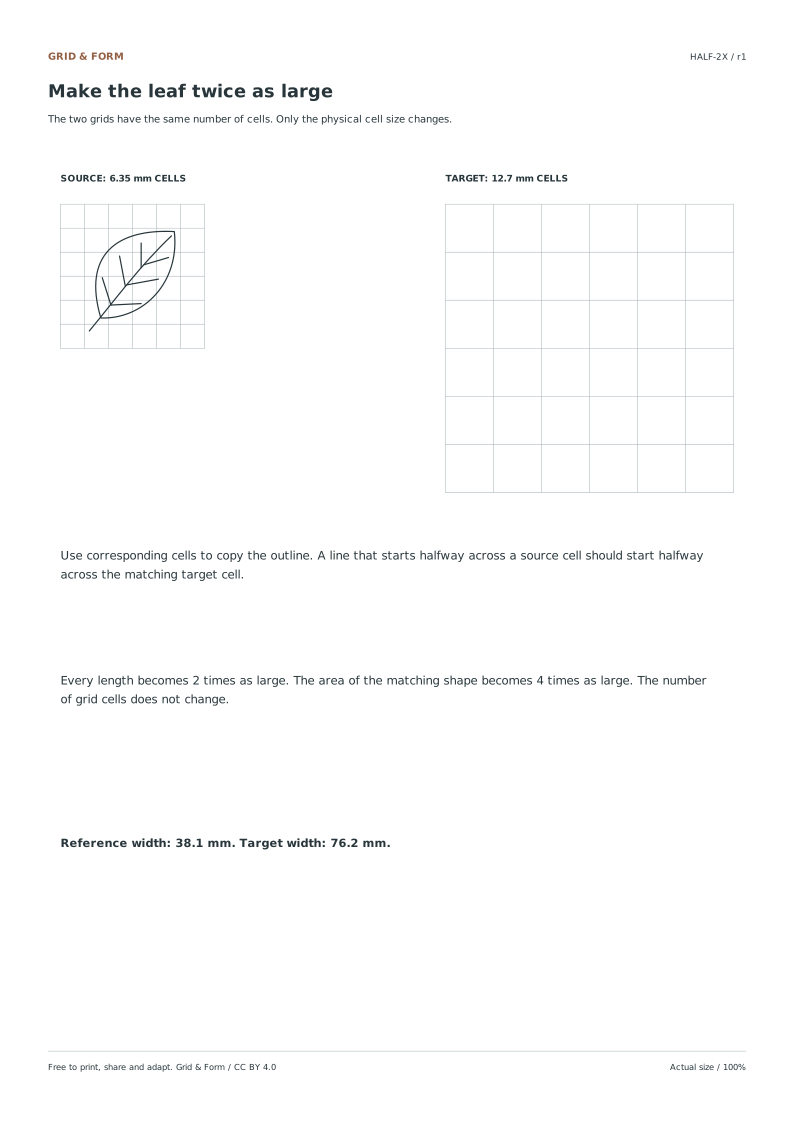
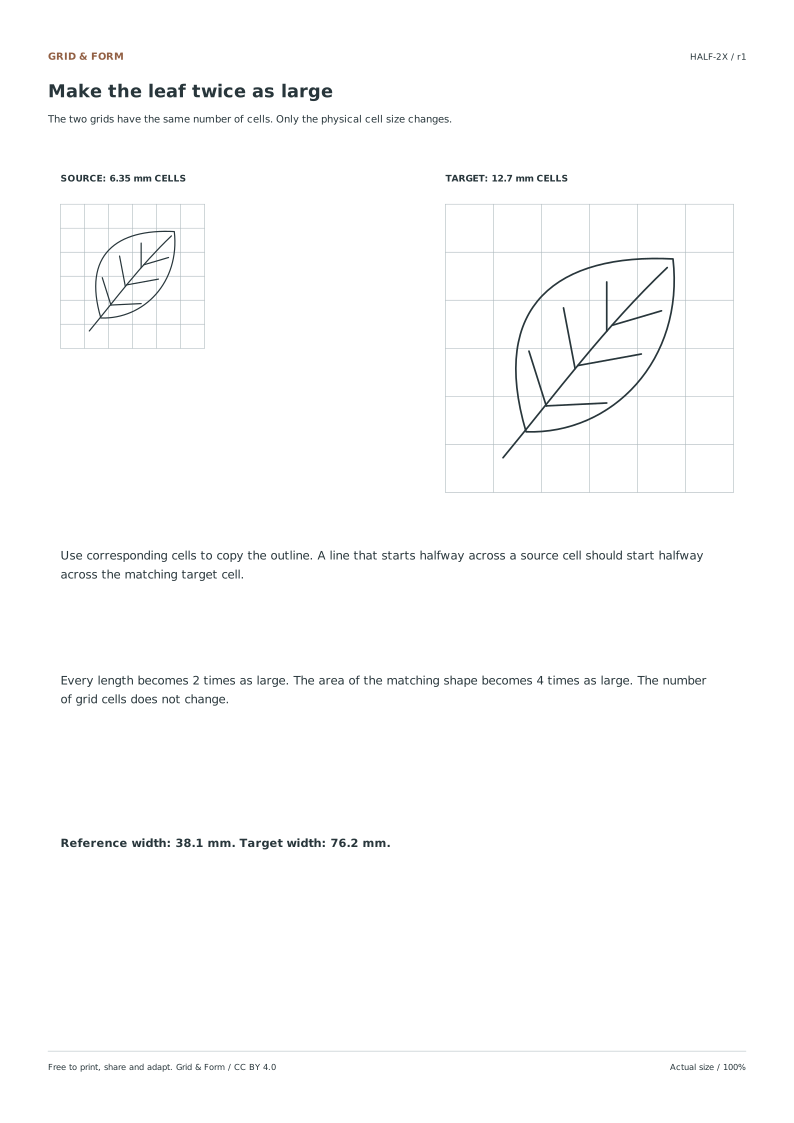
Make a leaf twice as large.
An original worksheet and answer make the difference between grid spacing and scale visible.
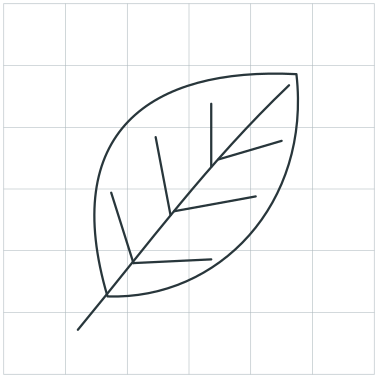
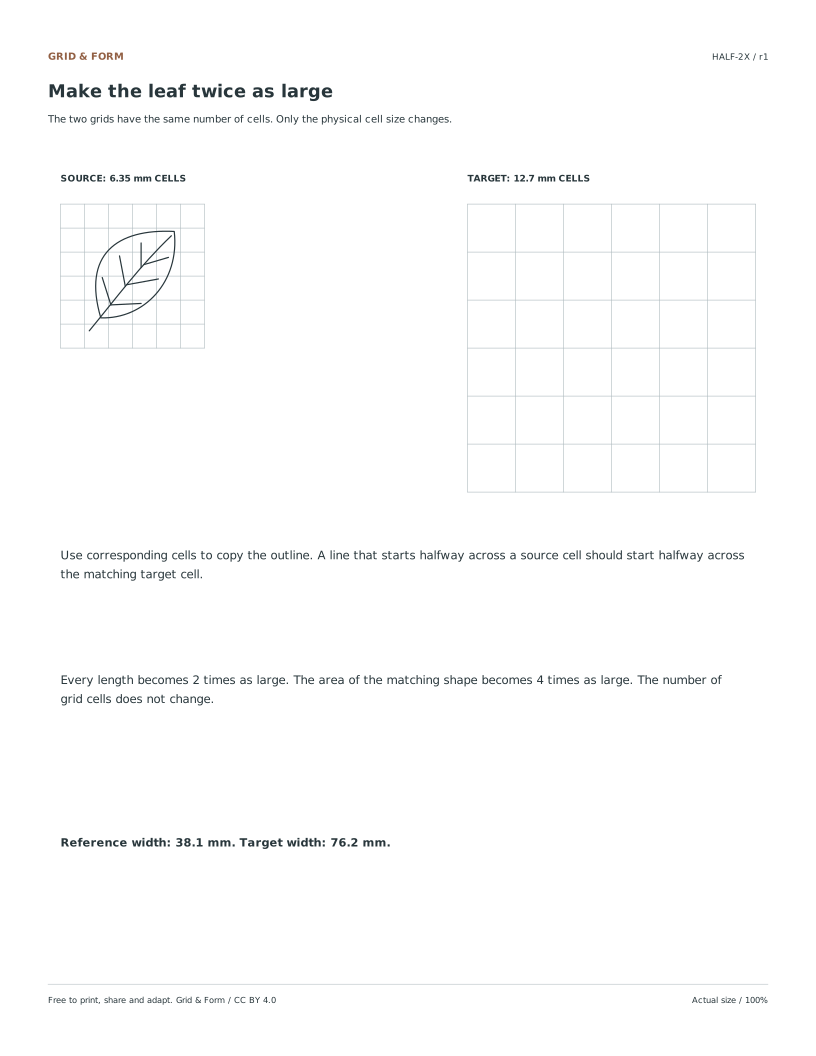
The source drawing uses six 6.35 mm cells along each side. The target uses six 12.7 mm cells. Keep every mark in the corresponding cell and the drawing doubles in both width and height.
- Notice the cell crossings.
Find where the leaf outline enters and leaves each source cell. Start with the main outline before the smaller veins.
- Move to the same cell.
Halfway across a small source cell becomes halfway across the matching large target cell. Do not copy the same physical distance.
- Compare the whole form.
Use the reference completion to check placement. A hand-drawn line can vary while still keeping the proportions.
HALF-2X / Original exercise
Same cell count.
Twice the cell size.
2 × 2 = 4 × area
All paper sizes & editable formats
- Worksheet: US Letter PDF · editable SVG
- Answers: US Letter PDF · editable SVG
- Worksheet: A4 PDF · editable SVG
- Answers: A4 PDF · editable SVG
When larger squares help.
Leave room to see the shape.
A half-inch grid gives a beginner more room to place a curve within a cell. It also leaves space for handwritten values or labels. Try the leaf before moving to a smaller grid; add only a few cell crossings at a time.
For drawing practice, you do not need every square to represent a real-world unit. It can simply be a guide for position and proportion.
Choose detail deliberately.
A quarter-inch sheet has four times as many cells in the same area as a half-inch sheet. That can help with a detailed diagram, but it also creates more intersections to track. Use the grid that makes the task easier to read.
A few useful answers
Before you begin
Is half-inch graph paper the same as 2 squares per inch?
Yes. Each interval is 1/2 inch, so two intervals span one inch. One inch equals 25.4 mm, making the file spacing 12.7 mm.
Does a half-inch square represent a foot?
Only if you choose that scale. At 1/2 inch to 1 foot, one square represents one foot and the same-unit ratio is 1:24. A blank grid does not impose that meaning.
Why are there different cell counts on A4 and Letter?
The paper dimensions differ. Each version keeps exactly 12.7 mm spacing and centers only whole cells. It does not stretch the last cells or resize the grid.
Can I use the enlargement worksheet with a class?
Yes. Print and share the original files free under CC BY 4.0. Keep the credit, license link and any change notice when you adapt them. See the reuse guide.
More ways to practice
Diagnostic checks before drawing
A printed grid is only useful if the physical spacing matches the intended 12.7 mm interval. After printing at 100%, place a ruler along a row of cells and measure from one line to the next, not from line centers to paper edges. The calibration bar on the sheet gives a quick visual reference; if the bar measures short or long, the print scaling is wrong and the grid should not be used for measurement.
Check the outer boundary as well. A grid with 15 columns has 16 vertical lines, and the outermost line closes the last complete square. If the outer line is clipped or missing, the usable cell count is smaller than expected. Mark the top-left intersection as the origin before copying any shape so that cell coordinates remain consistent.
- Print at 100% scaling, with no fit-to-page option enabled.
- Measure one cell line-to-line; it should read 12.7 mm (1/2 inch).
- Confirm the calibration bar matches its stated length.
- Count columns and rows, then label the top-left intersection as (0,0).
Enlargement by doubling cell counts
Enlargement on graph paper is a coordinate operation, not a freehand scaling. Choose a simple shape whose corners fall on grid intersections. Record each corner as a cell coordinate relative to the origin. To double the shape, multiply every coordinate by two and plot the new corners on a fresh area of the same grid. Because each cell is 12.7 mm, doubling cell counts doubles every linear dimension while keeping the shape's proportions unchanged.
Keep the original and enlarged drawings on separate sheets or clearly separated regions. Do not mix the two coordinate sets on one grid, because a doubled coordinate can land on a line that also belongs to the original drawing. If the enlarged shape exceeds the page, reduce the starting shape rather than changing the grid interval.
- Plot the original shape using whole-cell coordinates.
- List each corner as (column, row) from the origin.
- Multiply each coordinate by two to get the enlarged corners.
- Plot the enlarged corners on a fresh grid and connect them in the same order.
- Compare side lengths: each enlarged side should span twice as many cells as the original.
What to check after drawing
Verify the enlargement by counting cells along each side rather than measuring with a ruler alone. A side that spans 3 cells in the original must span 6 cells in the enlargement. Check that right angles remain right angles: a corner that occupied one cell corner should still sit on a line intersection after doubling. If a corner lands between lines, a coordinate was misread or multiplied incorrectly.
Artwork has multiple valid outcomes, so judge the result with a rubric rather than expecting one exact picture. The rubric below focuses on coordinate accuracy, proportional doubling, and clean line placement.
- Count cells on each enlarged side and compare with twice the original count.
- Confirm every enlarged corner sits on a line intersection.
- Check that parallel sides remain parallel and right angles remain right angles.
- Record any corner that missed an intersection and recheck its coordinate.
Try this example
On a half-inch grid, draw a rectangle with corners at (1,1), (4,1), (4,3), and (1,3). Enlarge it by doubling every cell coordinate.
Show the worked explanation
The original rectangle spans 3 cells horizontally and 2 cells vertically. Doubling each coordinate gives (2,2), (8,2), (8,6), and (2,6). The enlarged rectangle spans 6 cells horizontally and 4 cells vertically, so each side is twice the original cell count. Because each cell is 12.7 mm, the original sides are 38.1 mm and 25.4 mm; the enlarged sides are 76.2 mm and 50.8 mm. All corners land on grid intersections.
Common mistakes
- Measuring the grid from paper edge to first line instead of line to line. Place the ruler on one grid line and measure to the next parallel line; the interval should be 12.7 mm.
- Doubling the drawing by eye instead of doubling cell coordinates. Write each corner as (column, row), multiply both numbers by two, and plot the new points on intersections.
- Plotting the original and enlarged shapes on the same cells. Use a separate sheet or a clearly separated region so doubled coordinates do not overlap the original.
Check your work
- Every corner of the original shape sits on a grid intersection.
- Each enlarged coordinate is exactly twice the corresponding original coordinate.
- Enlarged side lengths span twice as many cells as the original sides.
- Right angles and parallel sides are preserved after doubling.
- The original and enlarged drawings occupy separate, clearly labeled regions.
Questions before you start
How do I know the printed grid is really half-inch spacing?
Print at 100%, measure one cell line-to-line with a ruler, and confirm it reads 12.7 mm. Also check that the calibration bar matches its stated length.
Why does doubling cell counts double the drawing?
Each cell is a fixed 12.7 mm square. Doubling the number of cells along every side doubles each linear dimension, so the shape grows to twice its original size without changing proportions.
What if an enlarged corner does not land on a grid intersection?
Recheck the original coordinate and the multiplication. A corner between lines usually means a coordinate was misread or a number was doubled incorrectly.