Reference diagrams
LETTER · Download PDF
A4 · Download PDF
Free original resources
Learn to draw a playground slide with a curved chute, side rails, ladder, and support frame. Use tracing, grid, and completion sheets to build accurate contour skills.
Four original cases, with reference diagrams, practice sheets and worked answers. Everything is free; no signup required.
LETTER · Download PDF
A4 · Download PDF
LETTER · Download PDF
A4 · Download PDF
LETTER · Download PDF
A4 · Download PDF
Use A4 or US Letter to match your printer. Use the stated values and conditions to solve each exercise; diagrams are not physical measuring rulers.
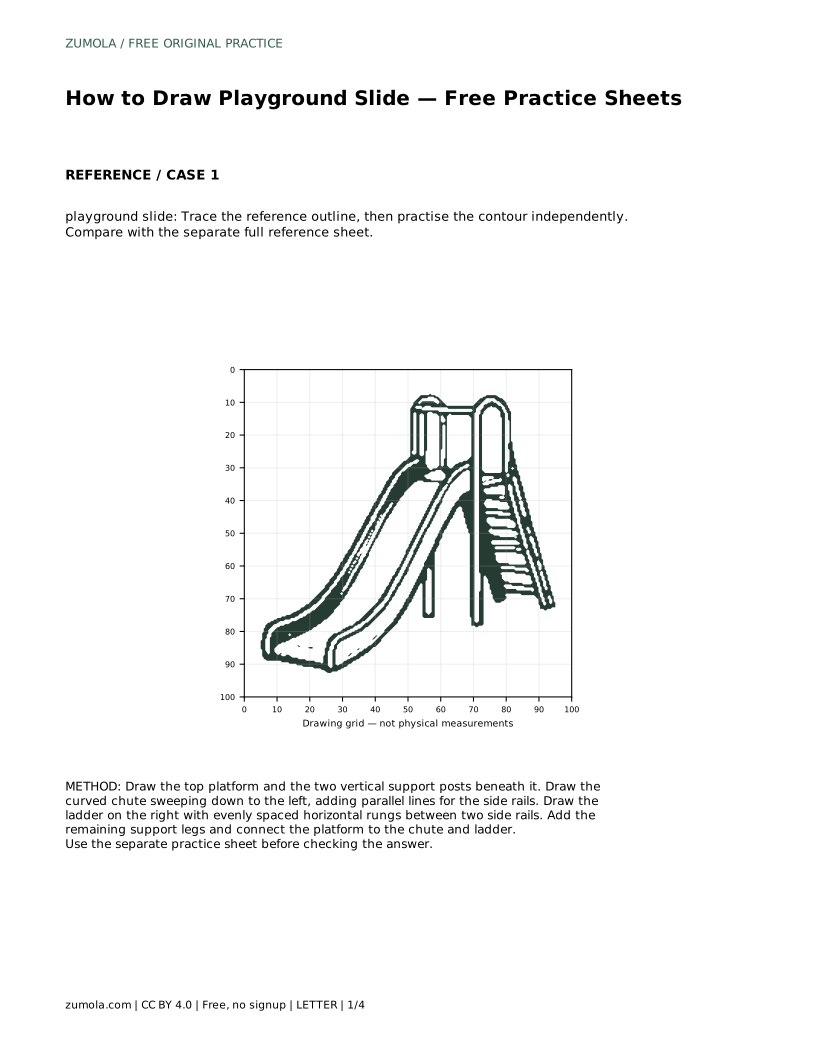
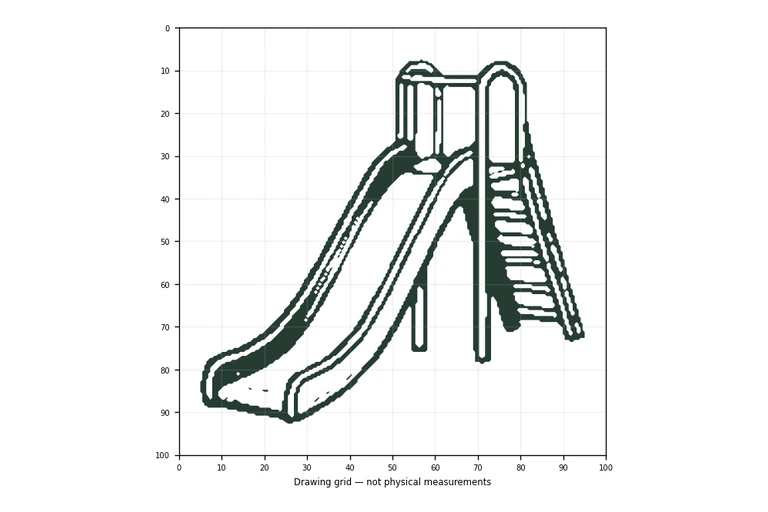
Drawing a playground slide is a practical way to study curved forms, parallel lines, and structural connections. This guide explains how to capture the essential features: a raised platform, a curved chute with side rails, a ladder with evenly spaced rungs, and vertical support posts. You will also find advice on using tracing, grid-copy, and partial-completion practice sheets. The goal is not a pixel-perfect copy but a drawing that preserves the slide's visible structure and proportions. Work through the steps slowly, checking each part against the reference before moving on.
Begin by placing the top platform. This is the highest horizontal element and sets the overall height of the slide. Draw it as a simple rectangle or a slightly angled quadrilateral, depending on the view. Beneath the platform, draw two vertical support posts. These posts should be parallel to each other and perpendicular to the ground line. Their length determines how tall the slide appears. Keep the posts straight and evenly spaced; they carry the platform and connect to the chute and ladder later.
Next, add the remaining support legs. A typical playground slide has at least four legs, but the reference may show only two clearly. Draw the visible legs as vertical lines that meet the ground at consistent points. Check that the platform sits securely on top of the posts and that no leg floats above the ground. This stage is about establishing the skeleton of the slide before adding curves.
The chute is the most distinctive part of the slide. It sweeps down from the platform to the ground, usually curving outward. Start by drawing a single curved line from the platform edge down to the ground. This line represents the center of the chute. Then add a second curved line parallel to the first, offset to one side, to show the width of the chute. The two lines should remain roughly the same distance apart along the curve.
Side rails run along the edges of the chute to keep riders safe. Draw them as raised lines parallel to the chute's outer edges. The rails should follow the same curve and sit slightly above the chute surface. Make sure the rails connect to the platform at the top and end near the ground at the bottom. Avoid making the rails too thick or too thin; they should be clearly visible but proportionate to the chute.
The ladder is usually on the right side of the slide, opposite the chute. Draw two vertical side rails for the ladder, starting from the ground and reaching up to the platform. The rails should be parallel and spaced apart enough to fit the rungs. Then draw horizontal rungs between the rails. Space the rungs evenly from bottom to top; uneven spacing makes the ladder look unstable. The rungs should be perpendicular to the side rails.
Check that the ladder connects to the platform at the top and touches the ground at the bottom. The ladder should not overlap the chute or the support posts. If the reference shows the ladder at an angle, adjust the side rails accordingly, but keep the rungs horizontal. This step completes the main structural elements of the slide.
Now connect the platform to the chute and ladder. The chute should attach to one edge of the platform, and the ladder to another. Draw short connecting lines if needed to show how they meet. Check that the support posts align with the platform and that the chute's curve starts smoothly from the platform edge. Look at the overall silhouette: the slide should look balanced, with the chute sweeping down on one side and the ladder rising on the other.
Finally, compare your drawing to the reference. Adjust any proportions that seem off: the chute might be too wide or narrow, the ladder rungs too far apart, or the platform too small. Use the practice sheets to trace the outline first, then try drawing independently. Remember that multiple correct drawings exist; assess whether the key features are present and proportional rather than aiming for an exact match.
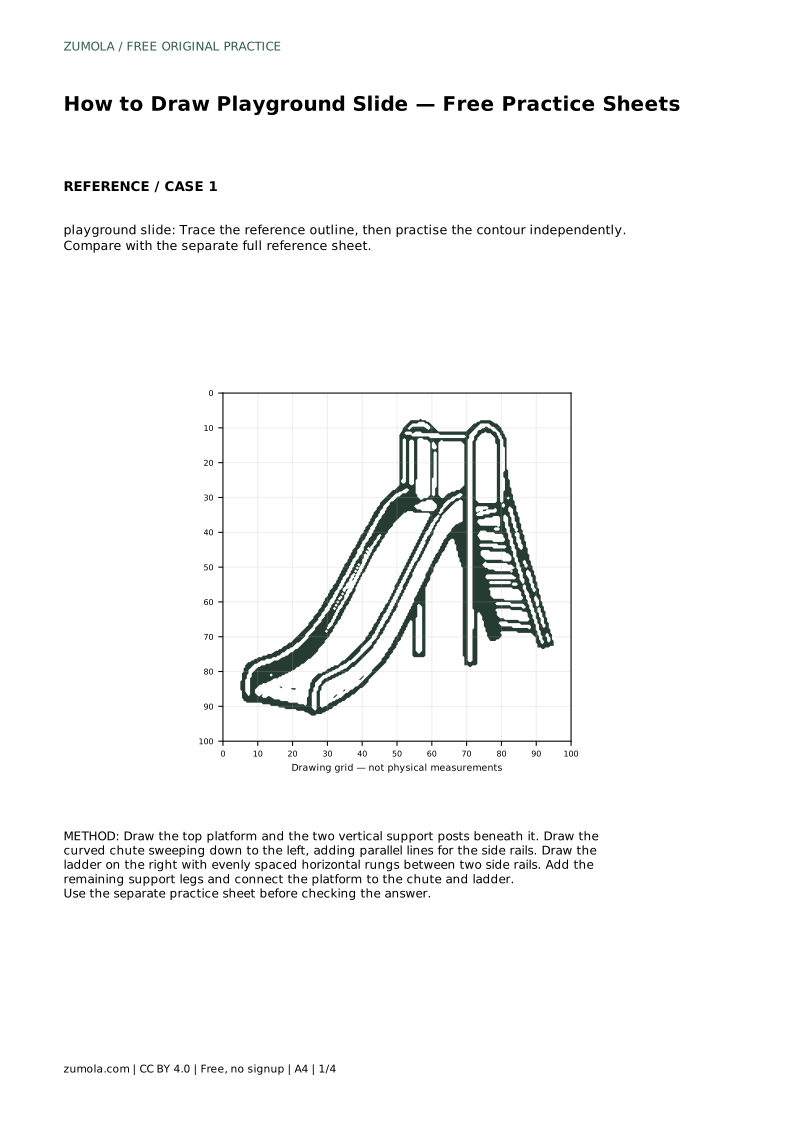
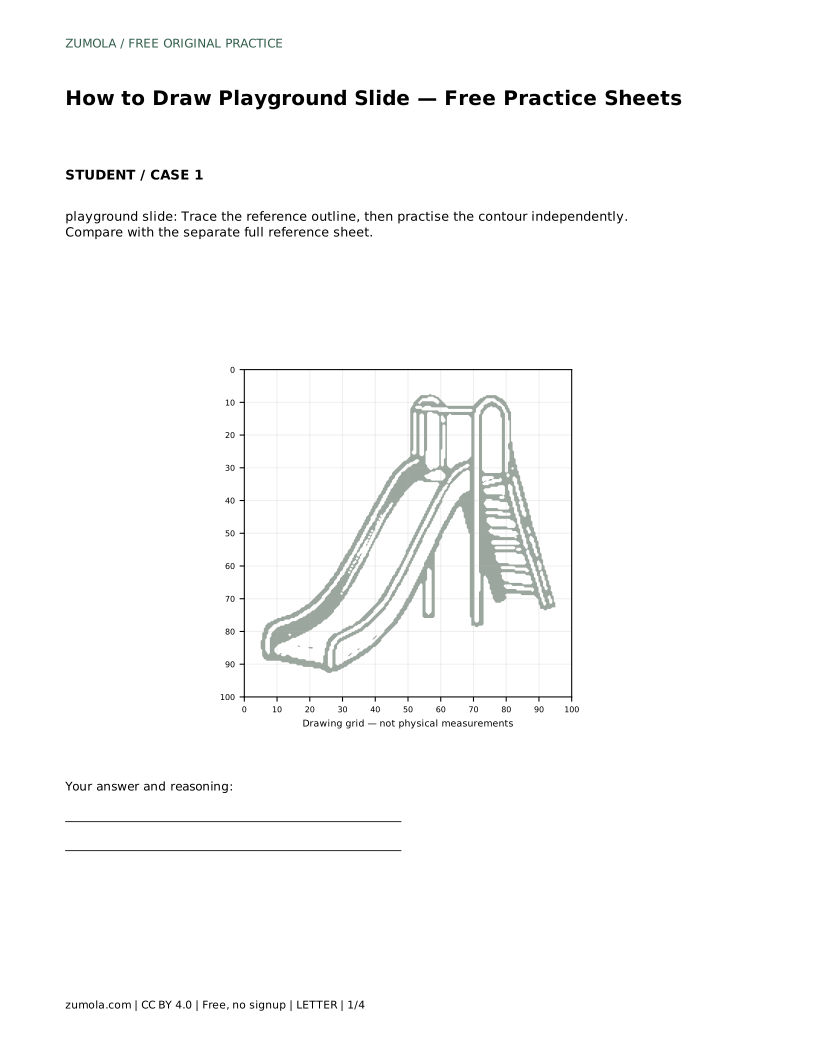
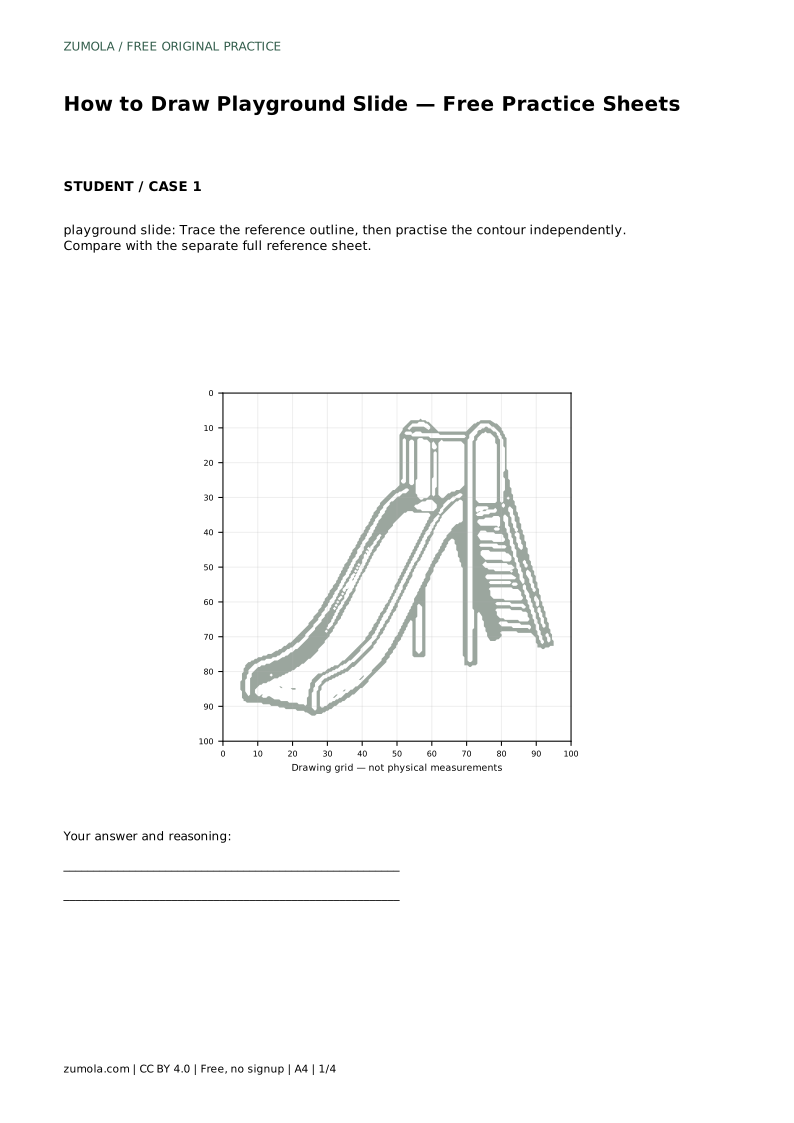
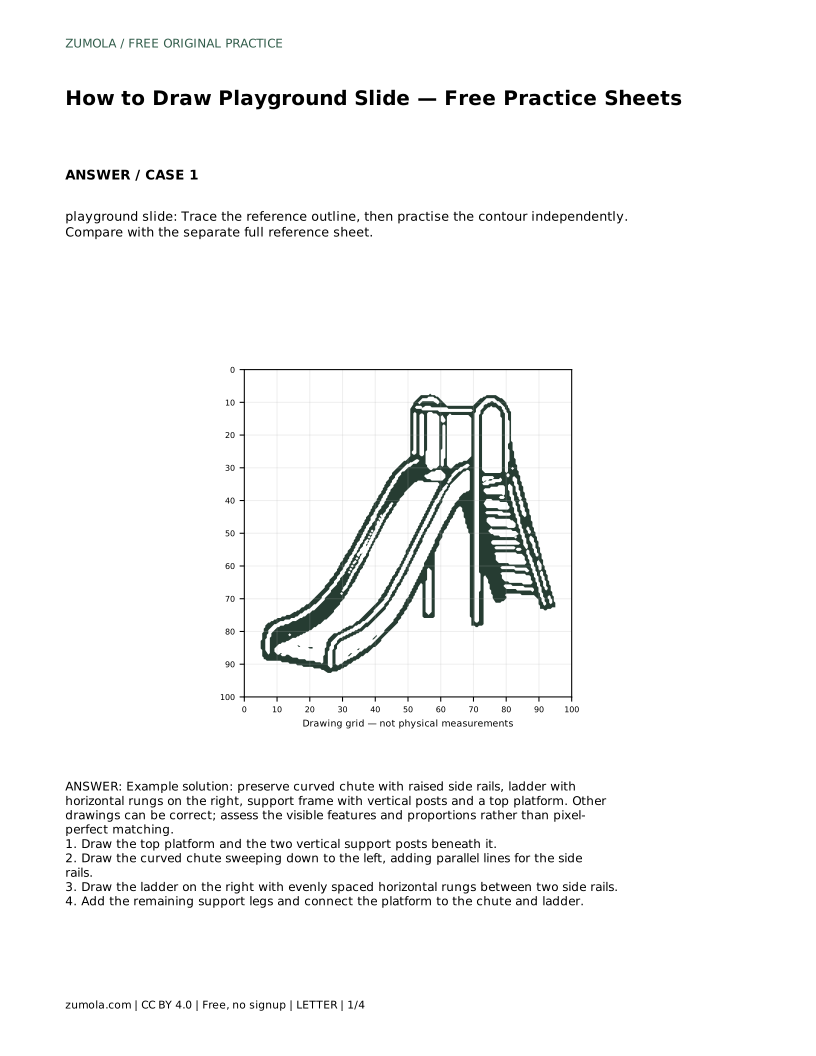
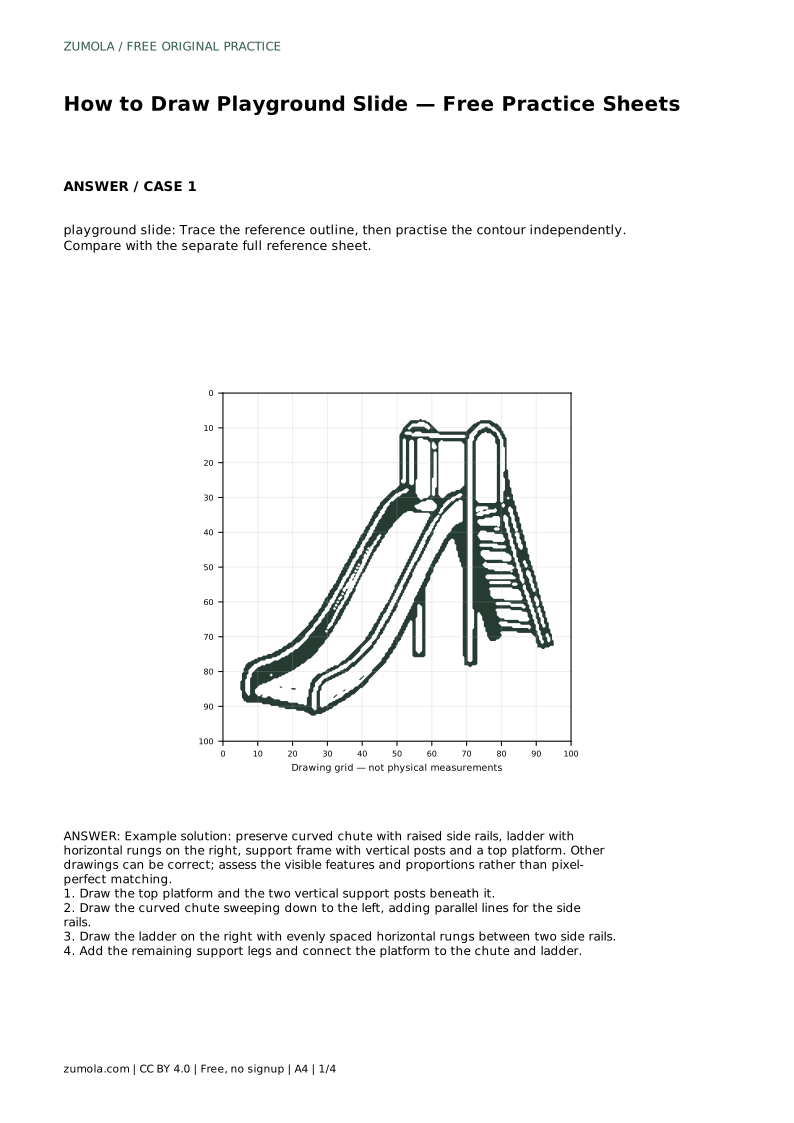
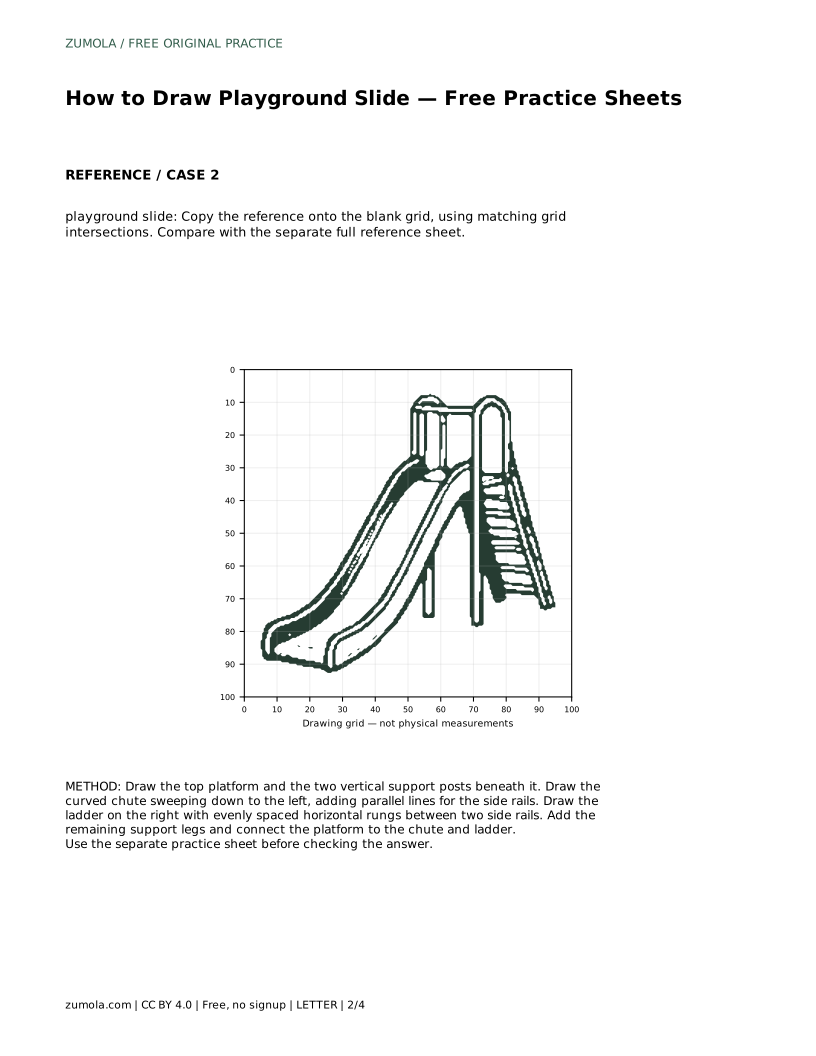
playground slide: Trace the reference outline, then practise the contour independently. Compare with the separate full reference sheet.
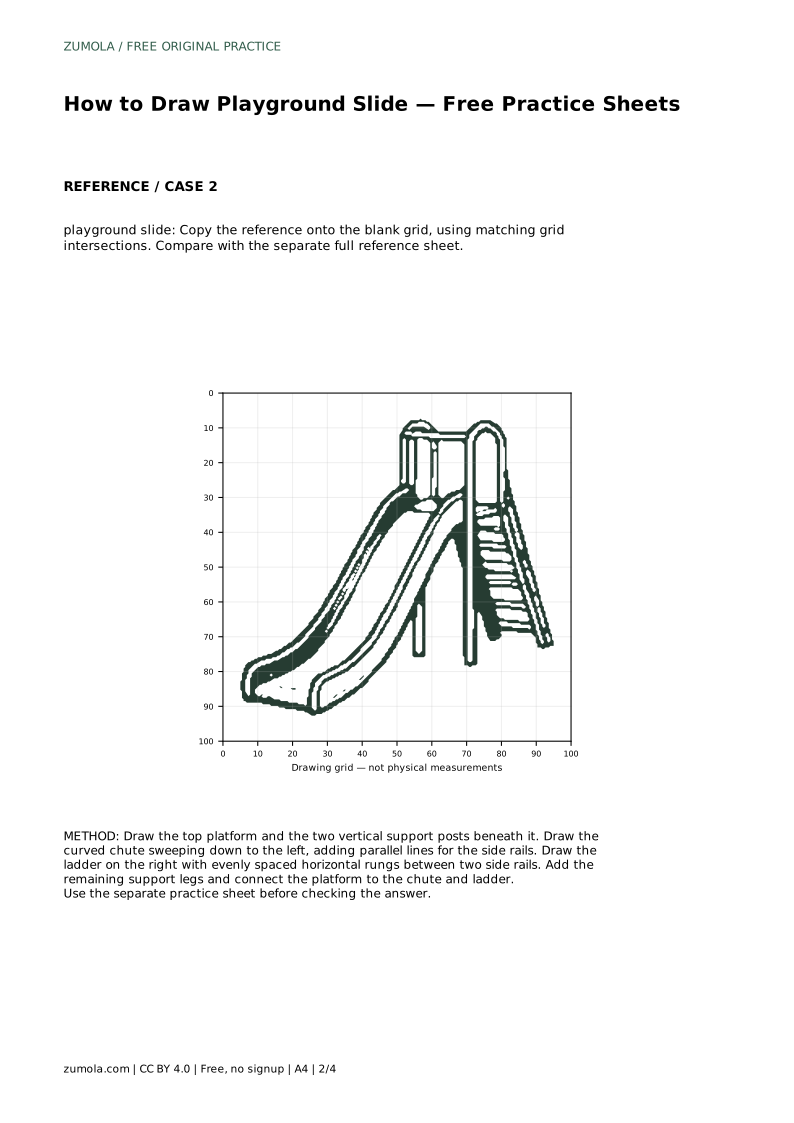
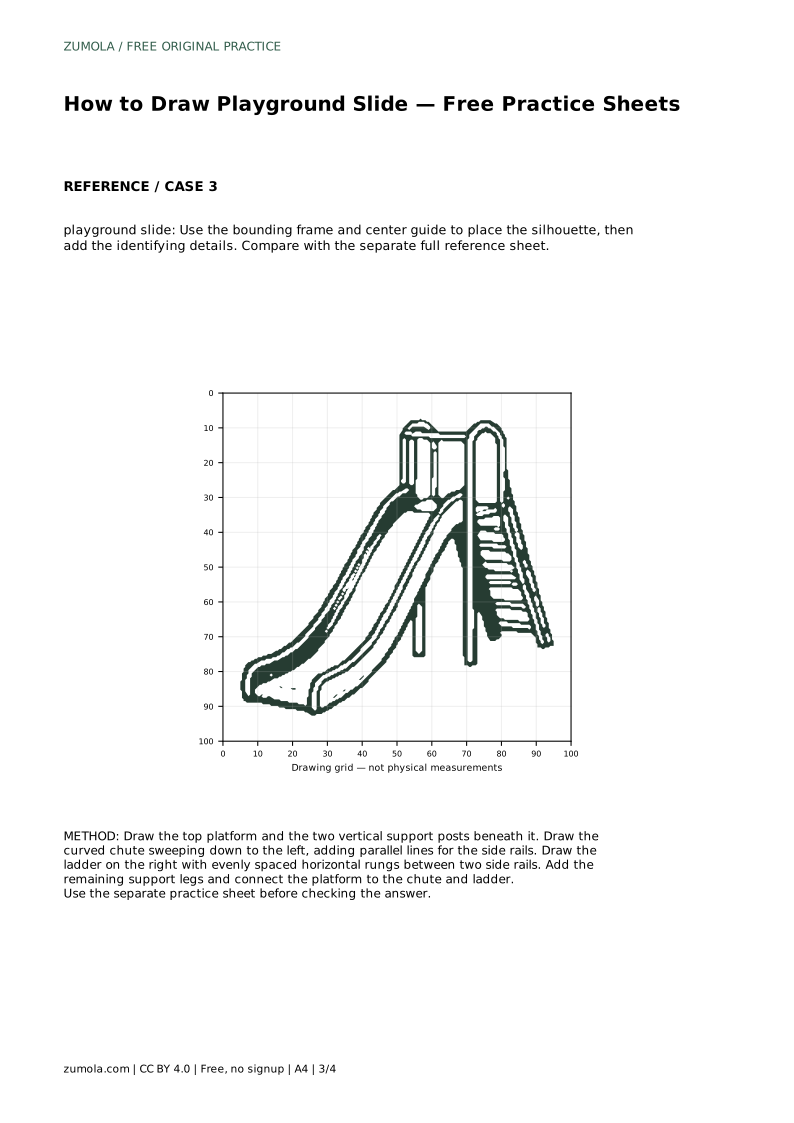
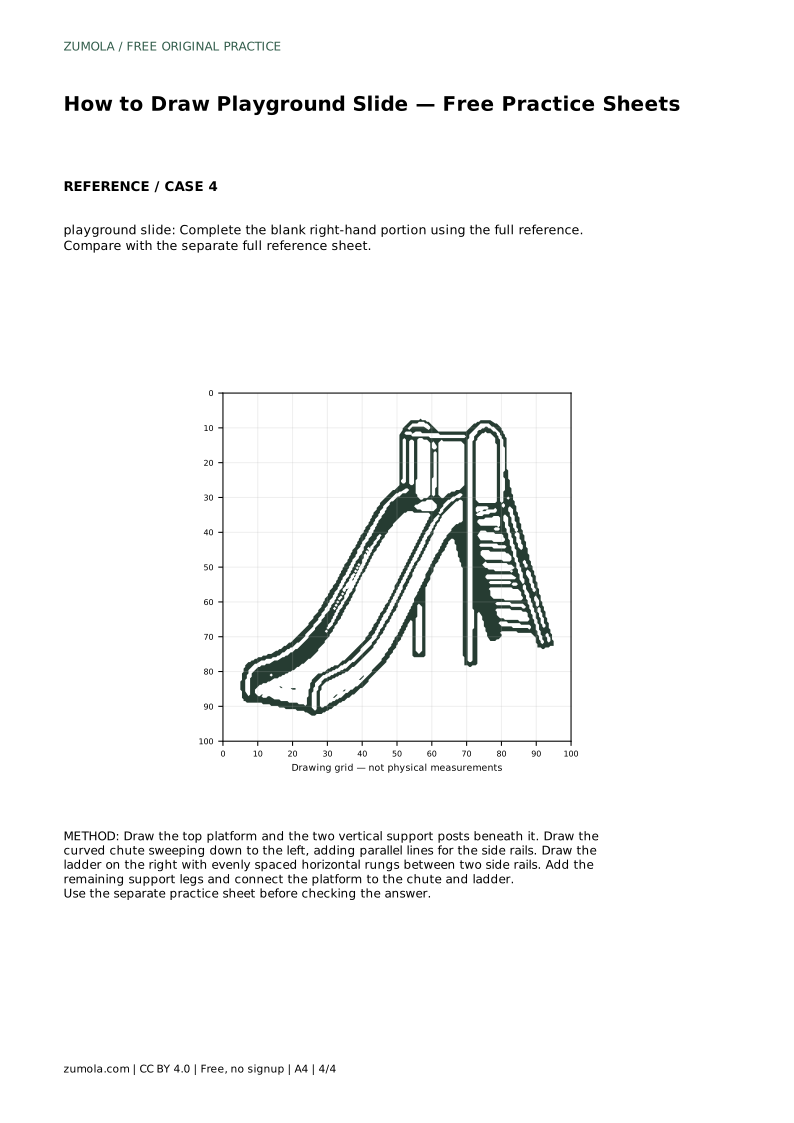
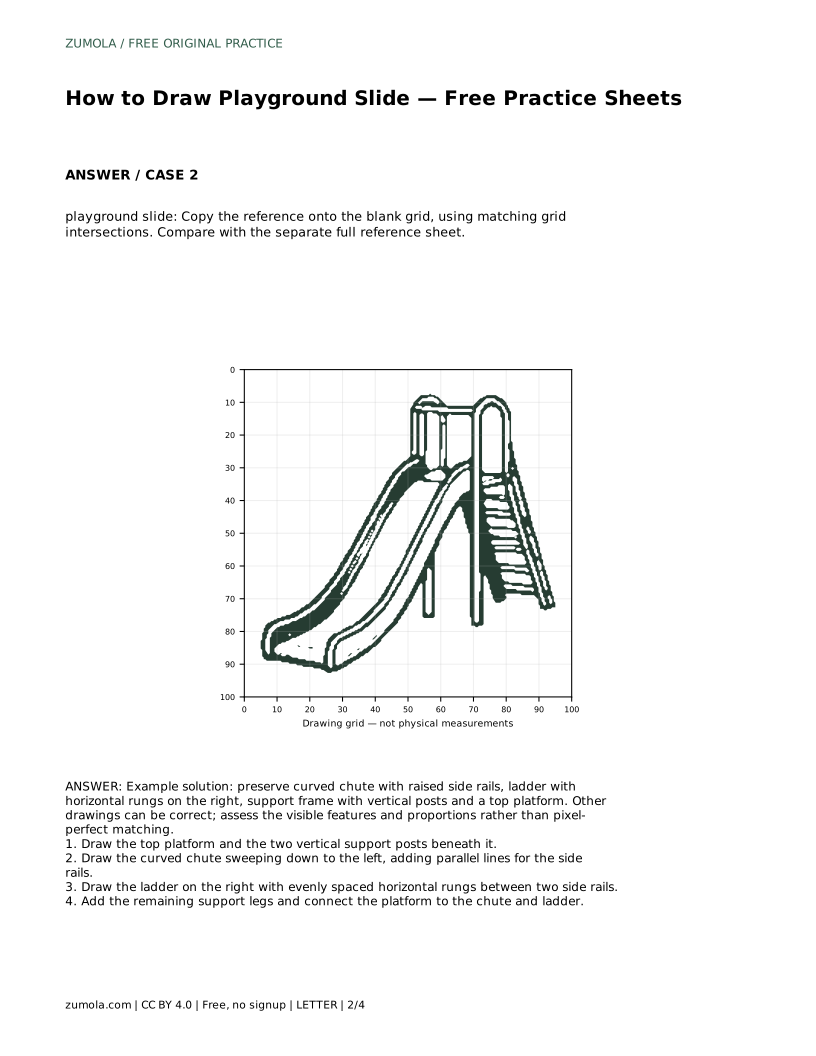
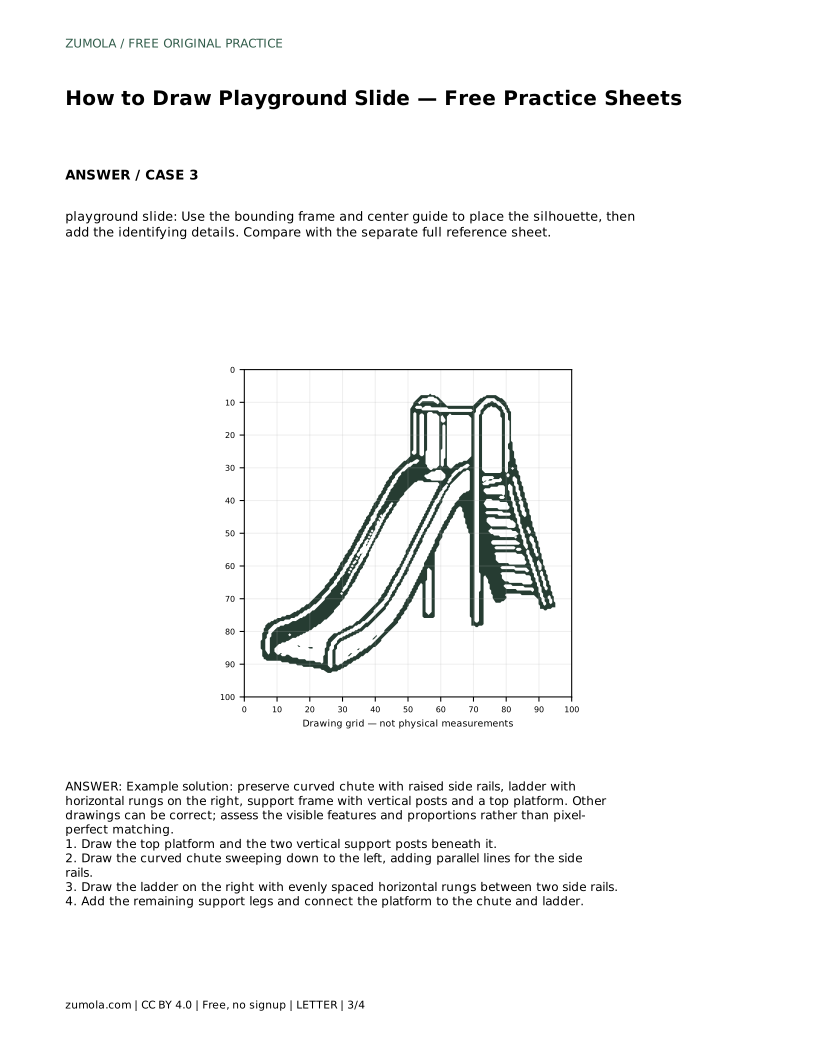
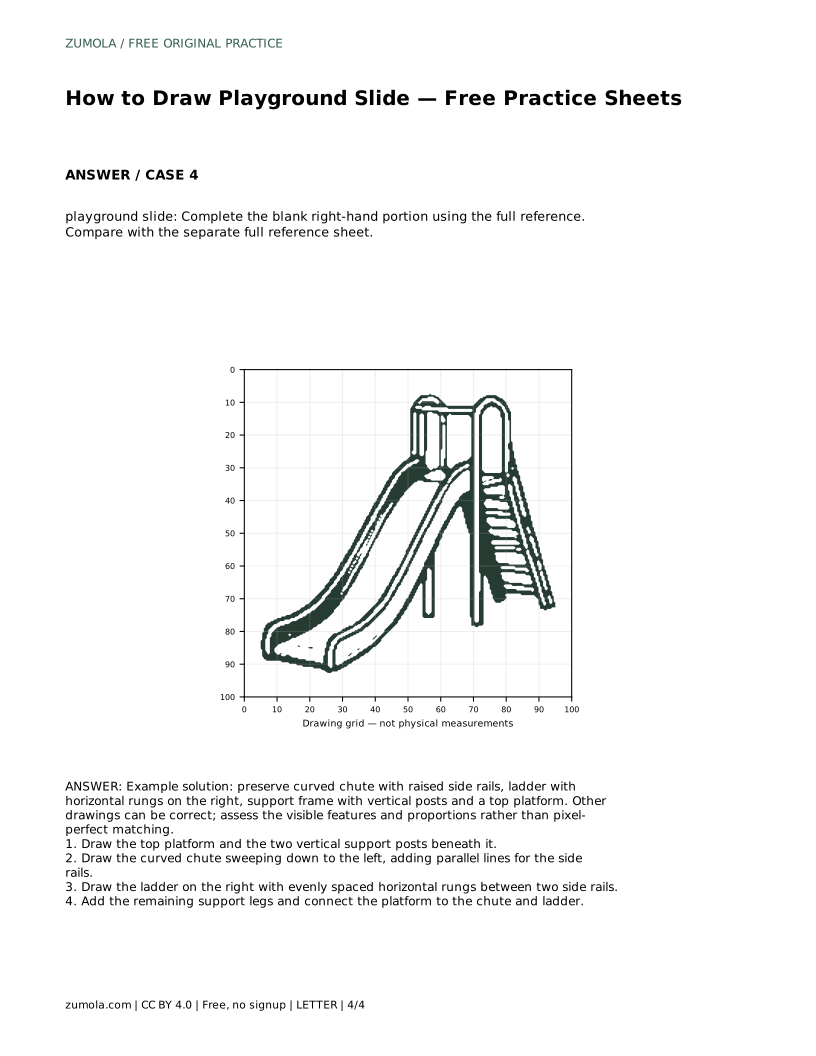
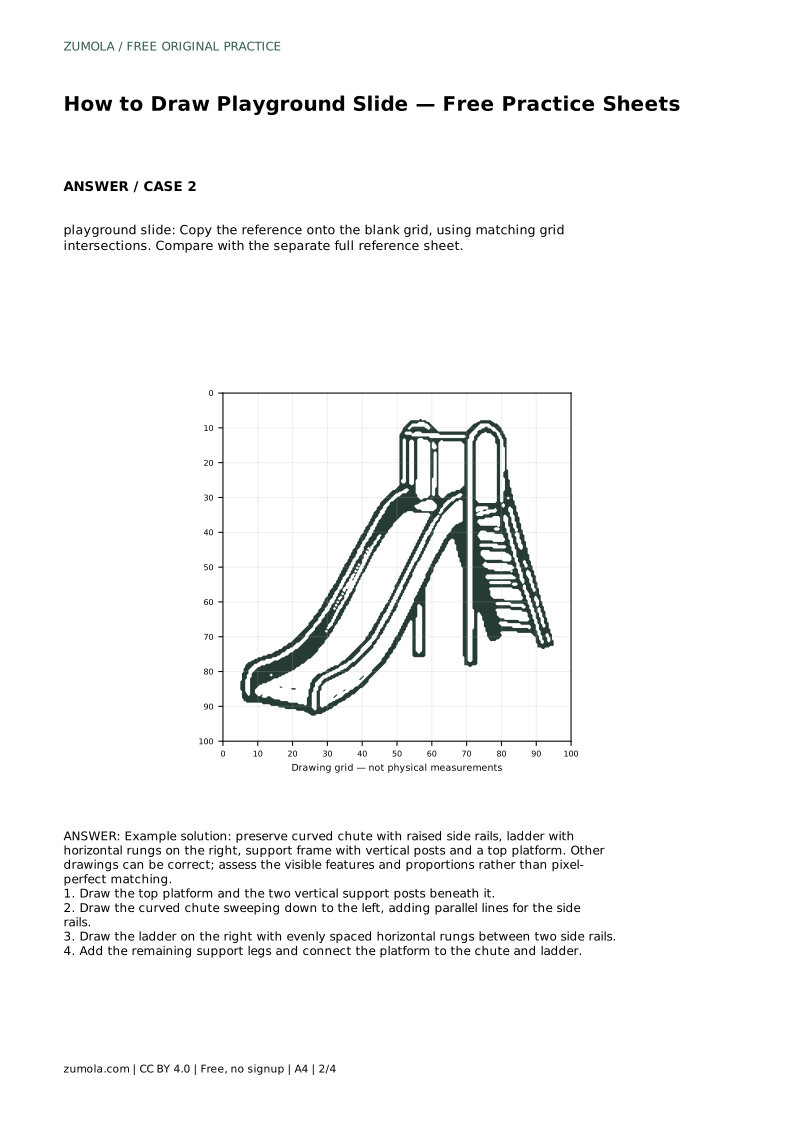
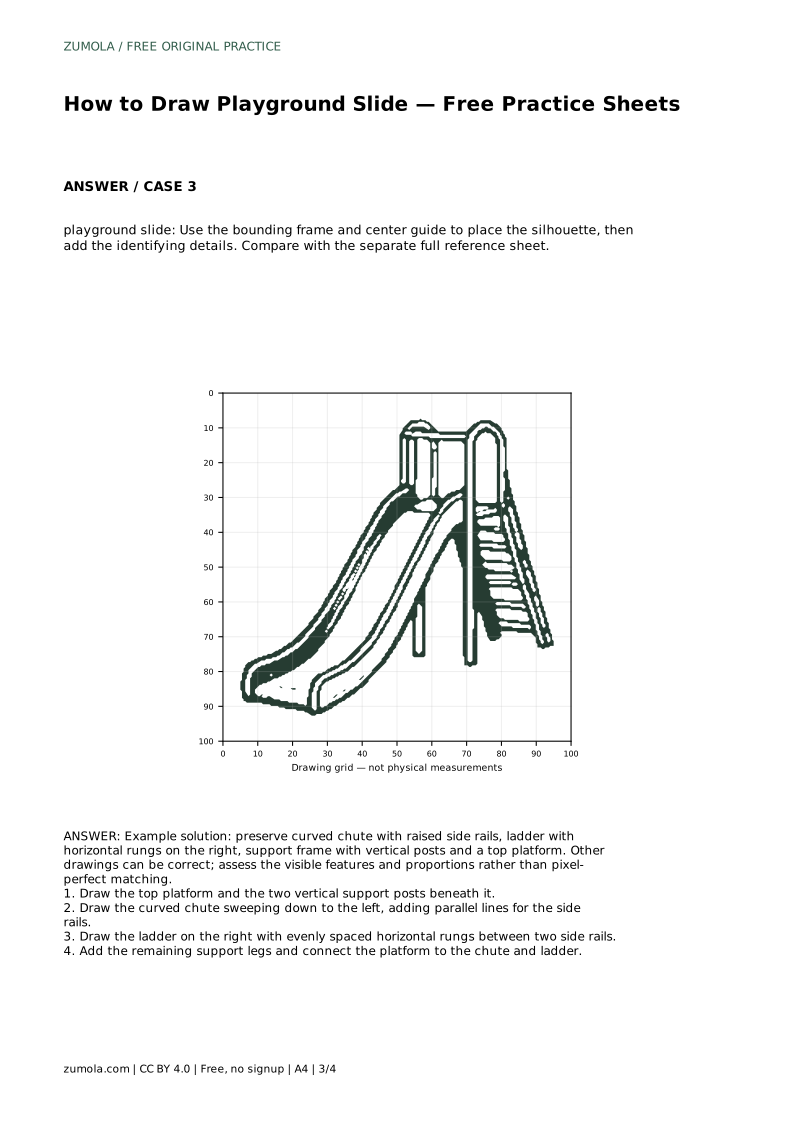
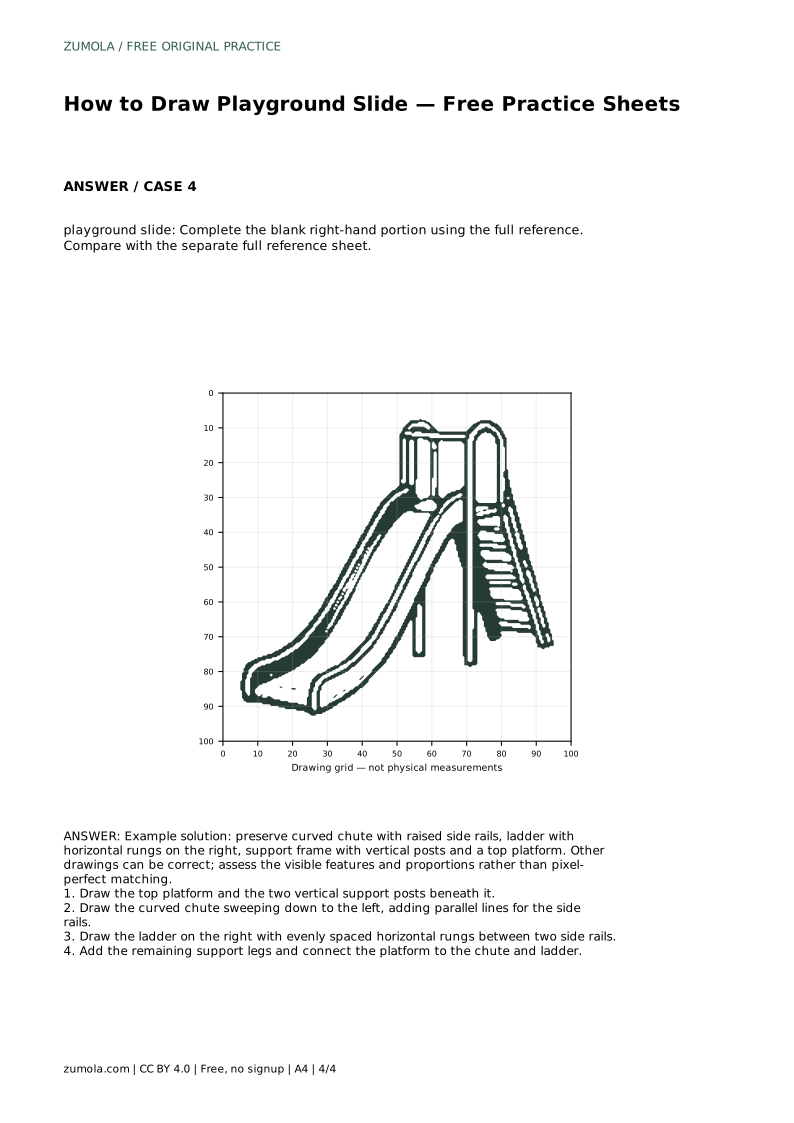
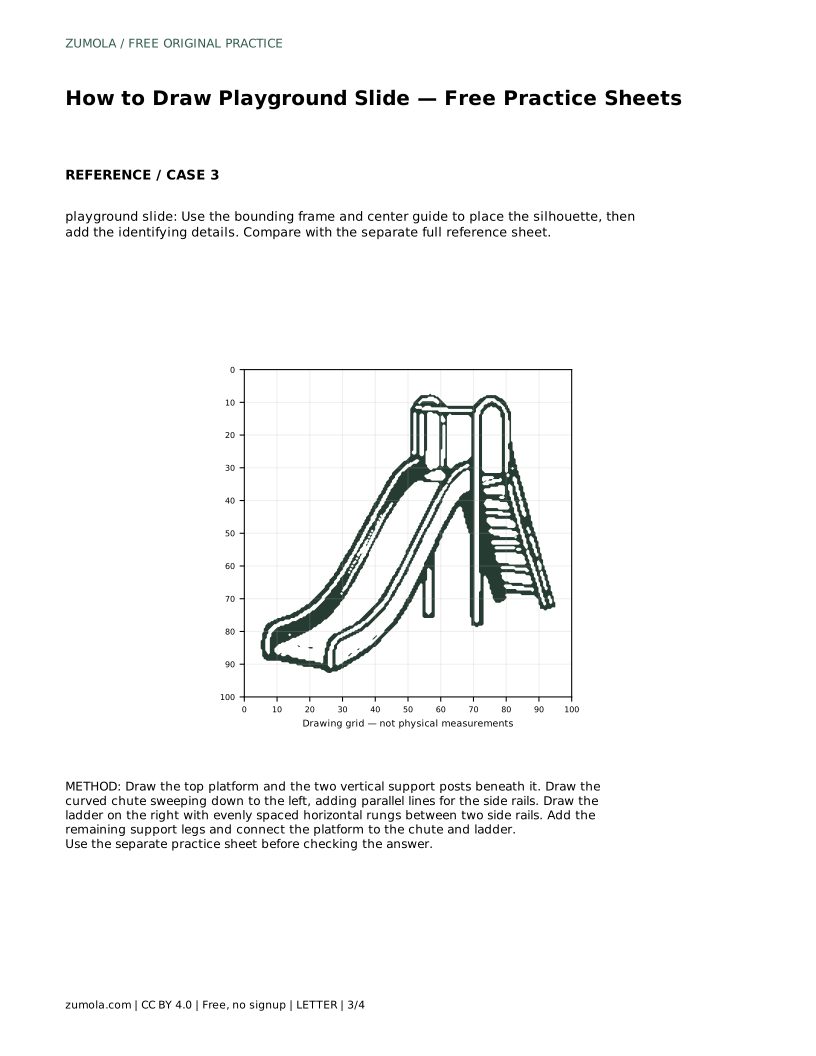
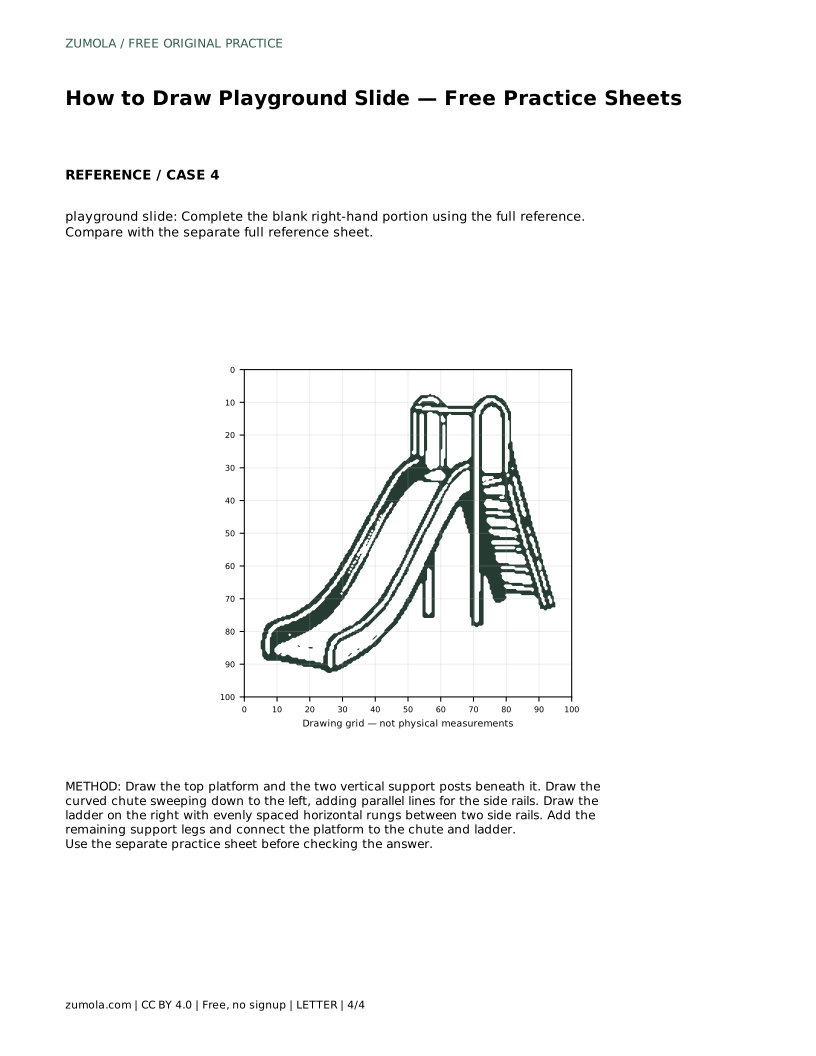
Example solution: preserve curved chute with raised side rails, ladder with horizontal rungs on the right, support frame with vertical posts and a top platform. Other drawings can be correct; assess the visible features and proportions rather than pixel-perfect matching. Draw the top platform and the two vertical support posts beneath it. Draw the curved chute sweeping down to the left, adding parallel lines for the side rails. Draw the ladder on the right with evenly spaced horizontal rungs between two side rails. Add the remaining support legs and connect the platform to the chute and ladder.
Draw only the legs visible in the reference. If the reference shows two, draw two; adding extra legs may change the structure.
Draw the curve in one continuous motion, or use several light strokes and refine. Keep the two edges parallel by checking the distance between them at several points.
Check the overall proportions: platform height, chute width, and ladder placement. Then check that all parts connect logically.
All drawing practice · Free coordinate paper
Original resources · CC BY 4.0 · Free for personal and classroom use with attribution.