Reference diagrams
LETTER · Download PDF
A4 · Download PDF
Free original resources
Learn to draw a car in three-quarter view by blocking the front and side planes, placing two wheels in perspective, and adding lights, grille, and mirrors.
Four original cases, with reference diagrams, practice sheets and worked answers. Everything is free; no signup required.
LETTER · Download PDF
A4 · Download PDF
LETTER · Download PDF
A4 · Download PDF
LETTER · Download PDF
A4 · Download PDF
Use A4 or US Letter to match your printer. Use the stated values and conditions to solve each exercise; diagrams are not physical measuring rulers.
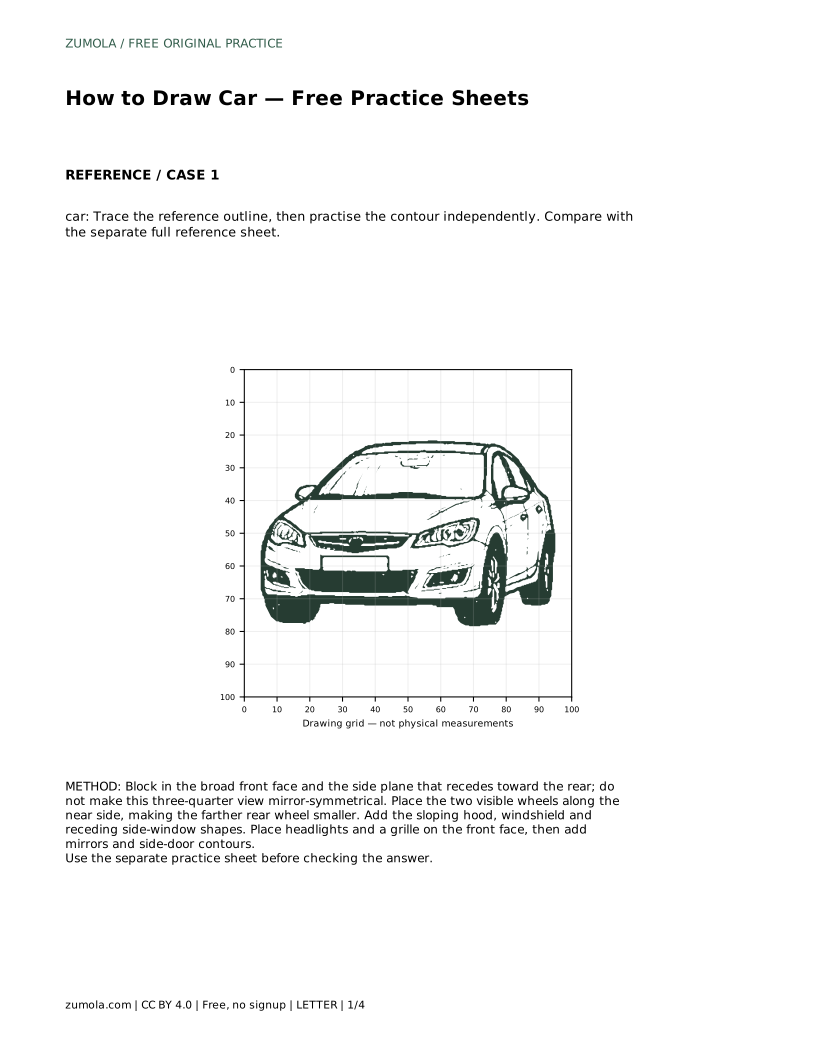
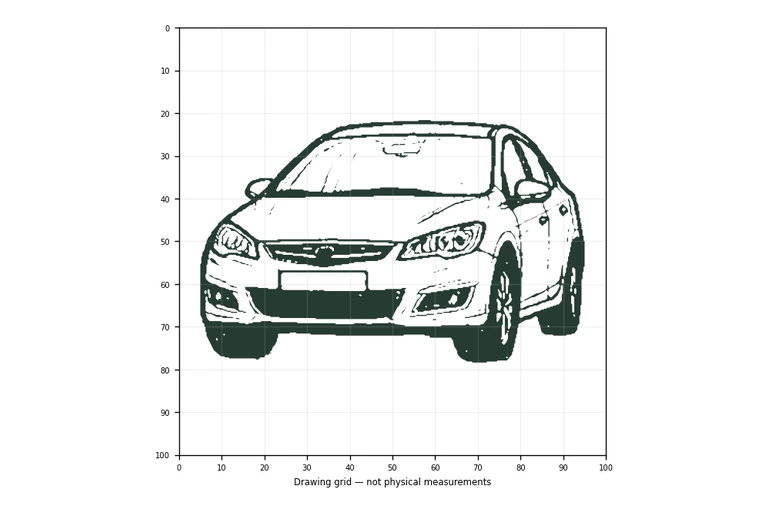
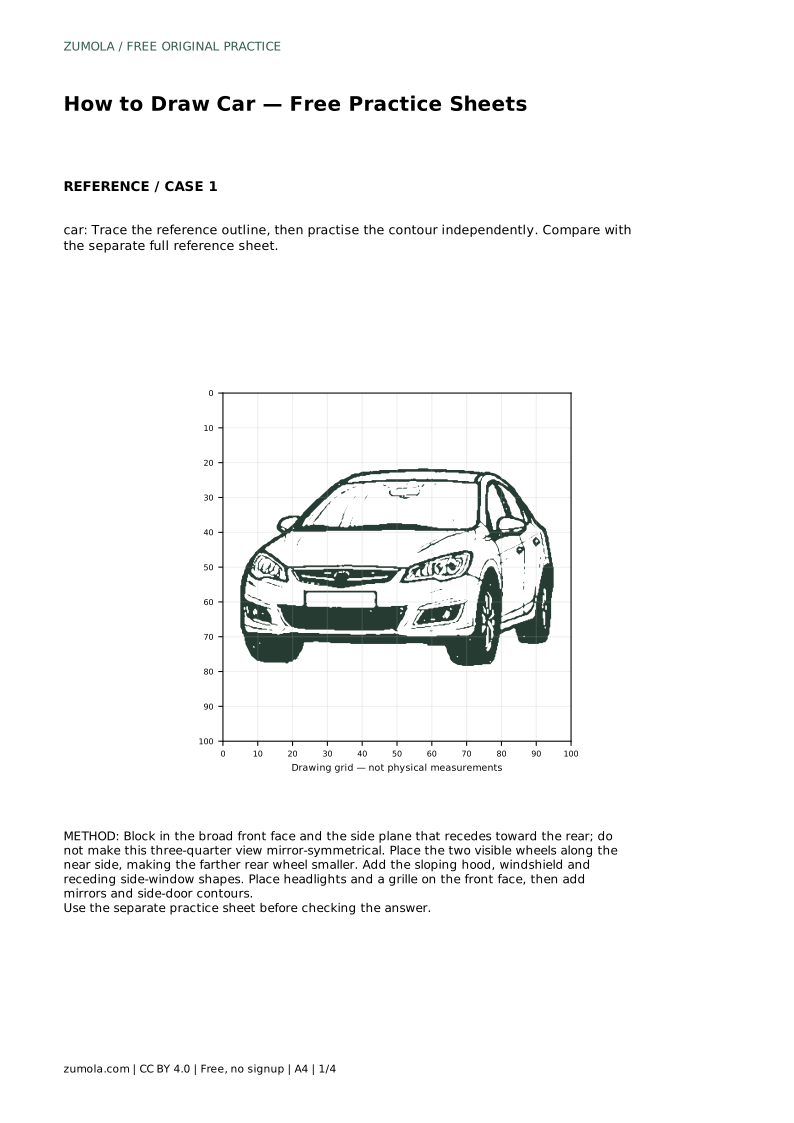
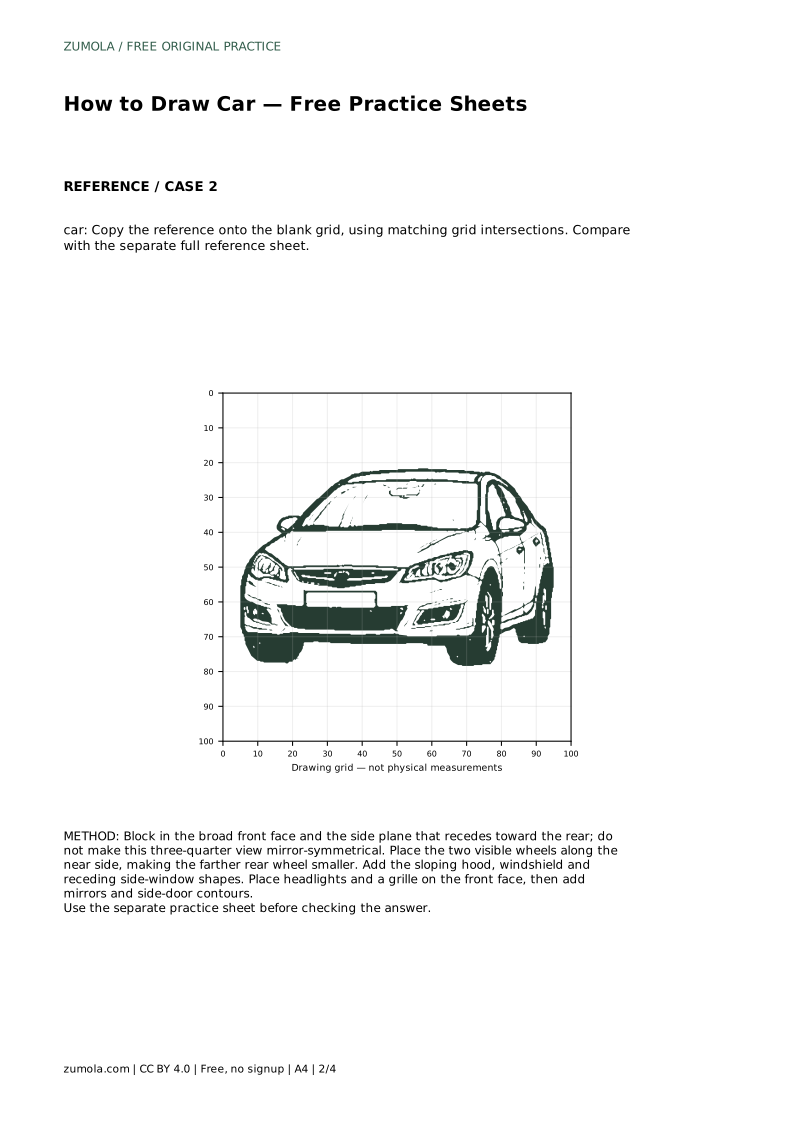
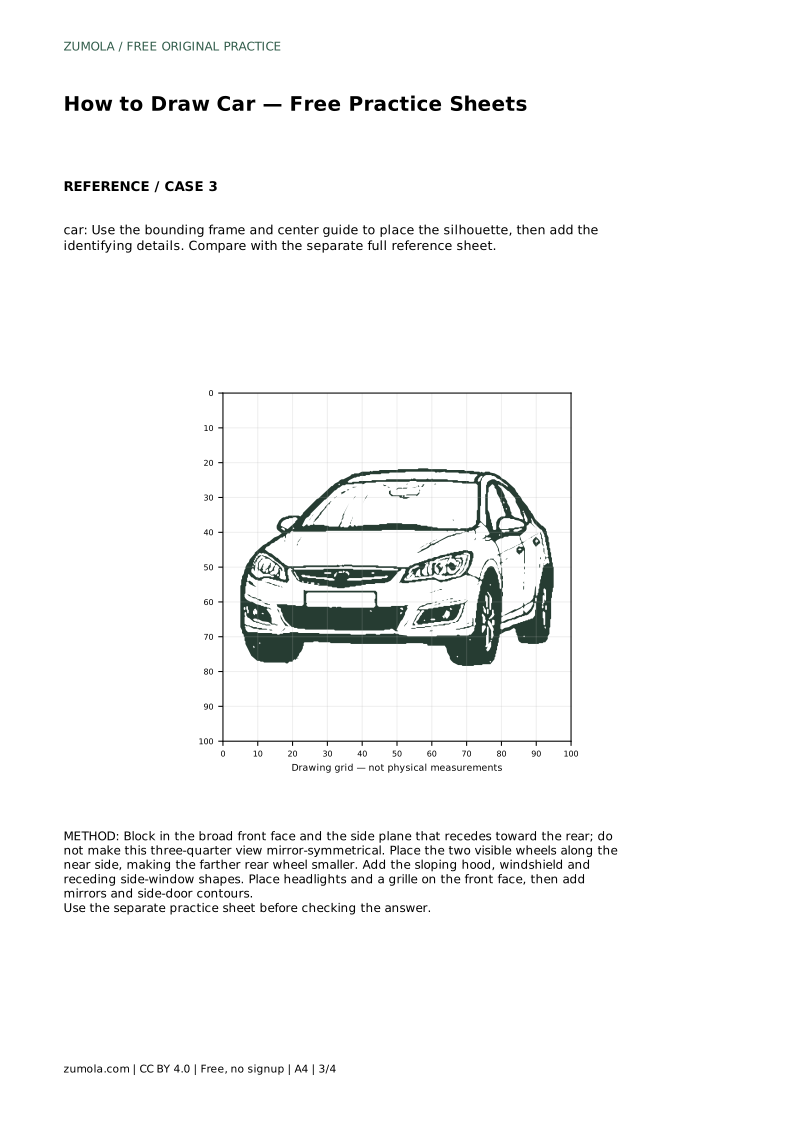
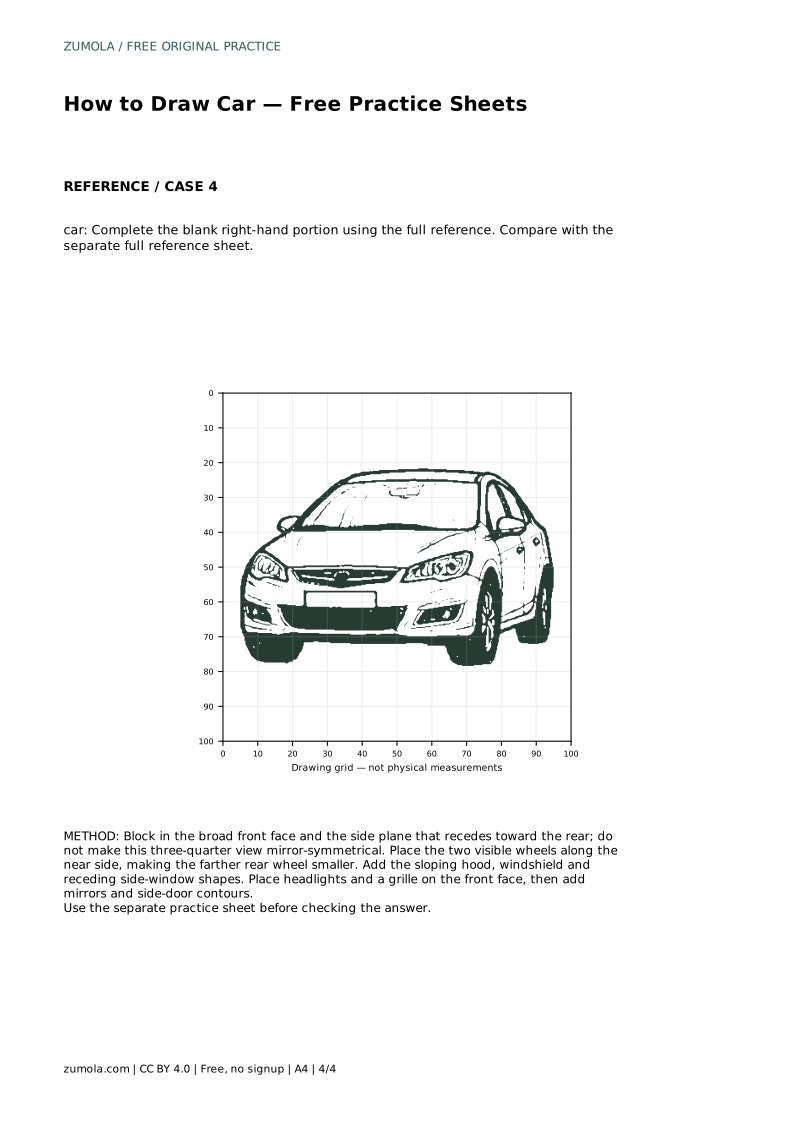
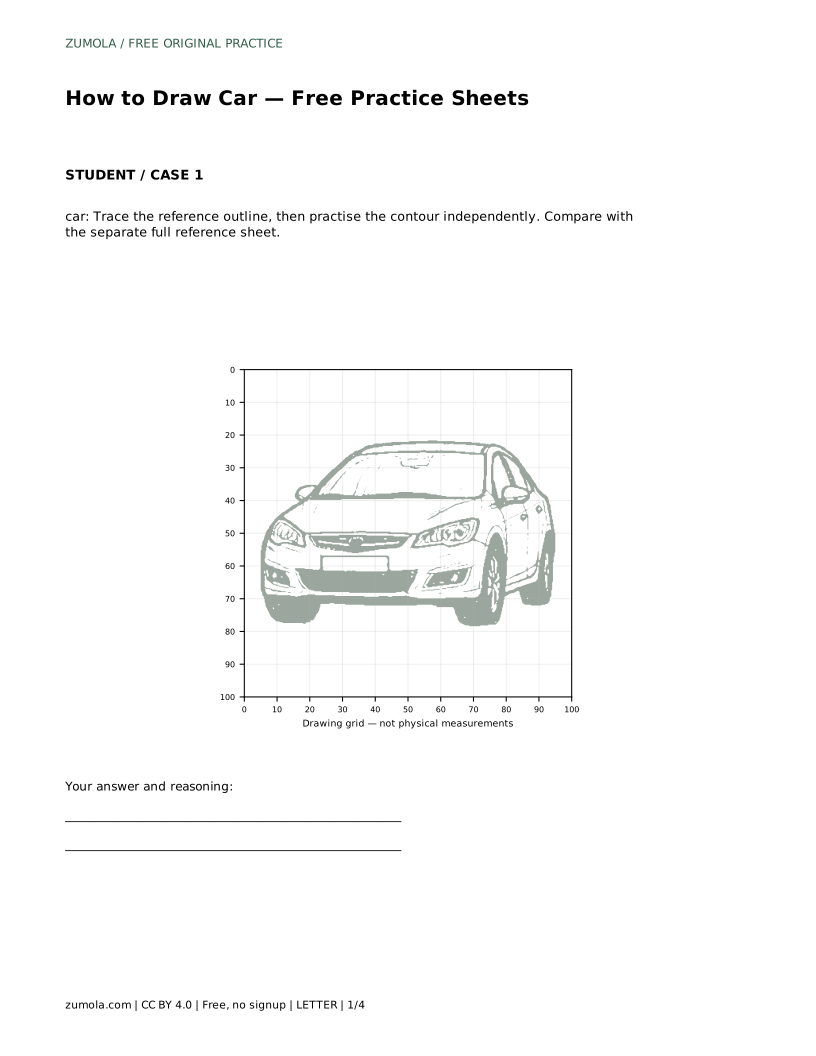
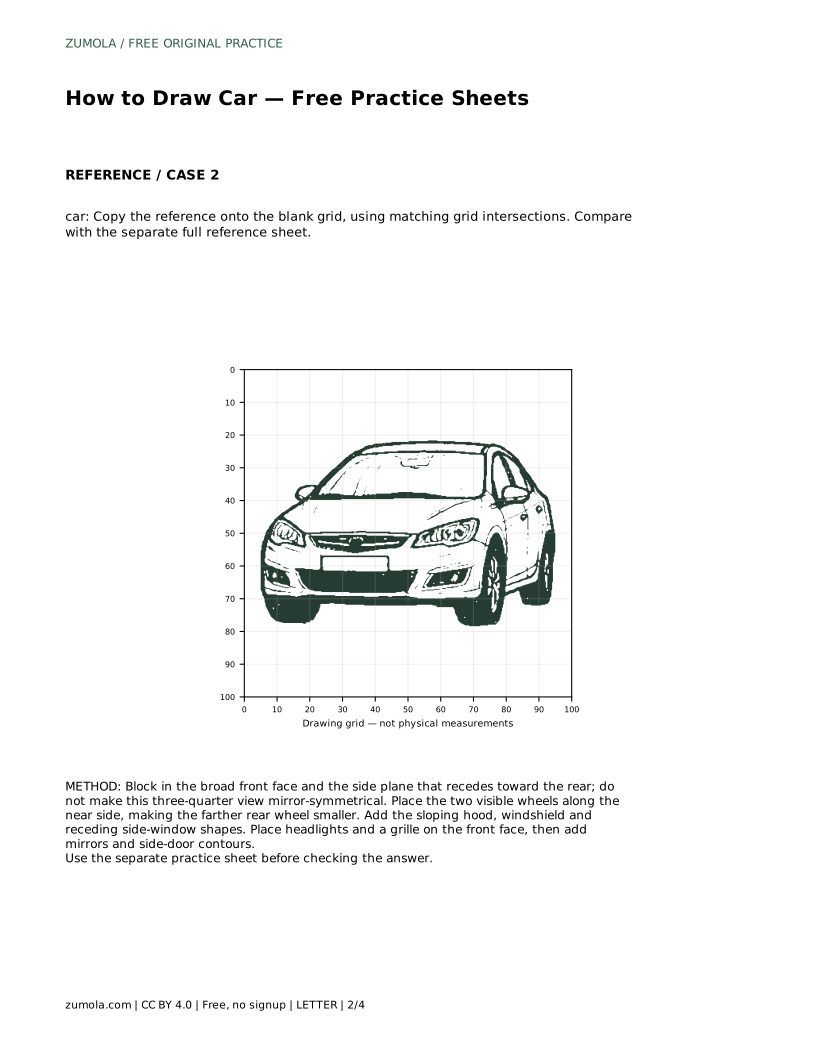
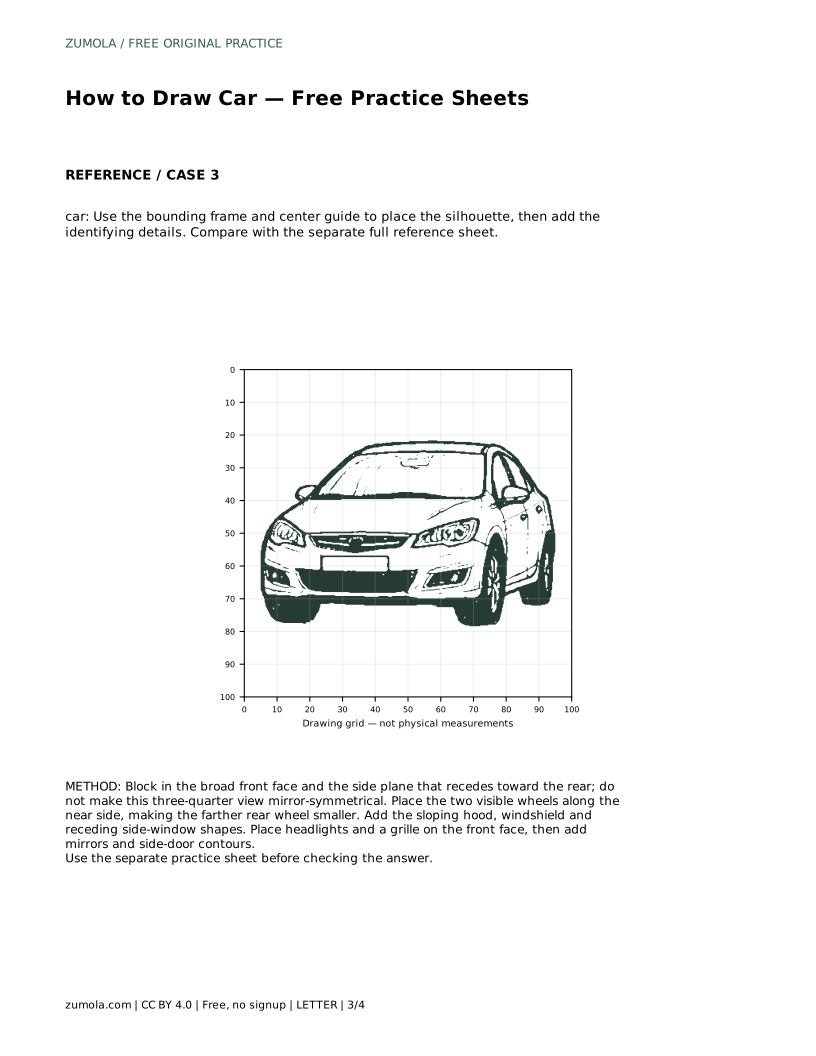
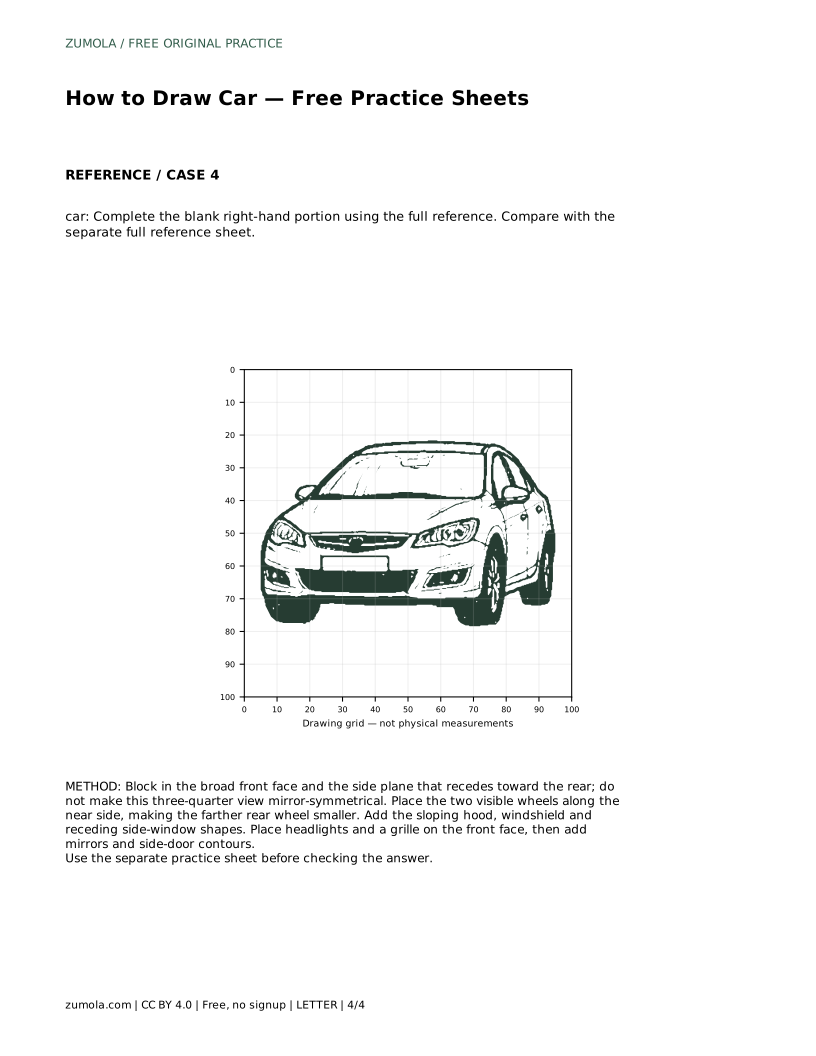
A three-quarter car view shows the front and one side at once, so the drawing is not mirror-symmetrical. This page explains how to build that shape from large planes to small details, then use the practice sheets to trace, copy on a grid, place a silhouette inside a frame, or complete a partly drawn car. Compare your work with the separate full reference sheet and judge the visible features and proportions.
Treat the car as two connected surfaces: a broad front face and a side plane that recedes toward the rear. The front face carries the headlights and grille; the side plane carries the doors, windows, and the near-side wheels. Because the side plane runs away from the viewer, its lines shorten and its shapes narrow as they move back. Keep that difference visible from the first few strokes.
Do not begin with wheels or windows. If the body planes are wrong, every detail placed on them will sit in the wrong position. Sketch the overall block lightly, check that the front is wider and more upright than the receding side, then commit to the outline.
In this view, two wheels are visible along the near side. The front wheel sits closer to the viewer, so it appears larger; the rear wheel is farther away, so it appears smaller. Both wheels should sit on a shared ground line, and the gap between them should follow the receding side plane rather than a flat horizontal strip.
Draw each wheel as an ellipse rather than a perfect circle, because the wheels are seen at an angle. Keep the ellipses upright and similar in proportion, with the rear one reduced. Avoid placing the wheels too high on the body; they belong at the bottom edge of the side plane.
The hood slopes from the front face back toward the windshield. The windshield rises from the hood and leans slightly back. Side windows follow the receding side plane, so their shapes become narrower toward the rear. Keep the roofline consistent with the window tops.
Place the headlights as a pair on the front face, with a grille between or below them. Add side mirrors at the front edge of the side windows, and draw side-door contours as gentle lines that follow the side plane. These details identify the car, but they should not overpower the body shape.
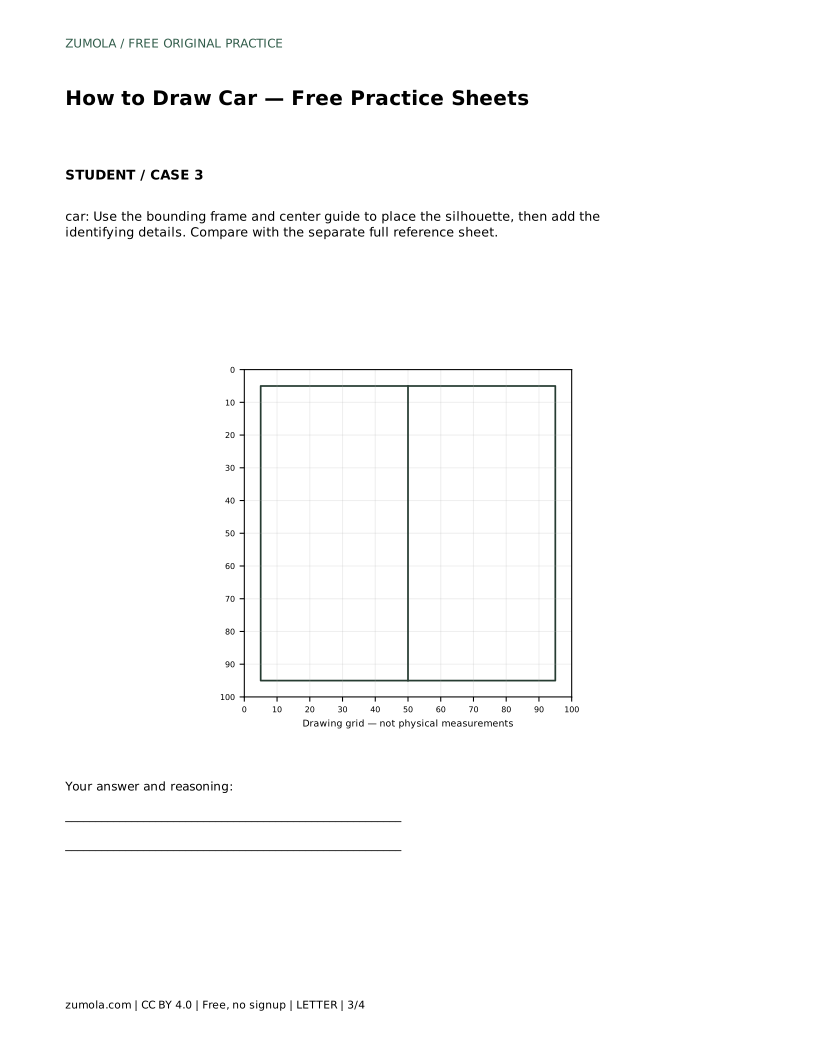
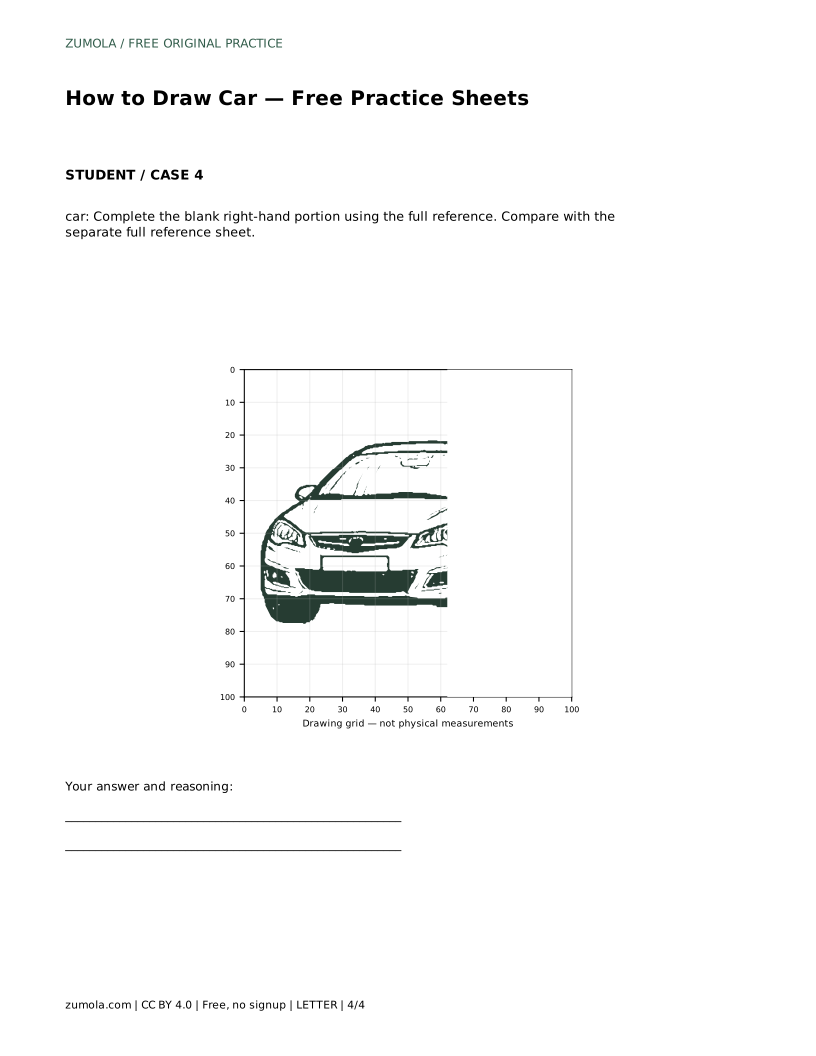
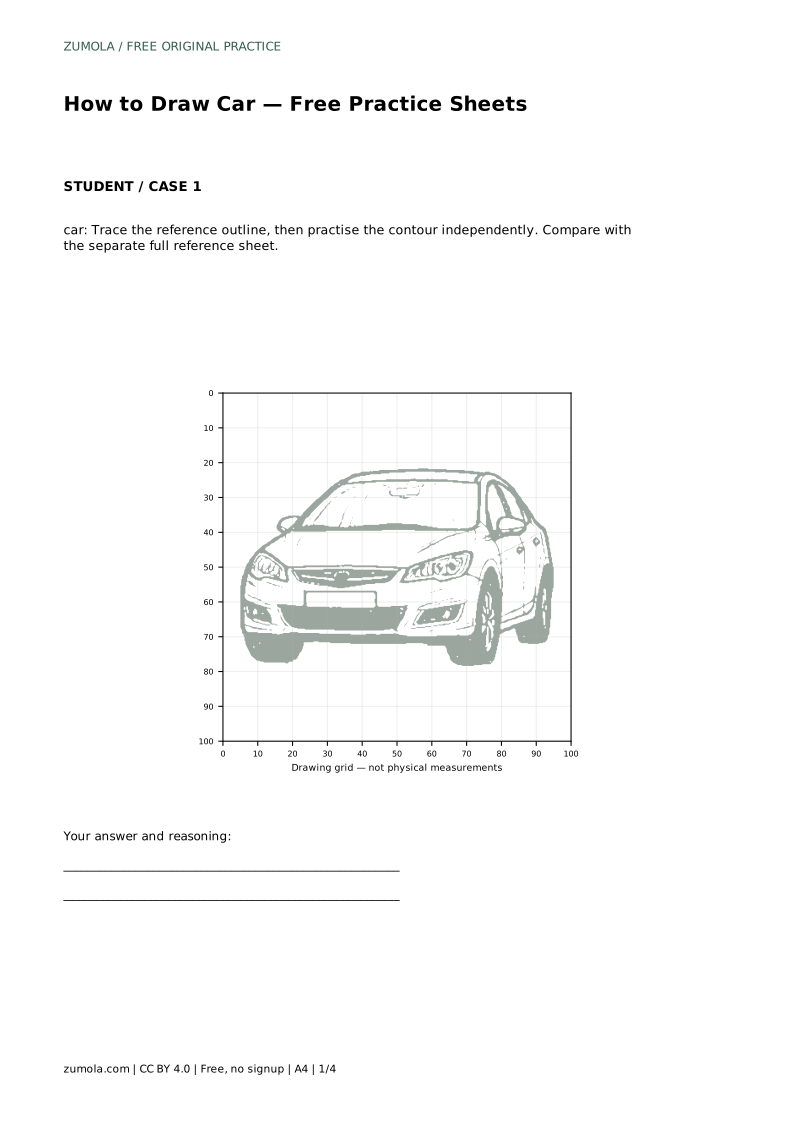
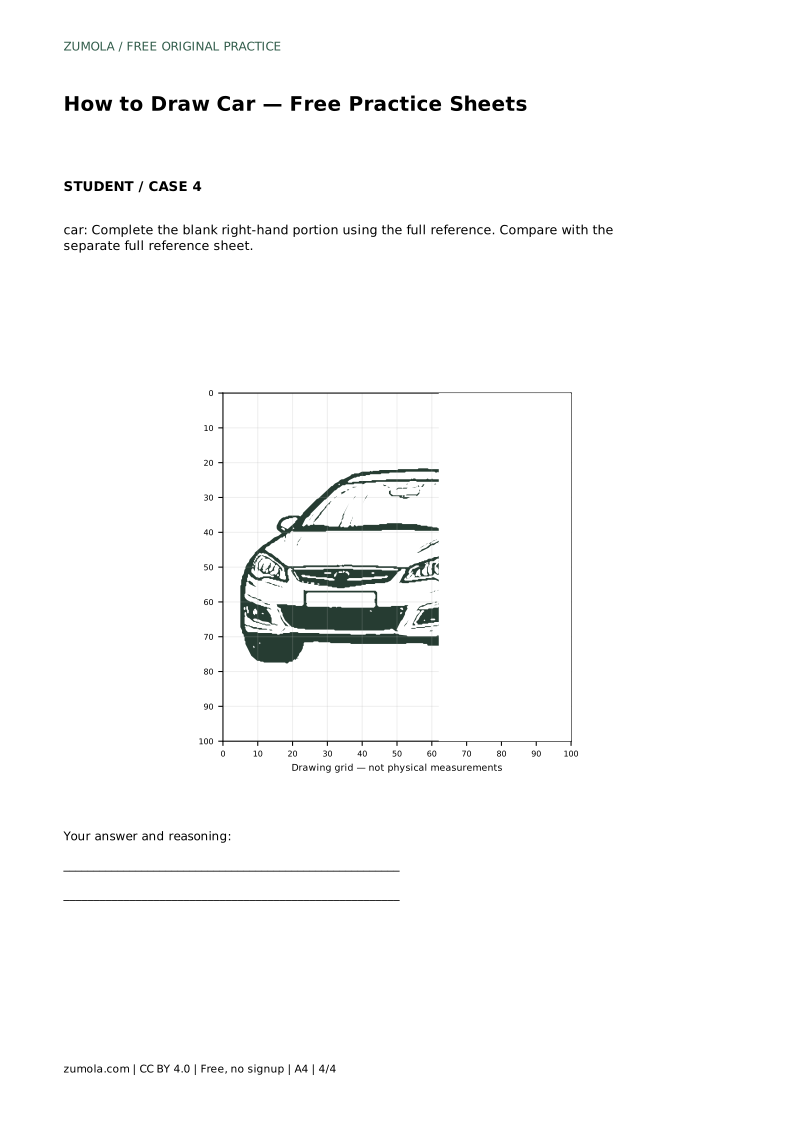
Each sheet supports a different way of learning the same view. Tracing builds the contour; the blank grid asks you to copy shapes at matching intersections; the bounding frame and center guide help you place the silhouette before adding details; the partial sheet asks you to complete the missing portion using the full reference.
After each attempt, compare with the separate full reference sheet. Ask whether the front face is broad, the side plane recedes, the rear wheel is smaller, and the identifying details are present. Other drawings can be correct, so assess the visible features and proportions rather than pixel-perfect matching.
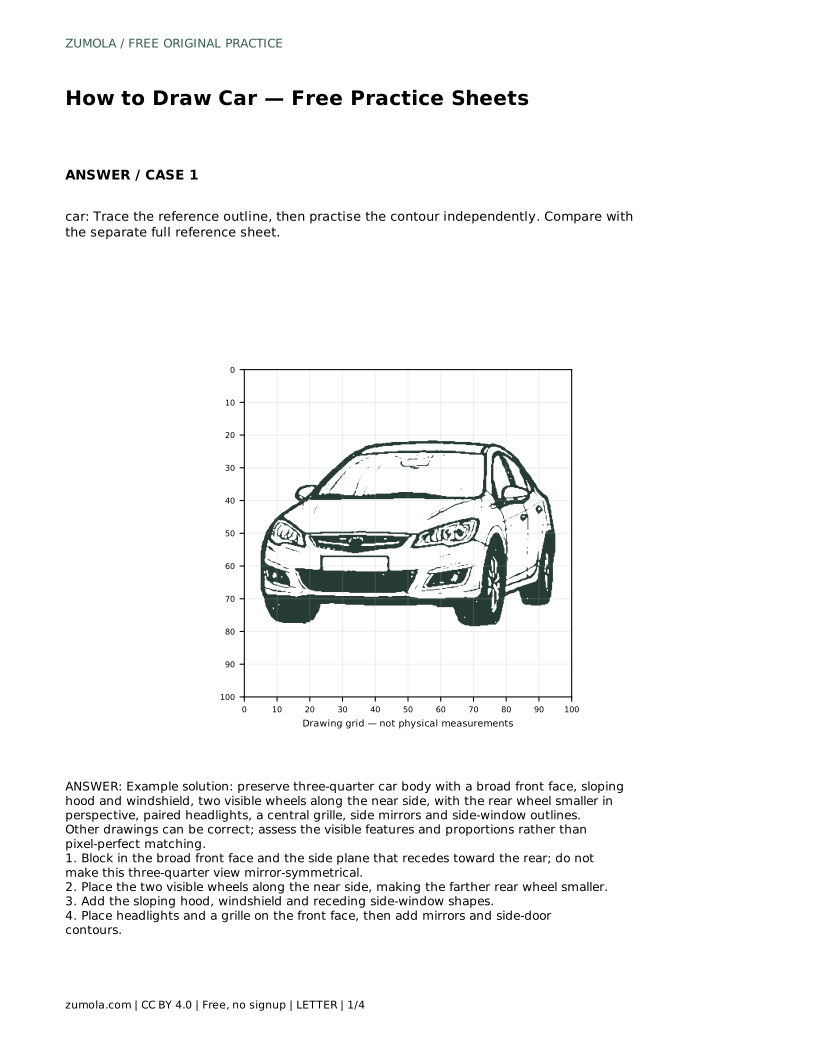
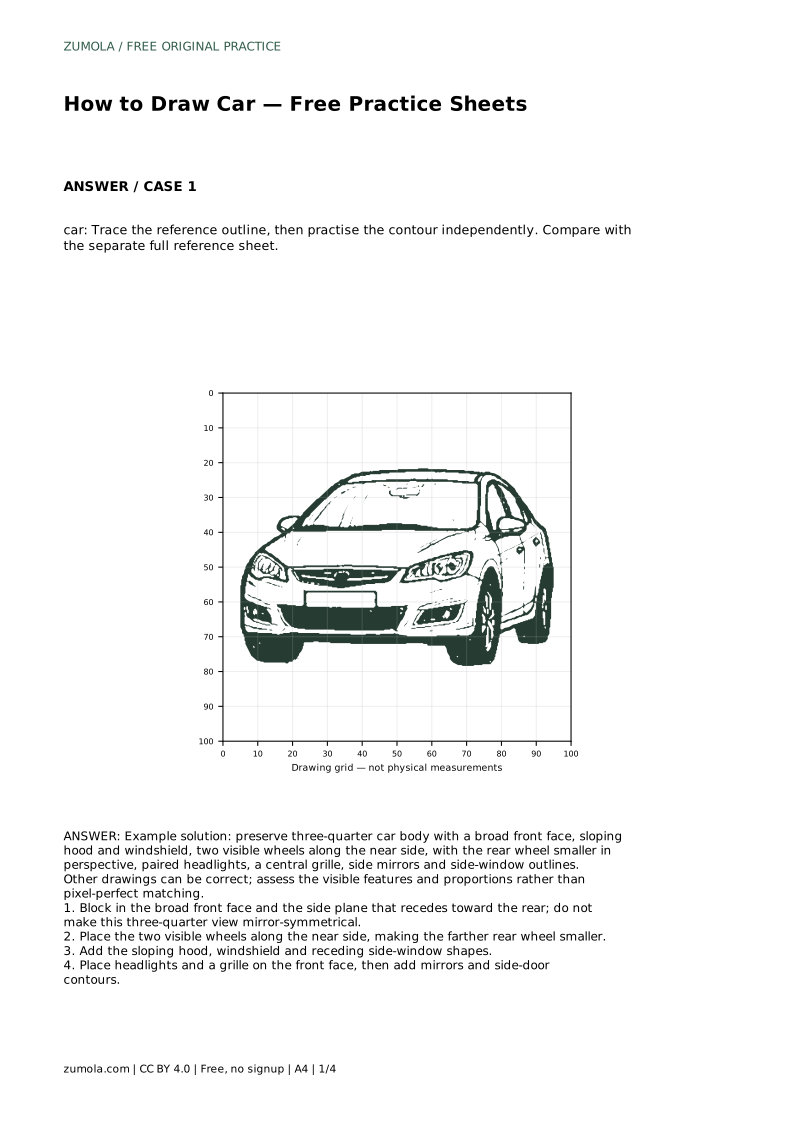
car: Trace the reference outline, then practise the contour independently. Compare with the separate full reference sheet.
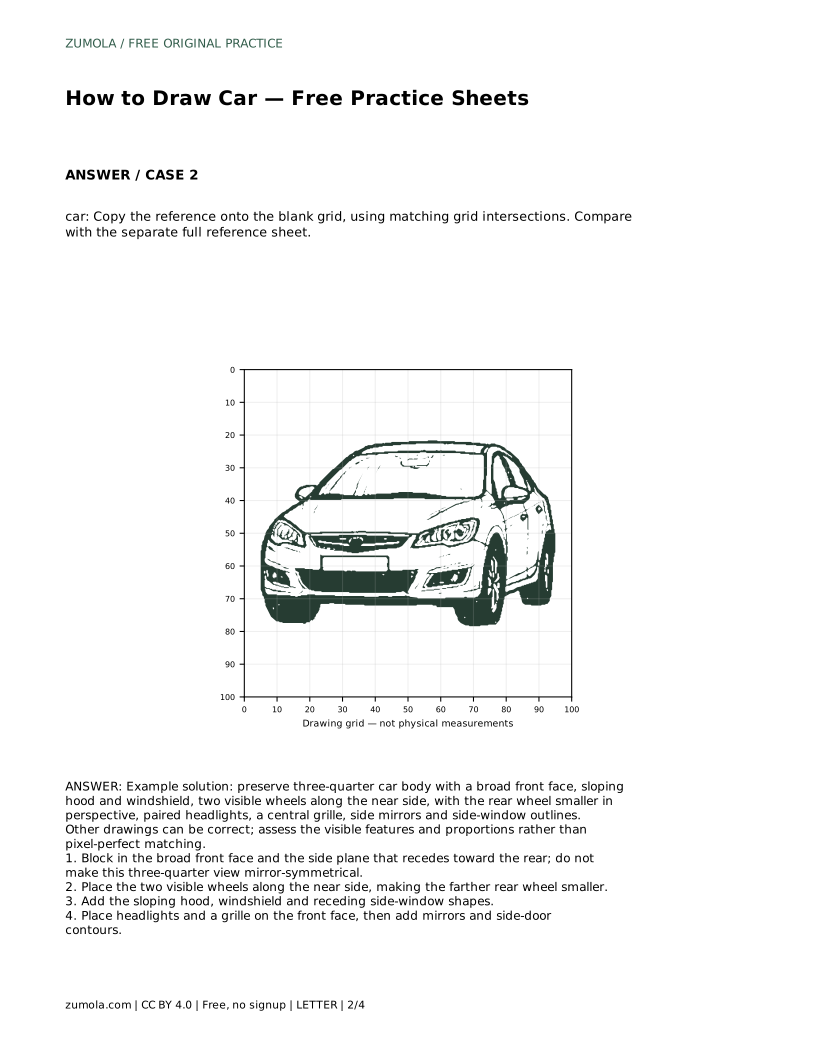
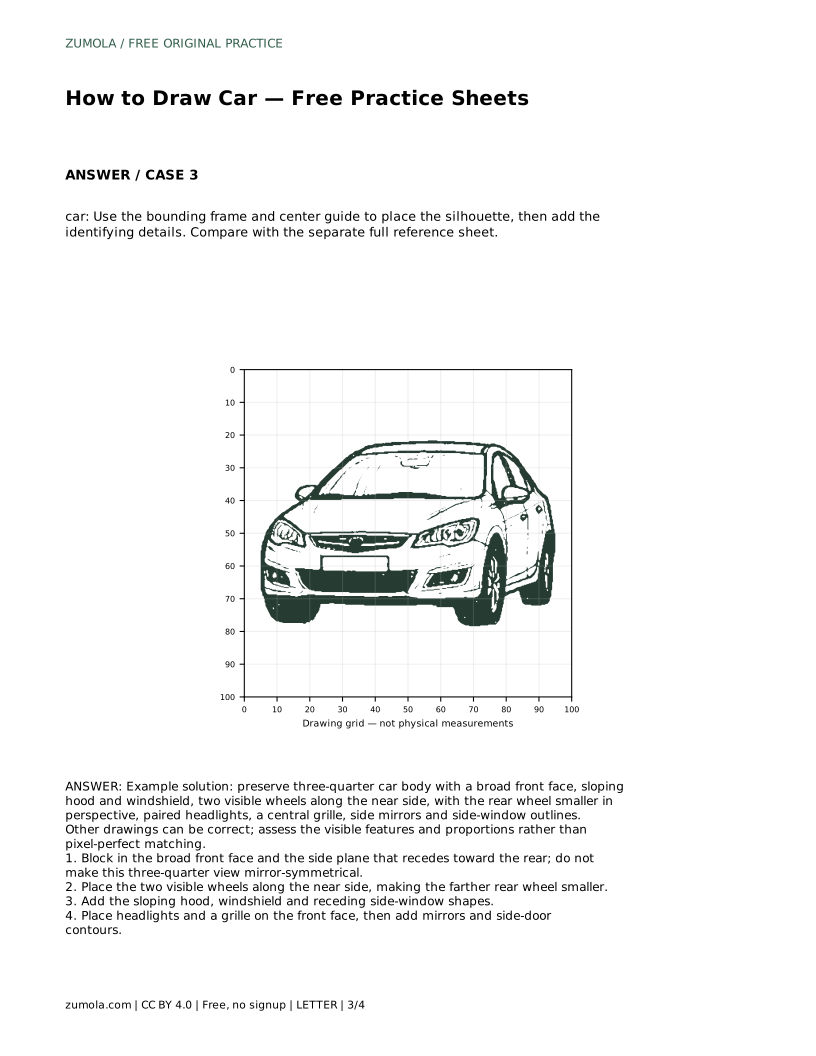
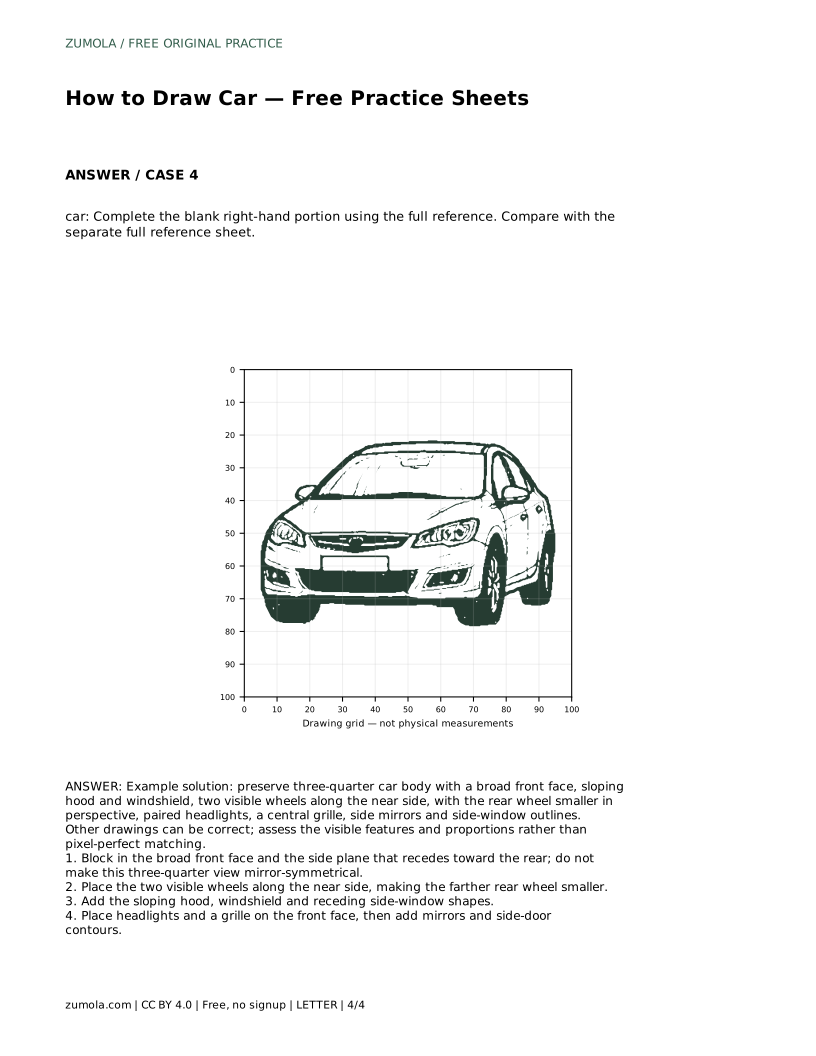
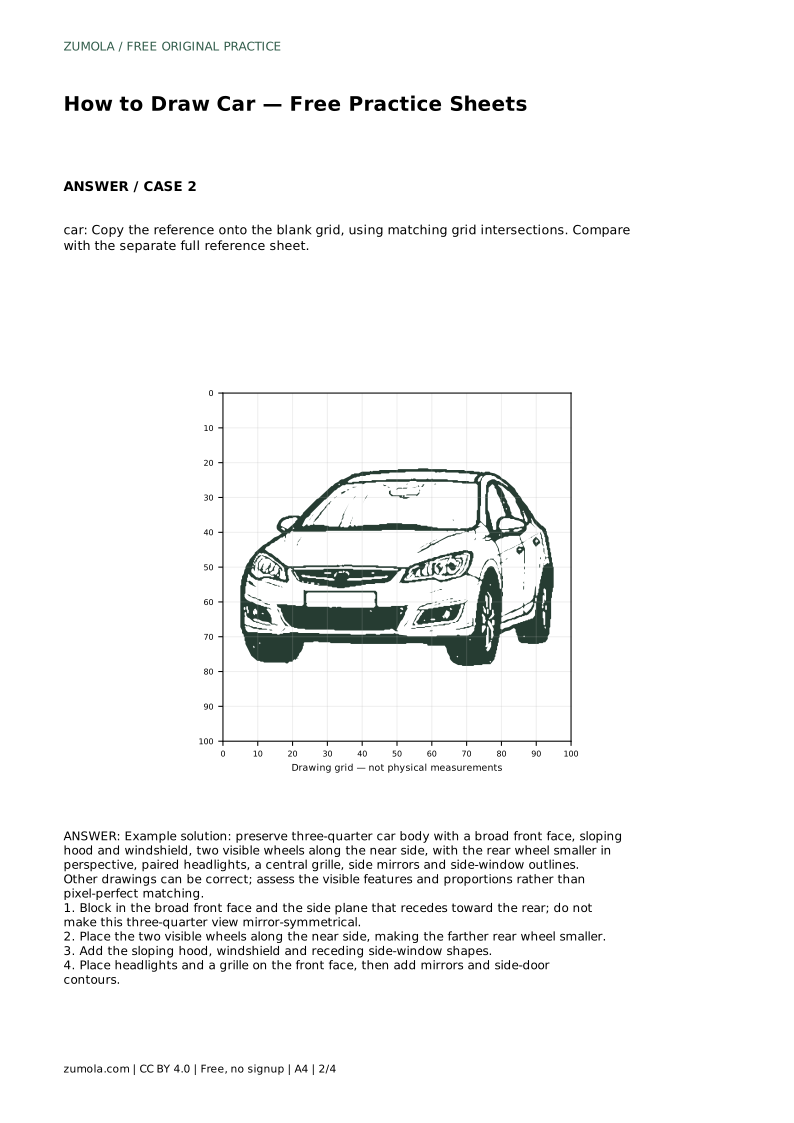
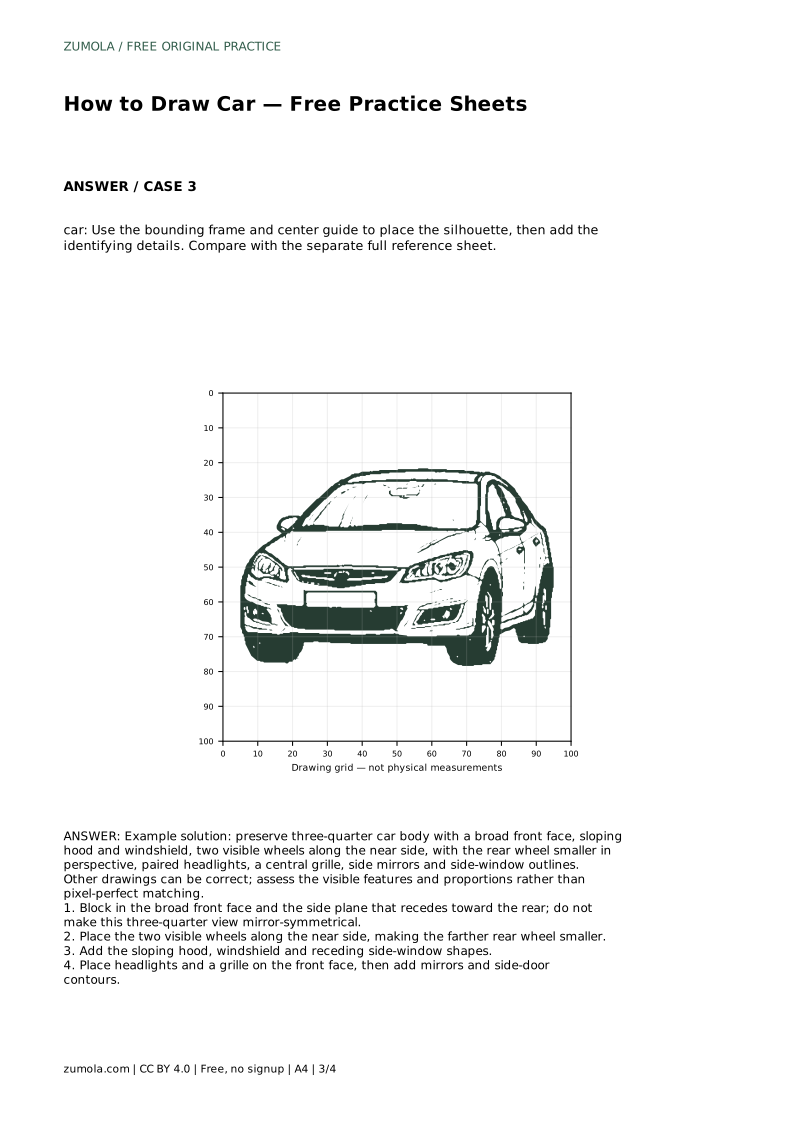
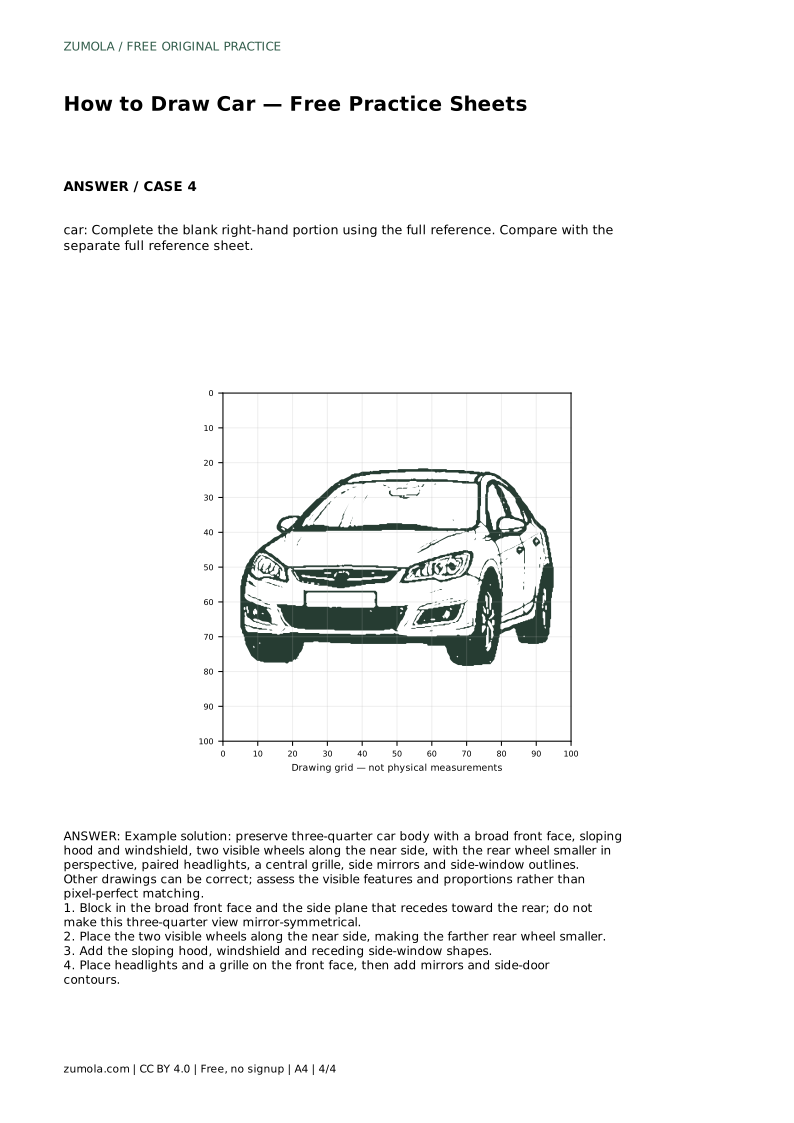
Example solution: preserve three-quarter car body with a broad front face, sloping hood and windshield, two visible wheels along the near side, with the rear wheel smaller in perspective, paired headlights, a central grille, side mirrors and side-window outlines. Other drawings can be correct; assess the visible features and proportions rather than pixel-perfect matching. Block in the broad front face and the side plane that recedes toward the rear; do not make this three-quarter view mirror-symmetrical. Place the two visible wheels along the near side, making the farther rear wheel smaller. Add the sloping hood, windshield and receding side-window shapes. Place headlights and a grille on the front face, then add mirrors and side-door contours.
The rear wheel is farther from the viewer in this three-quarter view, so it appears smaller than the nearer front wheel.
No. A three-quarter view shows a broad front face and a receding side plane, so the drawing is not mirror-symmetrical.
Check the visible features and proportions: broad front, receding side, two near-side wheels with the rear smaller, paired headlights, grille, mirrors, and window outlines.
All drawing practice · Free coordinate paper
Original resources · CC BY 4.0 · Free for personal and classroom use with attribution.