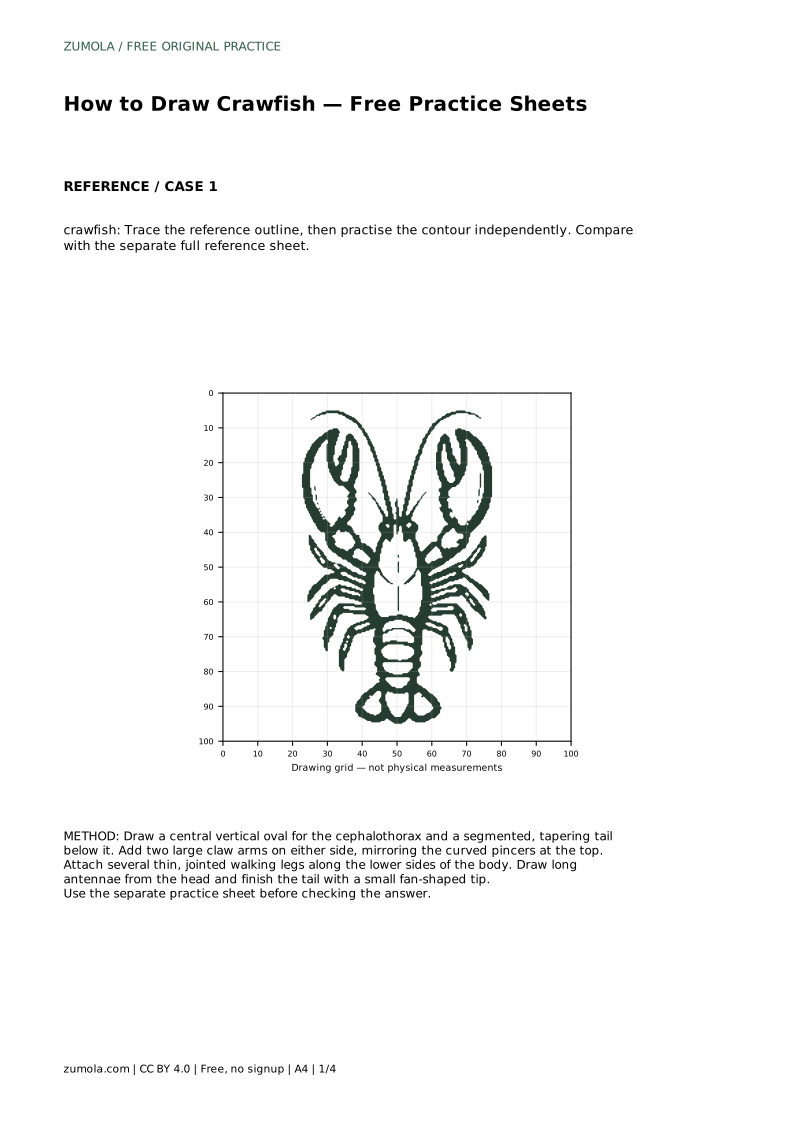
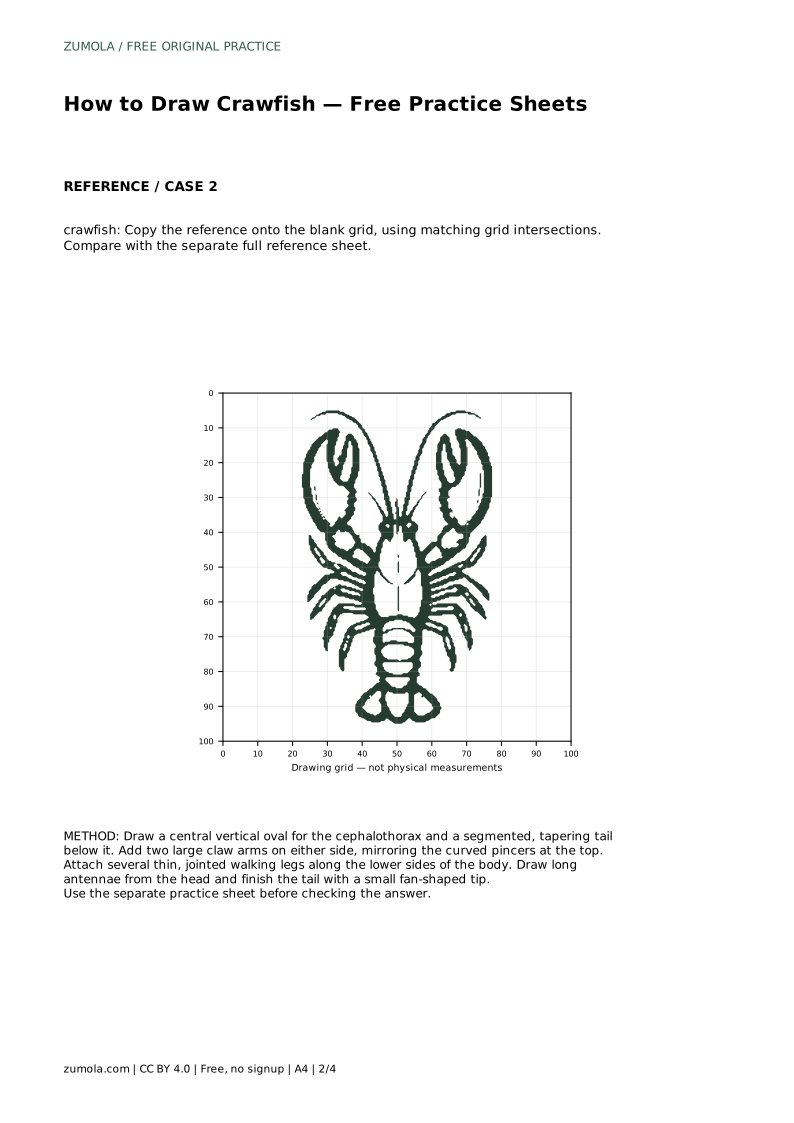
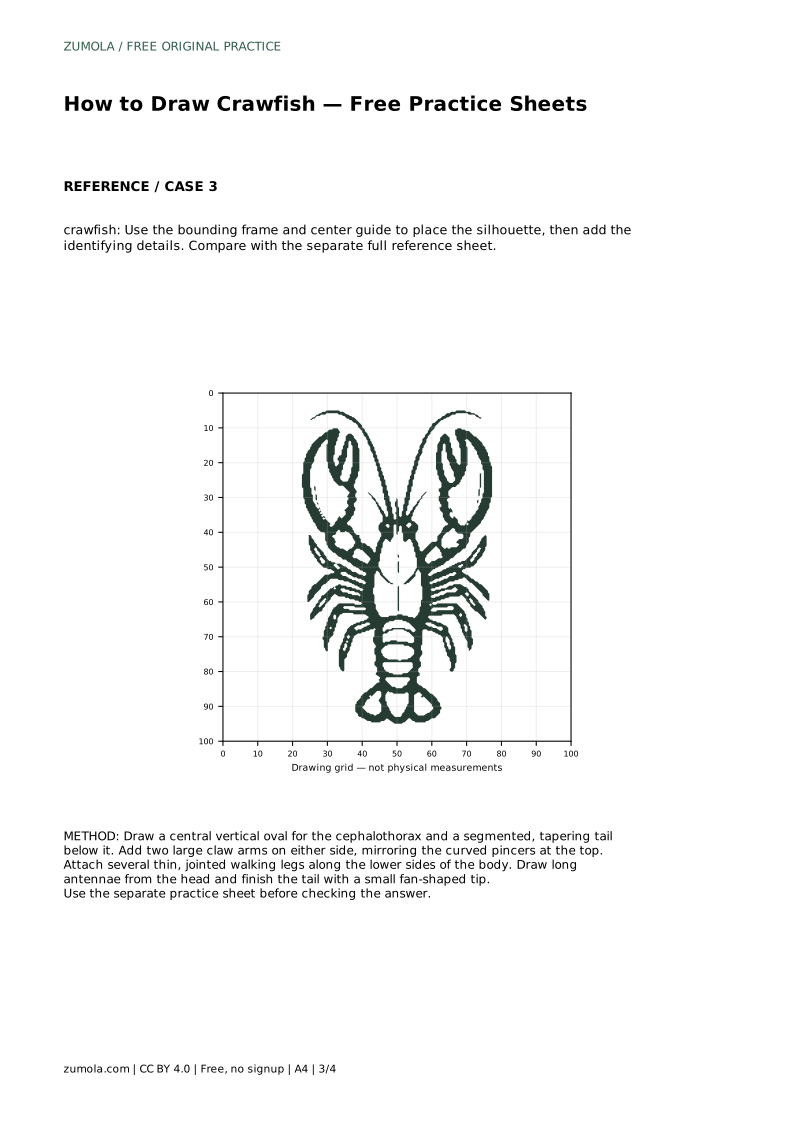
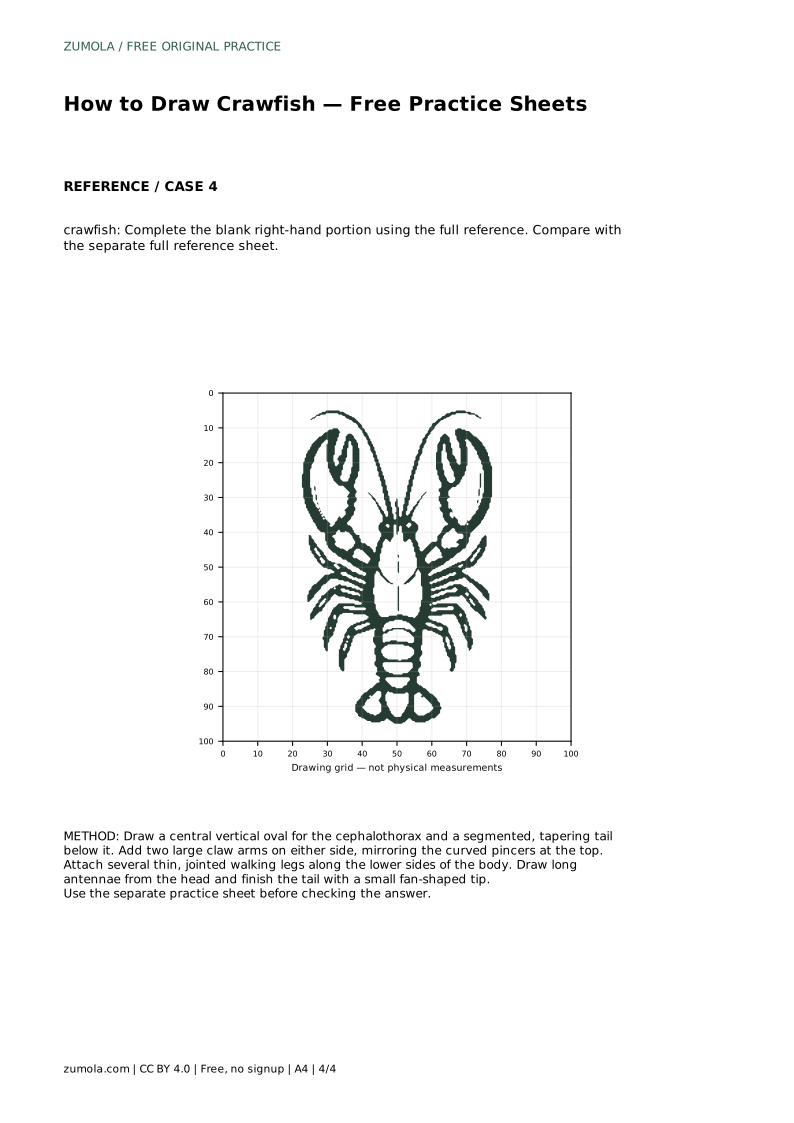
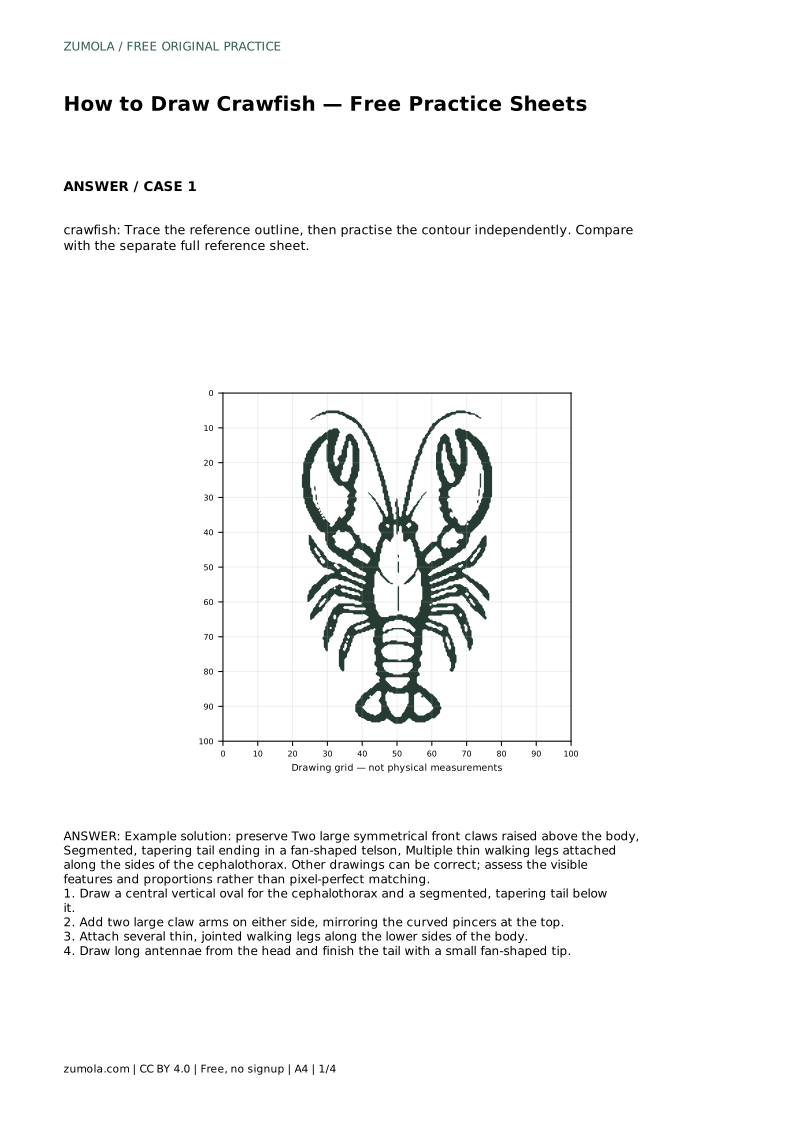
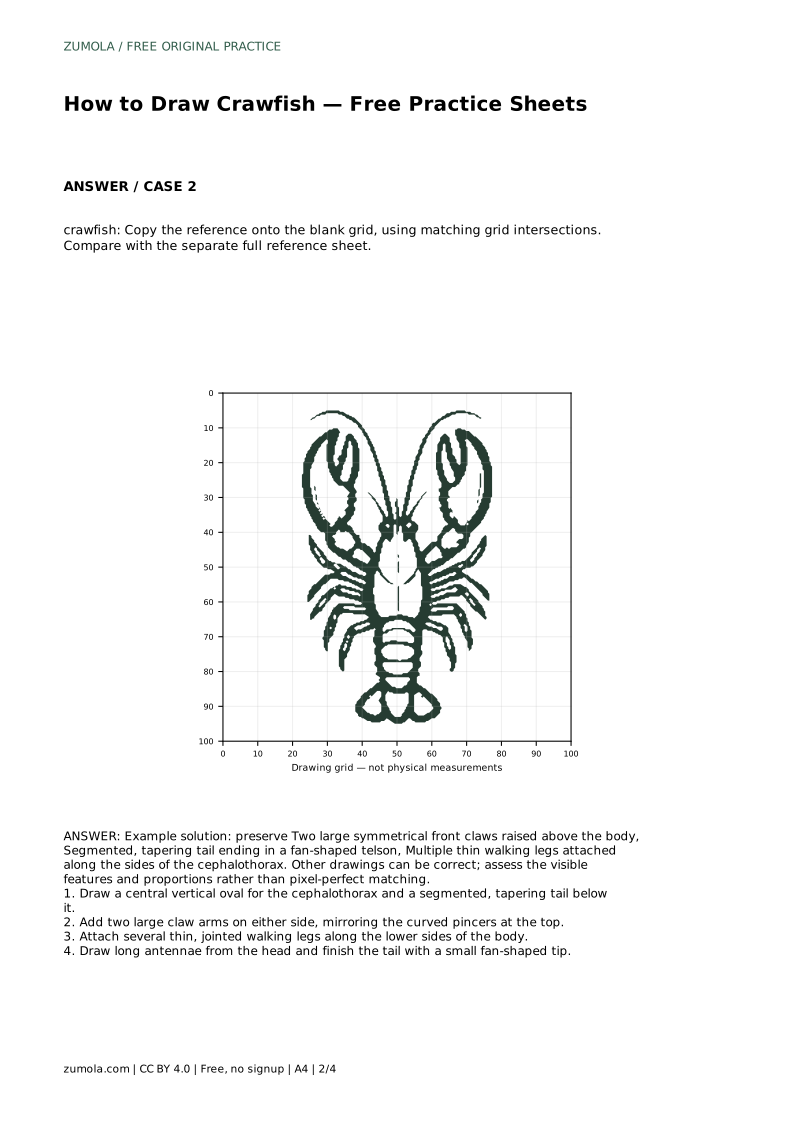
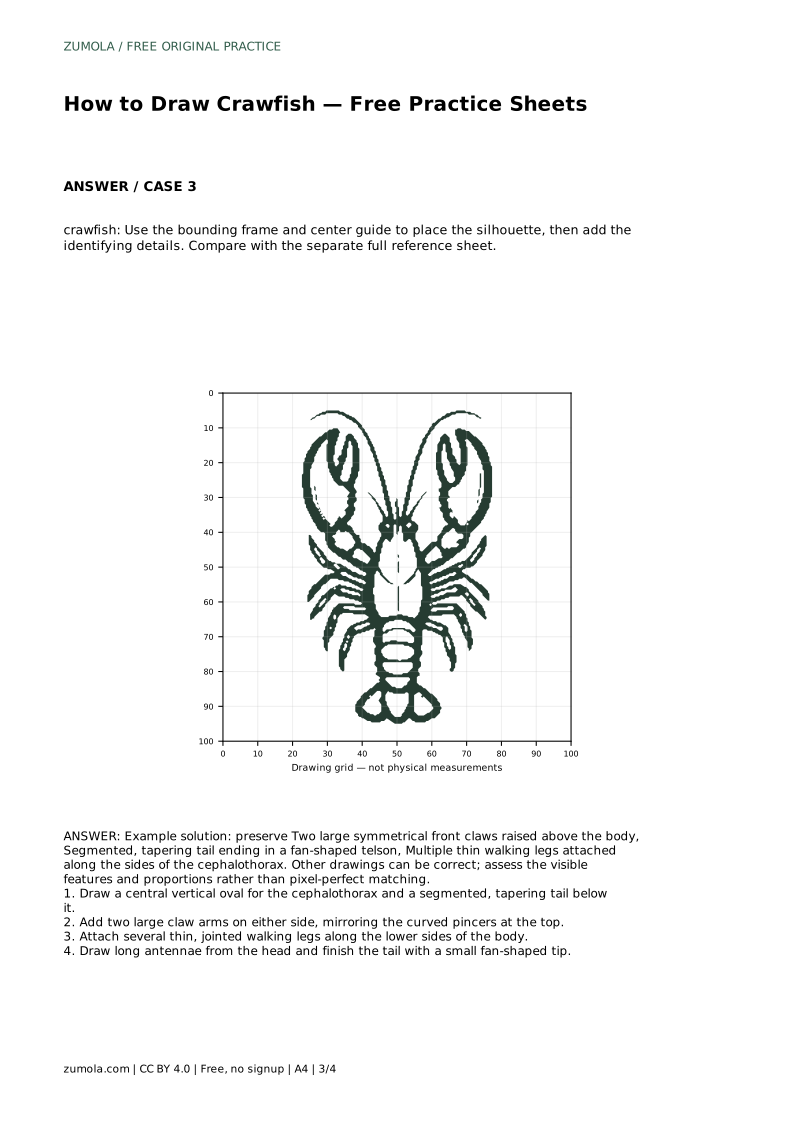
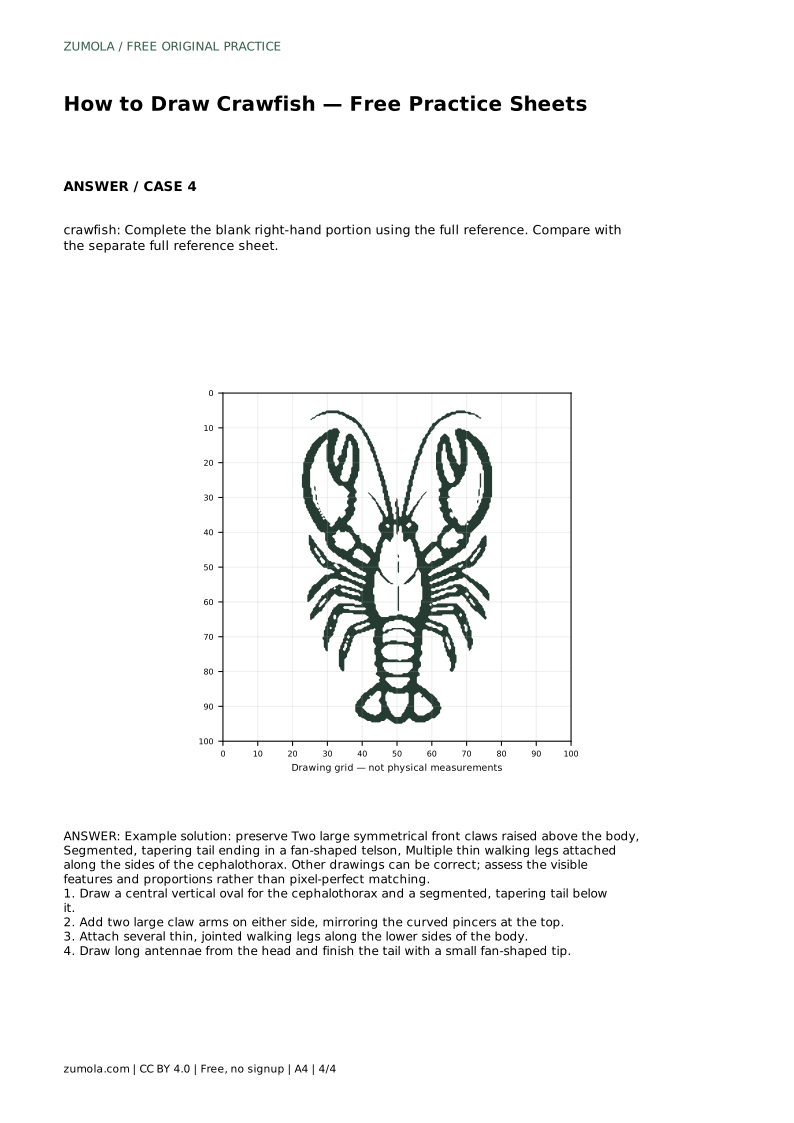
Reference diagrams
LETTER · Download PDF
A4 · Download PDF
Free original resources
Learn to draw a crawfish with clear steps: oval cephalothorax, segmented tail, symmetrical claws, walking legs, antennae, and fan-shaped telson. Free practice sheets.
Four original cases, with reference diagrams, practice sheets and worked answers. Everything is free; no signup required.
LETTER · Download PDF
A4 · Download PDF
LETTER · Download PDF
A4 · Download PDF
LETTER · Download PDF
A4 · Download PDF
Use A4 or US Letter to match your printer. Use the stated values and conditions to solve each exercise; diagrams are not physical measuring rulers.
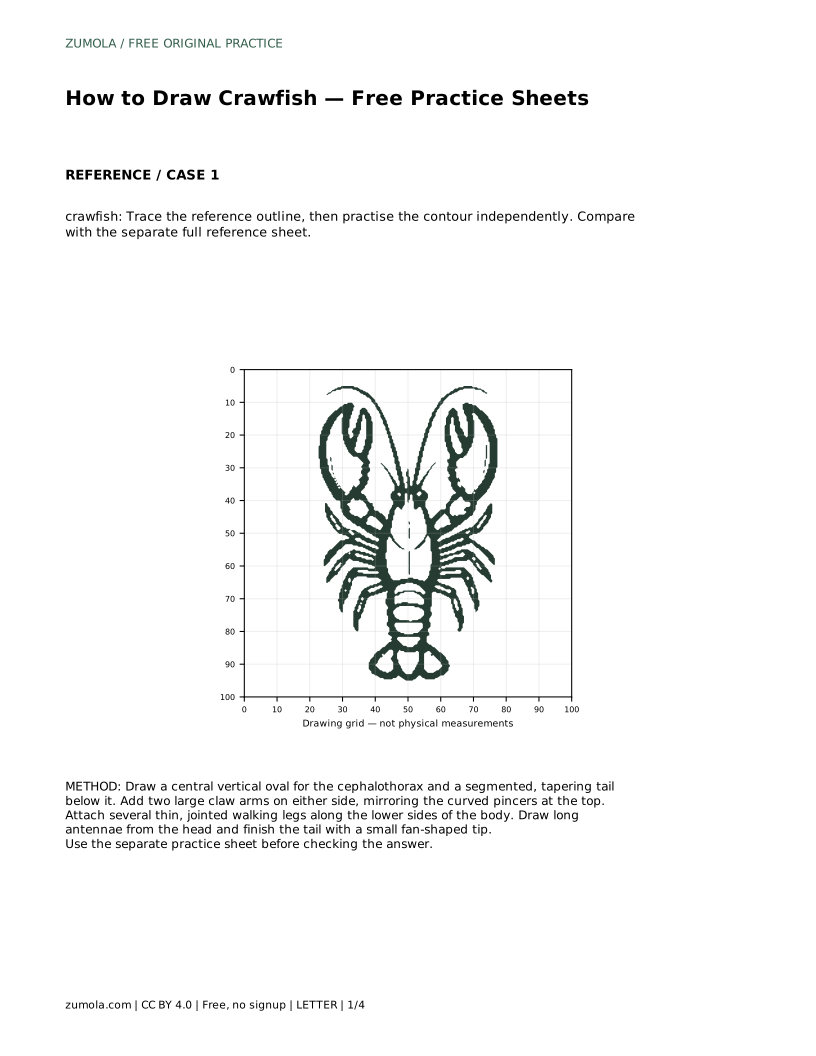
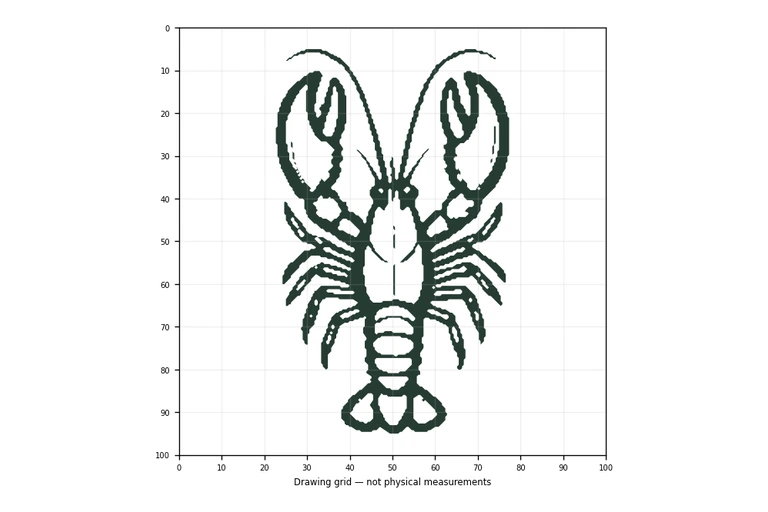
Drawing a crawfish is a manageable project when you break it into a few clear shapes. The body has a central oval, a segmented tail that tapers to a fan, two large claws raised above the body, several thin walking legs along the sides, and long antennae from the head. This guide gives you a reliable order for building those parts, plus practice-sheet tasks that help you compare your drawing with a reference. The goal is not a pixel-perfect copy but a clear, recognizable crawfish with correct proportions and visible features.
Begin with a central vertical oval for the cephalothorax, the front body section that carries the head and legs. Keep it upright and slightly wider at the top. Below it, draw the tail as a series of short segments that taper downward. Each segment should be a little narrower than the one above, so the tail narrows smoothly toward the tip. Finish the tail with a small fan-shaped telson, the flat end piece. The tail should look jointed, not like a single smooth cone.
Use light pencil lines first. Check that the oval and tail share a central vertical axis. If the tail drifts to one side, the whole crawfish will look unbalanced. The segmented tail is one of the most recognizable features, so give each segment a clear boundary.
The two large front claws are raised above the body and should be roughly symmetrical. Draw one claw arm on each side of the cephalothorax, curving upward and inward. Each arm ends in a curved pincer. Mirror the shapes as closely as you can, but small differences are acceptable. The claws are a key identifying feature, so make them prominent and clearly separated from the body.
Along the lower sides of the cephalothorax, attach several thin, jointed walking legs. These legs are much smaller than the claws. Draw them as narrow lines with a few bends to suggest joints. Keep the legs on both sides roughly even in number and length. Do not let them cross over the tail or the claws. The walking legs should sit below the claw arms and above the tail.
Draw long antennae from the head, extending forward or slightly outward. They should be thin and clearly longer than the walking legs. Two main antennae are enough to suggest the feature. After adding them, step back and compare your drawing with a reference sheet. Look for the central oval, the segmented tapering tail, the fan-shaped telson, the two raised symmetrical claws, and the thin walking legs along the sides. If any feature is missing or out of proportion, adjust it lightly before darkening your lines.
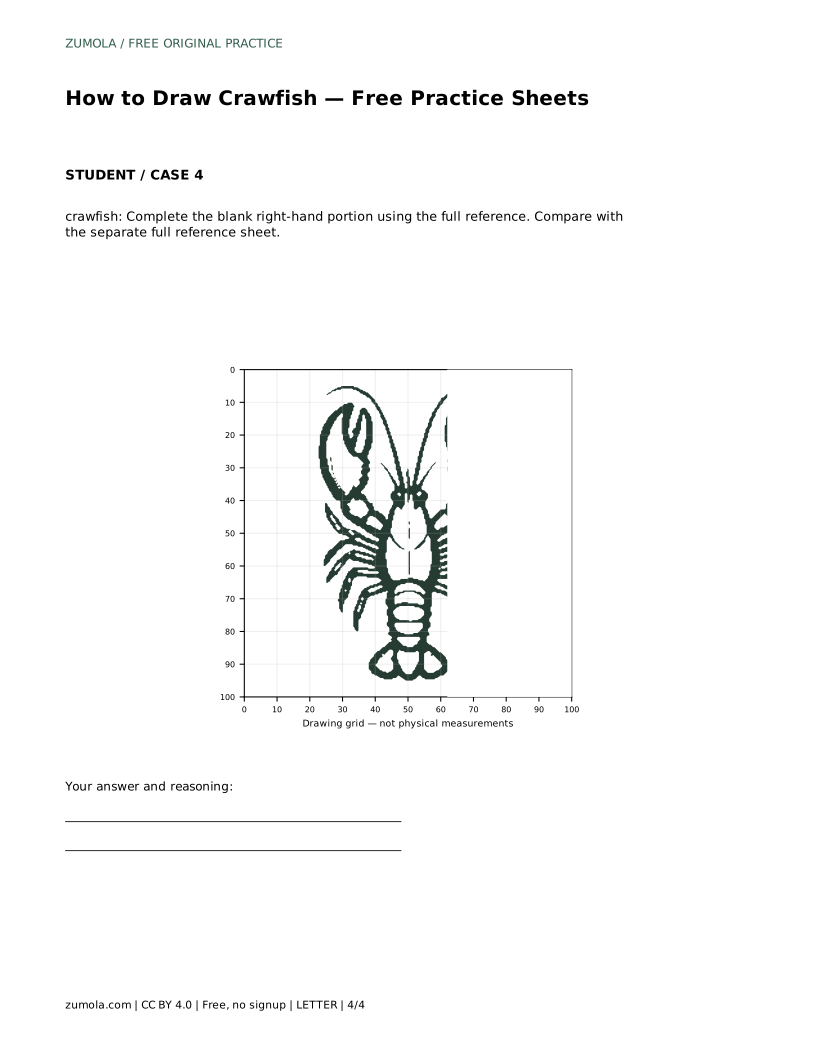
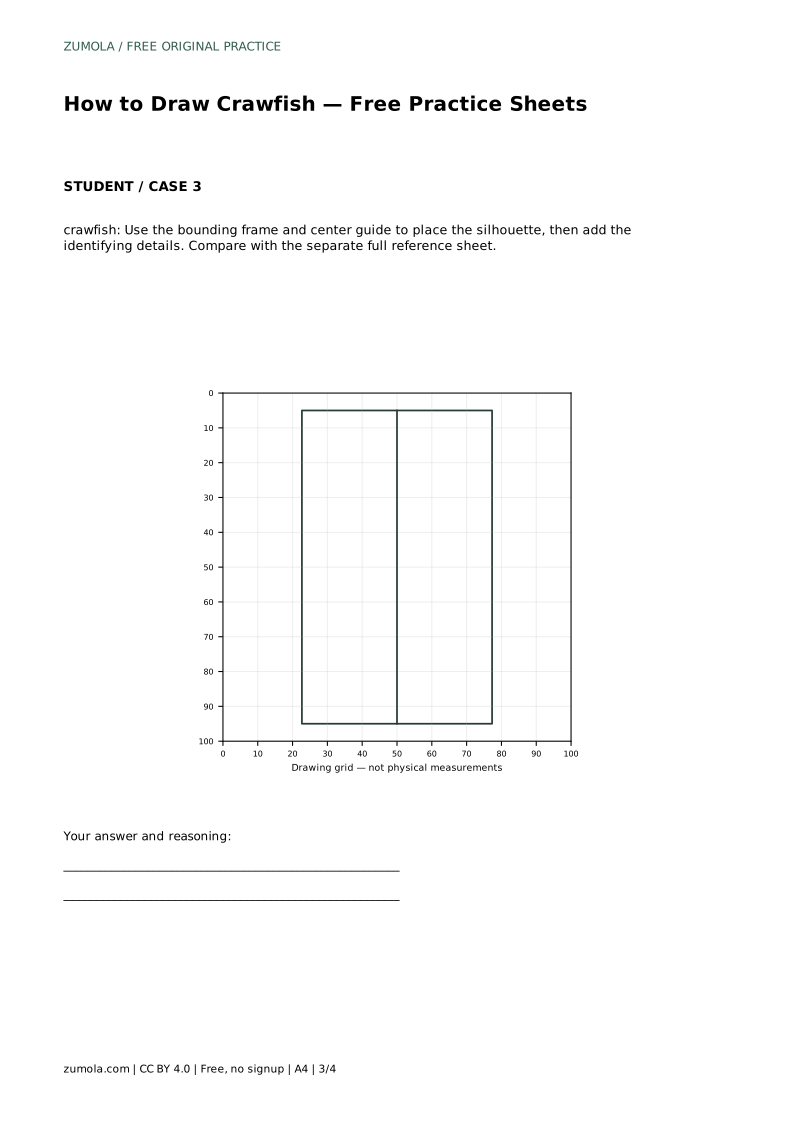
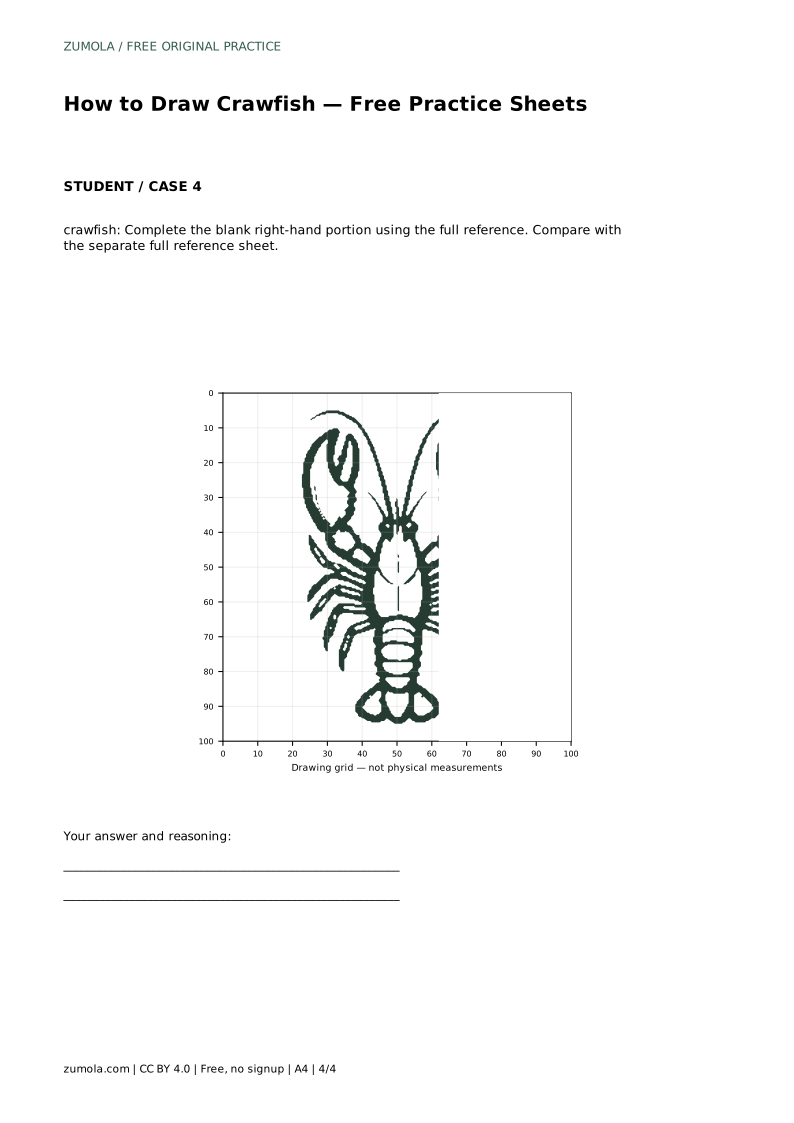
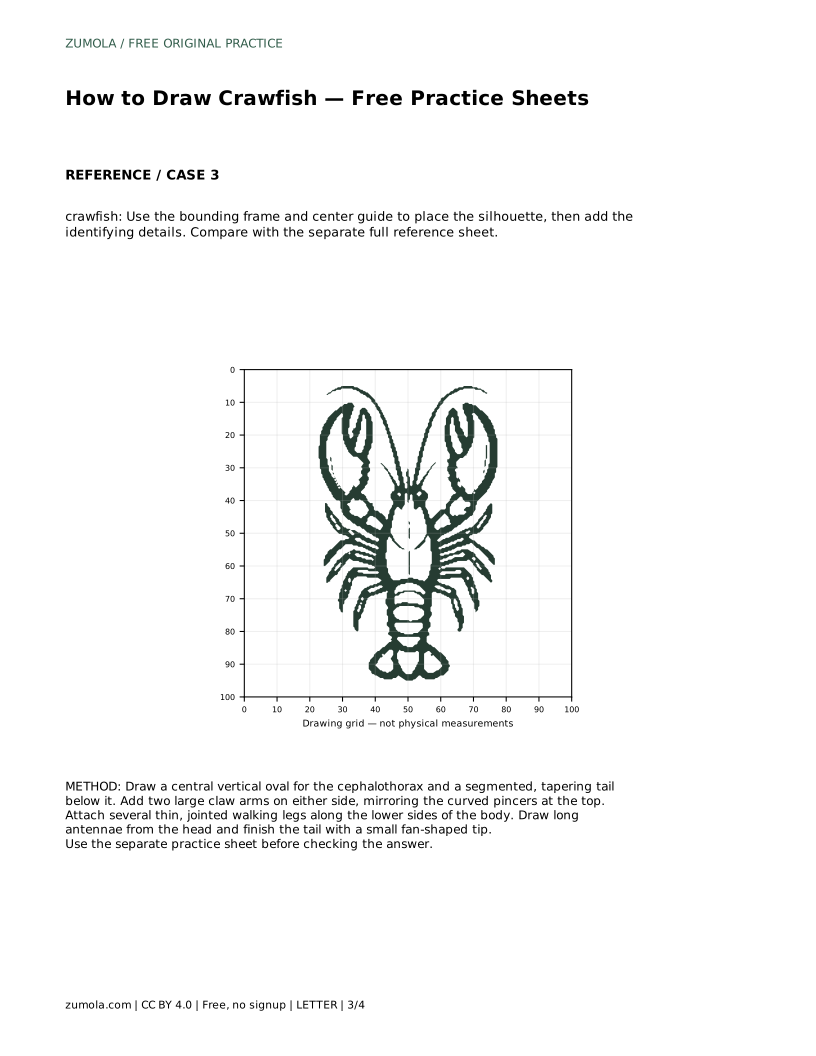
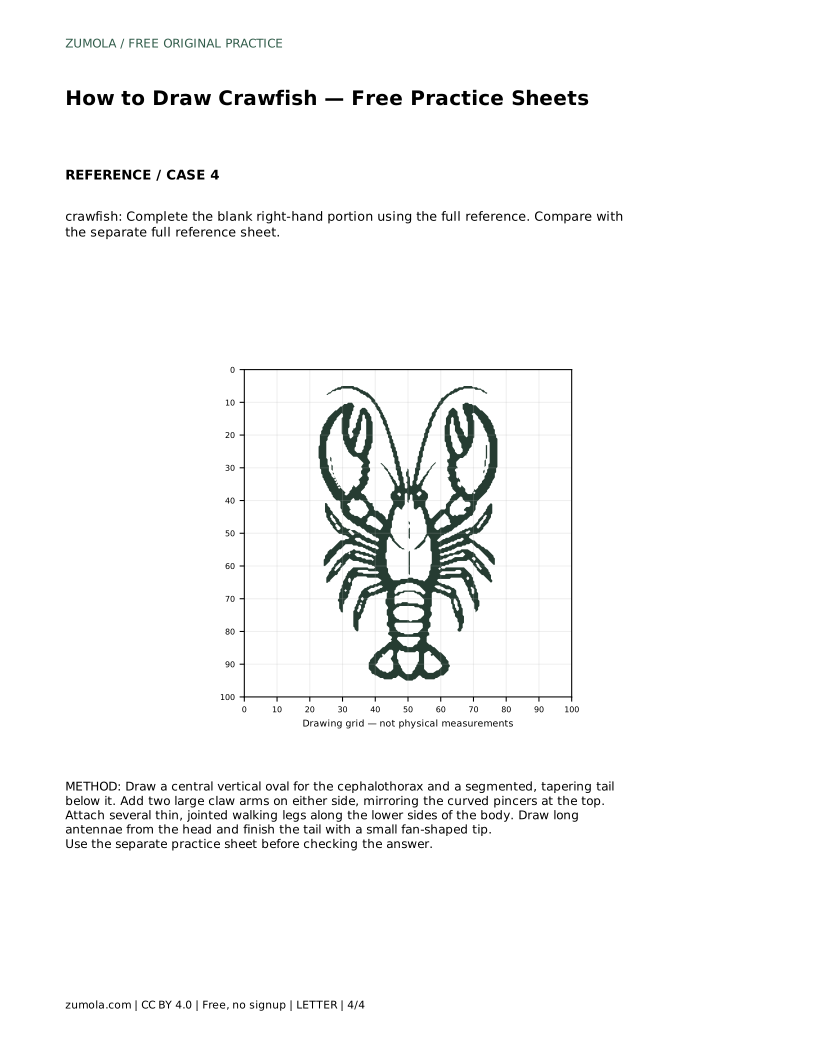
Remember that art has multiple valid outcomes. A correct crawfish drawing does not need to match the reference exactly. Instead, assess whether the visible features and proportions are clear. Use the practice-sheet tasks to trace, copy onto a grid, place the silhouette with a bounding frame and center guide, or complete a blank portion. Each task gives you a different way to check the same set of features.
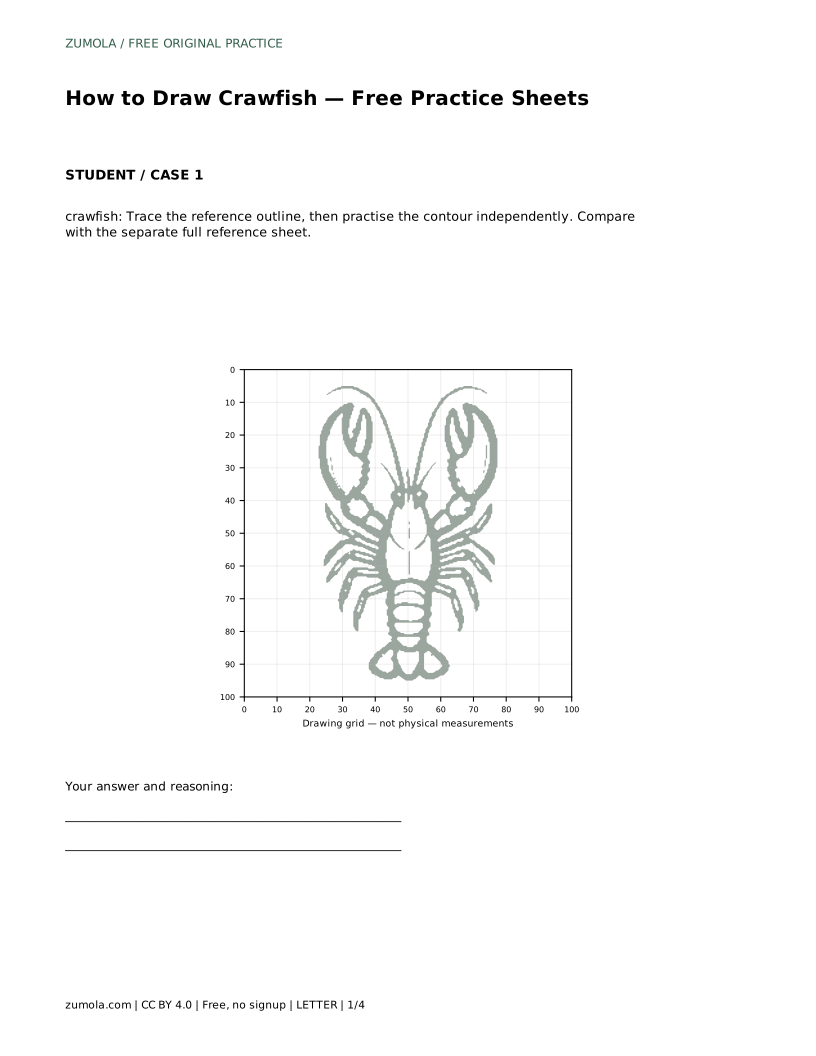
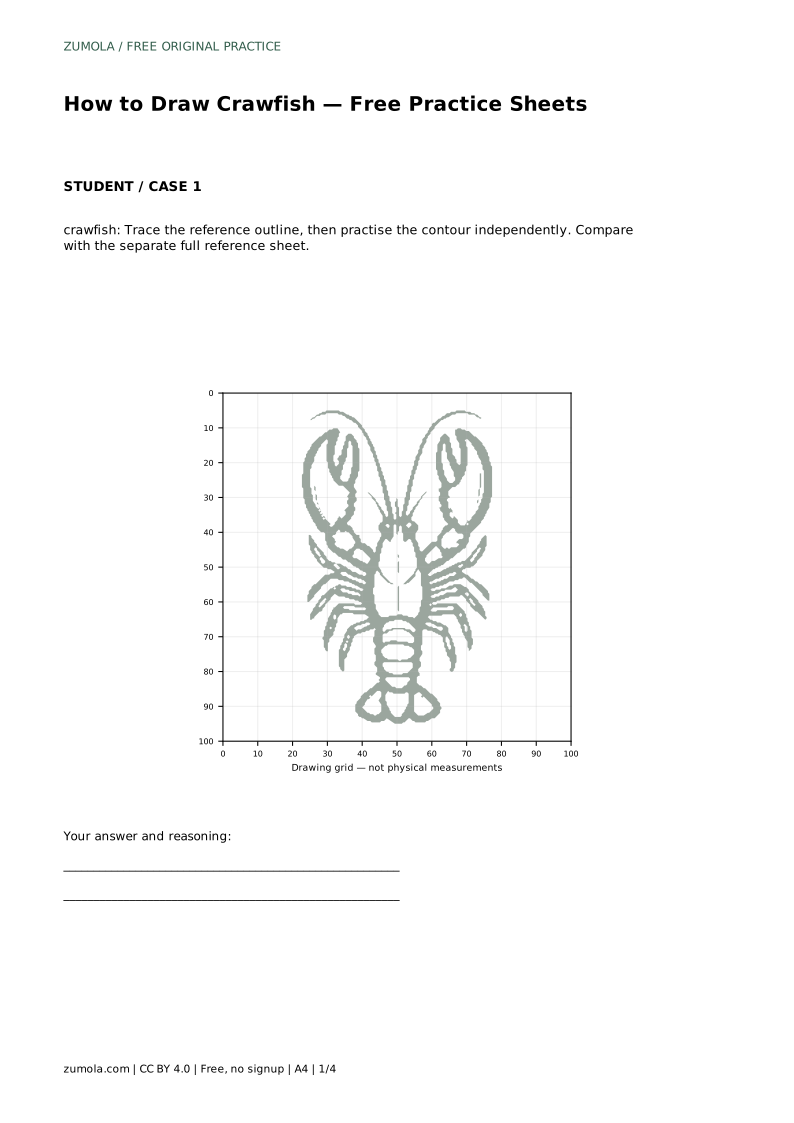
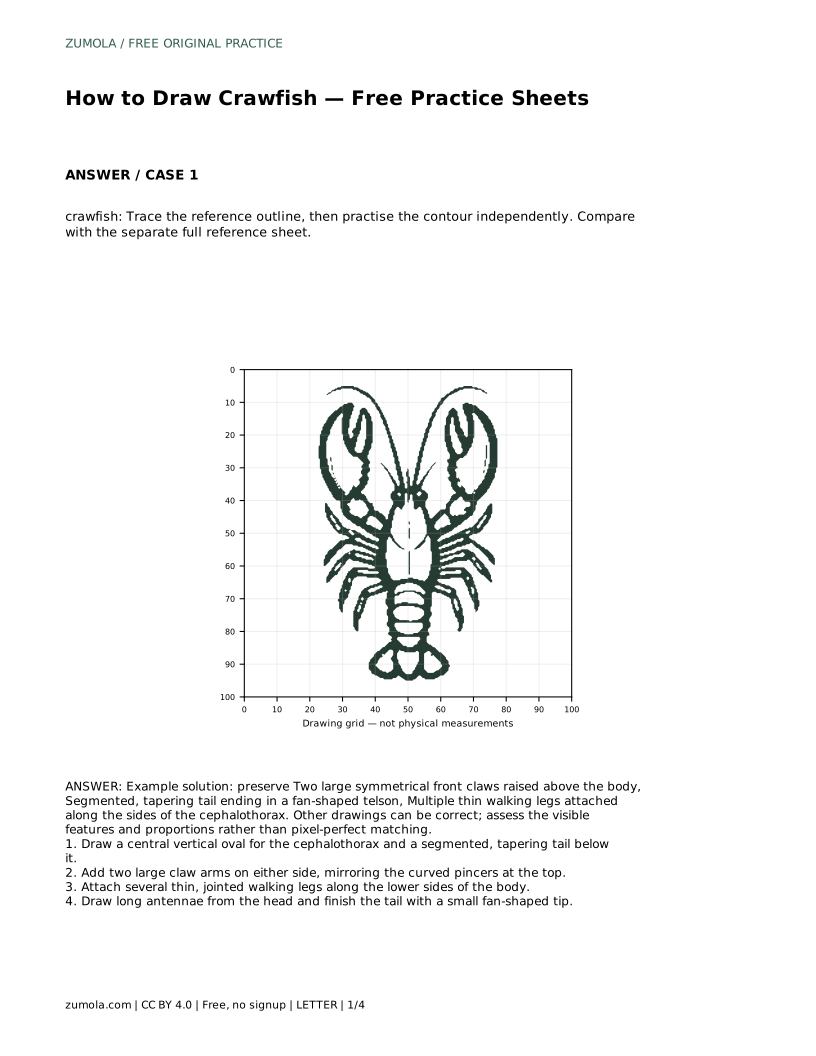
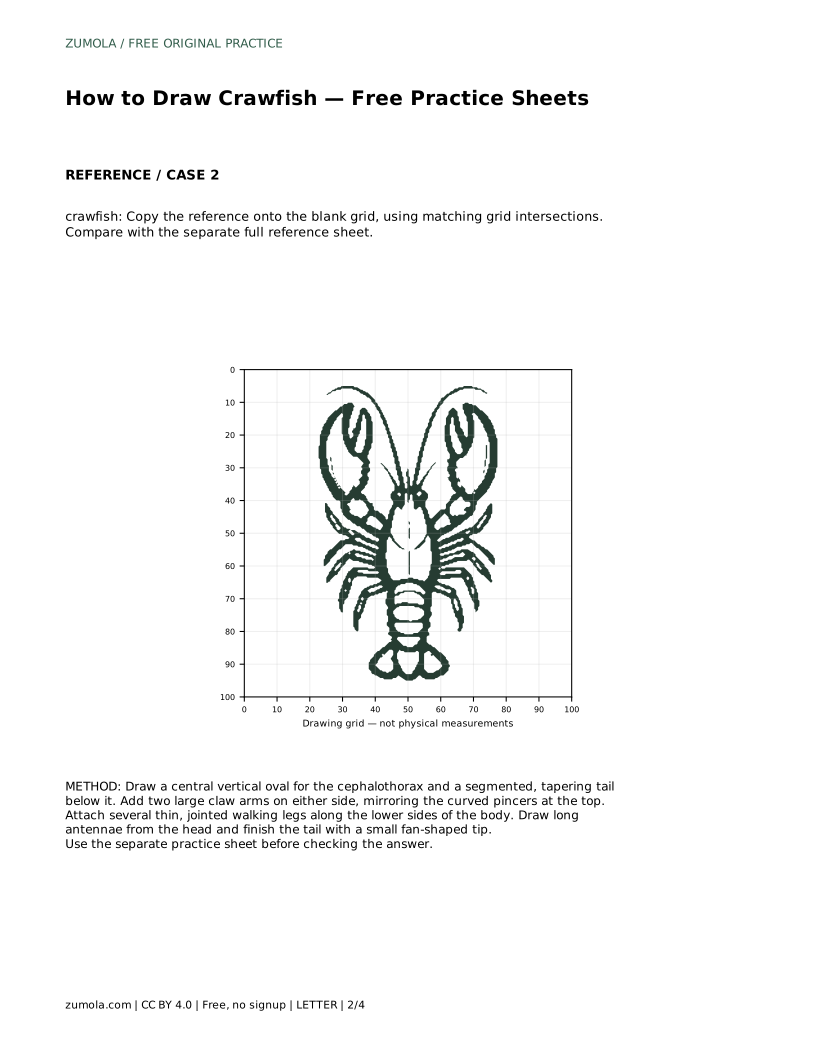
crawfish: Trace the reference outline, then practise the contour independently. Compare with the separate full reference sheet.
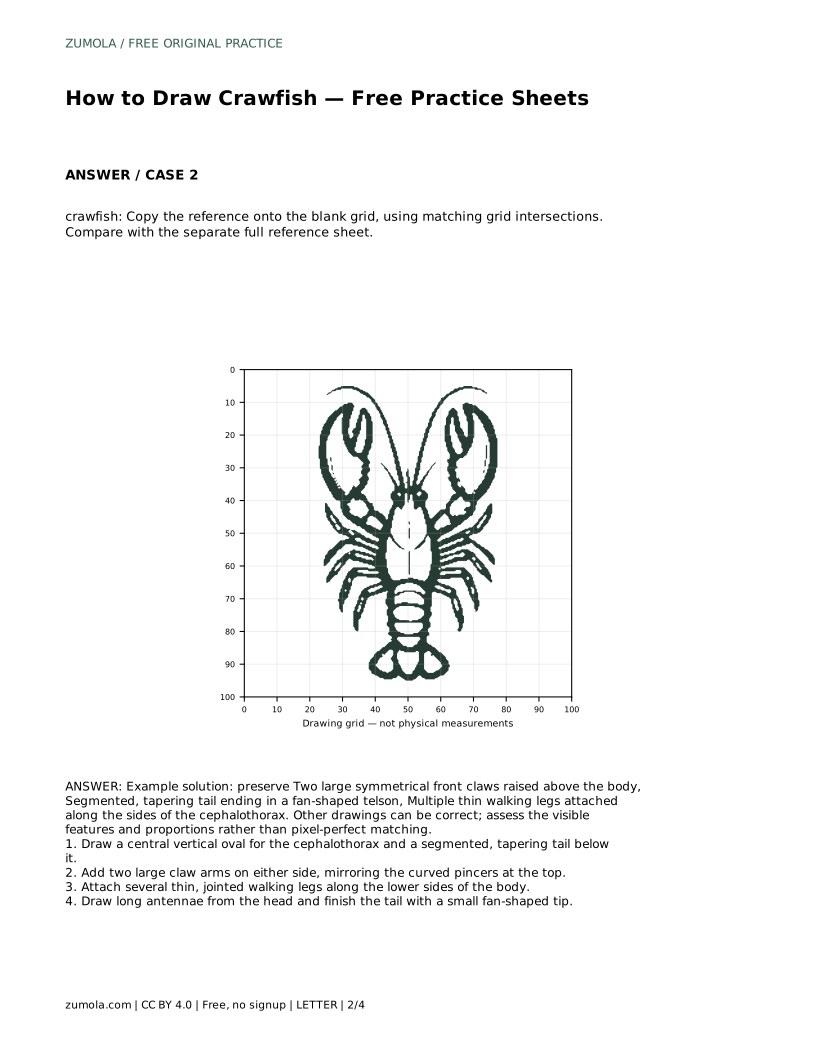
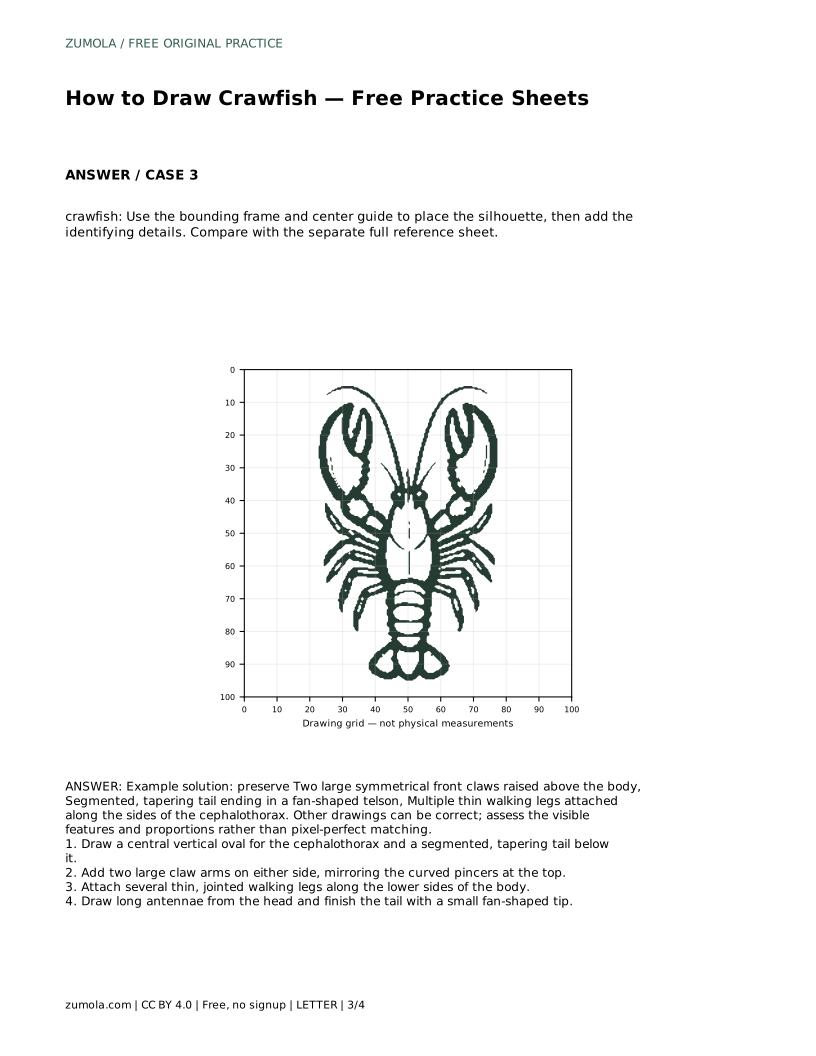
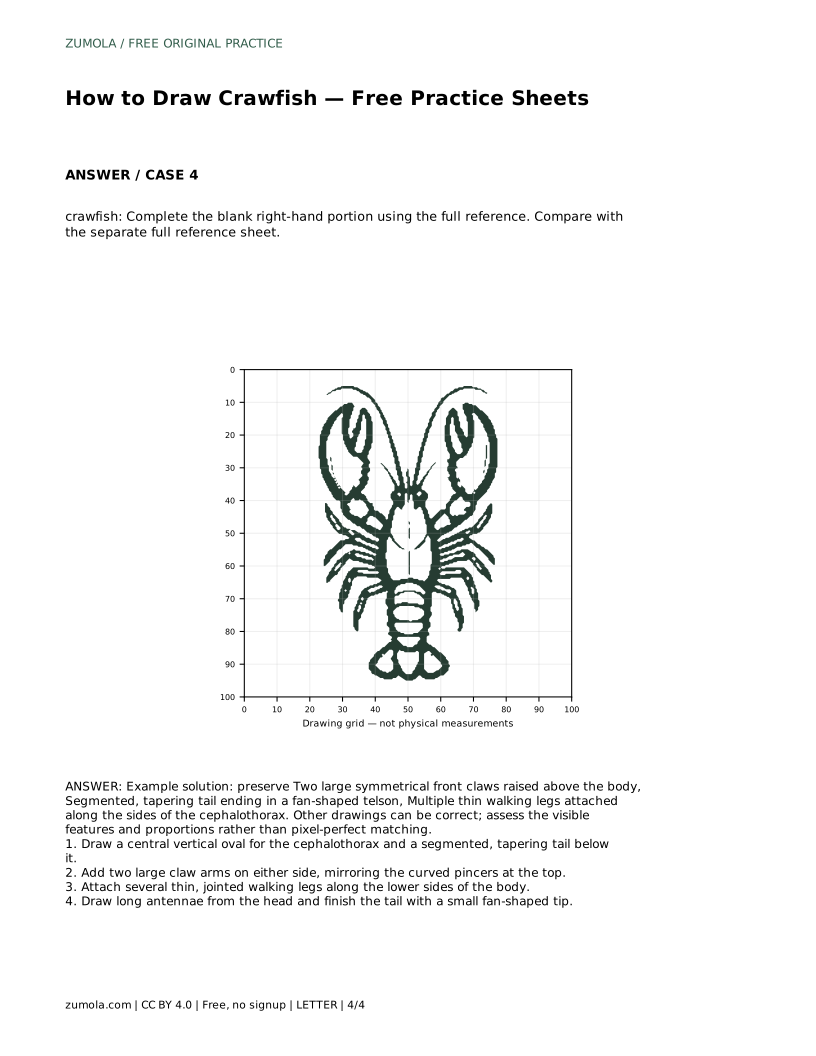
Example solution: preserve Two large symmetrical front claws raised above the body, Segmented, tapering tail ending in a fan-shaped telson, Multiple thin walking legs attached along the sides of the cephalothorax. Other drawings can be correct; assess the visible features and proportions rather than pixel-perfect matching. Draw a central vertical oval for the cephalothorax and a segmented, tapering tail below it. Add two large claw arms on either side, mirroring the curved pincers at the top. Attach several thin, jointed walking legs along the lower sides of the body. Draw long antennae from the head and finish the tail with a small fan-shaped tip.
No. Keep the walking legs thin, jointed, and roughly even in number and length on both sides. Small differences are fine as long as the legs are clearly attached along the lower sides of the cephalothorax.
Use a rubric: check for a central vertical oval, a segmented tapering tail, a fan-shaped telson, two large symmetrical claws raised above the body, multiple thin walking legs along the sides, and long antennae. Compare proportions and visible features rather than pixel-perfect matching.
Start with the central oval and segmented tail, then add the two raised claws, then the thin walking legs, and finally the antennae. Review the whole drawing against a reference sheet before darkening your lines.
All drawing practice · Free coordinate paper
Original resources · CC BY 4.0 · Free for personal and classroom use with attribution.