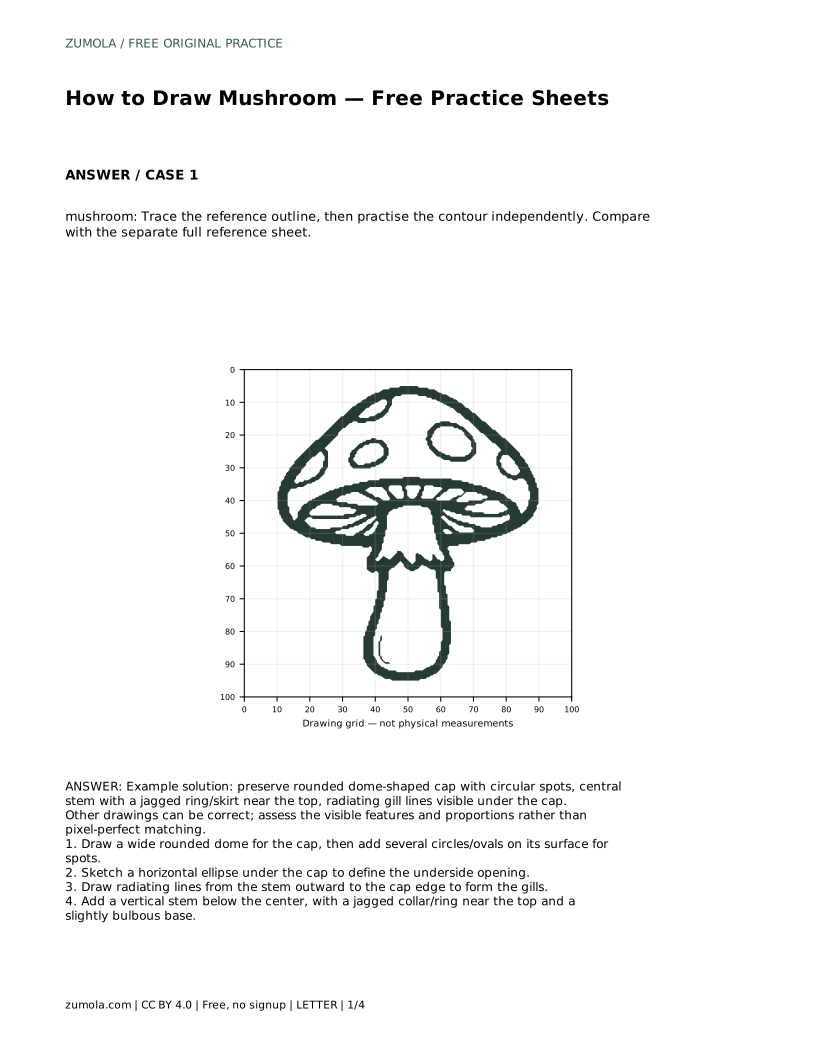
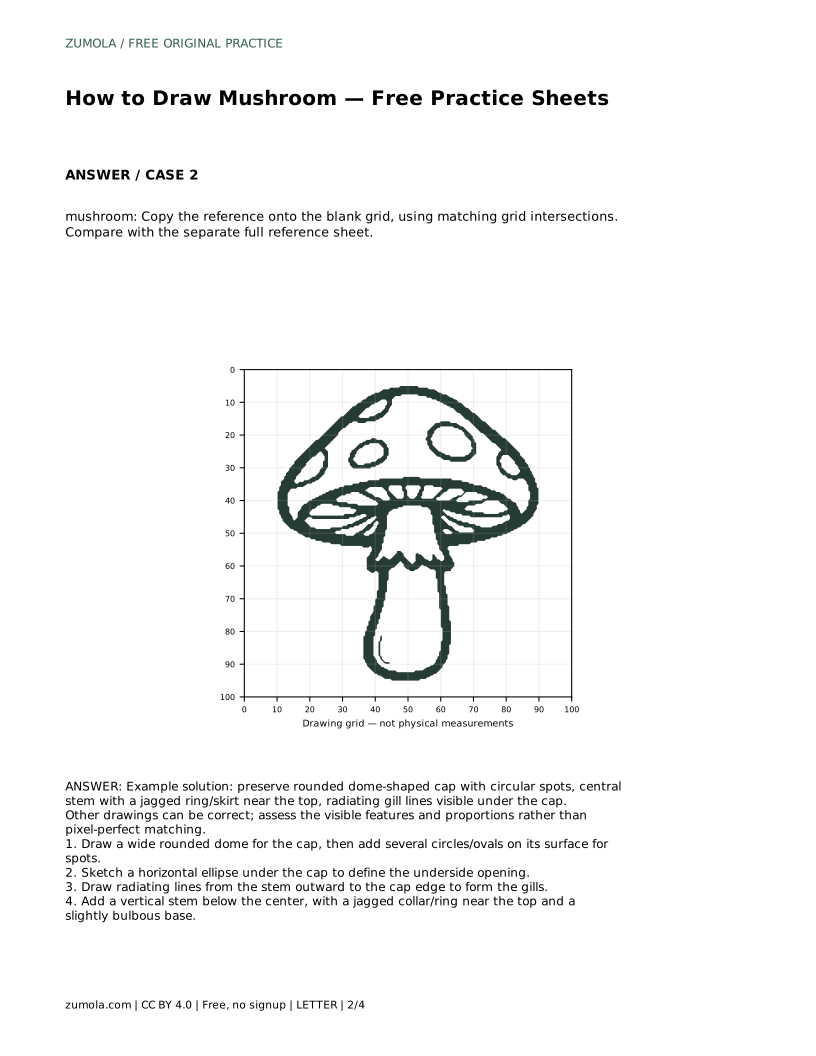
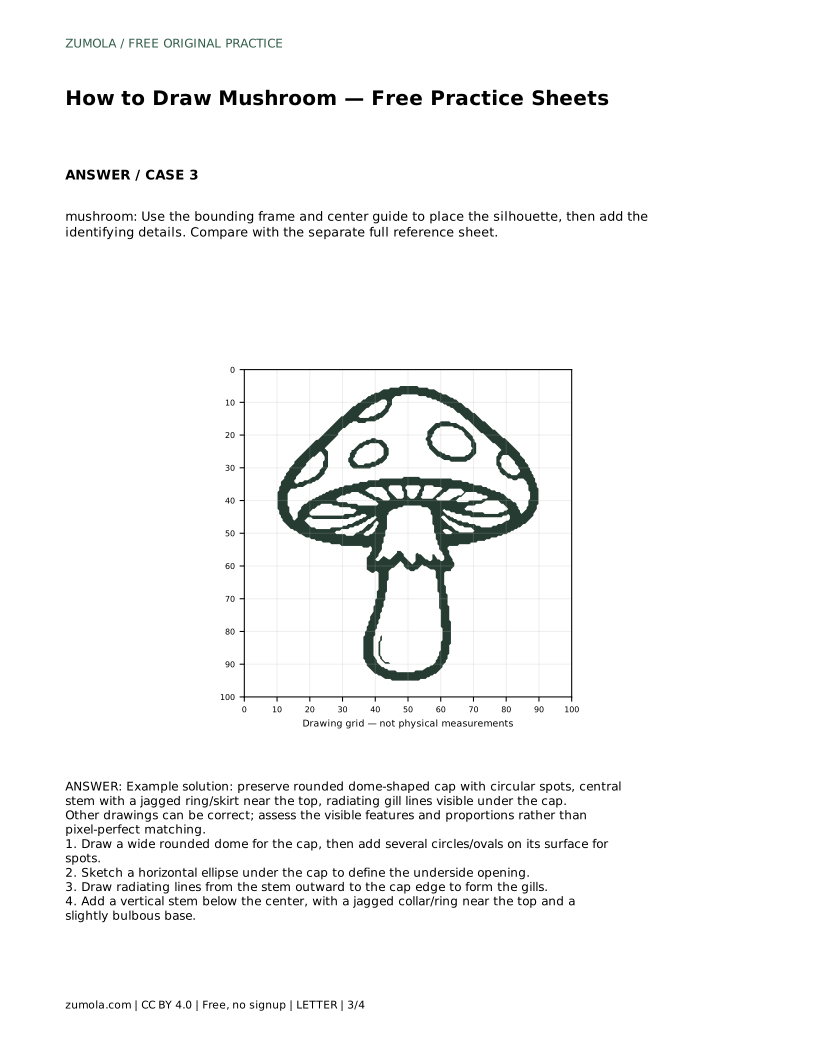
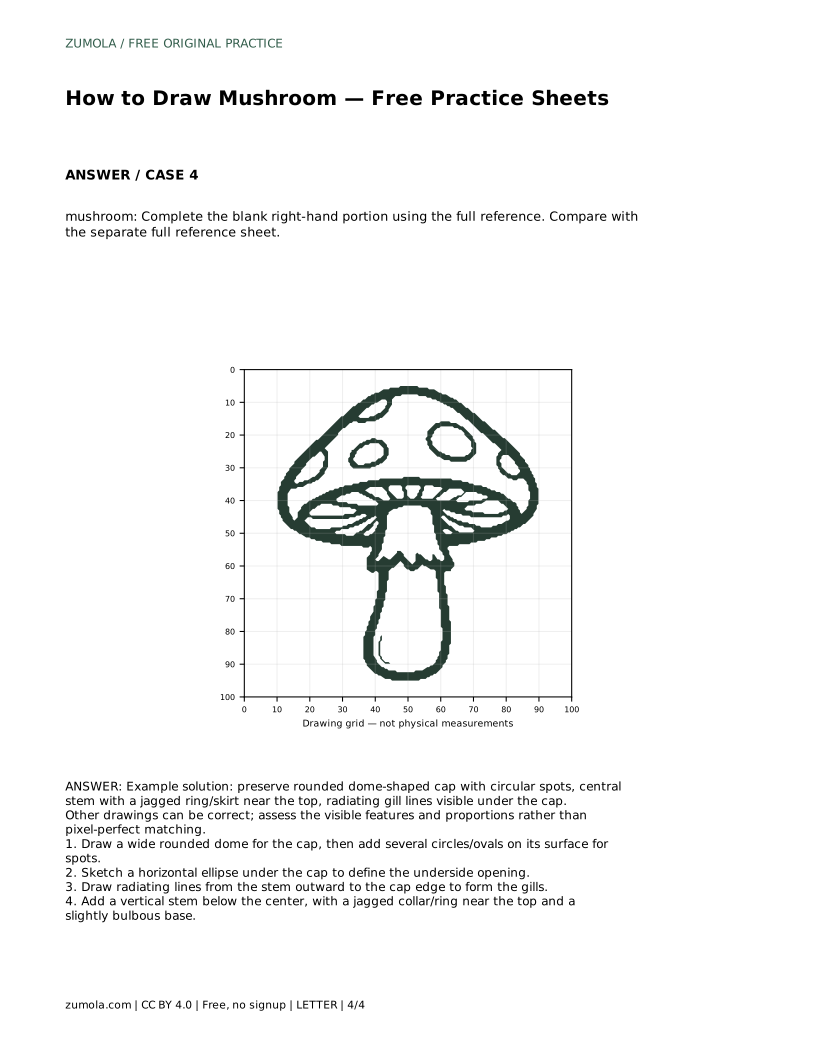
Reference diagrams
LETTER · Download PDF
A4 · Download PDF
Free original resources
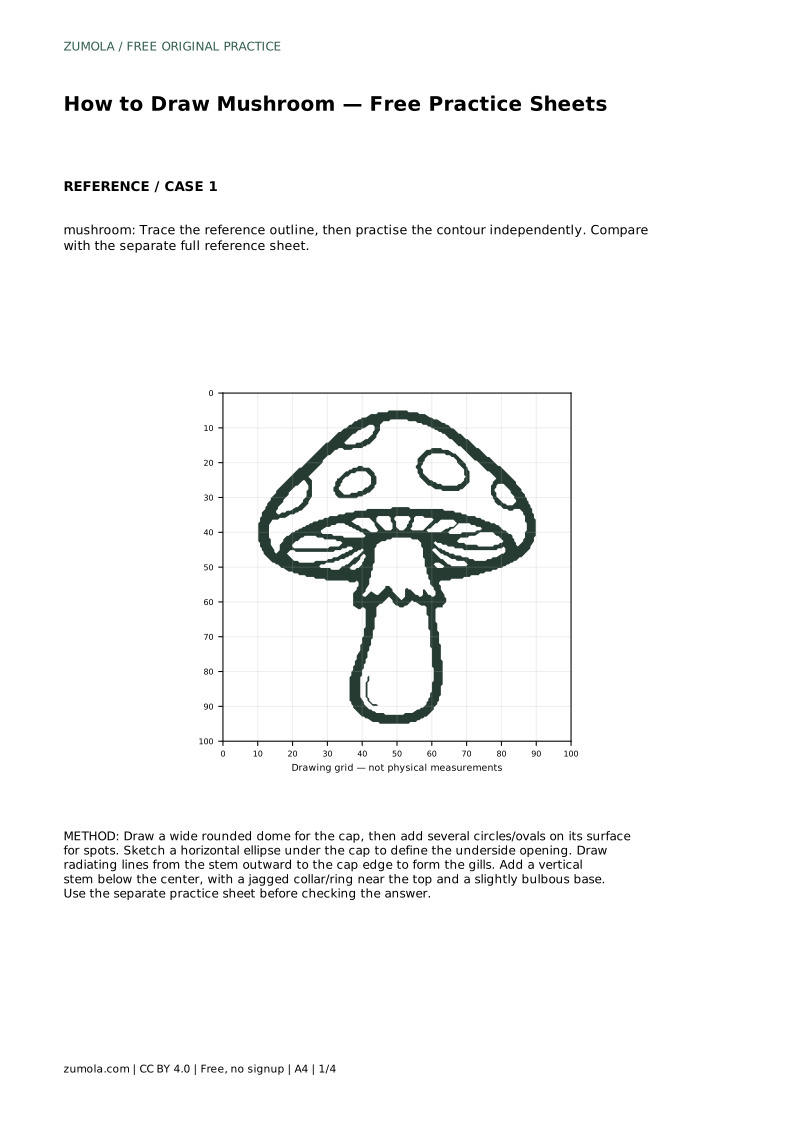
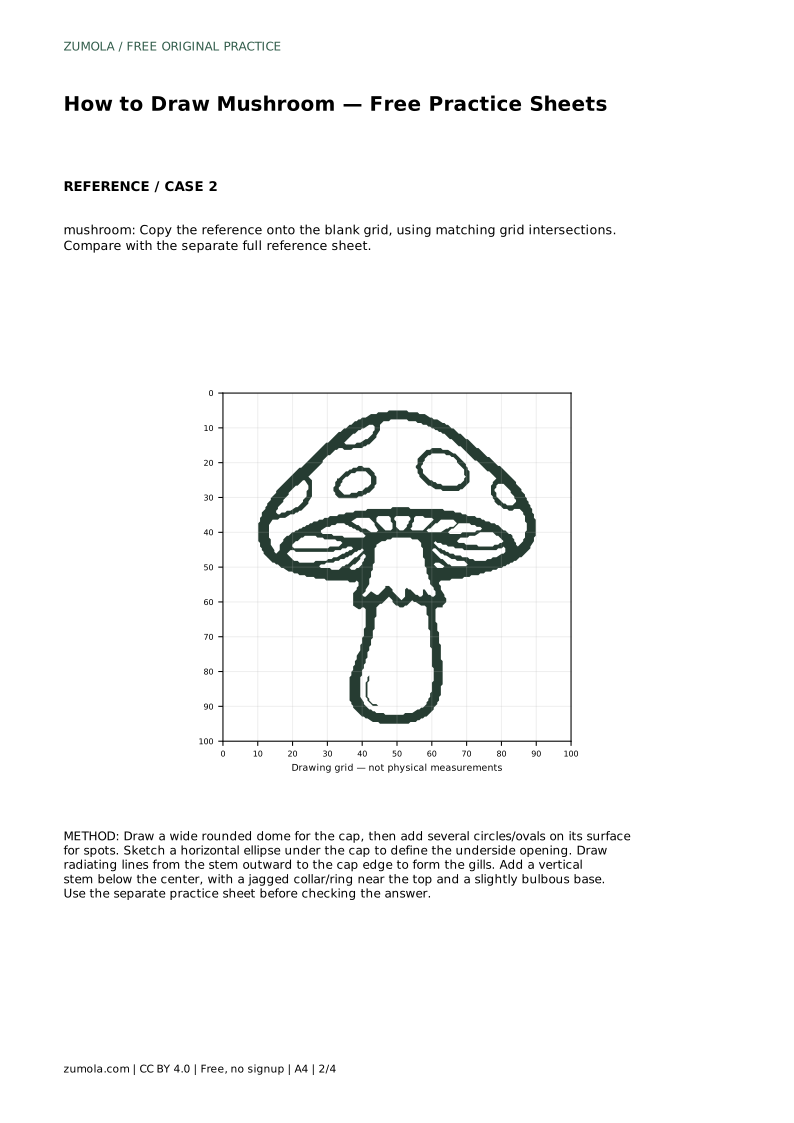
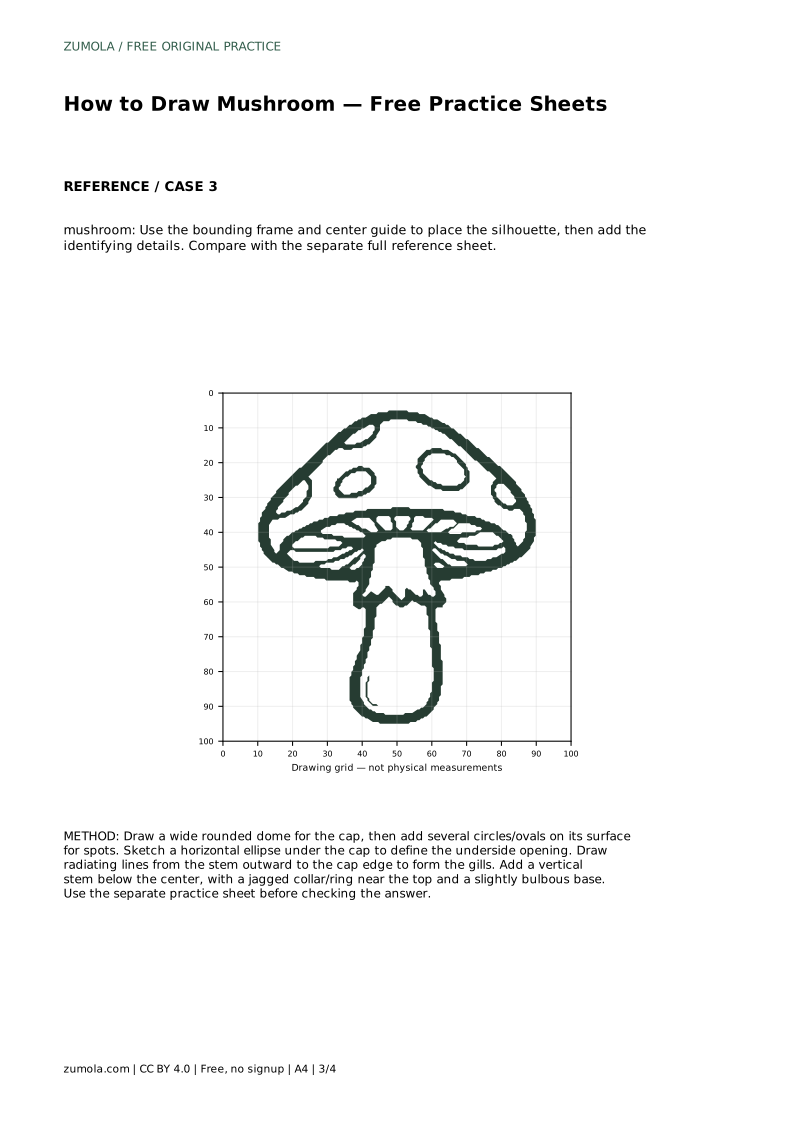
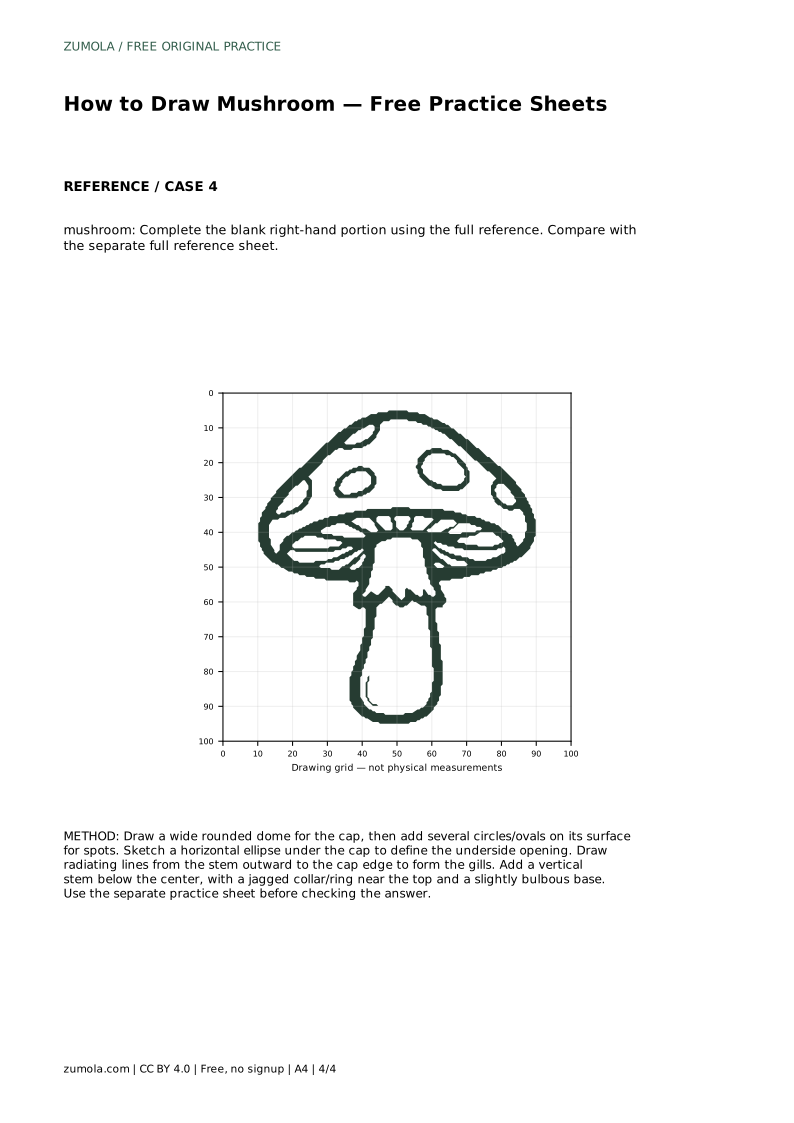
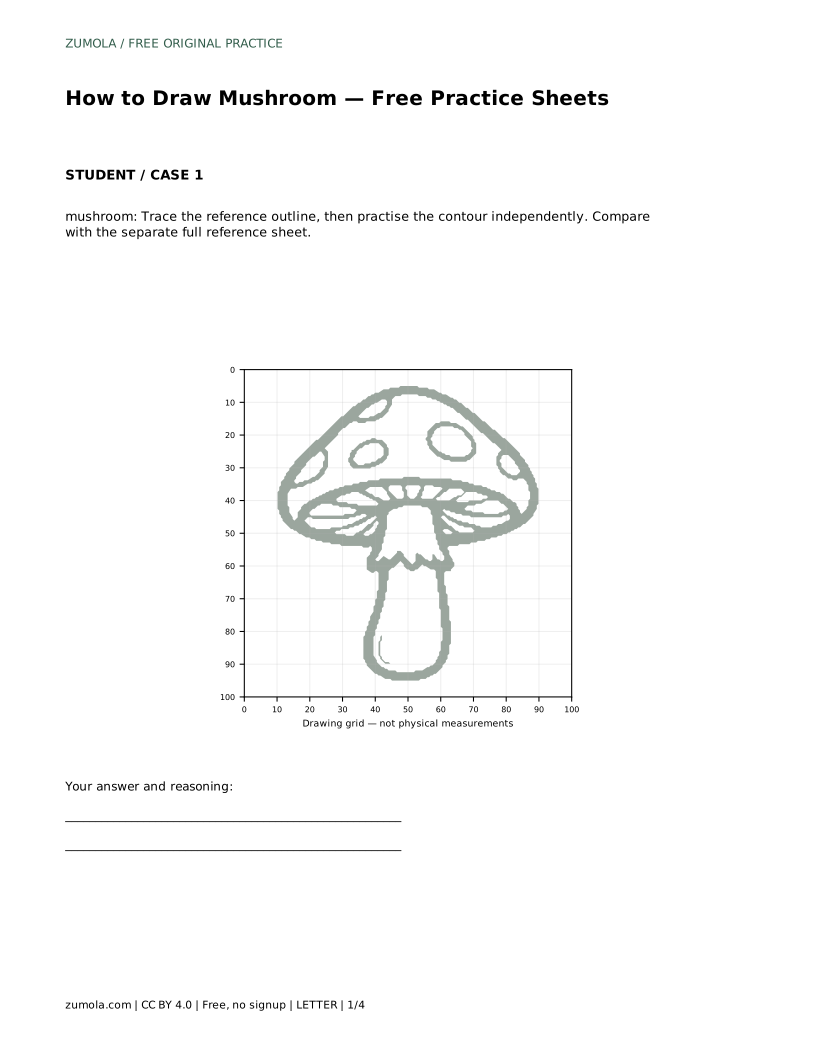
Learn to draw a mushroom by building the cap, underside ellipse, radiating gills, ring and stem. Use the practice sheets to compare features and proportions.
Four original cases, with reference diagrams, practice sheets and worked answers. Everything is free; no signup required.
LETTER · Download PDF
A4 · Download PDF
LETTER · Download PDF
A4 · Download PDF
LETTER · Download PDF
A4 · Download PDF
Use A4 or US Letter to match your printer. Use the stated values and conditions to solve each exercise; diagrams are not physical measuring rulers.
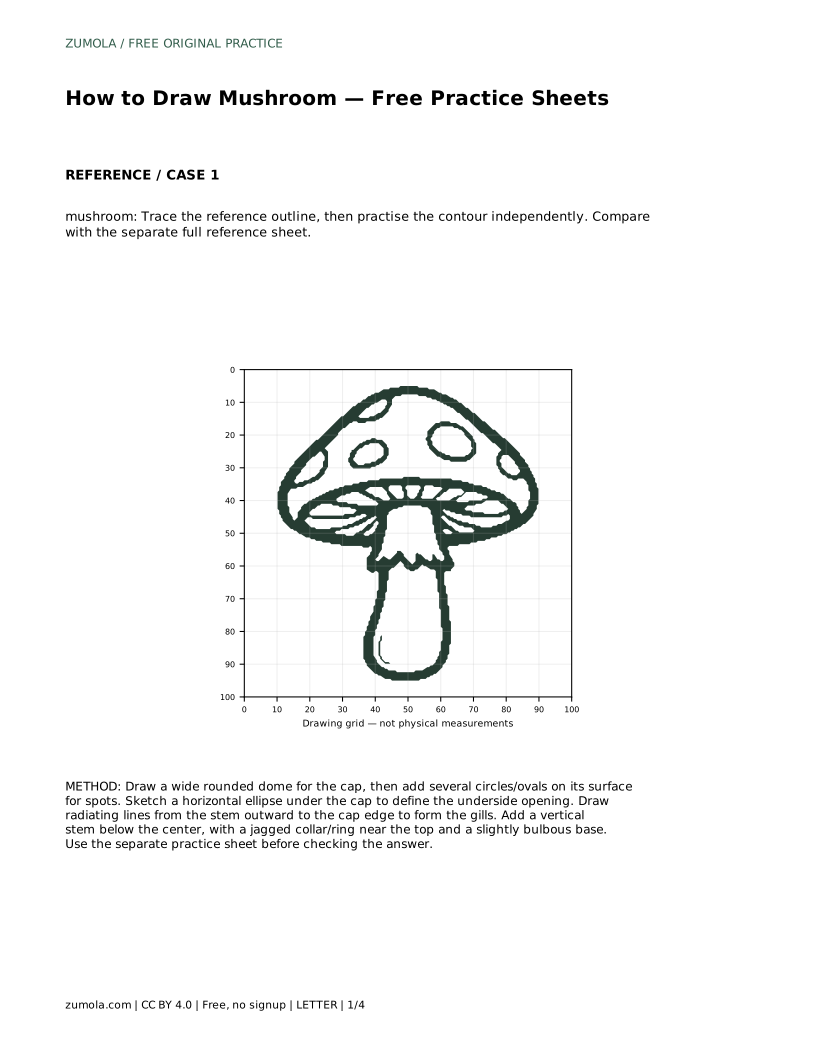
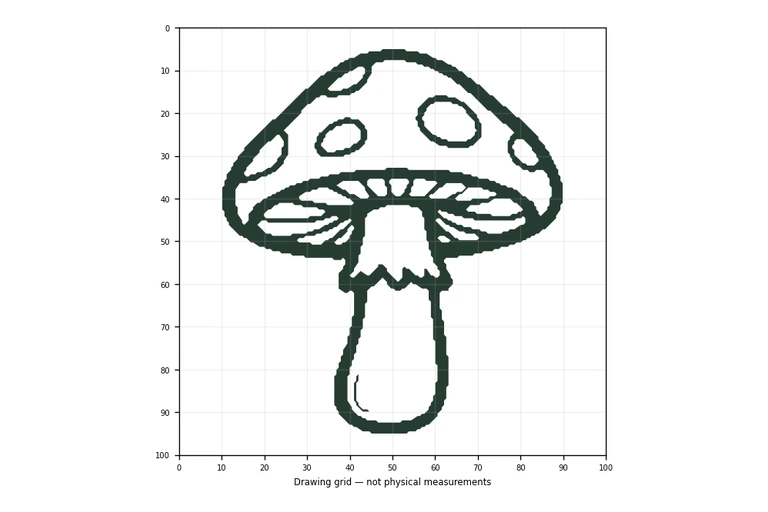
A mushroom drawing is easiest to control when you build it in layers rather than tracing a single outline. Start with the cap as a wide rounded dome, define the underside with a horizontal ellipse, then add gills that radiate from the stem outward. Finish with a central stem, a jagged ring near the top and a slightly bulbous base. The practice sheets let you trace, copy onto a grid, place the silhouette with a frame and center guide, or complete a blank half.
Begin with the cap. Draw a wide rounded dome that is broader than it is tall, so the mushroom reads as a cap rather than a ball. Keep the left and right edges roughly balanced around an imaginary vertical center line. Add several circles or ovals on the cap surface for spots, varying their sizes slightly so the surface does not look mechanical.
Next, define the underside. Sketch a horizontal ellipse beneath the cap; this ellipse represents the opening where the gills are visible. Its width should sit inside the cap edge, not extend beyond it. From the stem area, draw radiating lines outward to the cap edge to form the gills. Keep the lines evenly spaced and stop them at the ellipse boundary so the underside stays readable.
The stem should sit below the center of the cap and connect to the underside ellipse. Draw it as a gentle vertical form, slightly narrower at the top and a little wider at the base. A jagged collar or ring near the top of the stem adds a recognizable detail; keep the jagged edge irregular but small so it does not overpower the stem.
Check the overall proportions before adding final details. The cap should feel wider than the stem, and the stem should look tall enough to support it. If the cap looks too narrow, widen the dome rather than stretching the stem. If the gills look crowded, remove a few lines and space the remaining ones more evenly.
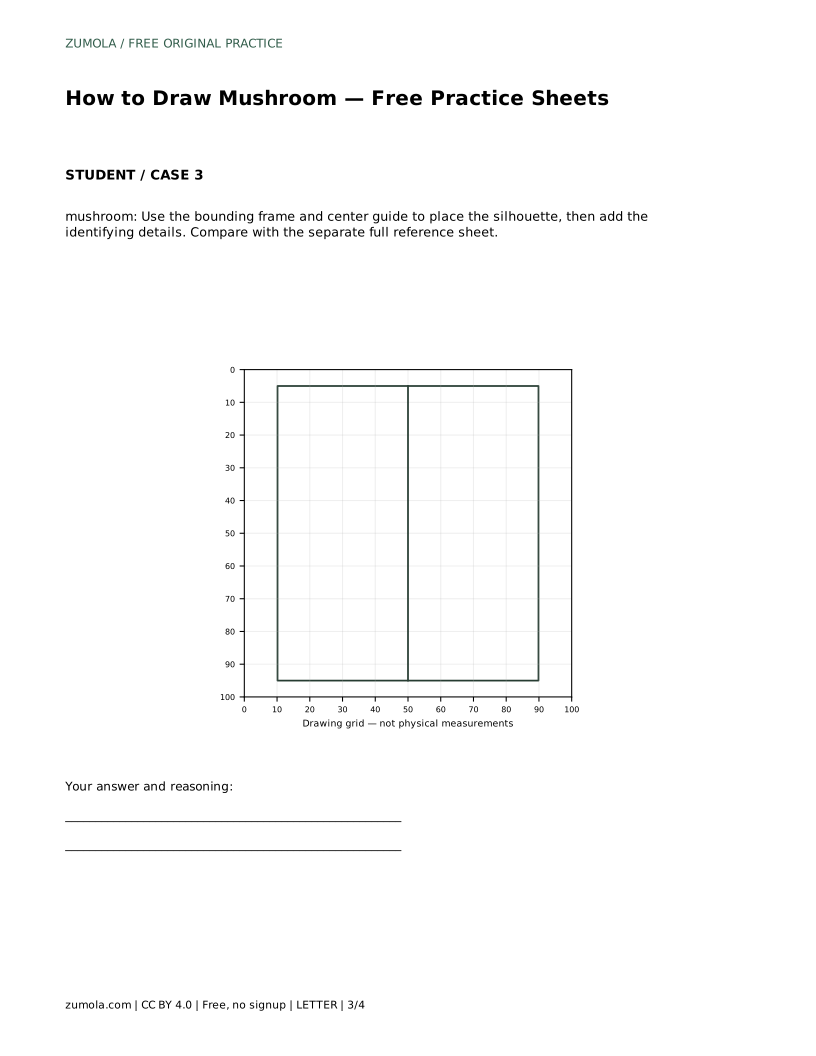
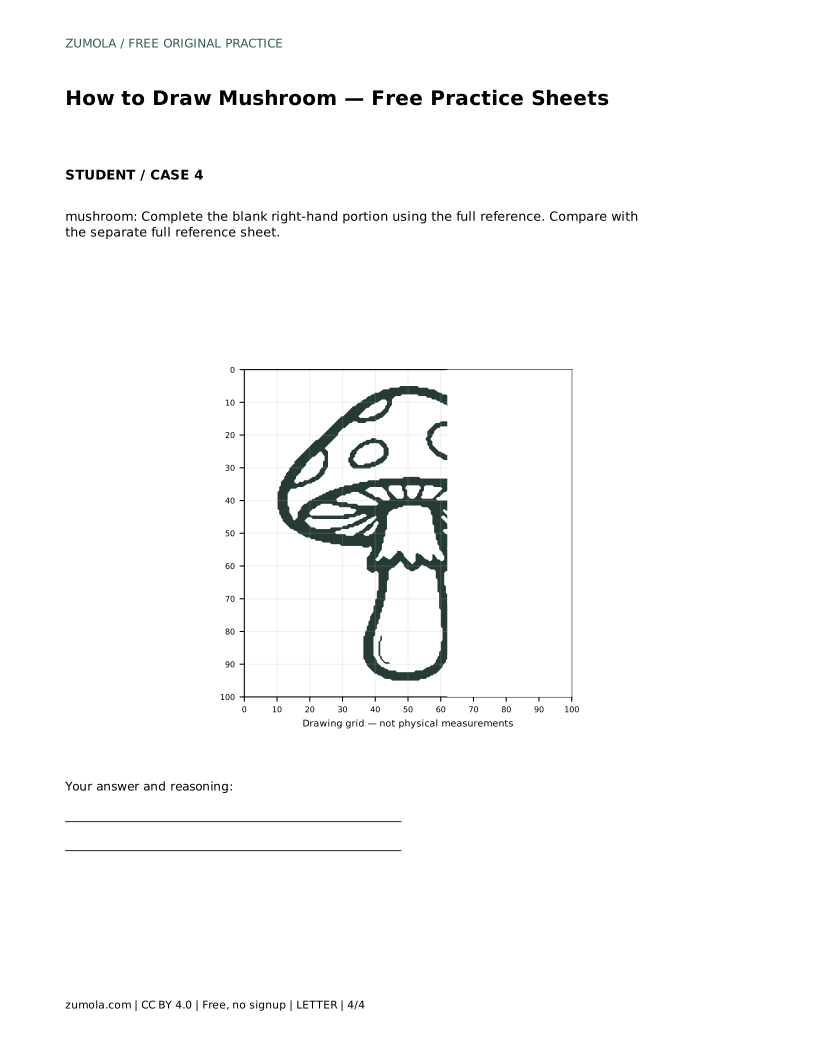
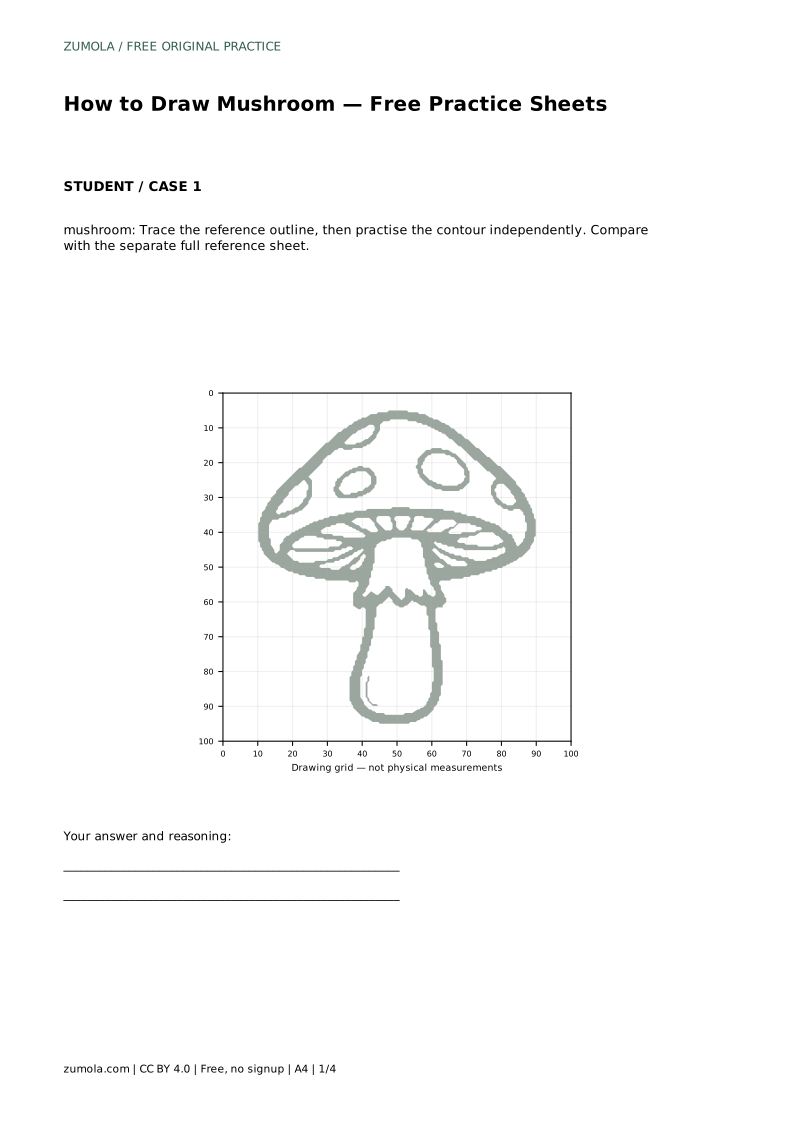
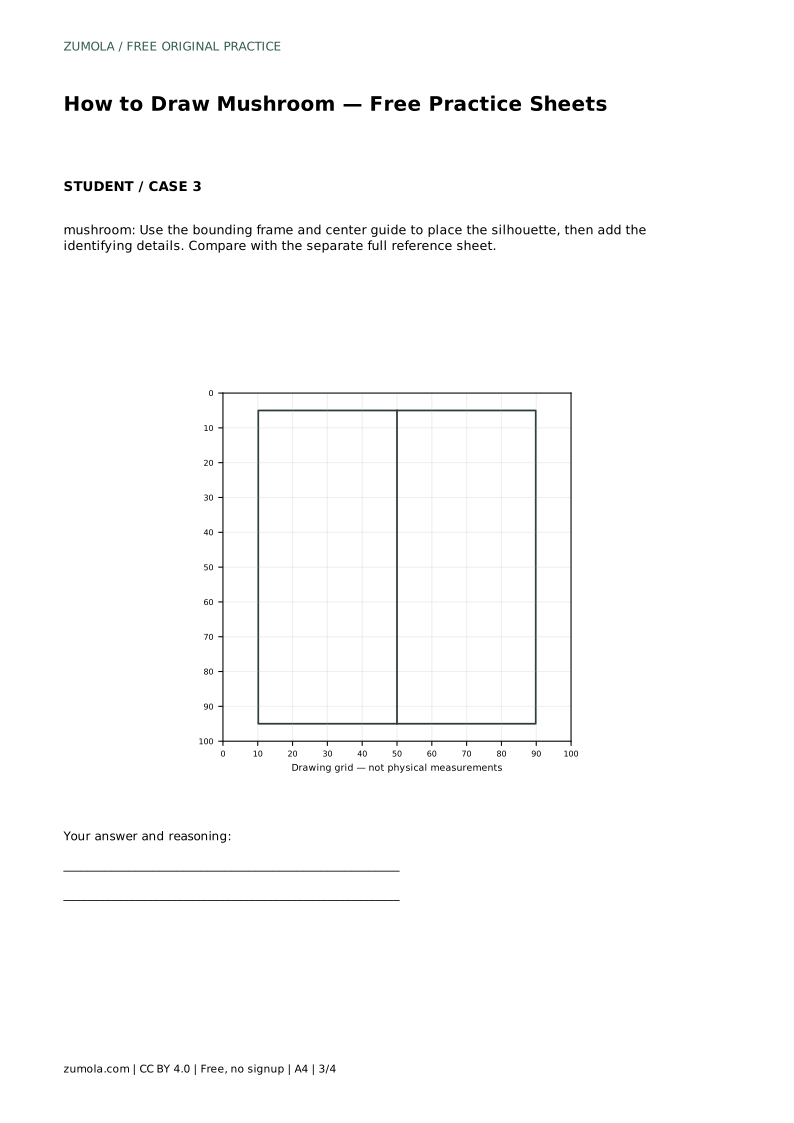
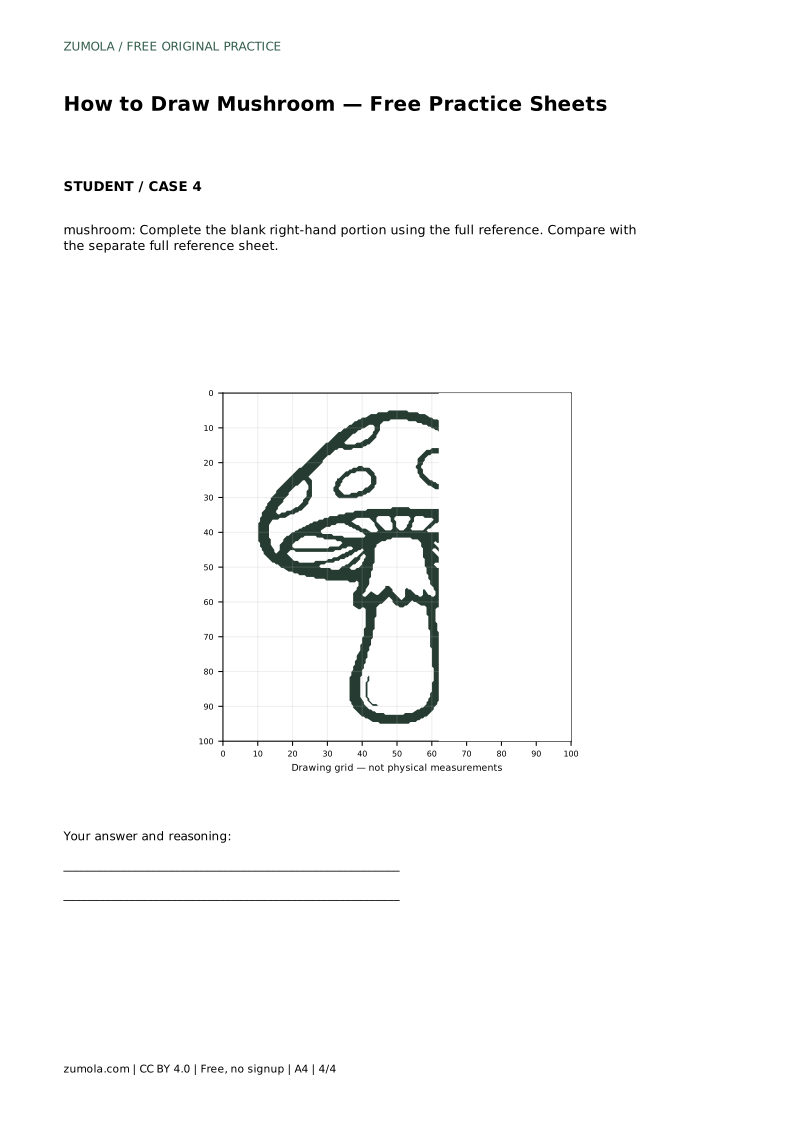
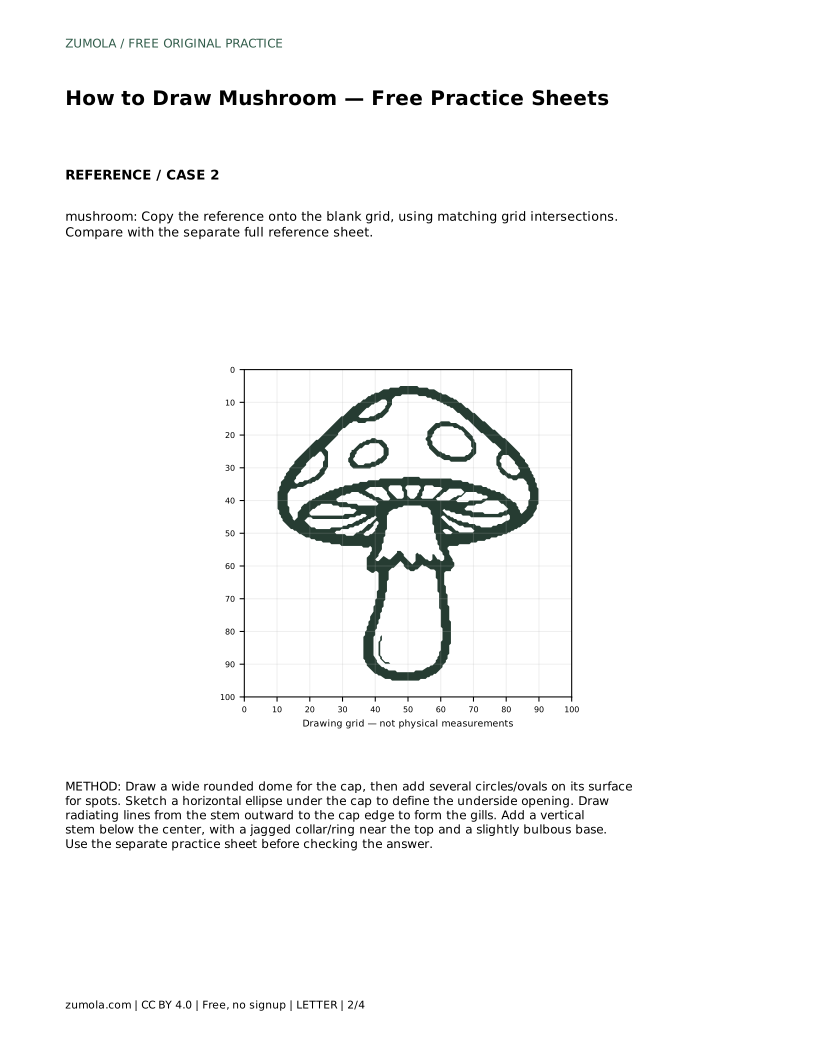
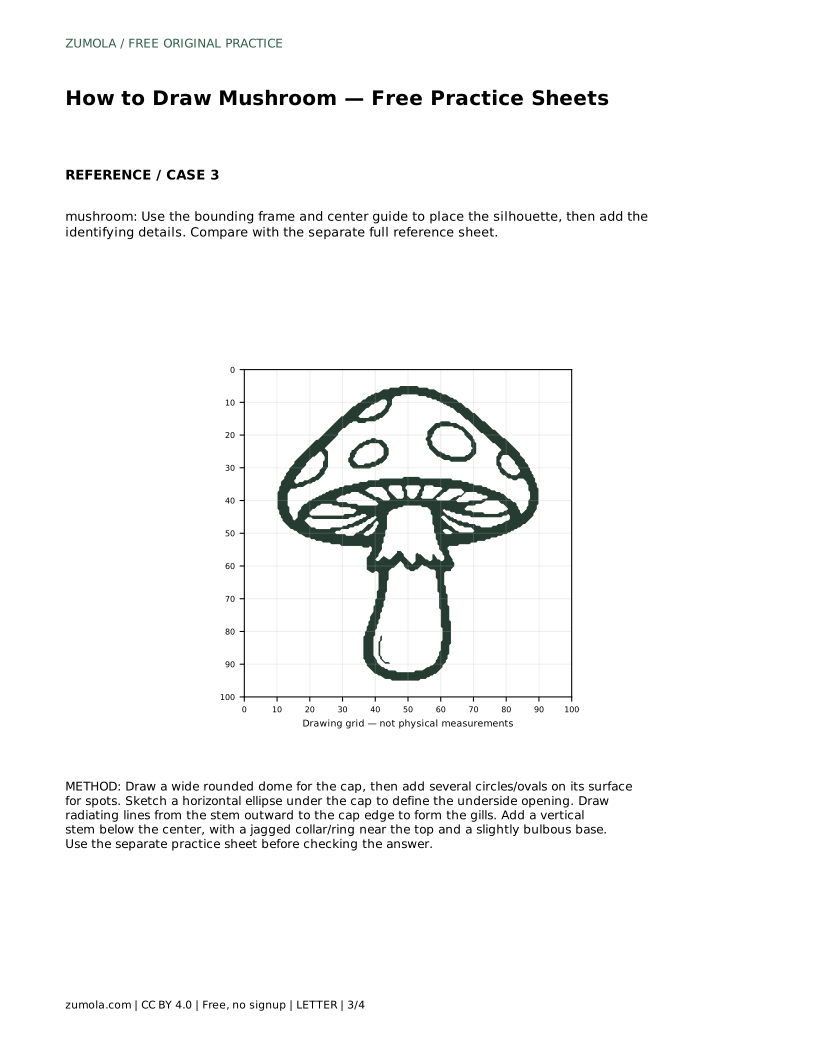
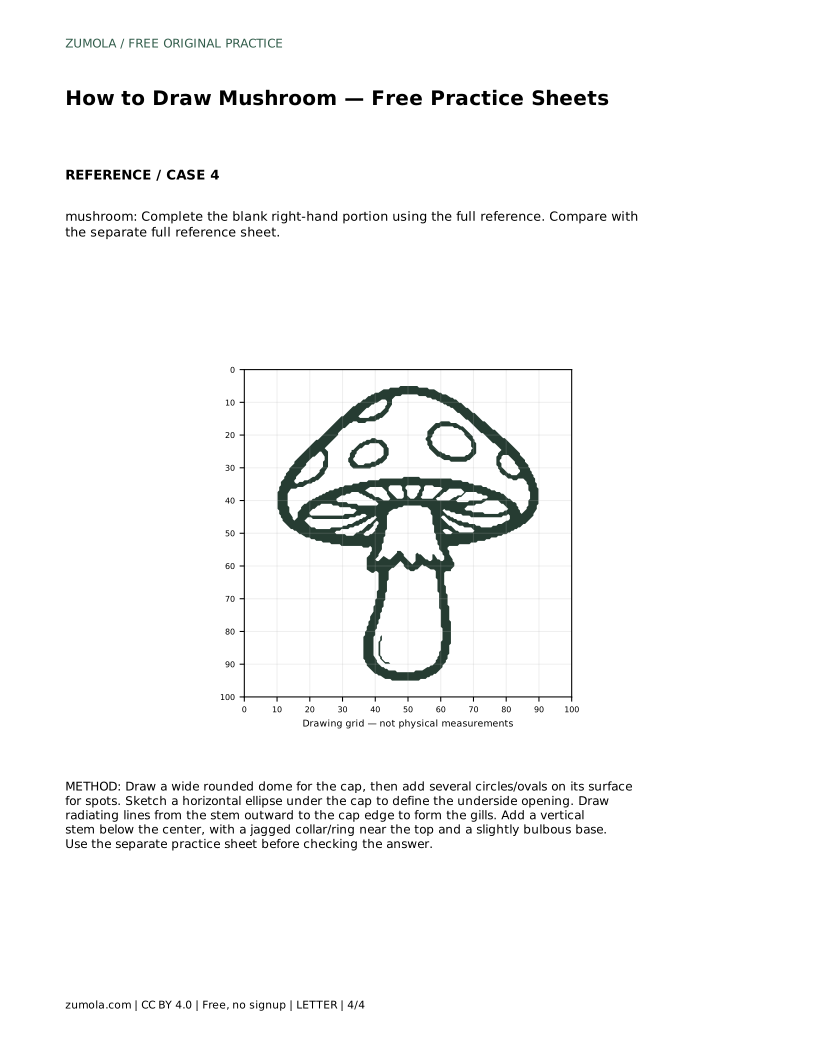
The trace sheet asks you to follow the reference outline first, then practise the contour independently. The grid sheet asks you to copy the reference onto the blank grid using matching grid intersections, which helps you judge placement and proportion. The frame and center guide sheet asks you to place the silhouette first, then add the identifying details. The half-complete sheet asks you to finish the blank right-hand portion using the full reference.
In every case, compare your drawing with the separate full reference sheet. Judge the visible features and proportions rather than expecting a pixel-perfect match. Different line weights, spot placements and gill counts can all be correct if the cap, underside, gills, ring and stem remain clear.
A useful check is whether a viewer can identify the mushroom from its parts. Look for a rounded dome cap, spots on the surface, a horizontal underside ellipse, radiating gill lines, a central stem and a jagged ring near the top. Then check proportions: cap wider than the stem, stem centered, gills contained within the underside.
Art has multiple valid outcomes, so treat the reference as a guide to structure rather than a single correct answer. A drawing with fewer spots or a slightly different ring shape can still be successful if the main forms are clear and balanced.
Most problems come from building details before the main shapes are settled. If the cap looks flat, raise the dome slightly. If the gills look tangled, redraw them as clean radiating lines from a single stem point. If the stem looks unstable, widen its base and re-center it under the cap.
These answers address the most common points about building and checking the drawing.
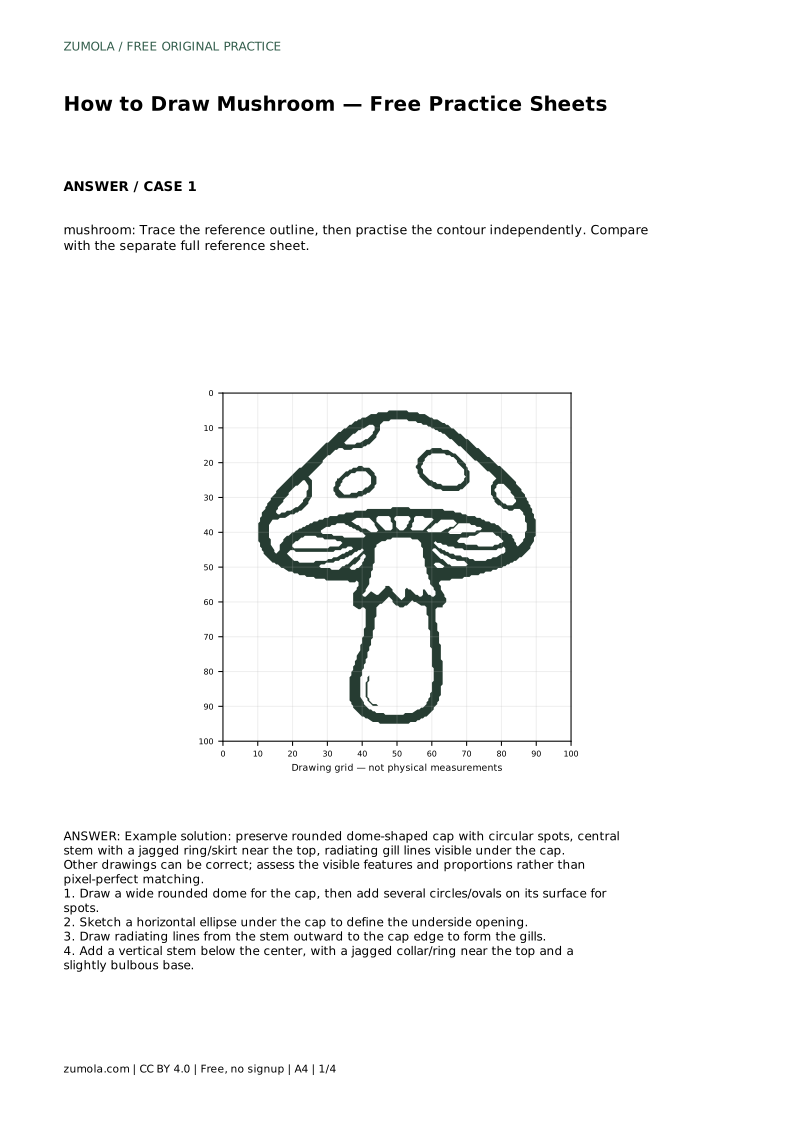
mushroom: Trace the reference outline, then practise the contour independently. Compare with the separate full reference sheet.
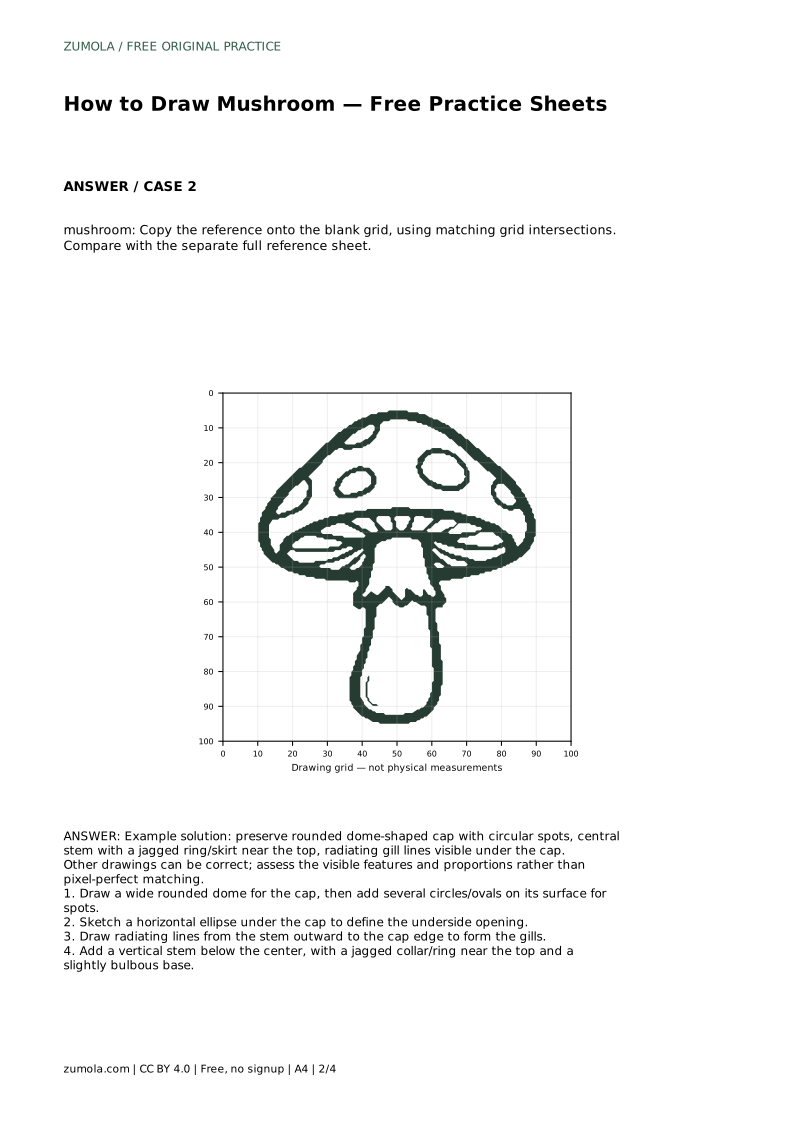
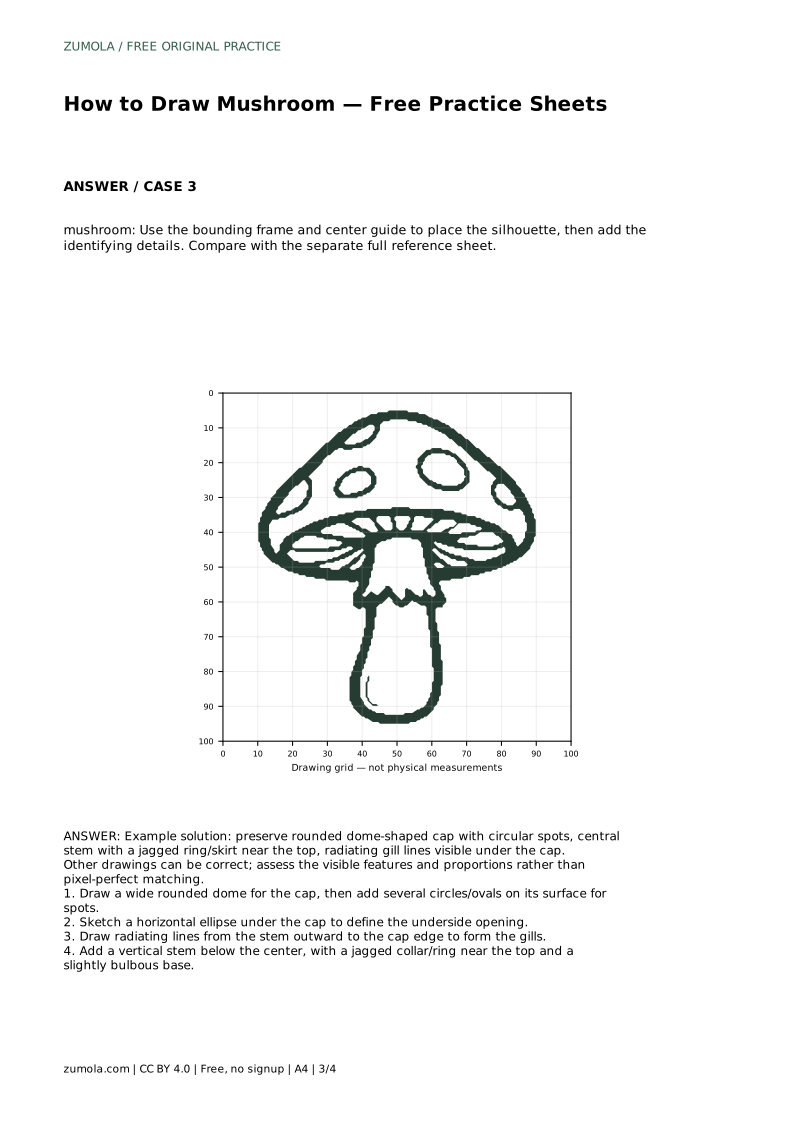
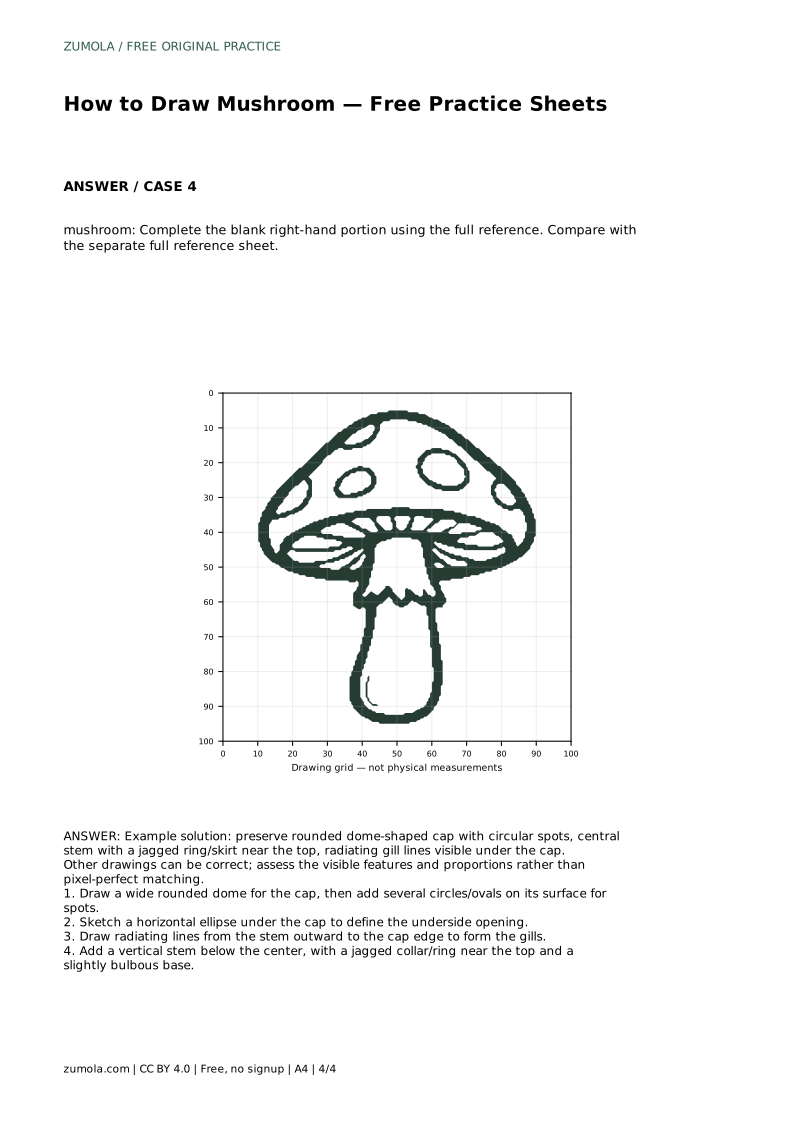
Example solution: preserve rounded dome-shaped cap with circular spots, central stem with a jagged ring/skirt near the top, radiating gill lines visible under the cap. Other drawings can be correct; assess the visible features and proportions rather than pixel-perfect matching. Draw a wide rounded dome for the cap, then add several circles/ovals on its surface for spots. Sketch a horizontal ellipse under the cap to define the underside opening. Draw radiating lines from the stem outward to the cap edge to form the gills. Add a vertical stem below the center, with a jagged collar/ring near the top and a slightly bulbous base.
No. Spots can vary in number and size as long as they sit on the cap surface and the overall dome shape stays clear.
There is no fixed count. Use enough evenly spaced radiating lines to make the underside readable without crowding the ellipse.
Yes. The grid sheet is for copying by matching grid intersections, so tracing is not required.
All drawing practice · Free coordinate paper
Original resources · CC BY 4.0 · Free for personal and classroom use with attribution.