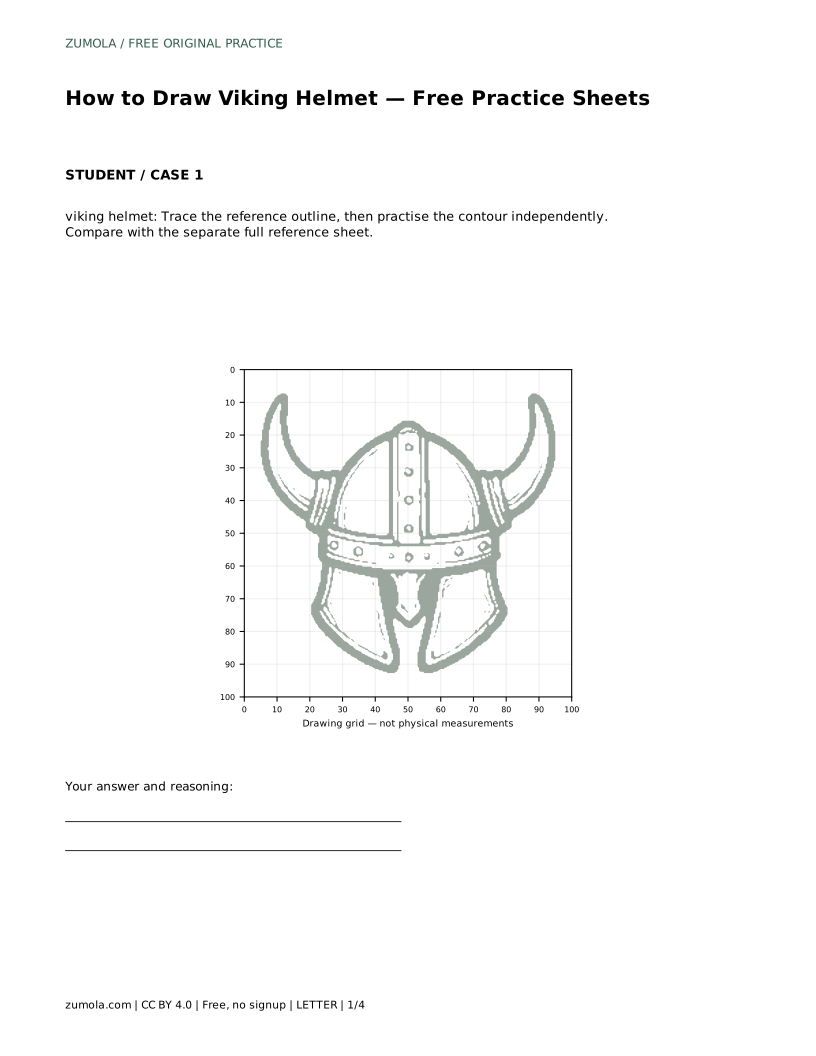
Reference diagrams
LETTER · Download PDF
A4 · Download PDF
Free original resources
Learn to draw a Viking helmet with a rounded dome, riveted bands, curved horns and cheek guards. Trace, grid-copy or complete the outline, then self-check.
Four original cases, with reference diagrams, practice sheets and worked answers. Everything is free; no signup required.
LETTER · Download PDF
A4 · Download PDF
LETTER · Download PDF
A4 · Download PDF
LETTER · Download PDF
A4 · Download PDF
Use A4 or US Letter to match your printer. Use the stated values and conditions to solve each exercise; diagrams are not physical measuring rulers.
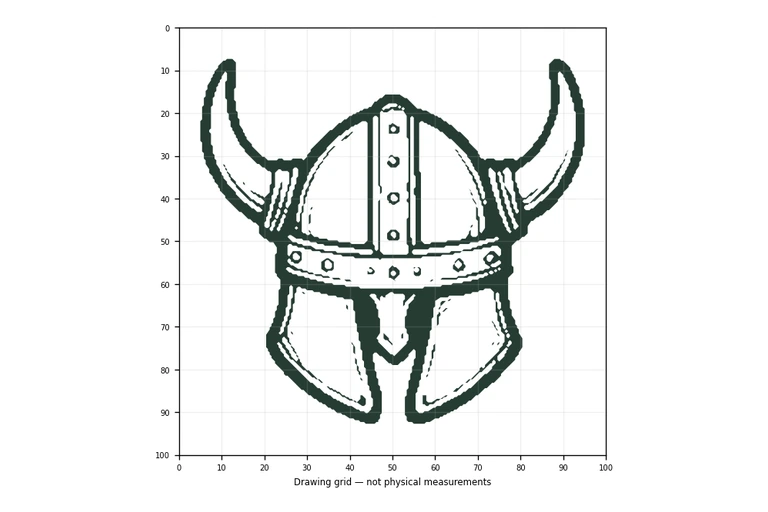
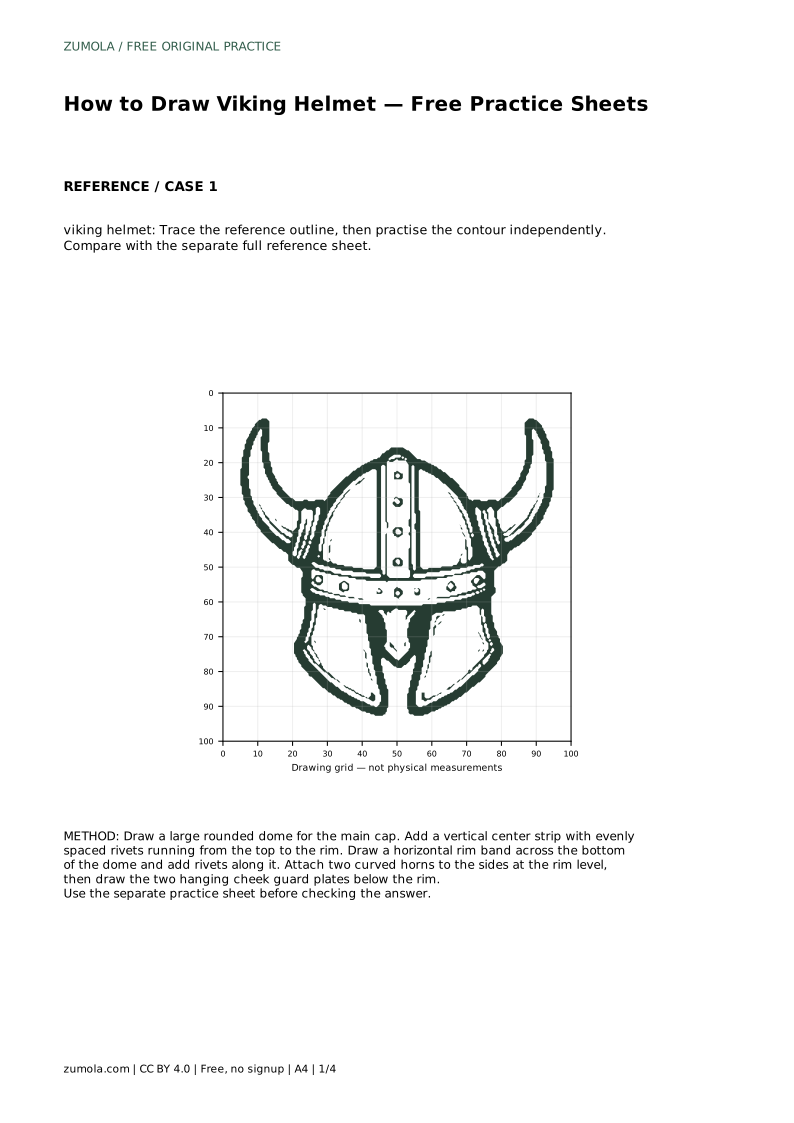
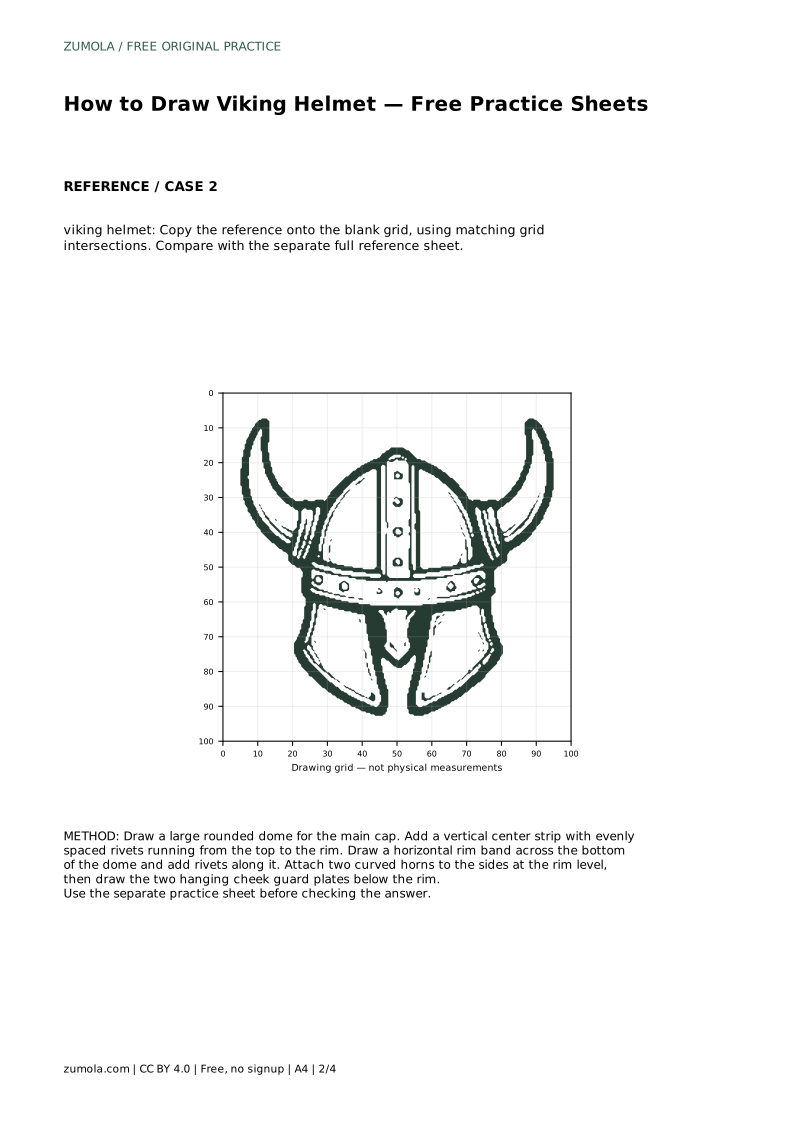
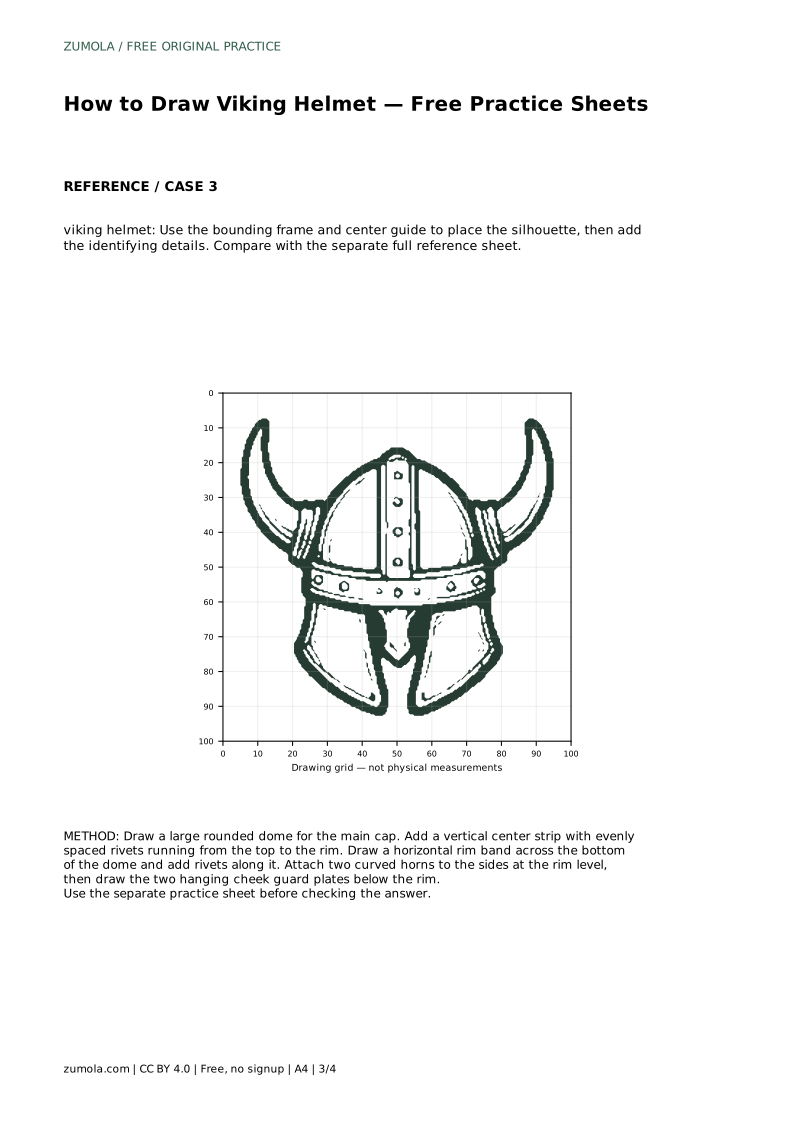
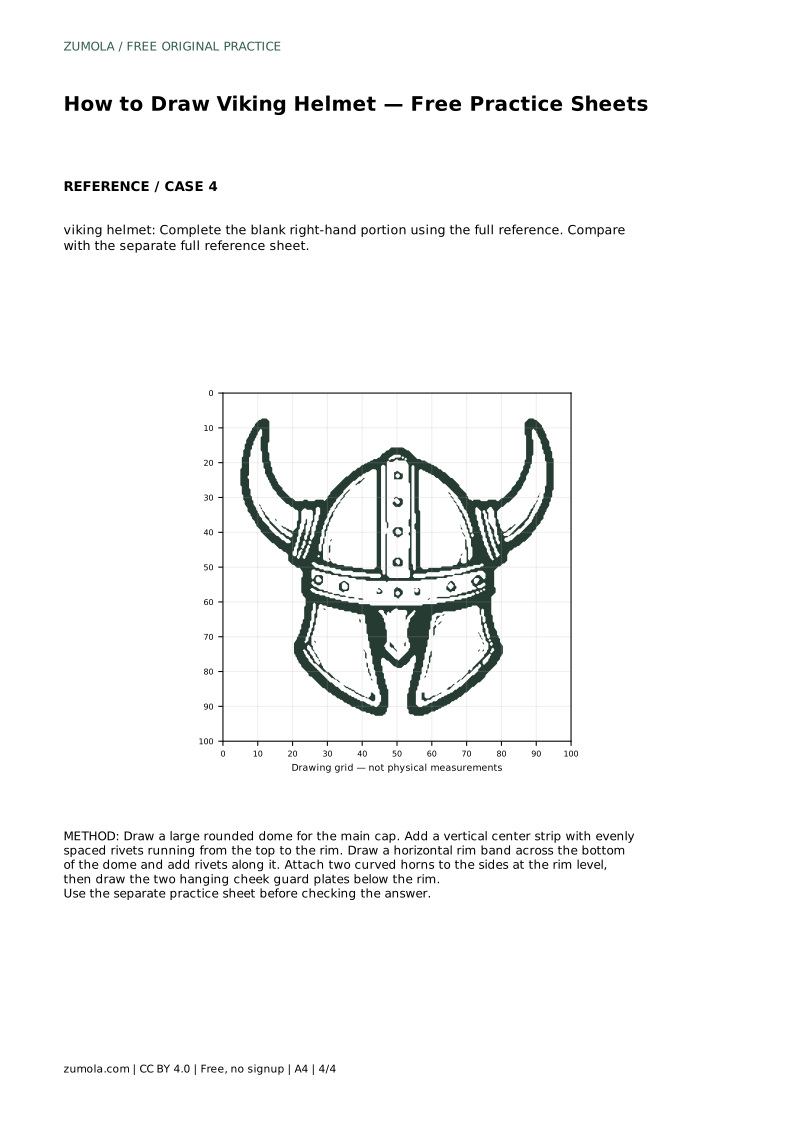
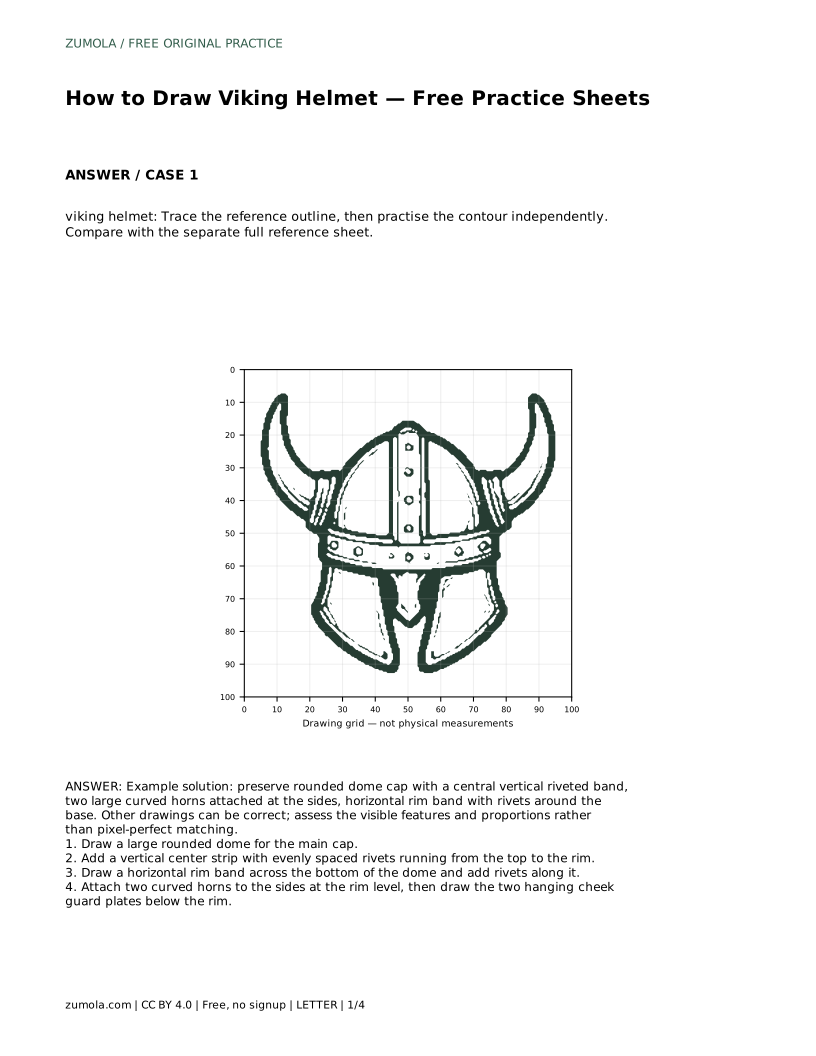
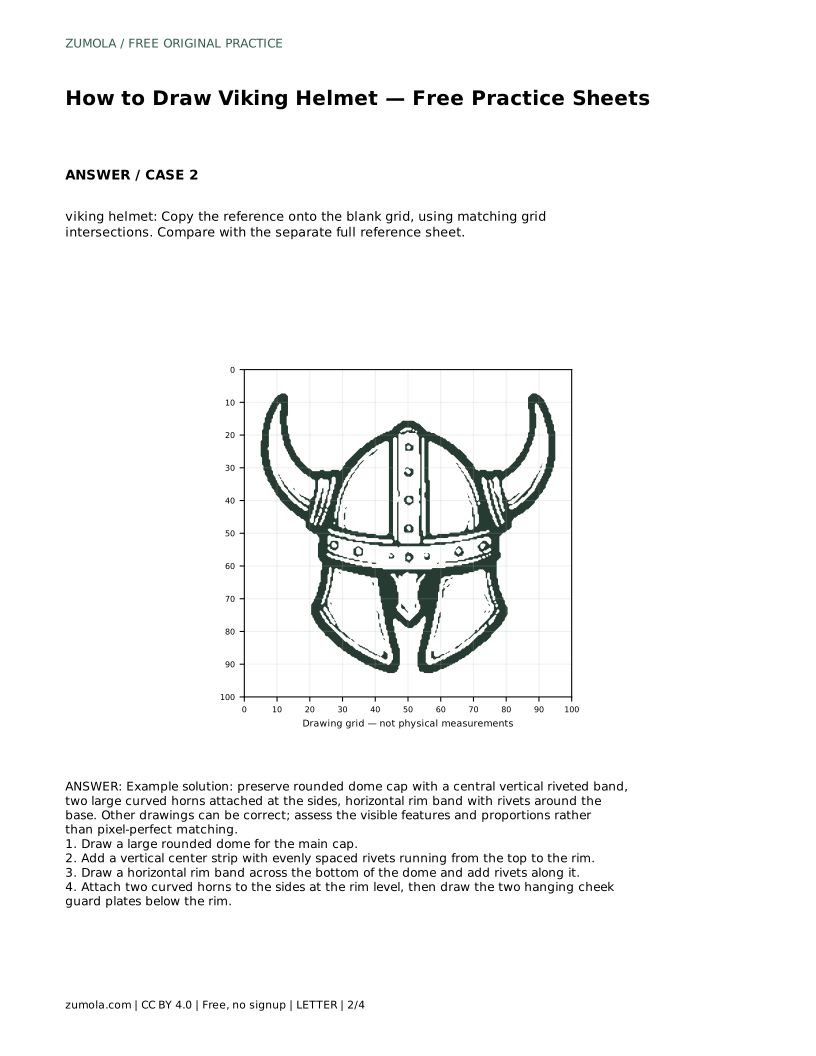
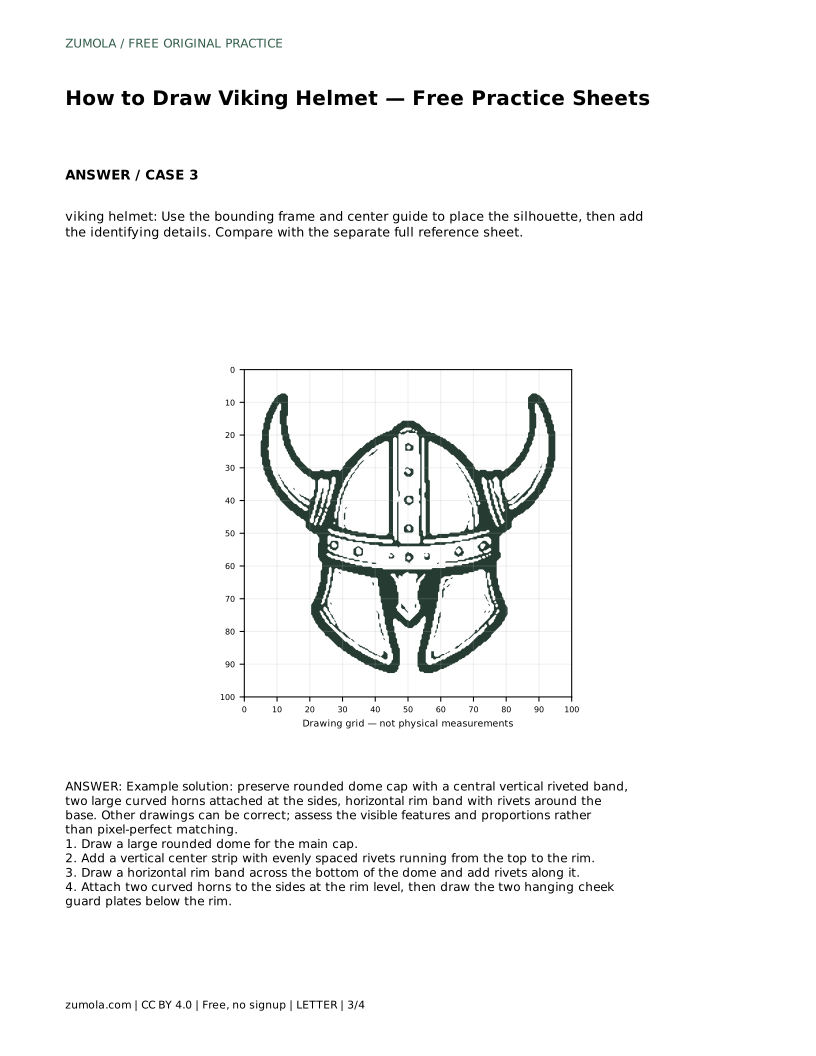
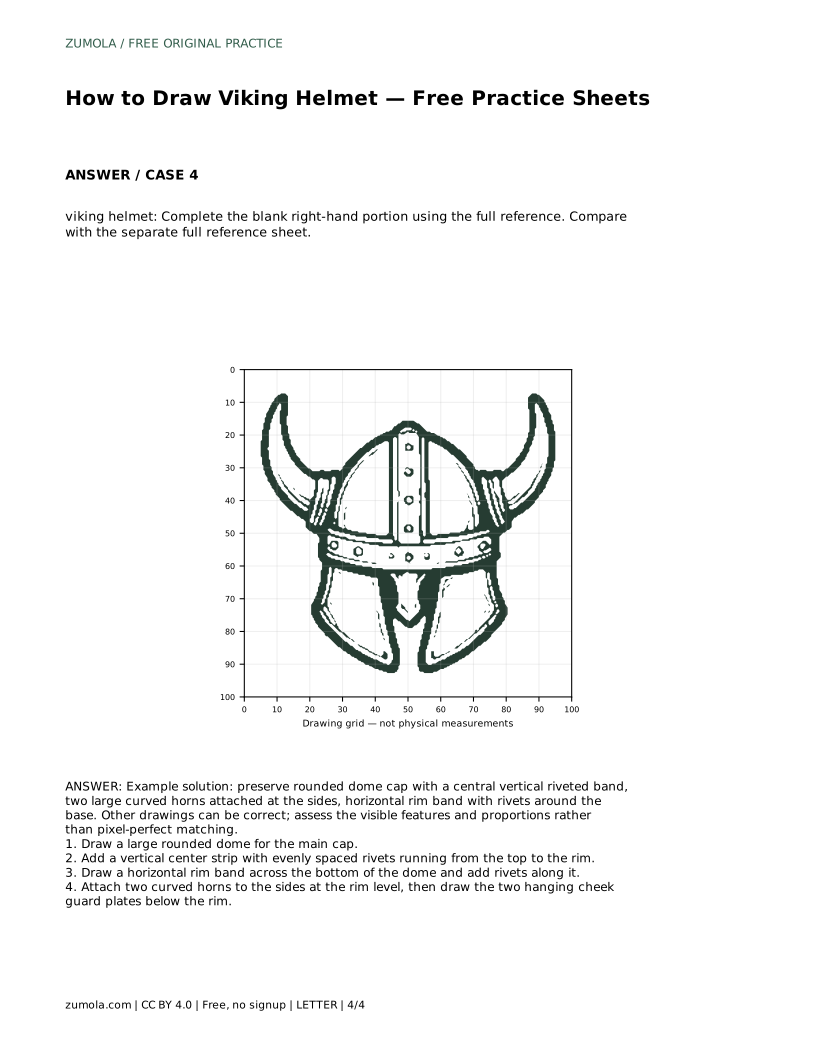
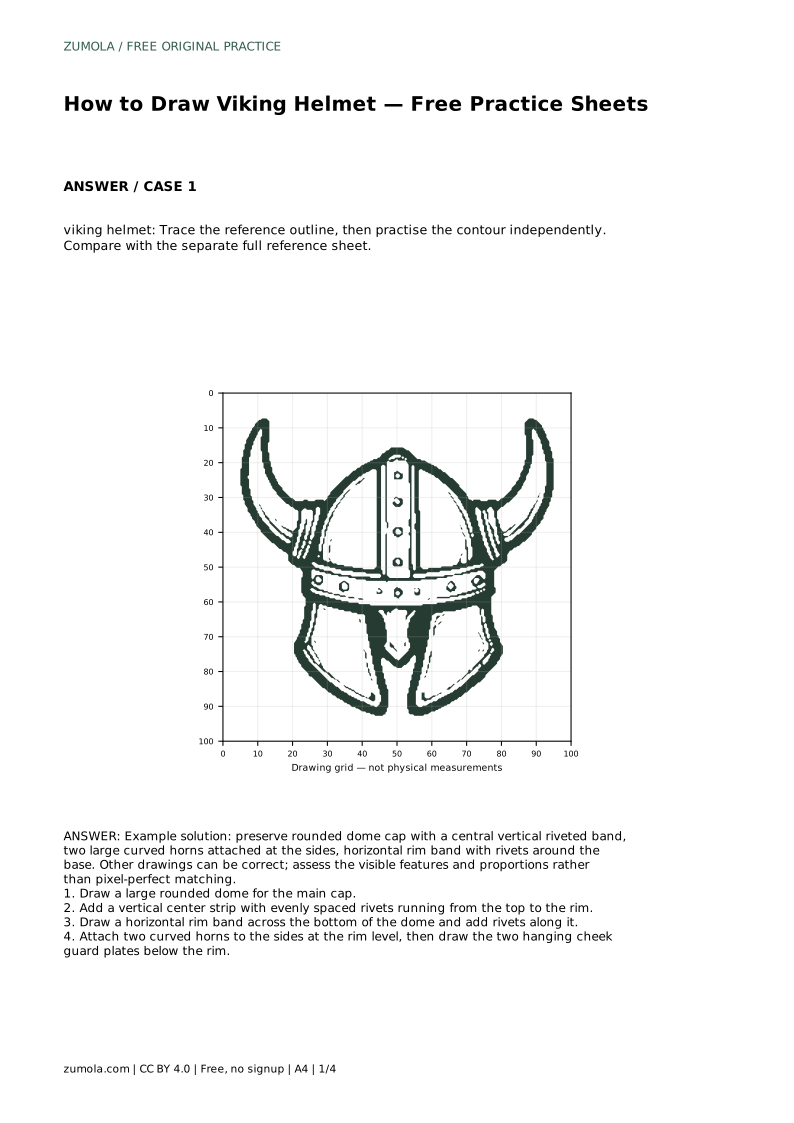
A Viking helmet drawing is built from a few clear shapes: a rounded dome, a vertical band with rivets, a horizontal rim, two curved horns and hanging cheek guards. This page explains how those parts fit together and how to practise them on the free sheets. Because drawings can differ and still be correct, you will check visible features and proportions rather than aim for a pixel-perfect copy.
Start with the dome, because it sets the overall size and height of the helmet. Draw a large rounded cap that is wider at the bottom than at the top, like the upper half of an oval. Keep the curve smooth and symmetrical; a lopsided dome makes every later detail look off.
Next, place the two bands. The vertical center strip runs from the top of the dome down to the rim, and the horizontal rim band crosses the bottom of the dome. Draw the rim first if it helps you judge where the dome ends, then add the vertical strip so it meets the rim cleanly. Space small circles along both bands for rivets, keeping the spacing even.
Finally, attach the horns and cheek guards. The horns curve outward and upward from the sides at rim level, and the two cheek guard plates hang below the rim. Check that both horns start at the same height and curve in matching directions.
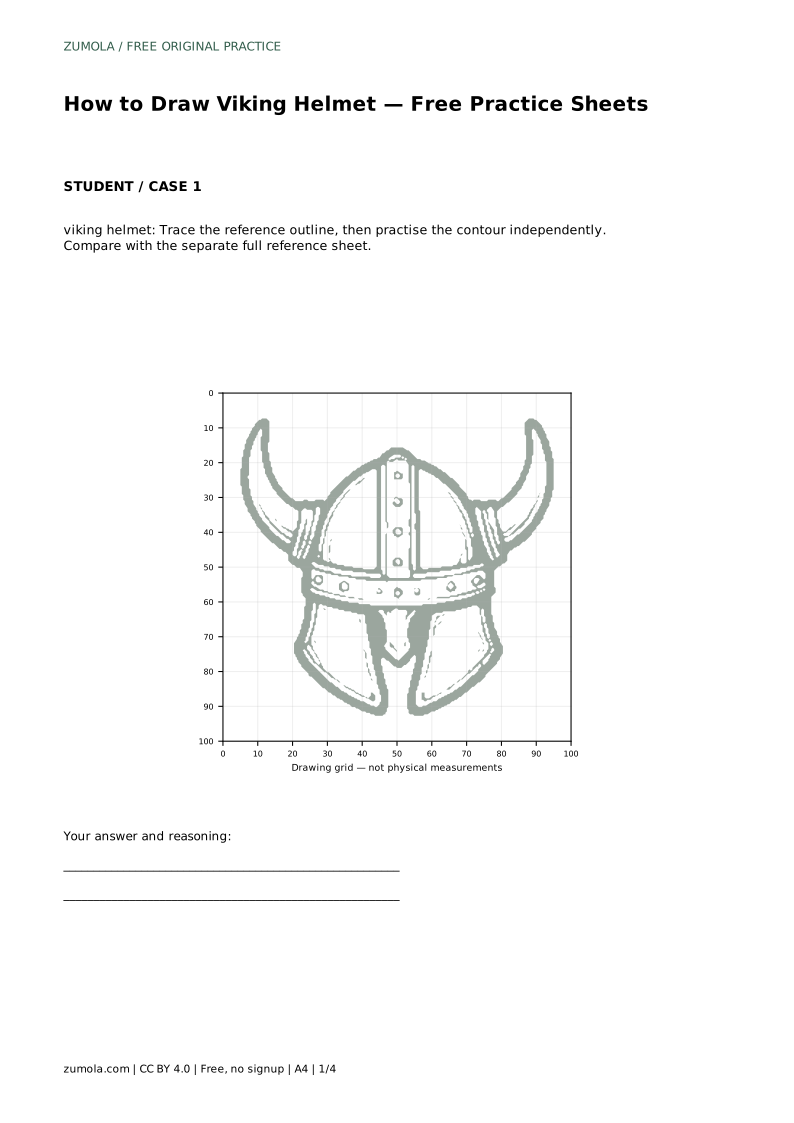
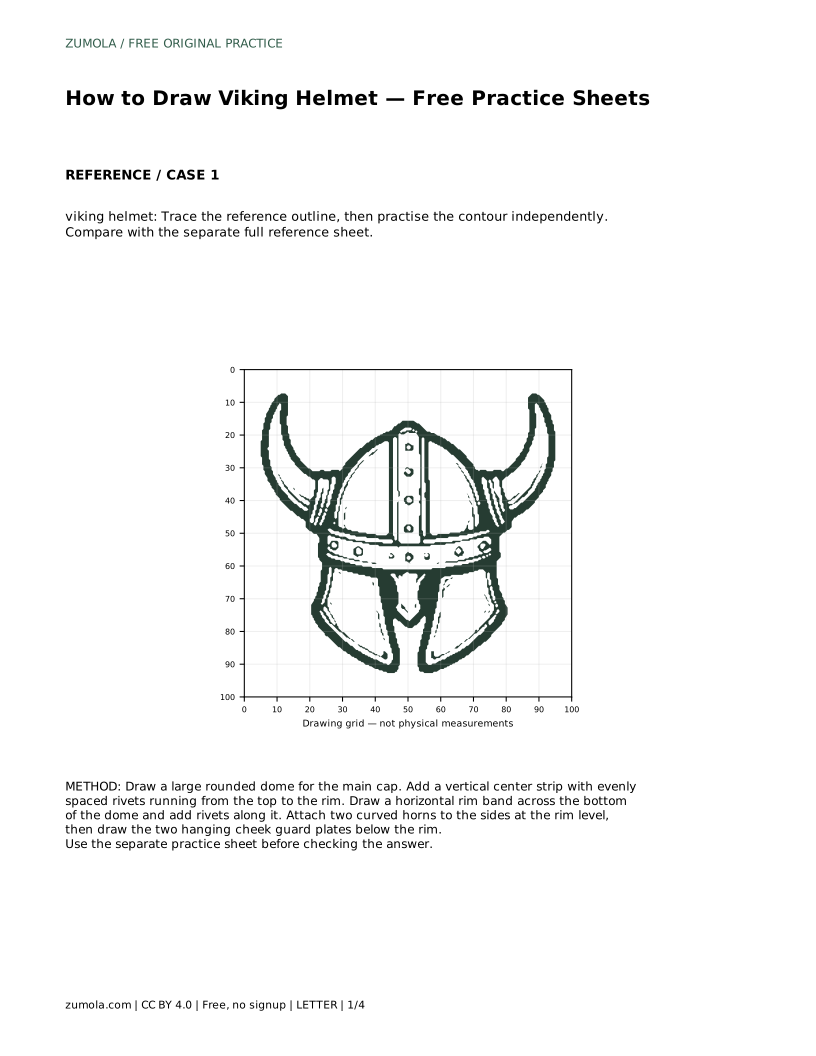
The trace sheet asks you to follow the reference outline first, then repeat the contour on your own. This builds muscle memory for the dome curve and horn shape before you add details.
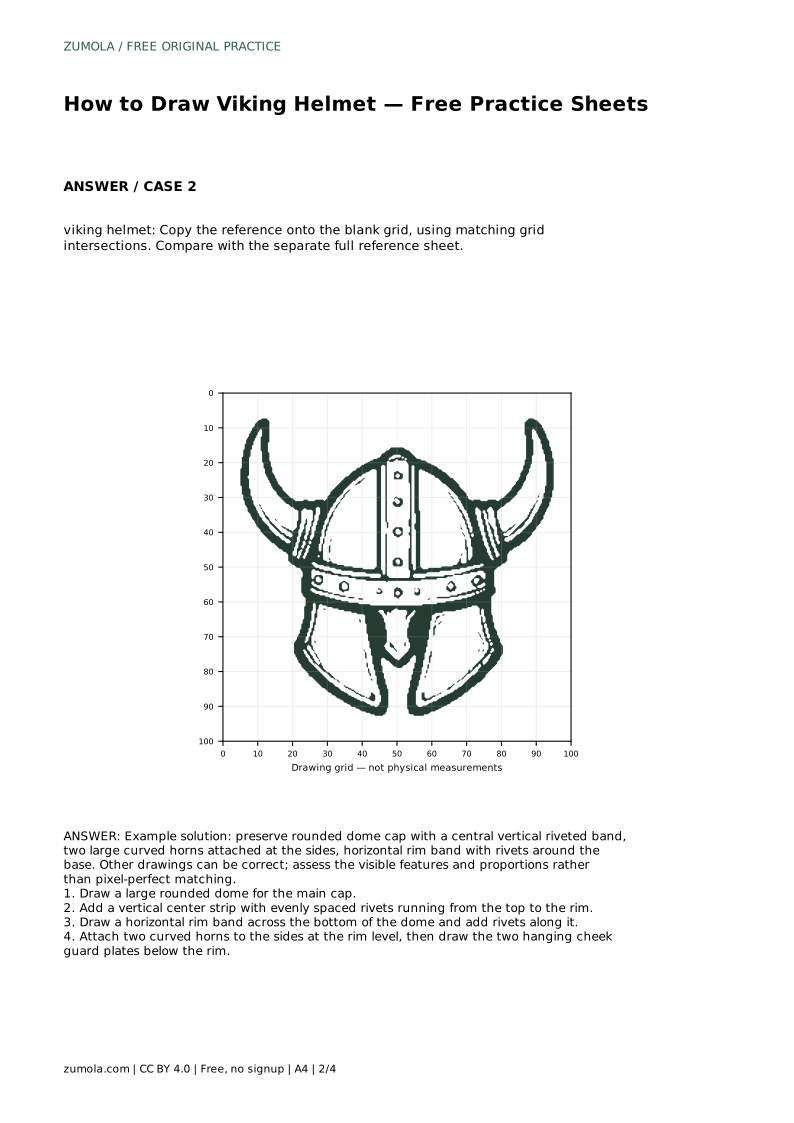
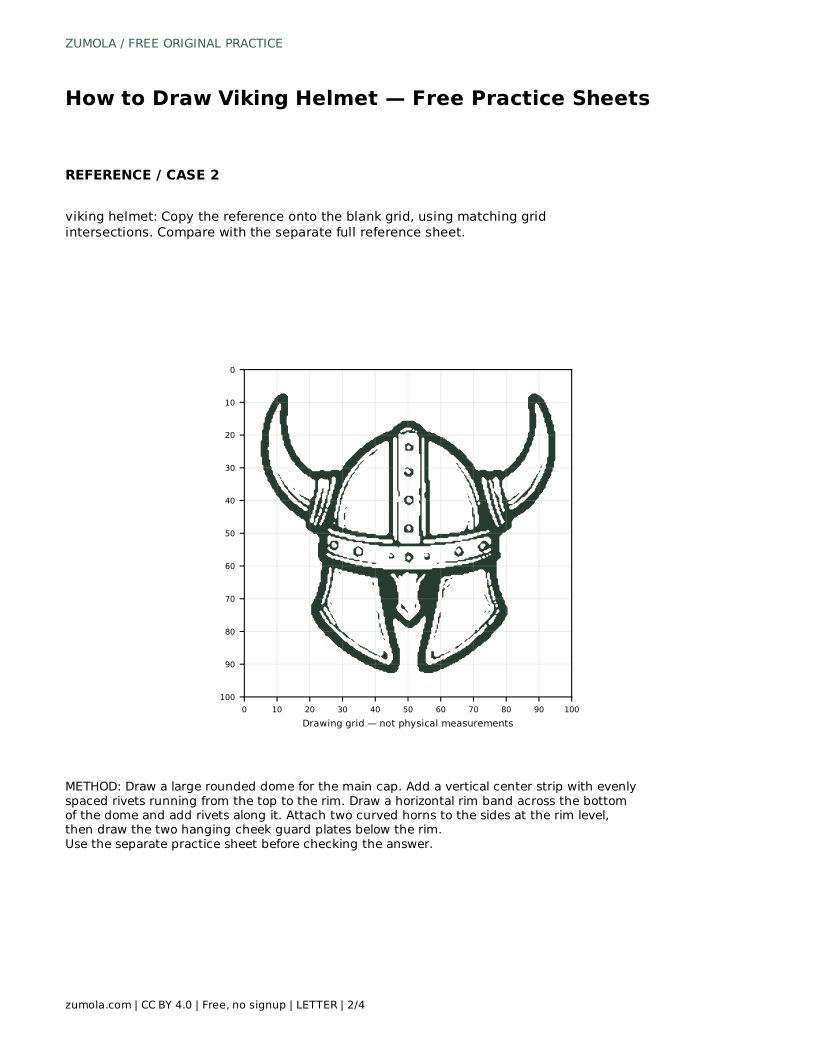
The grid sheet asks you to copy the reference onto a blank grid using matching grid intersections. Treat each intersection as a landmark: note where the dome top, horn tips and rim ends fall, then connect those points with smooth lines.
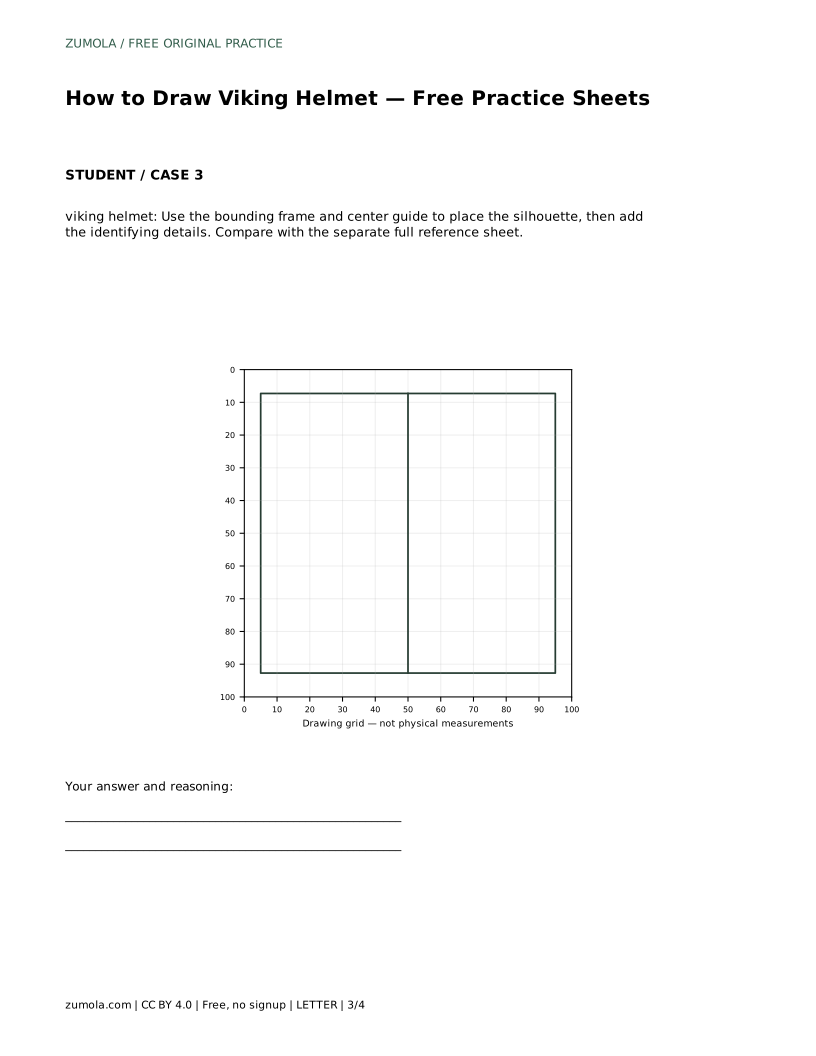
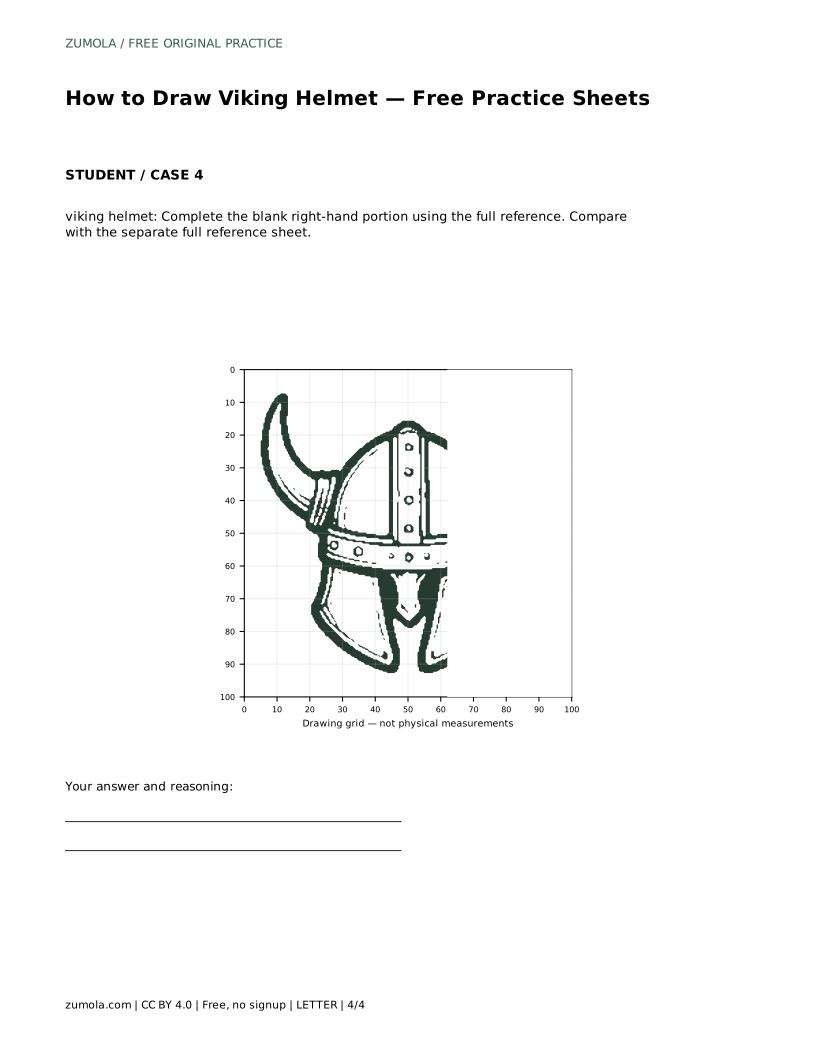
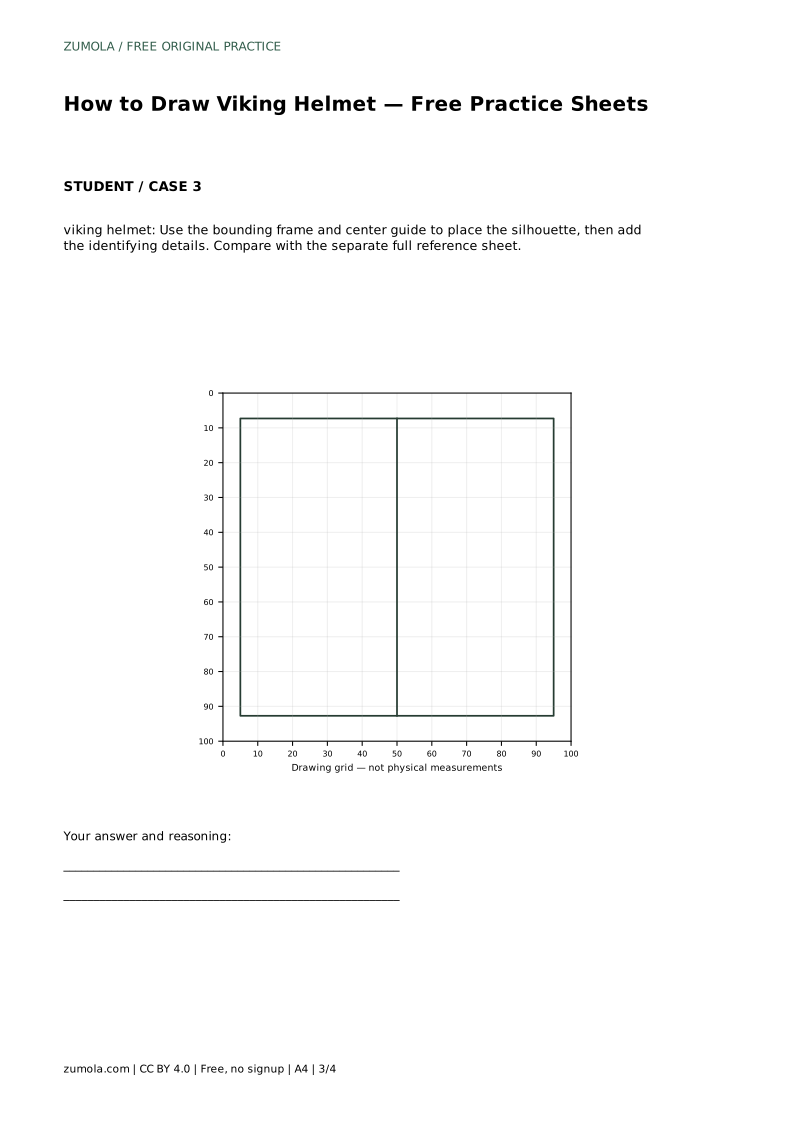
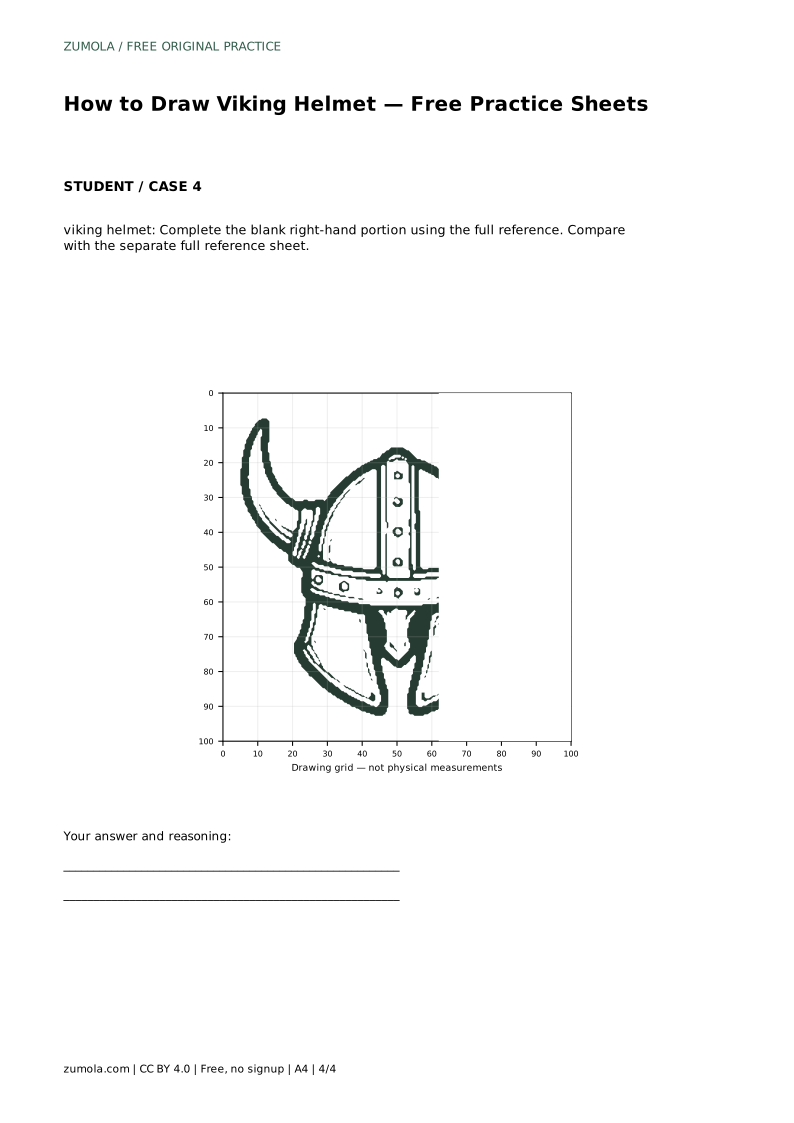
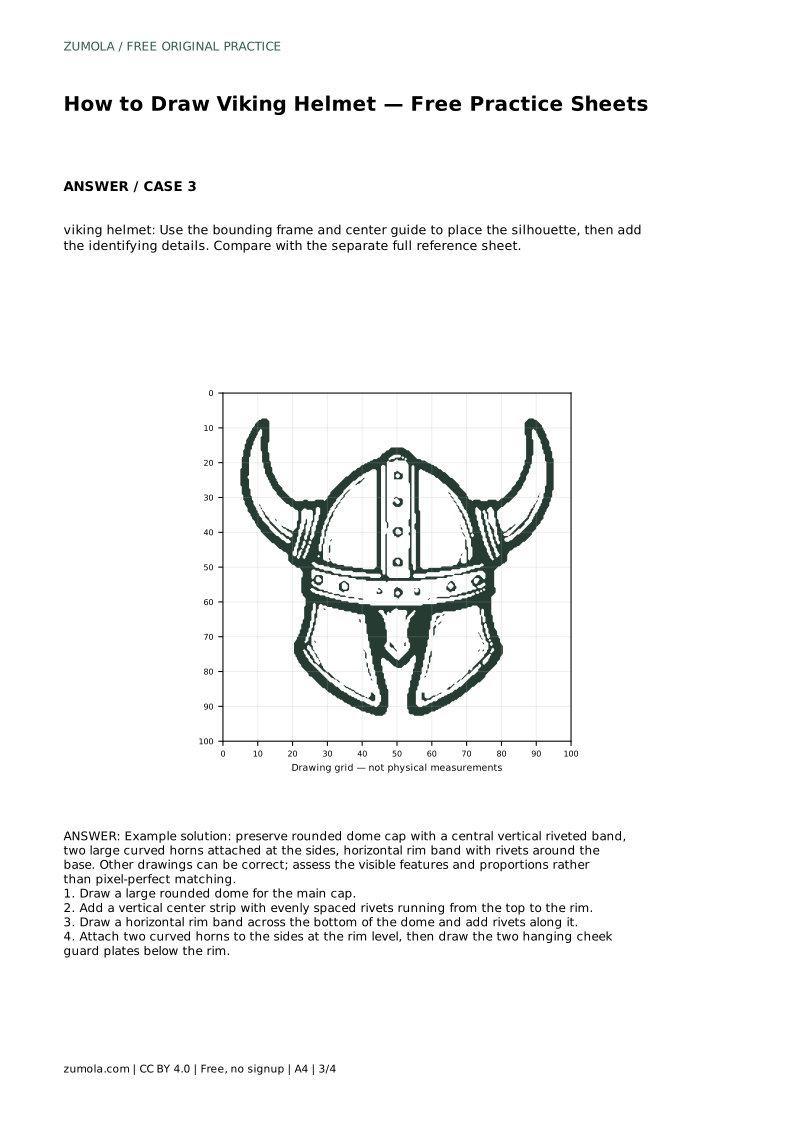
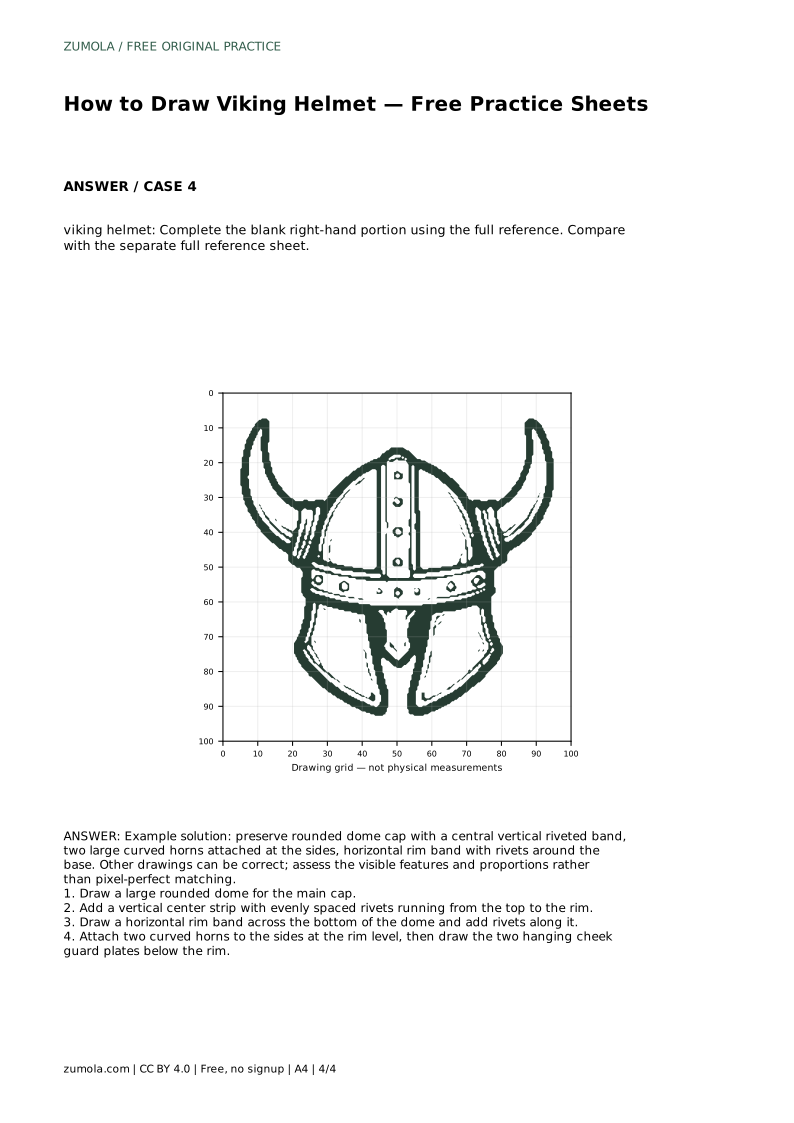
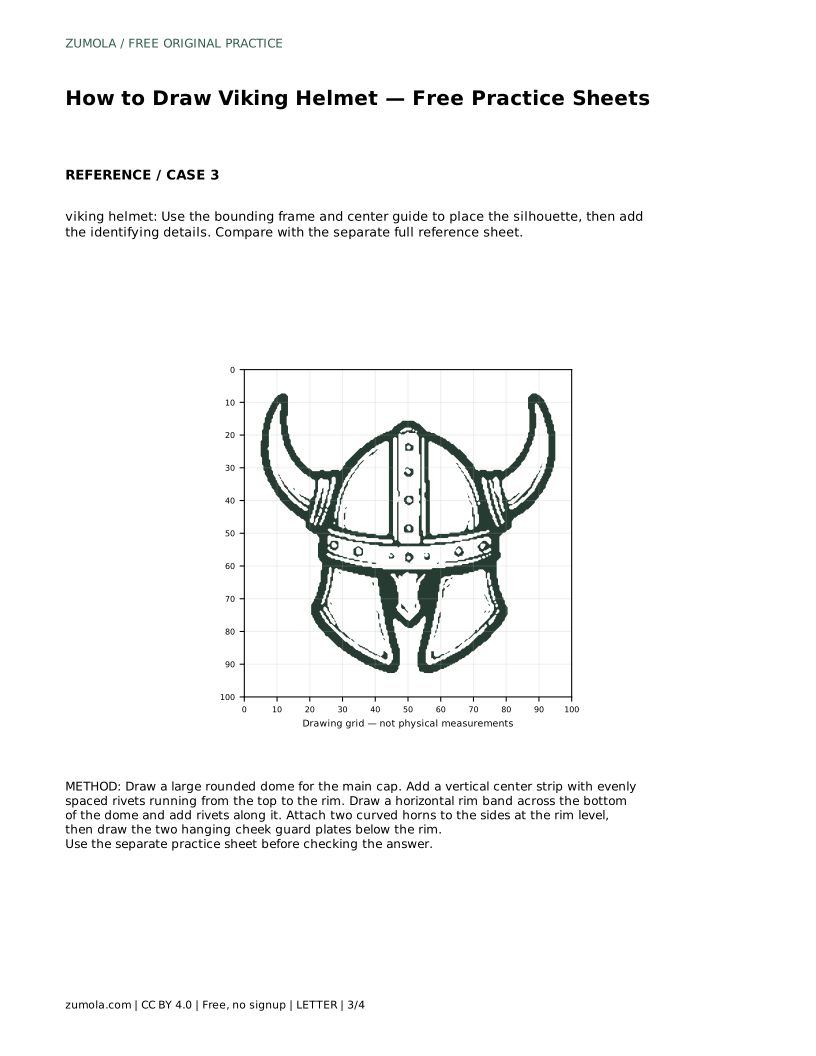
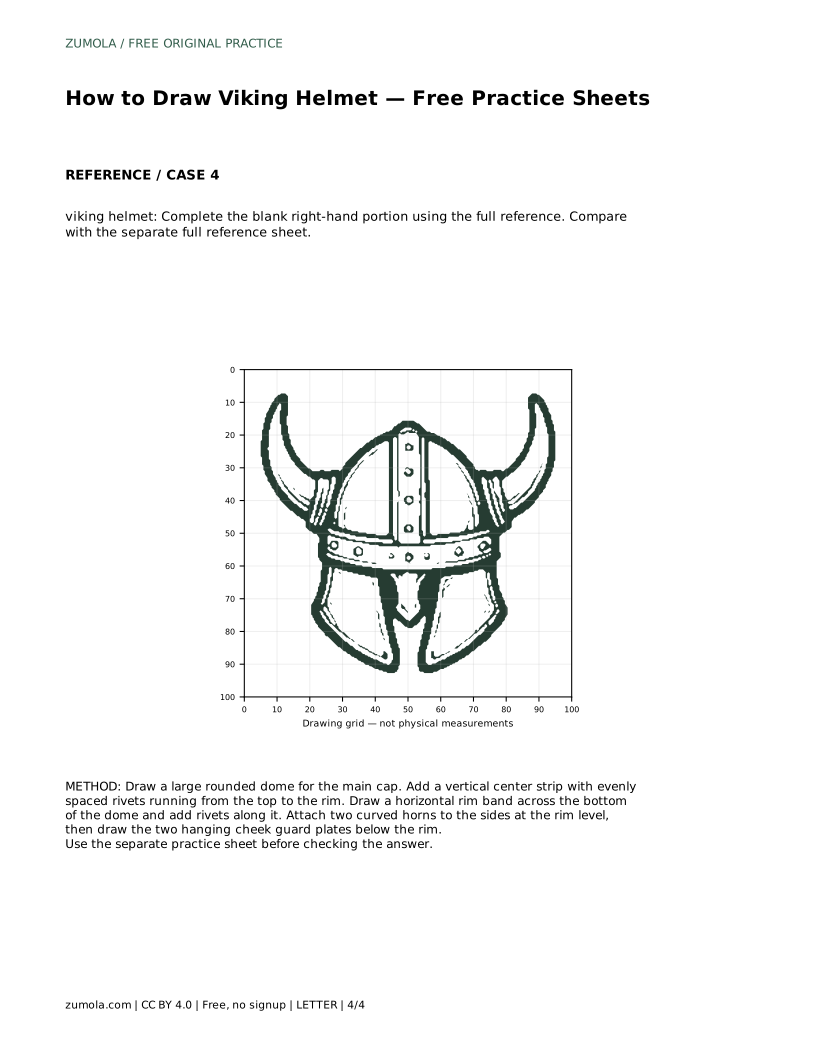
The bounding-frame sheet gives you a frame and center guide. Use them to place the silhouette so the helmet sits centered and at a sensible size, then add the identifying details. The partial sheet gives you one half of the drawing; complete the blank side by matching the finished side across the center line.
After any sheet, compare your drawing with the separate full reference sheet. Look for missing features and uneven proportions rather than small differences in line style.
A common problem is a dome that is too tall or too narrow, which makes the horns look misplaced. Compare the dome width to its height: in most reference drawings the dome is broader than it is tall.
Check that the rim band sits at the widest part of the dome and that both horns attach at that same level. If one horn starts higher, the helmet looks tilted. Keep the cheek guards below the rim and roughly equal in size.
Rivets should be small and evenly spaced. If they crowd together or drift off the band, redraw the band line first and place the rivets along it.
This is a drawing exercise, not a reconstruction of historical armor. Horned helmets are a popular illustration convention, and the sheets focus on the visible features listed above. Different line weights, horn curves and rivet counts can all be correct. Use the rubric to judge whether the key parts are present and well proportioned.
viking helmet: Trace the reference outline, then practise the contour independently. Compare with the separate full reference sheet.
Example solution: preserve rounded dome cap with a central vertical riveted band, two large curved horns attached at the sides, horizontal rim band with rivets around the base. Other drawings can be correct; assess the visible features and proportions rather than pixel-perfect matching. Draw a large rounded dome for the main cap. Add a vertical center strip with evenly spaced rivets running from the top to the rim. Draw a horizontal rim band across the bottom of the dome and add rivets along it. Attach two curved horns to the sides at the rim level, then draw the two hanging cheek guard plates below the rim.
No. Other drawings can be correct. Assess the visible features and proportions rather than pixel-perfect matching.
Start with the trace sheet to learn the contour, then move to the grid, bounding-frame or partial sheet for independent practice.
Check the dome shape, the rim level and where the horns attach, since these control the overall proportions.
All drawing practice · Free coordinate paper
Original resources · CC BY 4.0 · Free for personal and classroom use with attribution.