Reference diagrams
LETTER · Download PDF
A4 · Download PDF
Free original resources
Learn to draw a realistic mallard duck by tracing its outline, then working independently. Build the body, bill, neck ring, folded wing, and webbed feet in order.
Four original cases, with reference diagrams, practice sheets and worked answers. Everything is free; no signup required.
LETTER · Download PDF
A4 · Download PDF
LETTER · Download PDF
A4 · Download PDF
LETTER · Download PDF
A4 · Download PDF
Use A4 or US Letter to match your printer. Use the stated values and conditions to solve each exercise; diagrams are not physical measuring rulers.
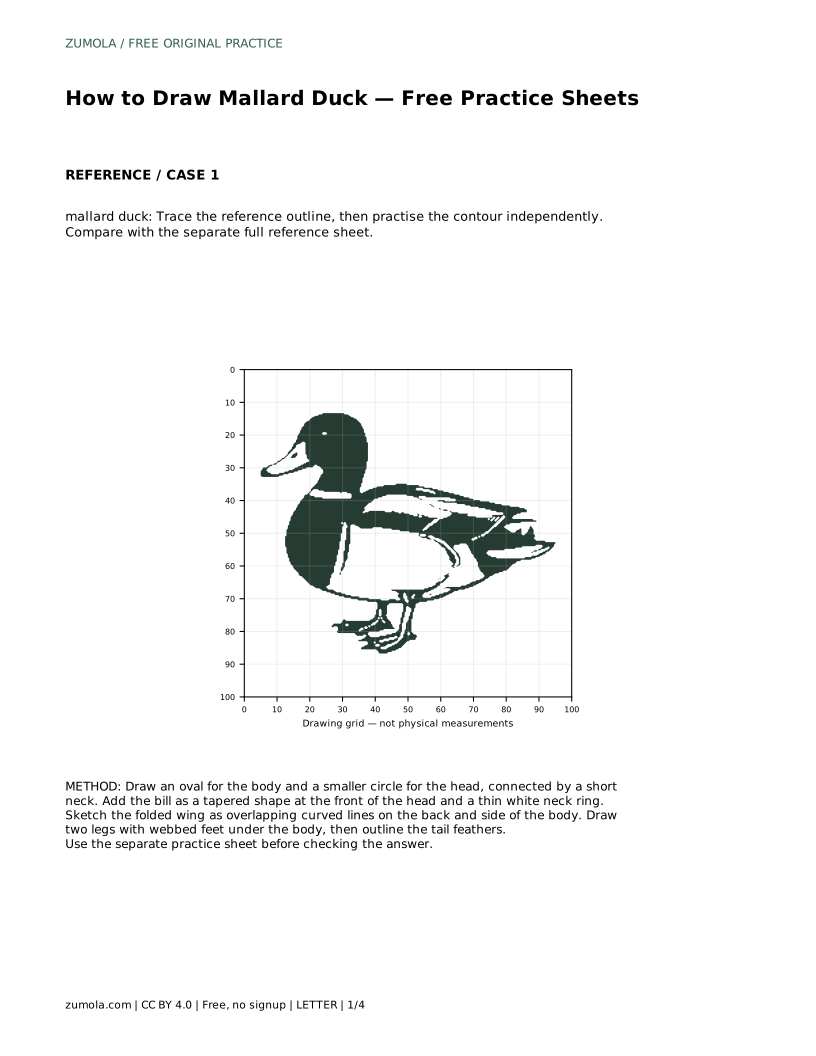
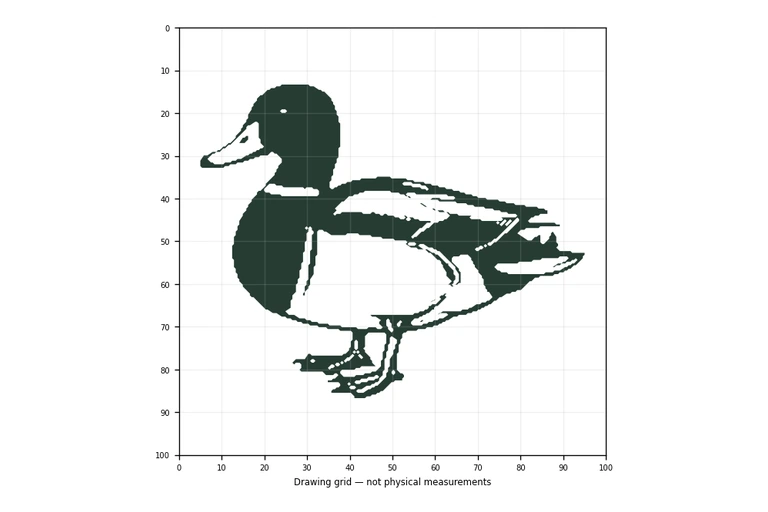
A mallard is recognizable by a few clear features: a rounded head, a short tapered bill, a thin white neck ring, and a folded wing layered along the back. This guide shows how to build those features in a sensible order, first by tracing a reference outline and then by drawing the same duck without tracing. The goal is a believable bird, not a pixel-perfect copy.
Begin with two simple shapes: an oval for the body and a smaller circle for the head. Place the head slightly above and forward of the body, then connect them with a short neck. Keep the body oval wider than it is tall, because a mallard floating or standing has a compact, horizontal mass. Check that the head is clearly smaller than the body before adding detail.
Once the two shapes sit well together, soften the joins into a single silhouette. The back should curve gently, and the chest should round forward. Leave the tail area open for now; it is easier to shape after the wing is placed.
The bill is short and slightly pointed, tapering from the front of the head. Draw it as a tapered shape rather than a long triangle, and keep it roughly level with the lower half of the head. A thin white band circles the neck just below the head; draw it as a narrow ring that follows the neck's curve, not a straight stripe.
These two details do most of the identifying work. If the bill looks too long or the ring sits too low, the duck stops reading as a mallard. Compare the bill length to the head width: they should be close, with the bill a little shorter.
A folded wing lies along the back and side of the body. Sketch it as overlapping curved lines, starting near the shoulder and sweeping back toward the tail. Layer two or three feather shapes so the wing looks folded rather than flat. The tail feathers extend behind the body as a short, slightly upturned wedge.
Keep the wing inside the body outline; it should sit on the surface, not stick out beyond the back. Overlapping lines suggest depth without needing every feather drawn.
Draw two legs under the body, spaced apart so the duck looks balanced. Each leg ends in a webbed foot: three forward toes joined by a curved web, with a small rear point. Keep the legs short, since a mallard's body sits close to its feet.
If the duck is floating, omit the legs or show only a hint of them below the waterline. Decide this before drawing, because adding legs to a floating bird looks inconsistent.
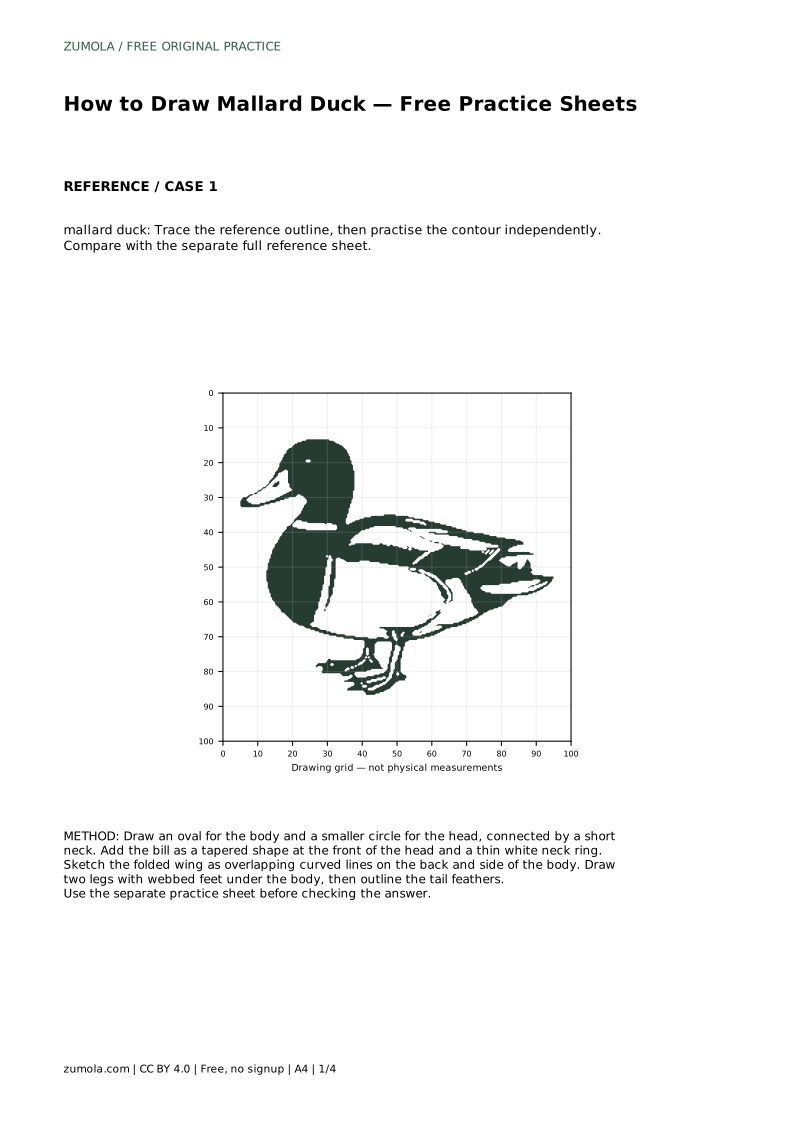
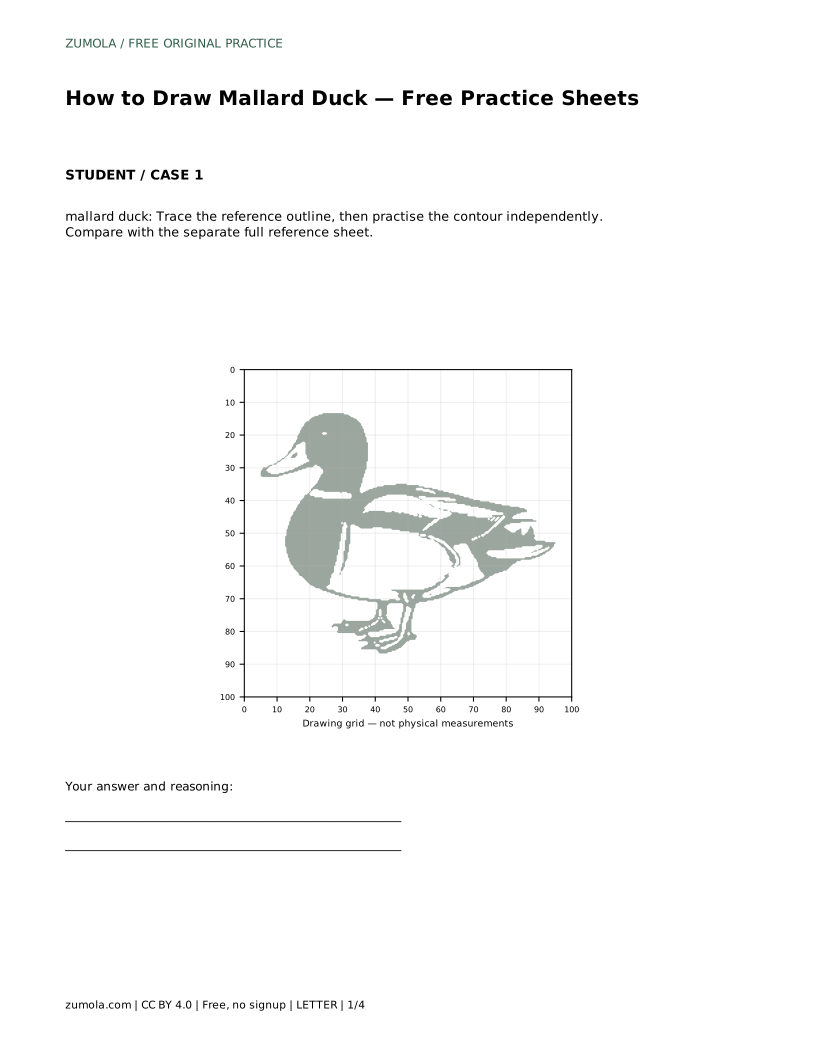
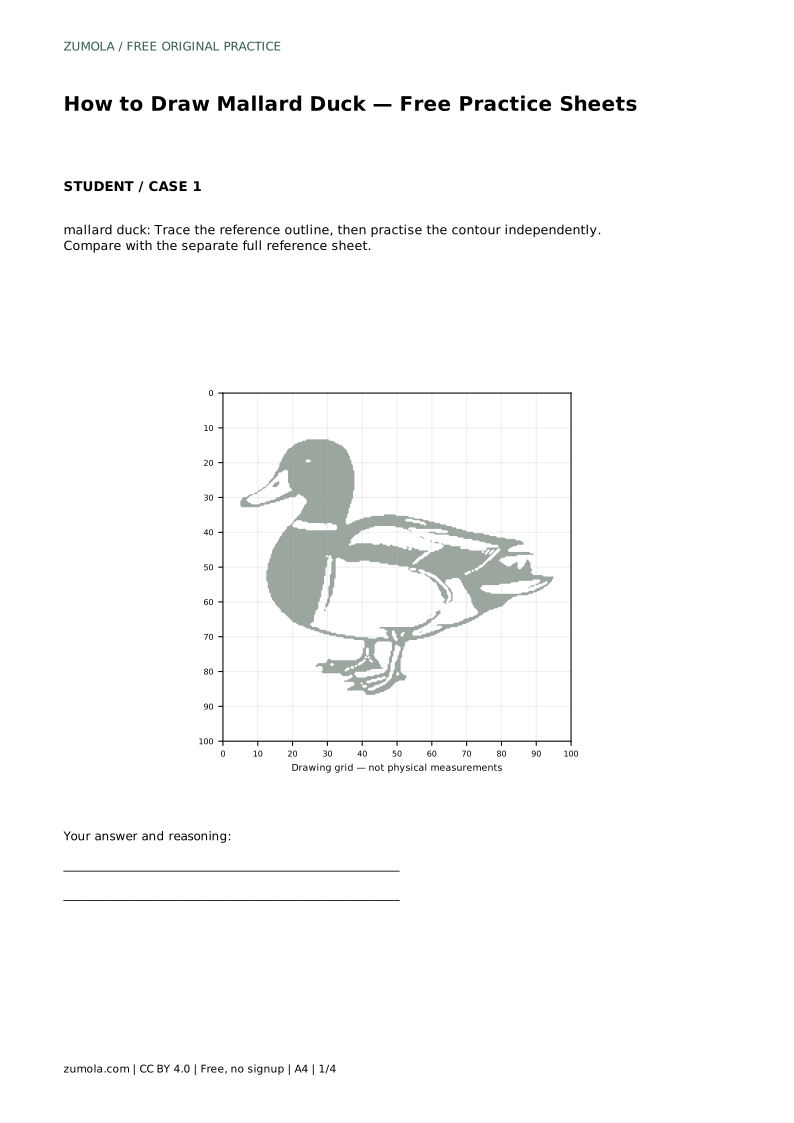
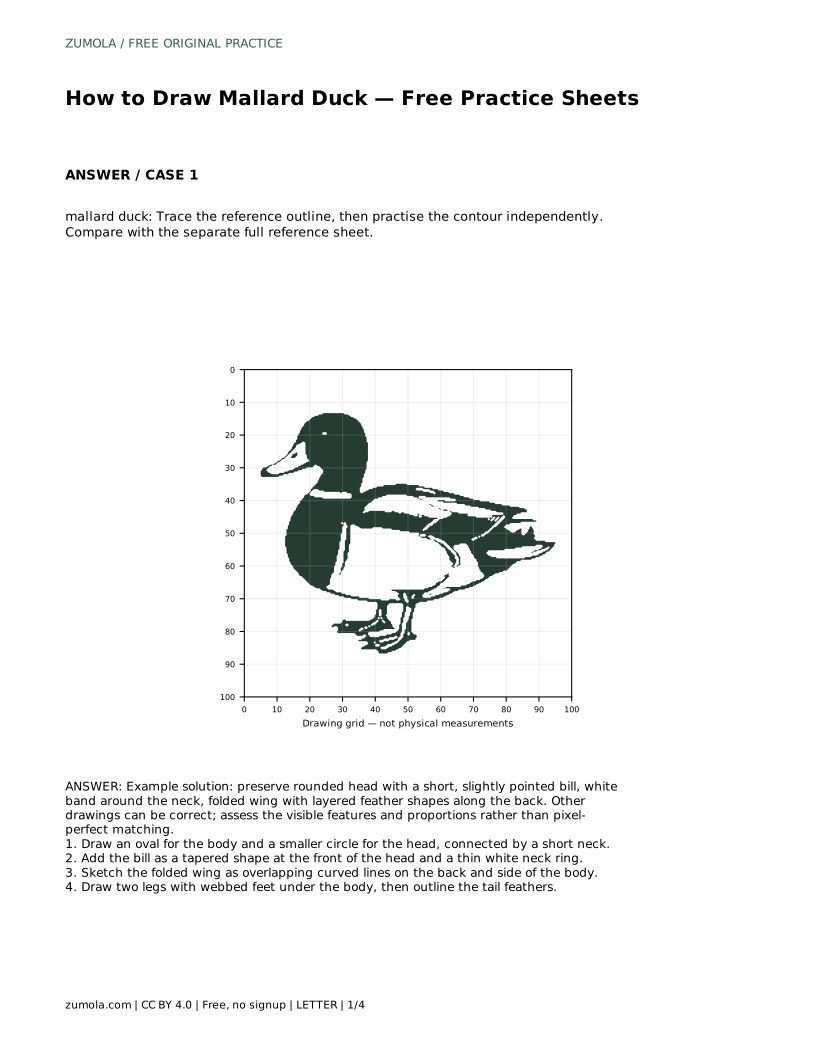
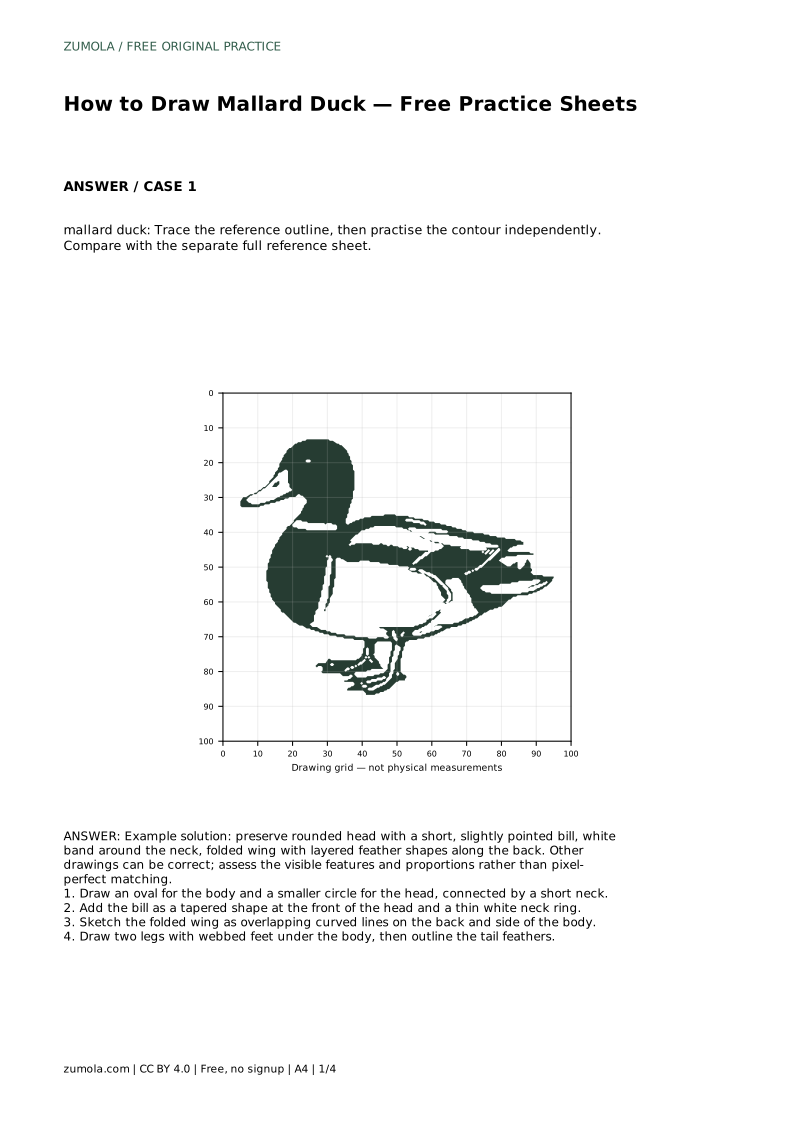
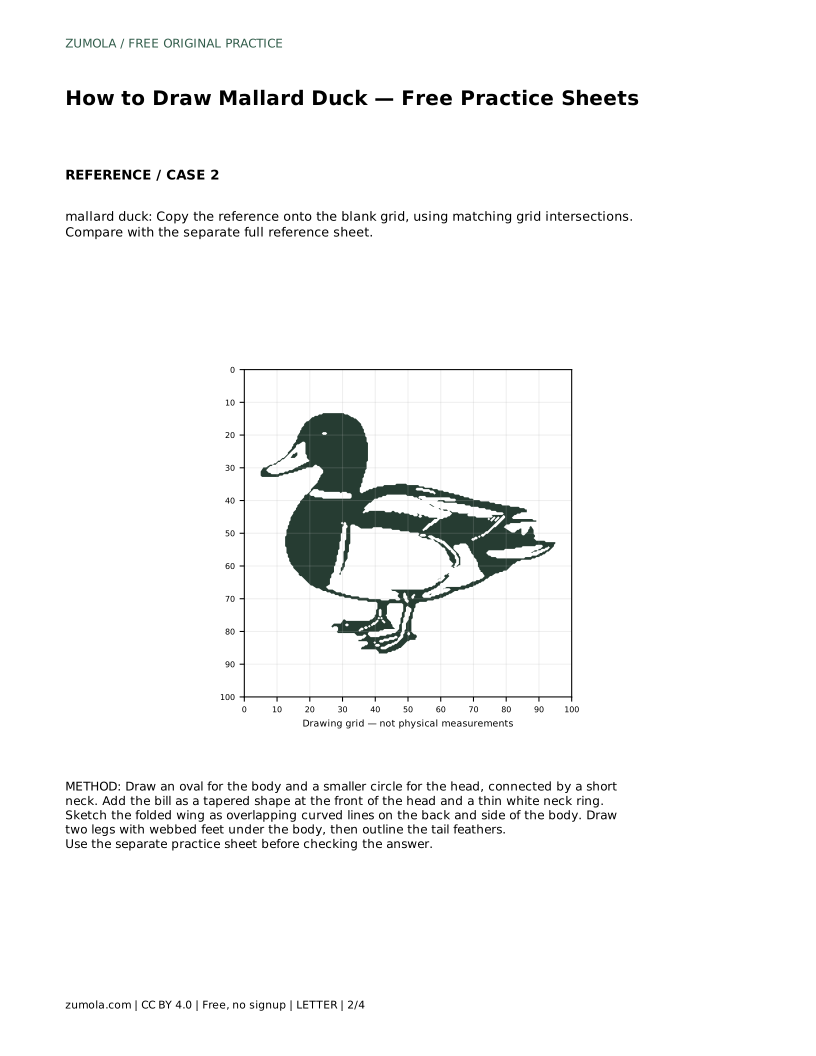
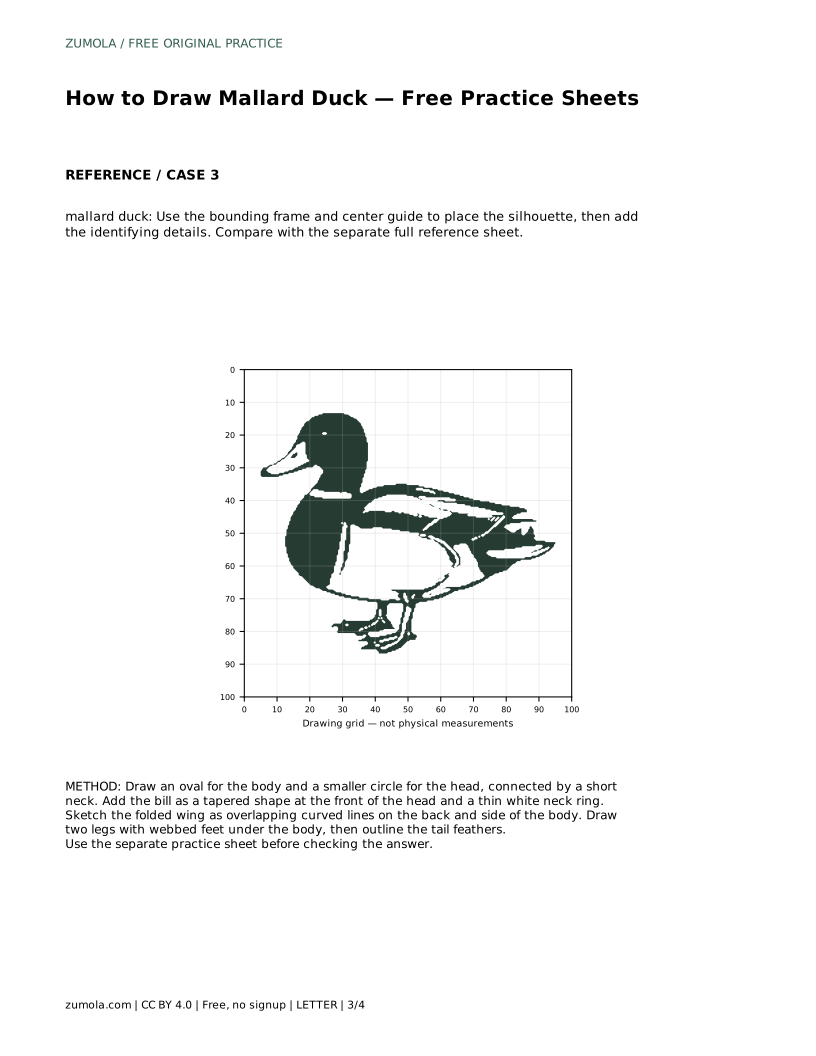
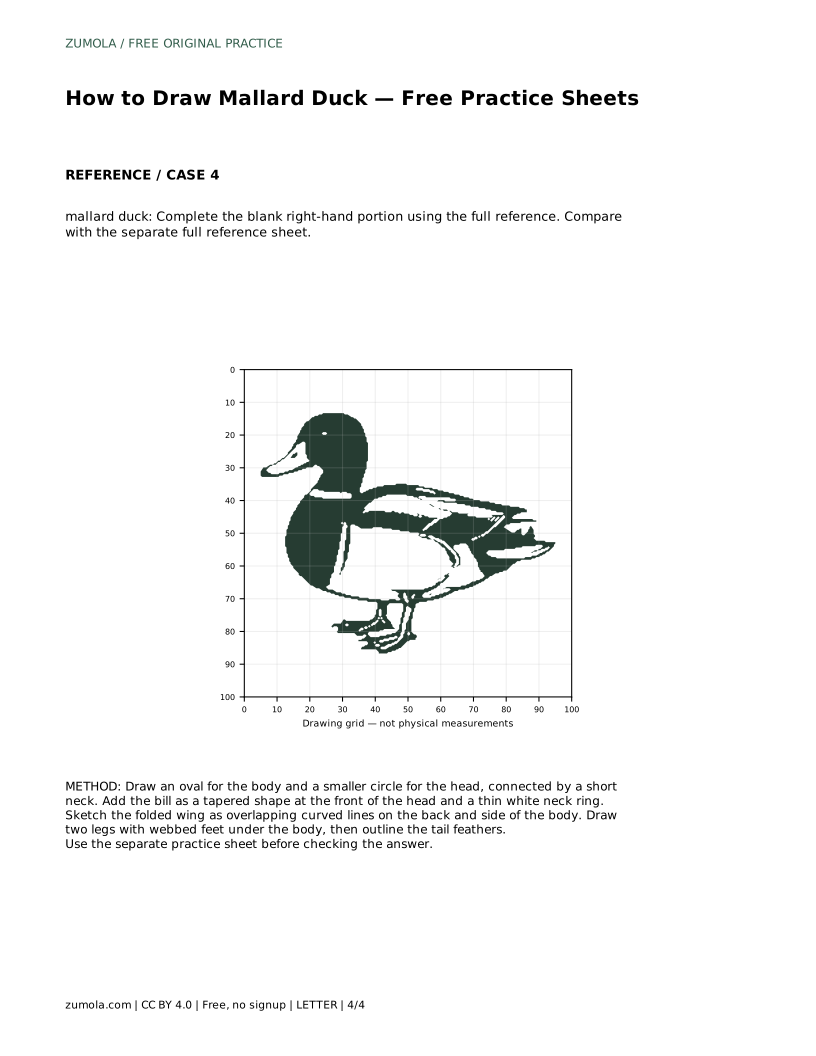
mallard duck: Trace the reference outline, then practise the contour independently. Compare with the separate full reference sheet.
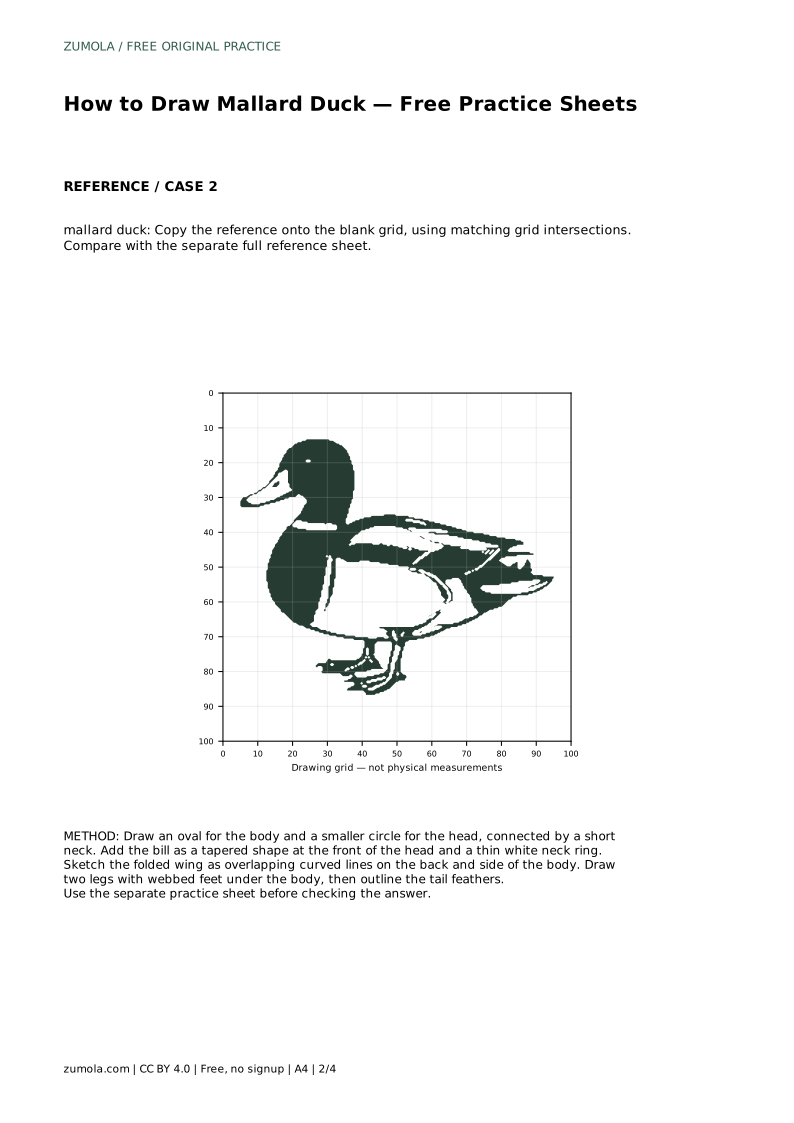
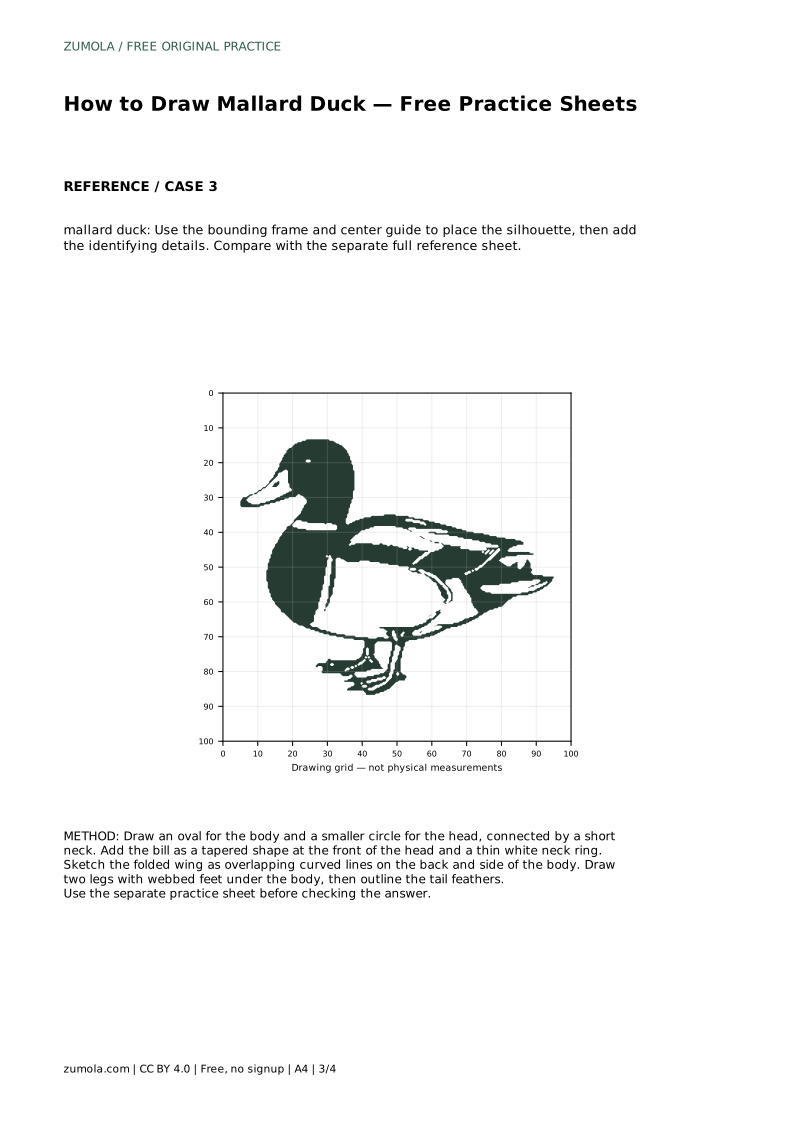
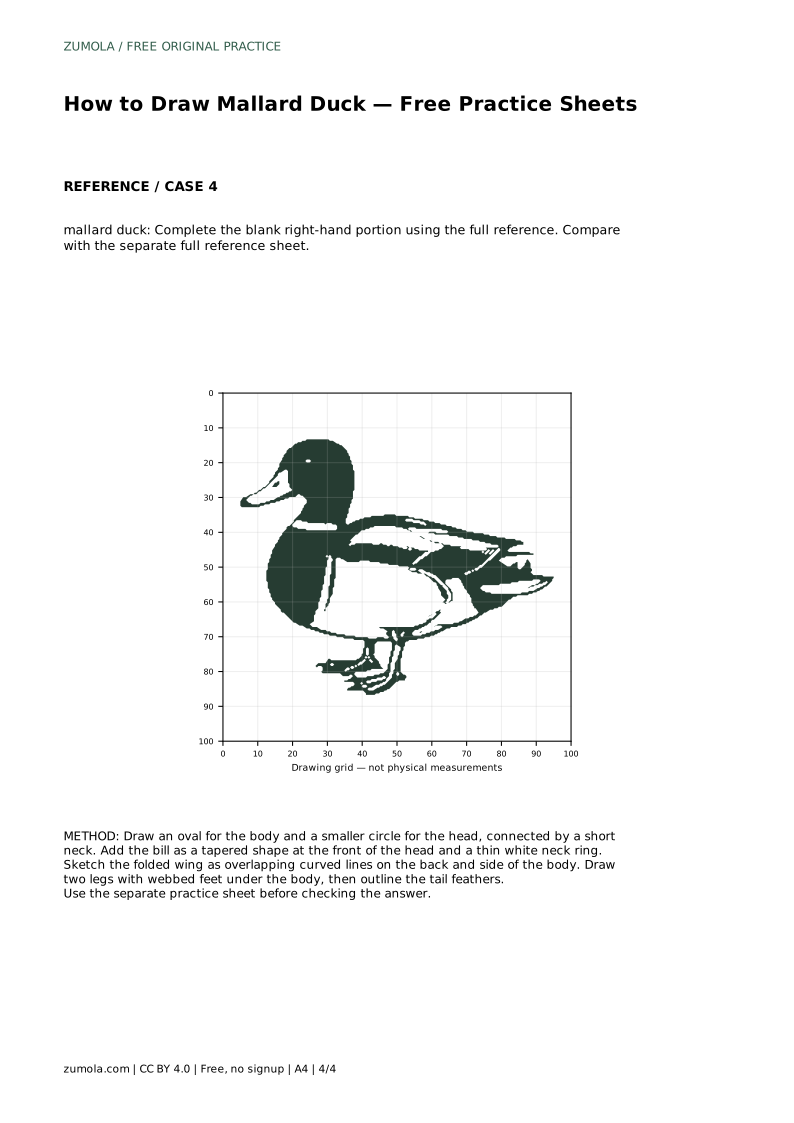
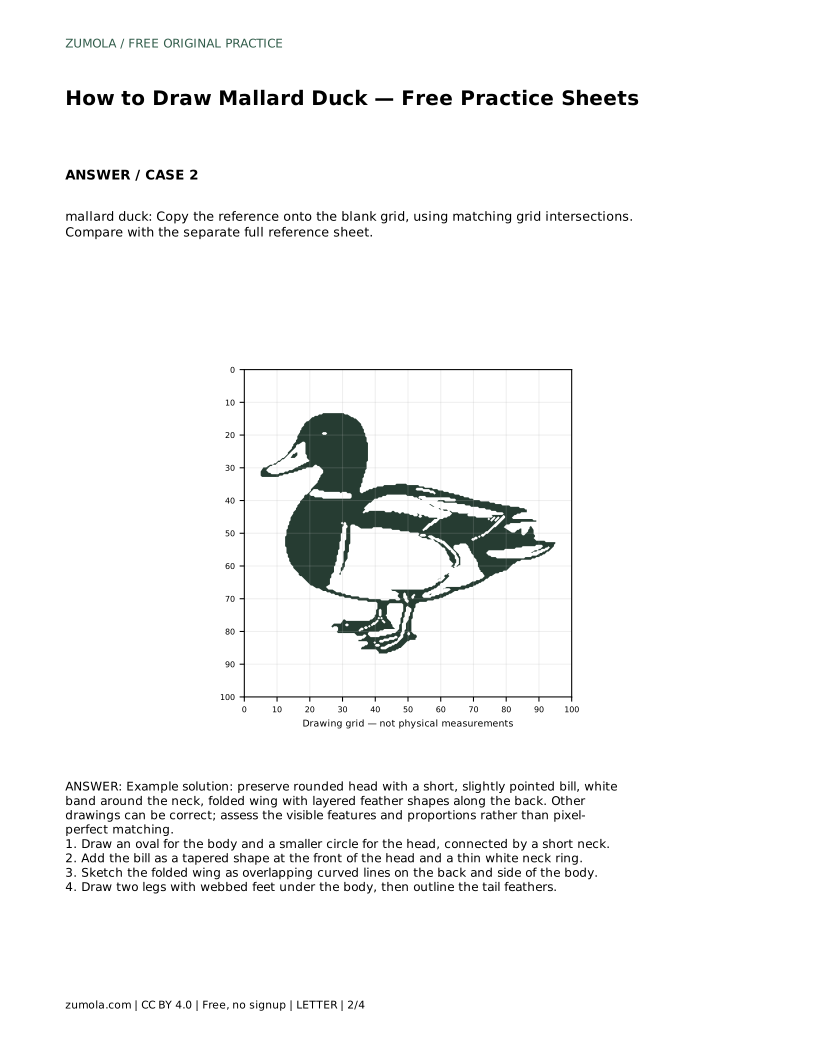
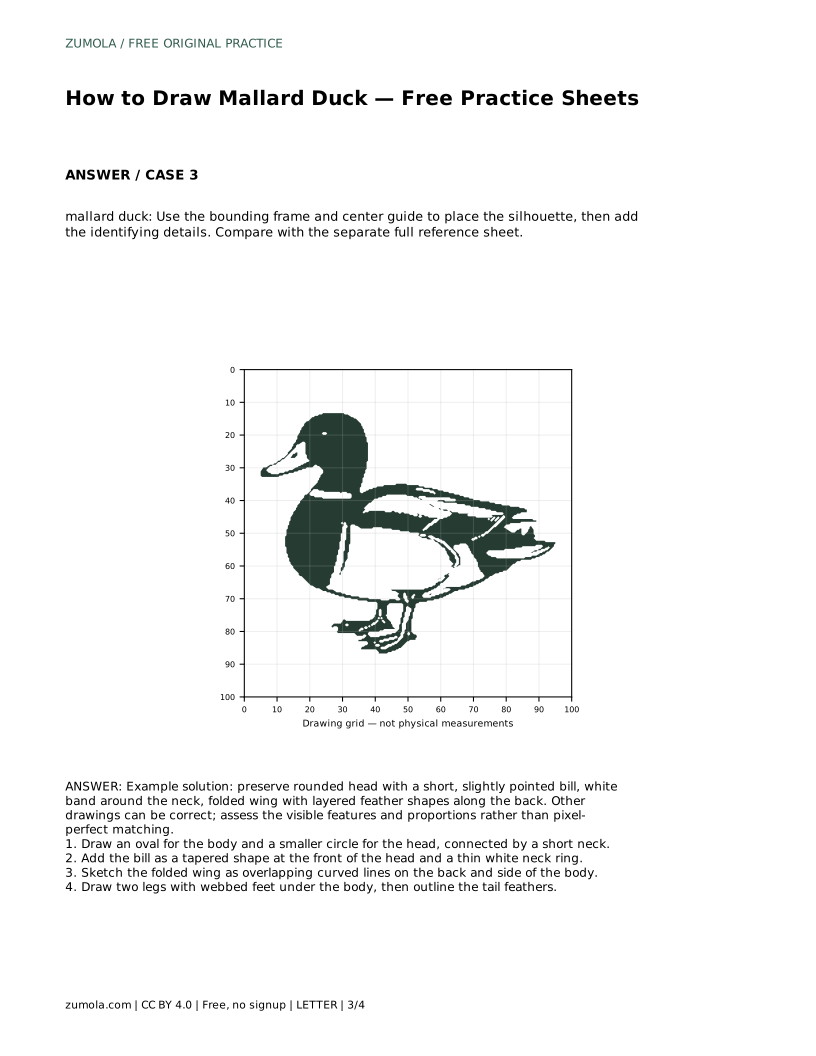
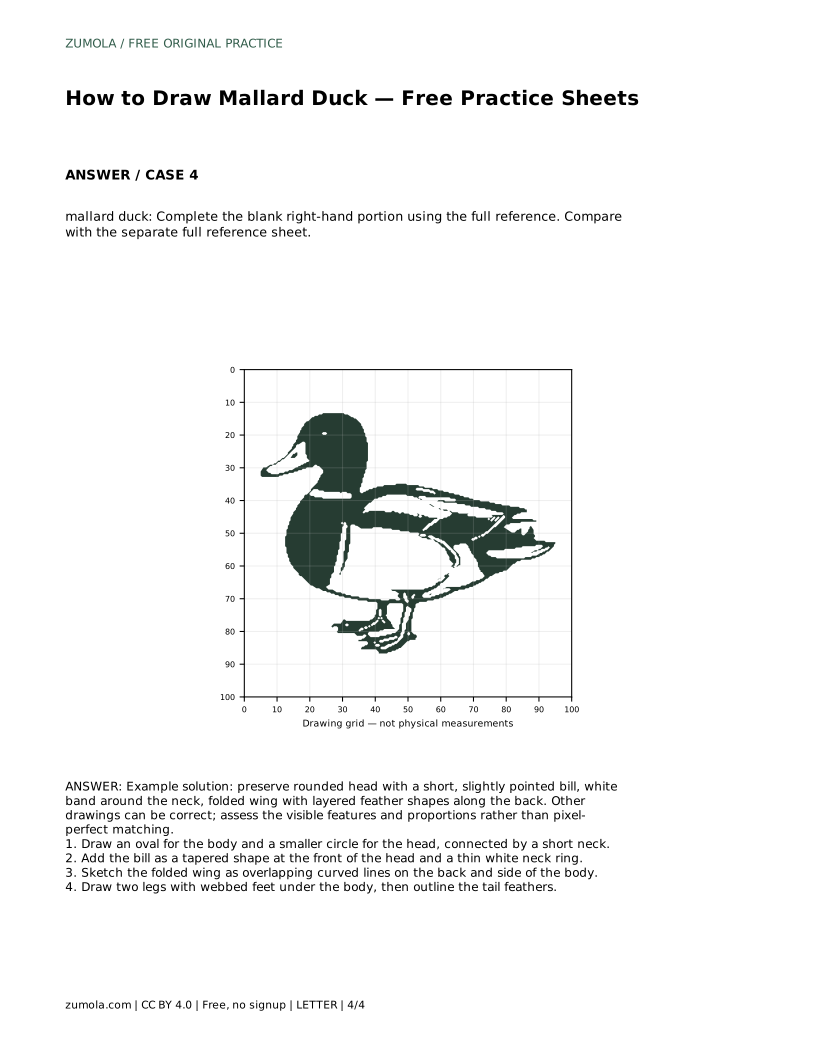
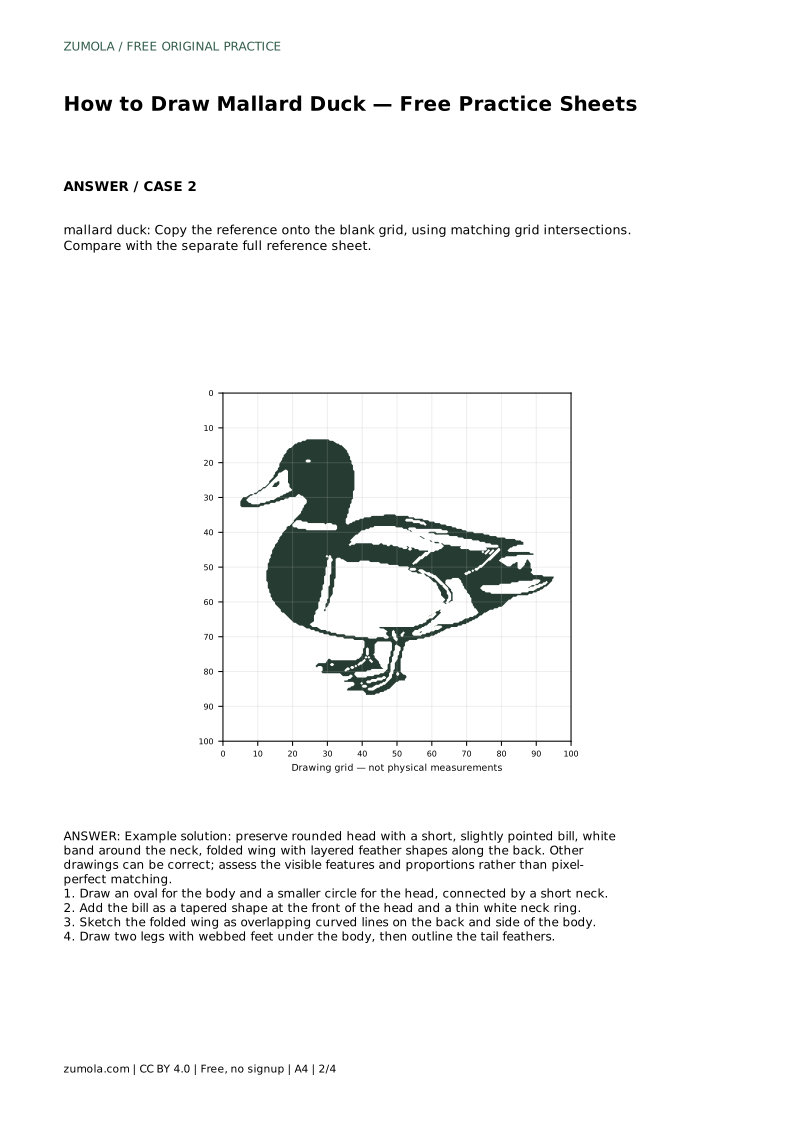
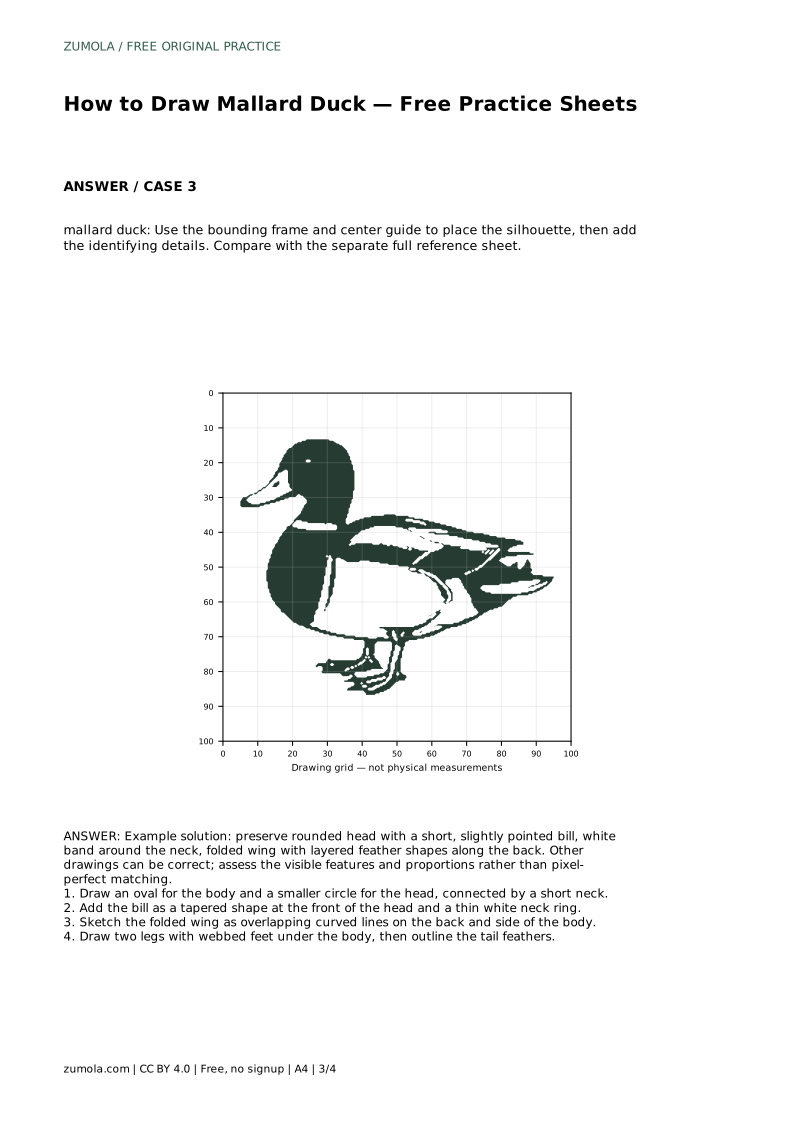
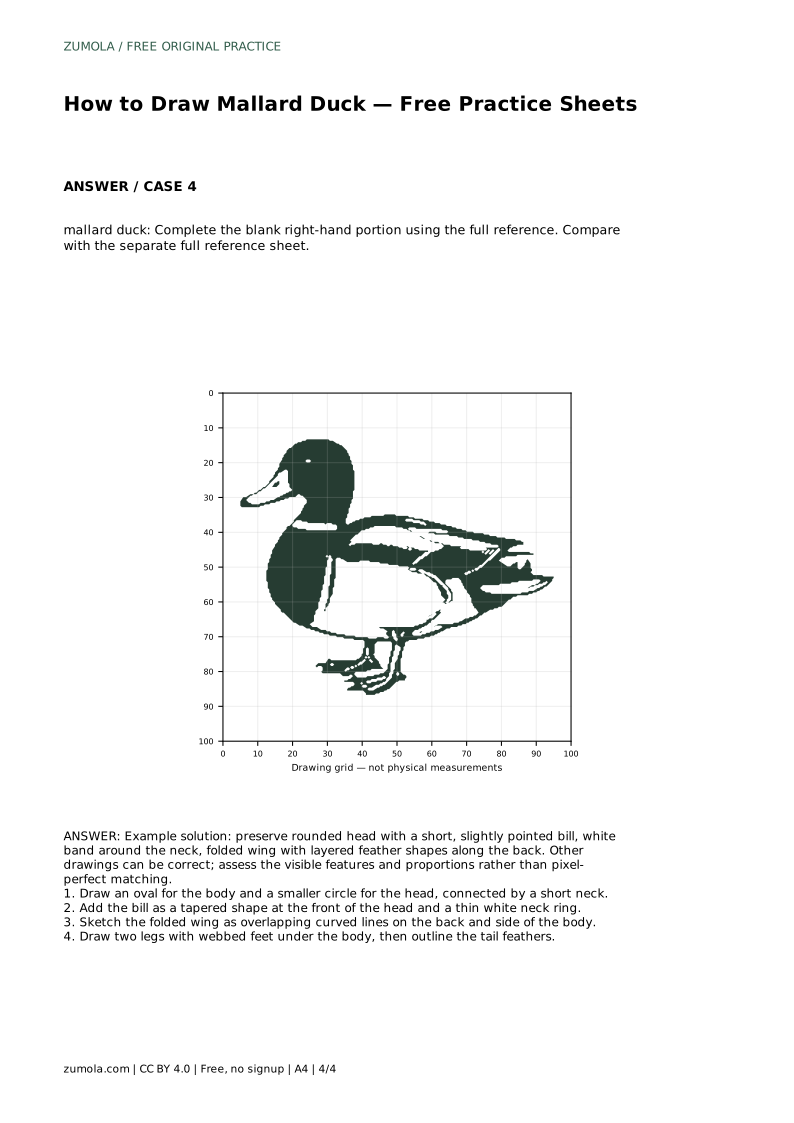
Example solution: preserve rounded head with a short, slightly pointed bill, white band around the neck, folded wing with layered feather shapes along the back. Other drawings can be correct; assess the visible features and proportions rather than pixel-perfect matching. Draw an oval for the body and a smaller circle for the head, connected by a short neck. Add the bill as a tapered shape at the front of the head and a thin white neck ring. Sketch the folded wing as overlapping curved lines on the back and side of the body. Draw two legs with webbed feet under the body, then outline the tail feathers.
Tracing helps you learn the outline and proportions. After one traced pass, try the same duck on blank paper and compare your result with the reference.
Check the visible features: rounded head, short tapered bill, thin white neck ring, folded layered wing, and webbed feet. Proportions matter more than exact line placement.
Yes. For a floating duck, omit the legs or show only a hint below the waterline, and keep the body low and horizontal.
All drawing practice · Free coordinate paper
Original resources · CC BY 4.0 · Free for personal and classroom use with attribution.