Reference diagrams
LETTER · Download PDF
A4 · Download PDF
Free original resources
Learn to draw a watermelon slice with a wedge contour, inner edge band, and seed rows. Free printable practice sheets for tracing, grids, and guided drawing.
Four original cases, with reference diagrams, practice sheets and worked answers. Everything is free; no signup required.
LETTER · Download PDF
A4 · Download PDF
LETTER · Download PDF
A4 · Download PDF
LETTER · Download PDF
A4 · Download PDF
Use A4 or US Letter to match your printer. Use the stated values and conditions to solve each exercise; diagrams are not physical measuring rulers.
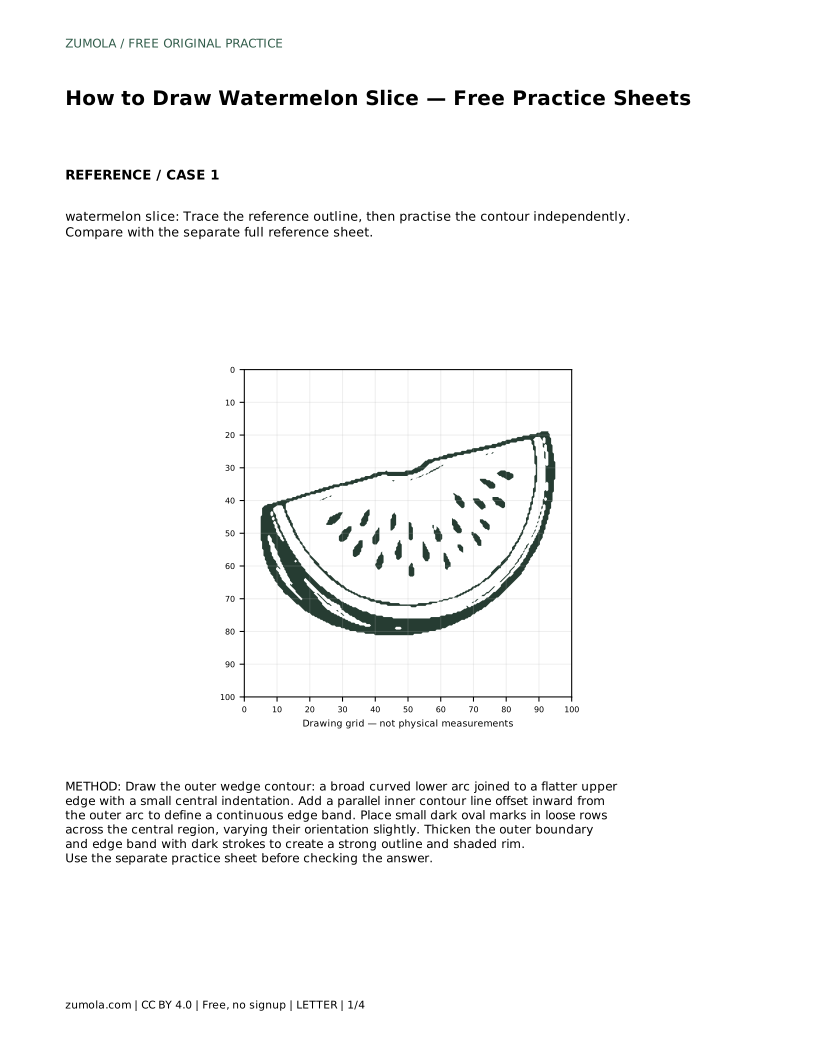
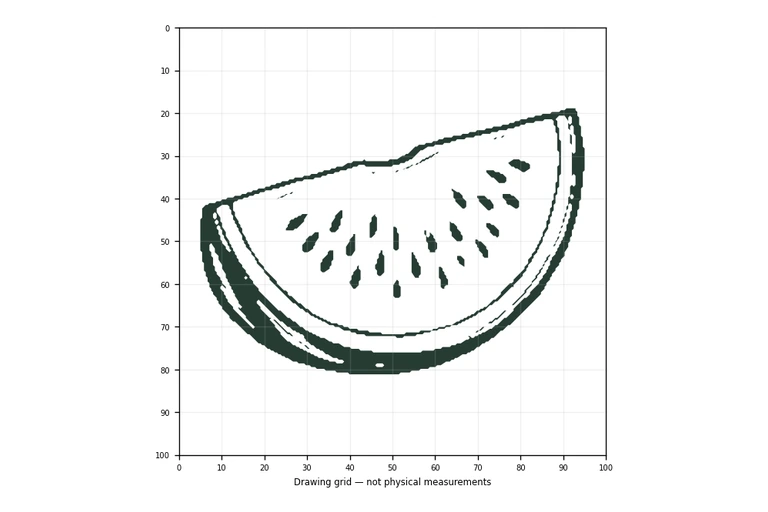
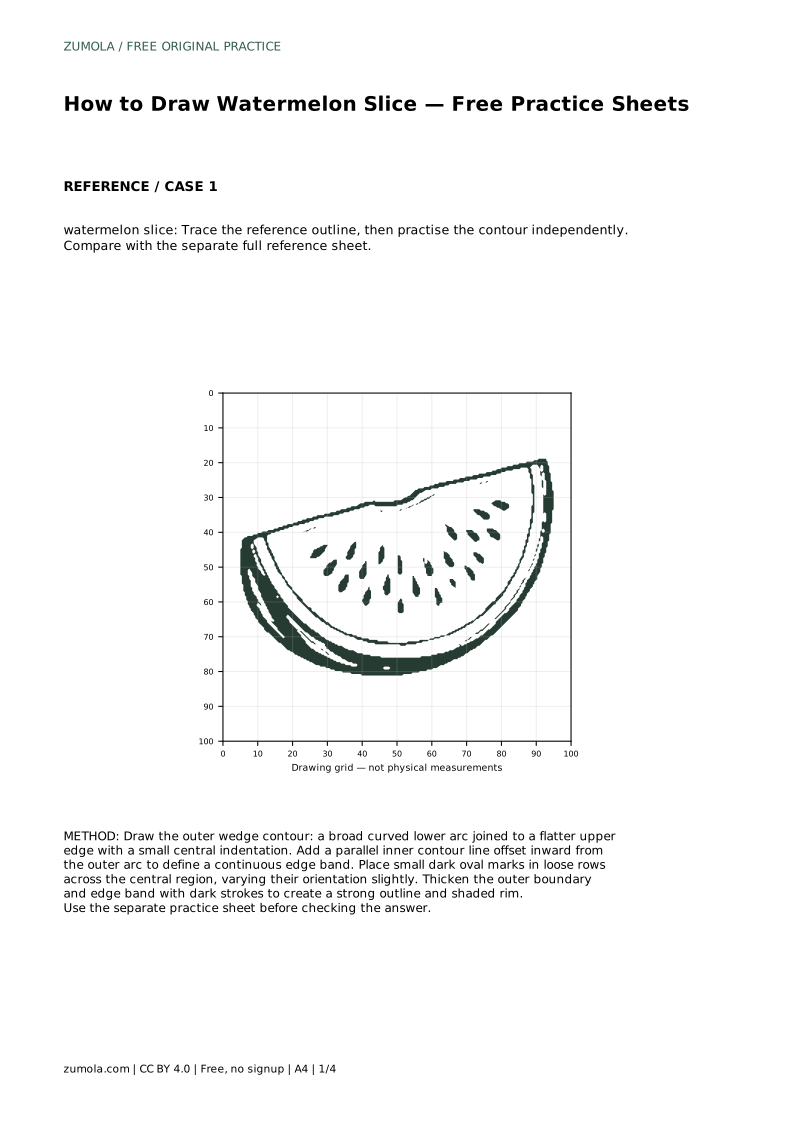
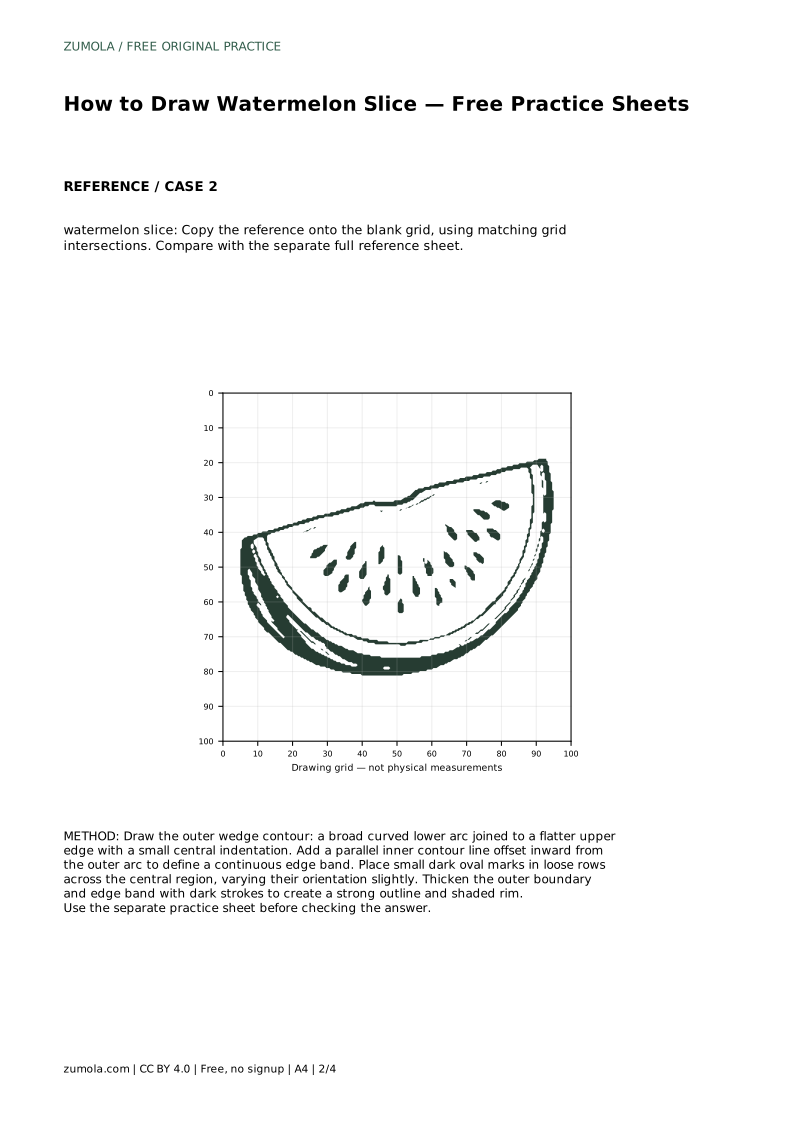
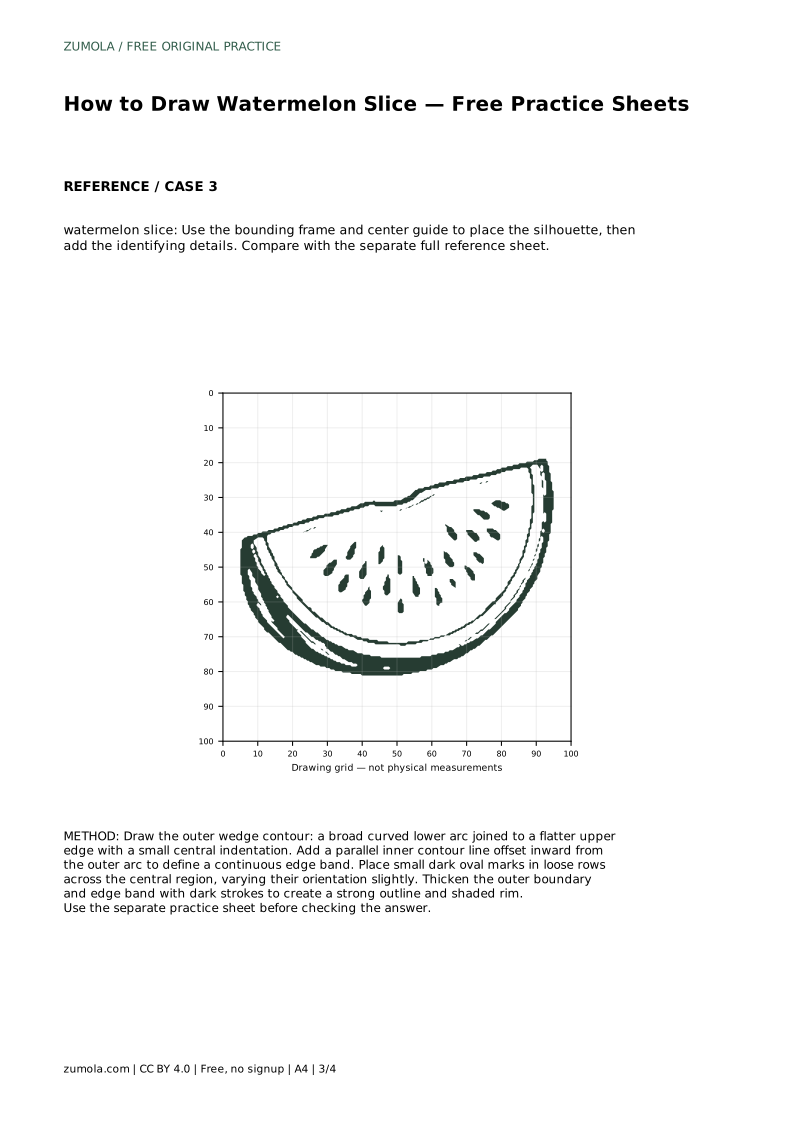
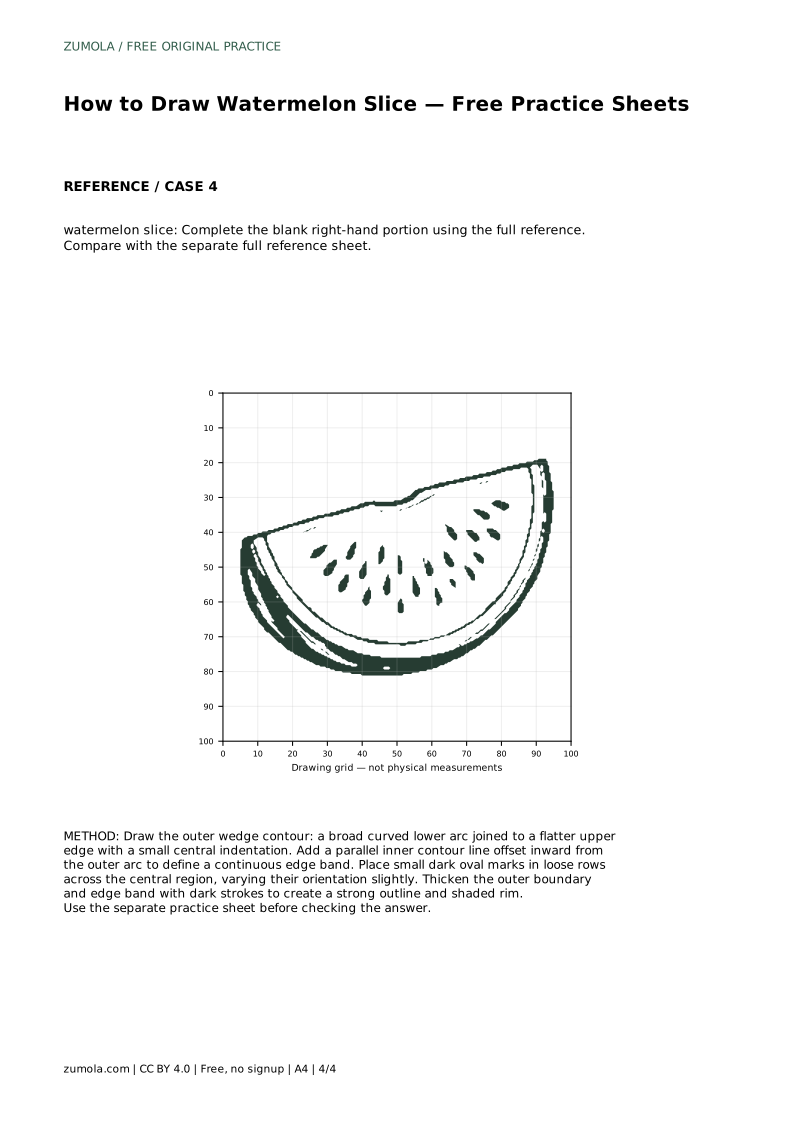
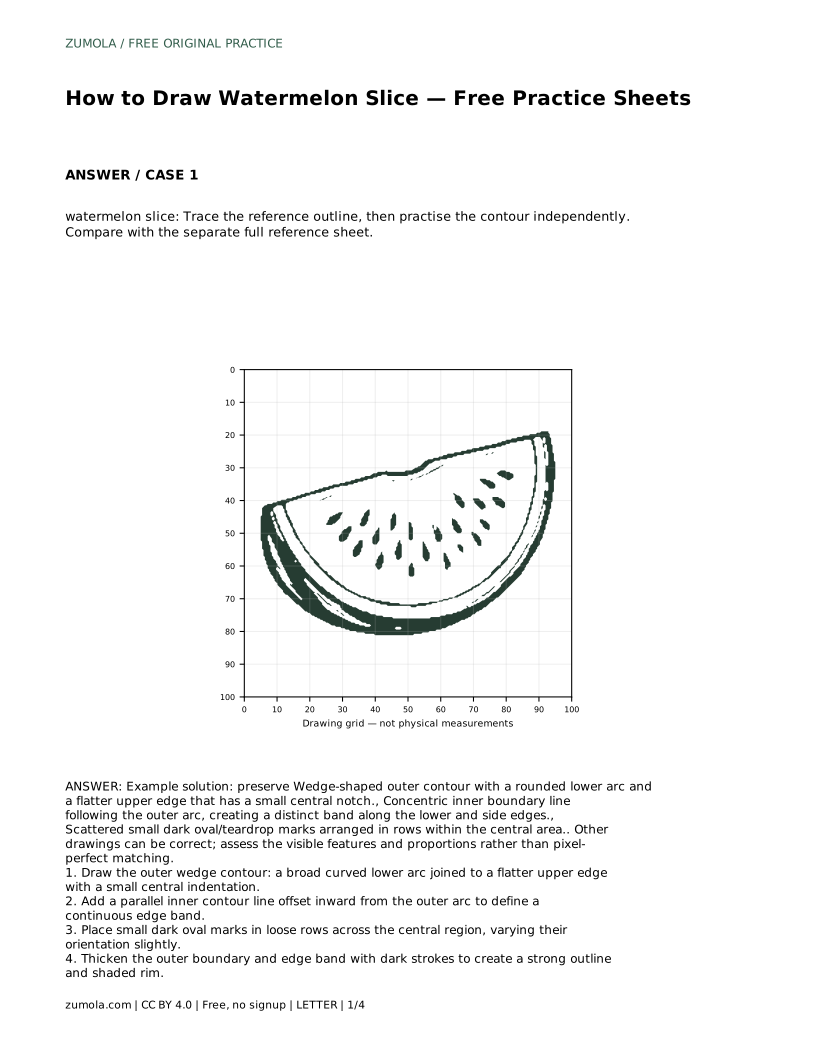
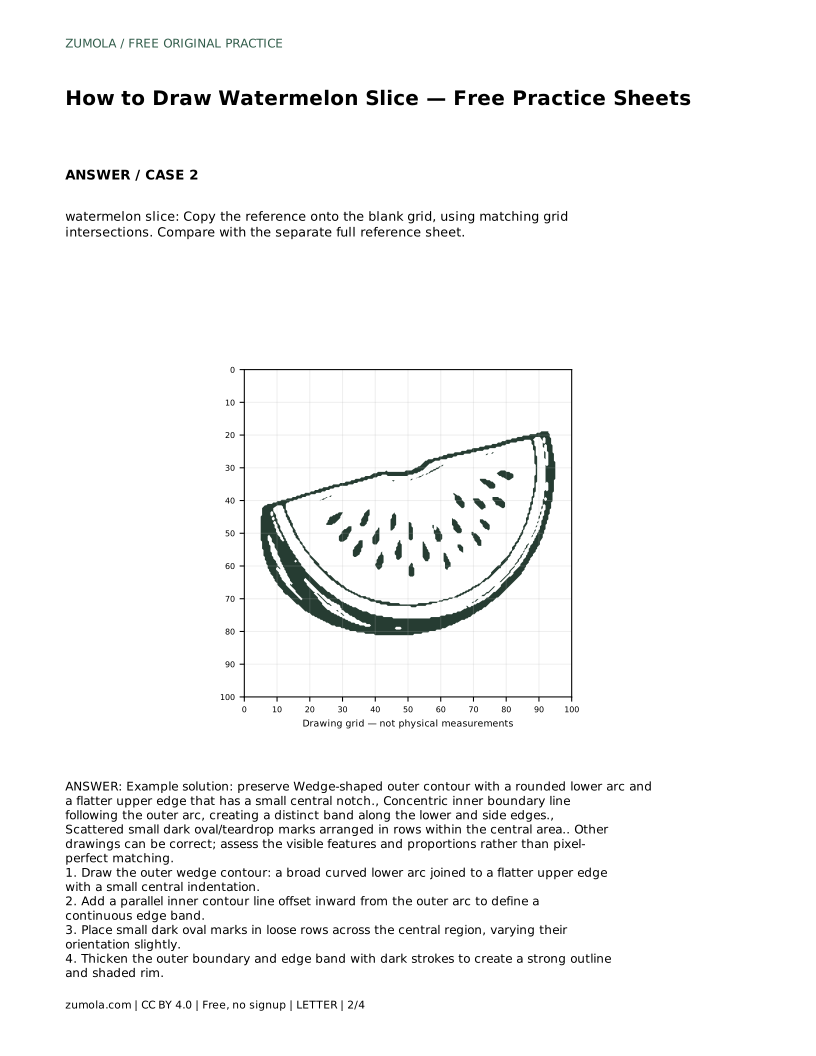
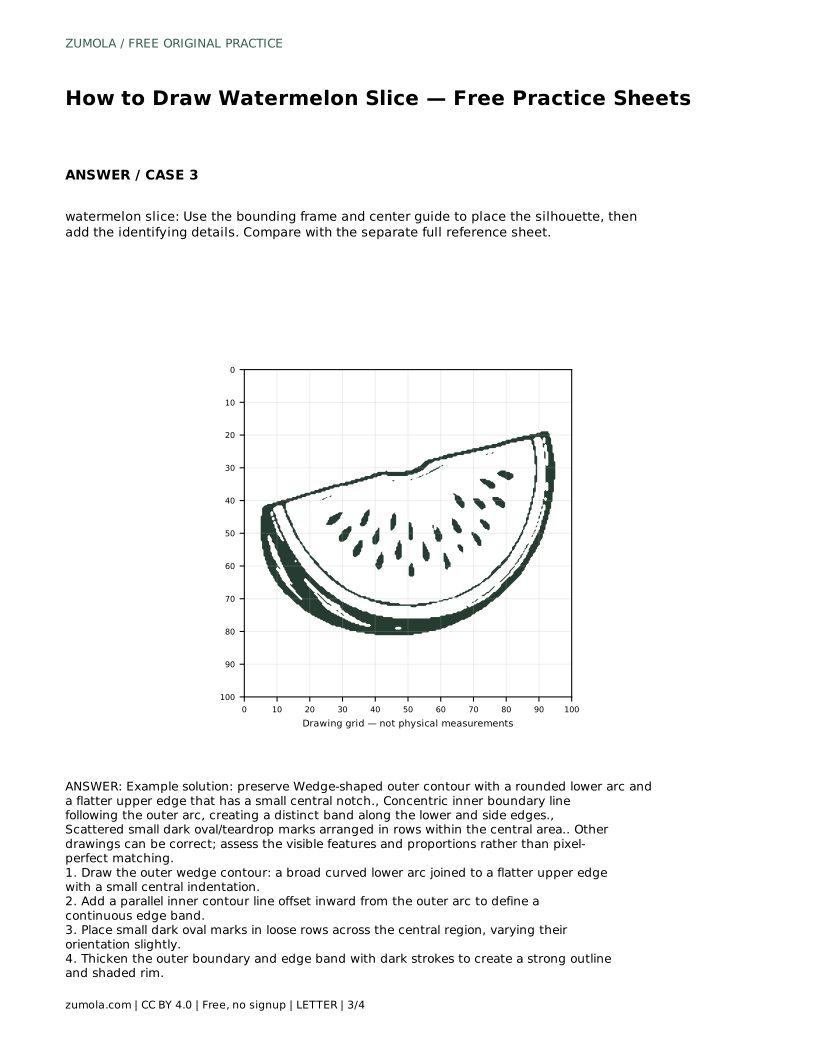
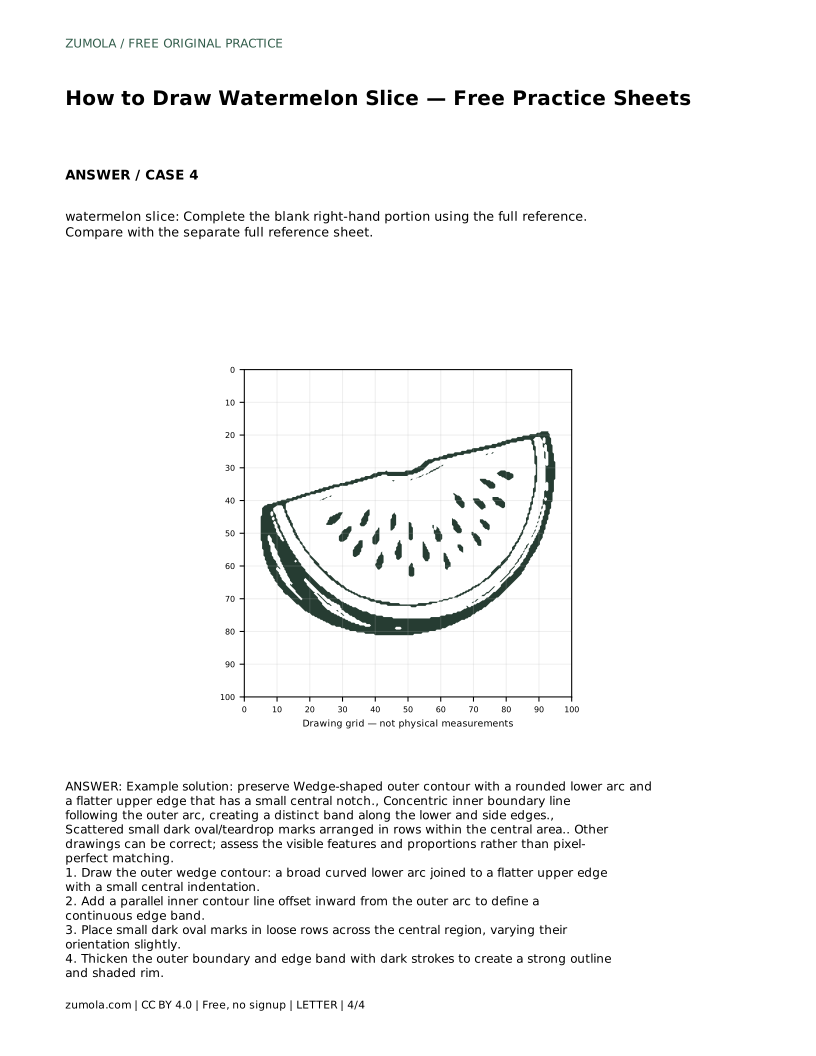
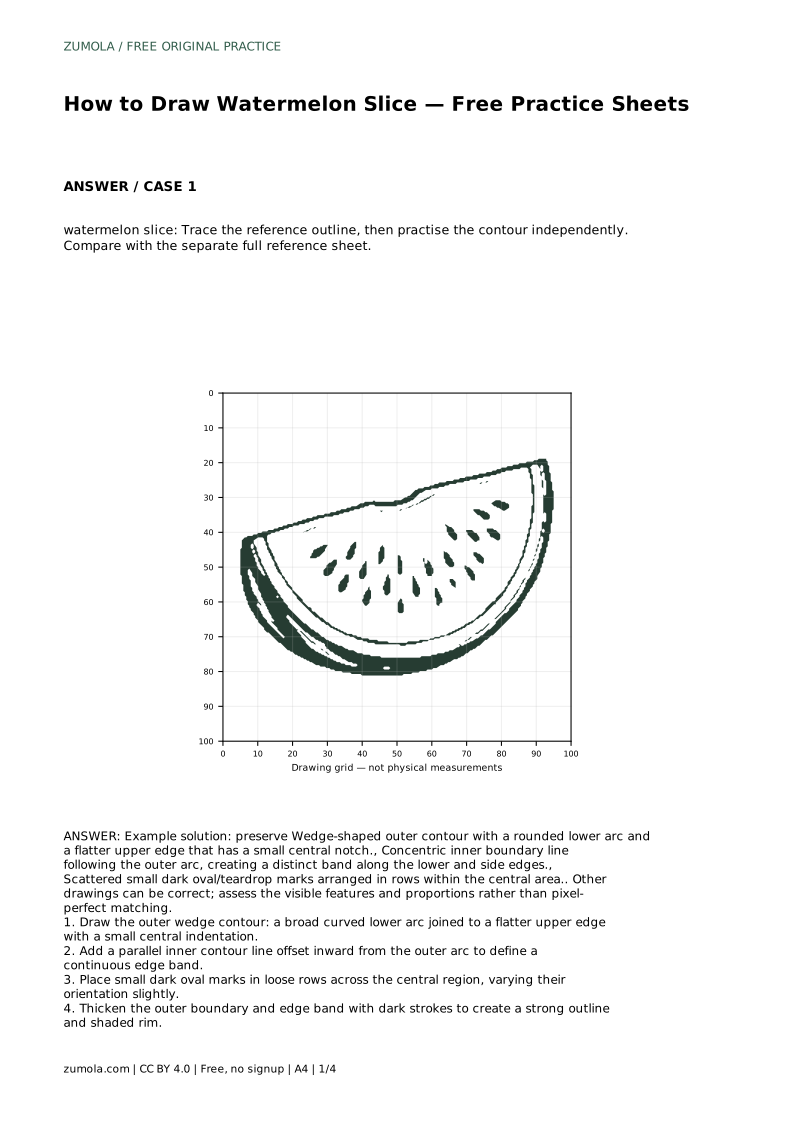
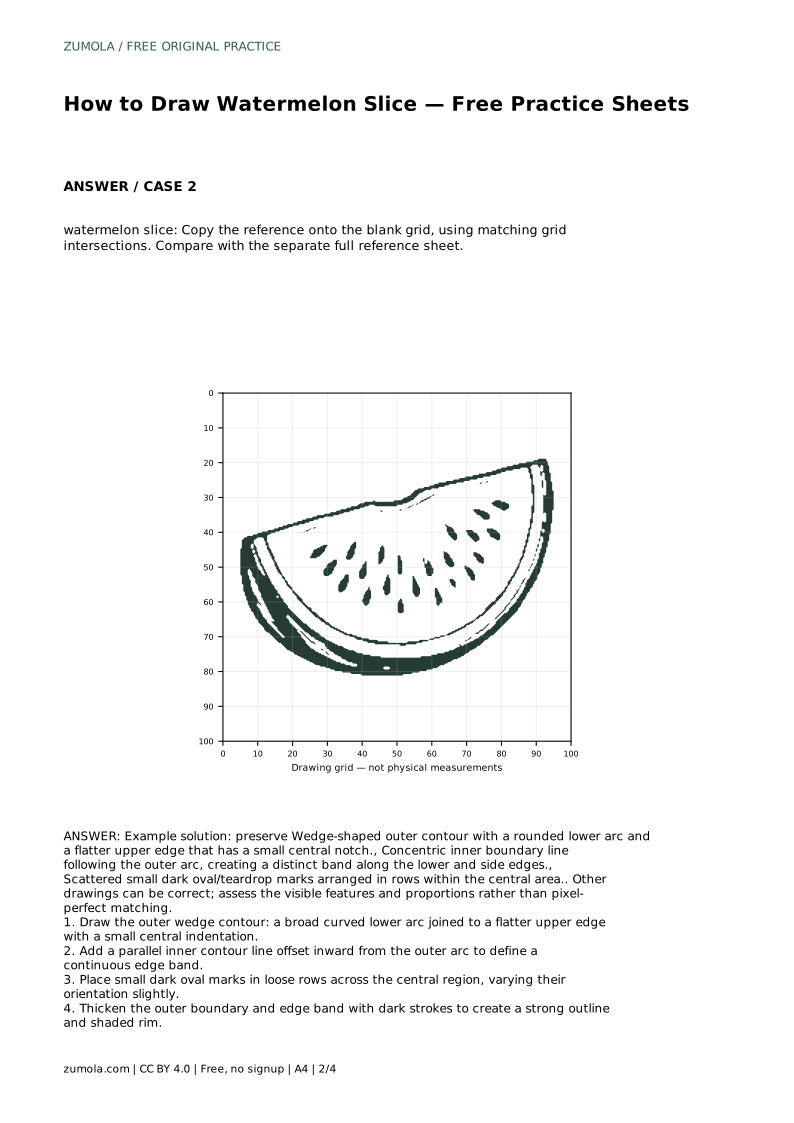
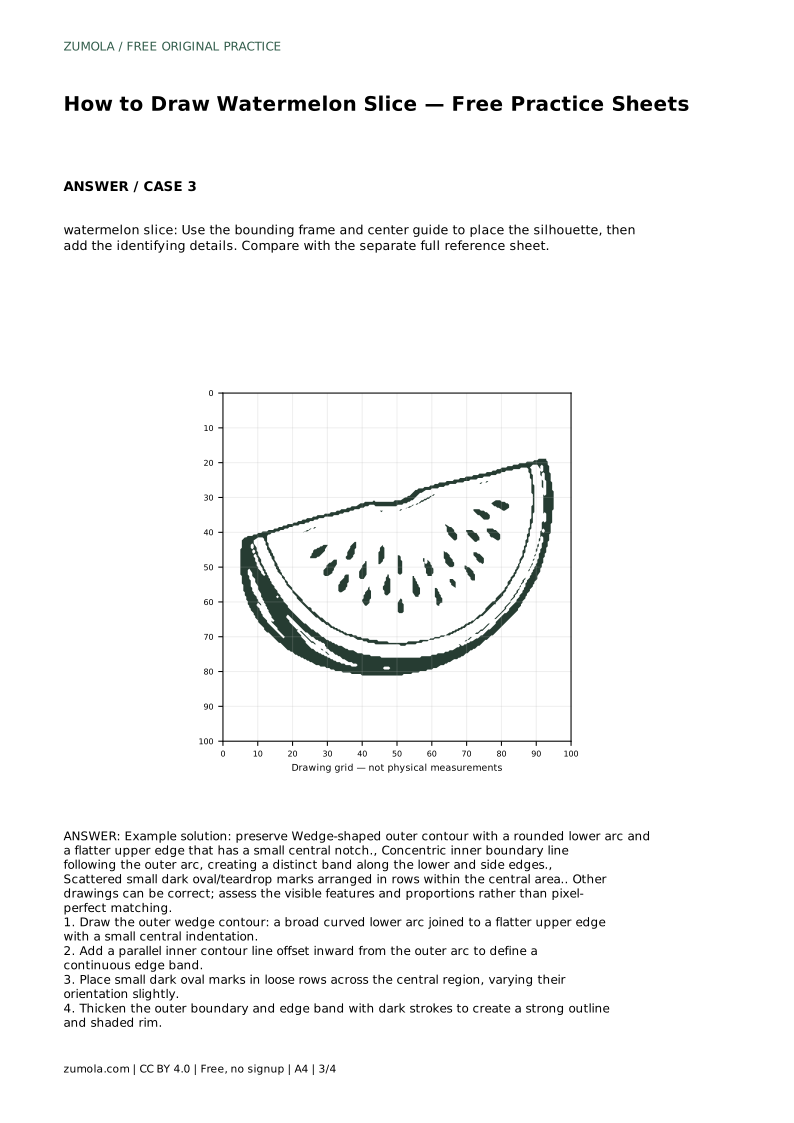
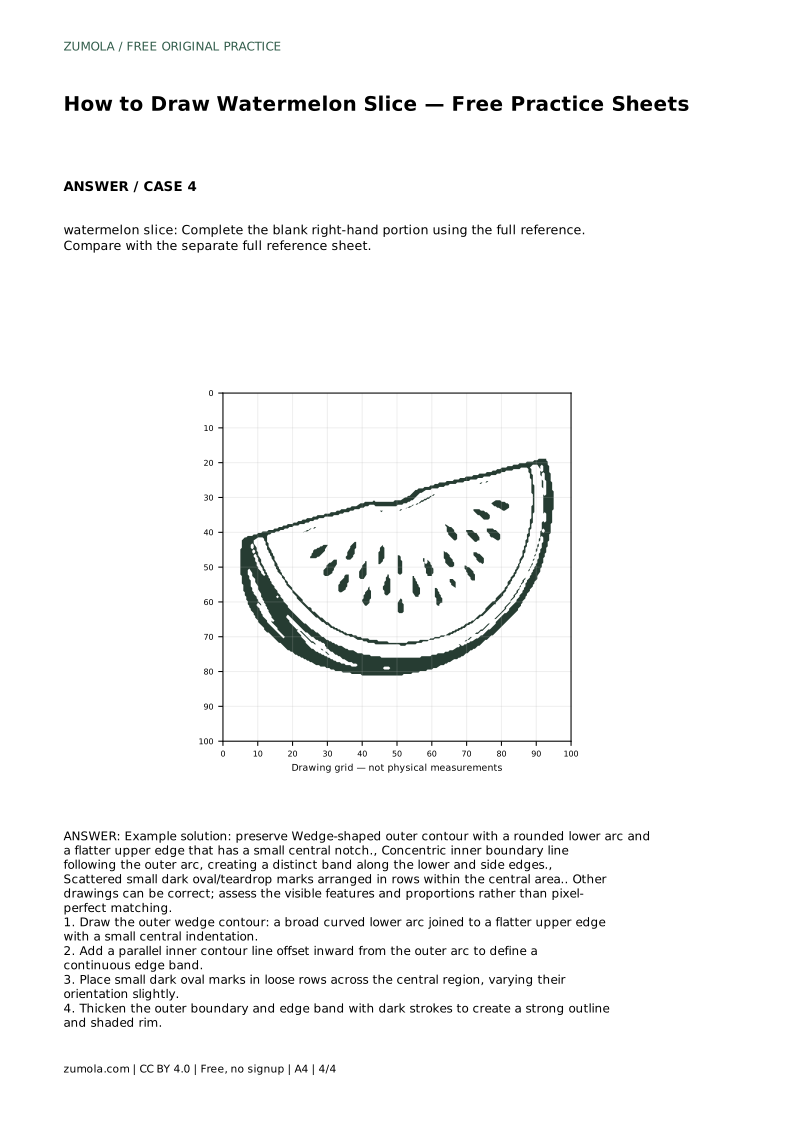
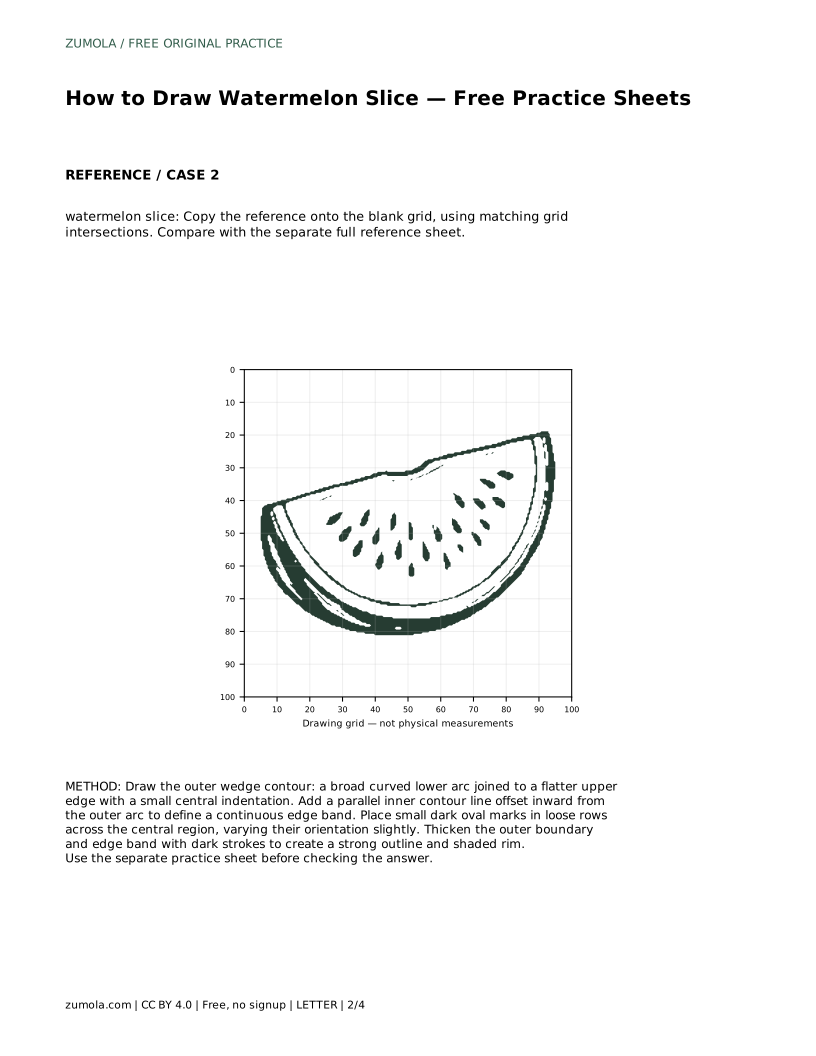
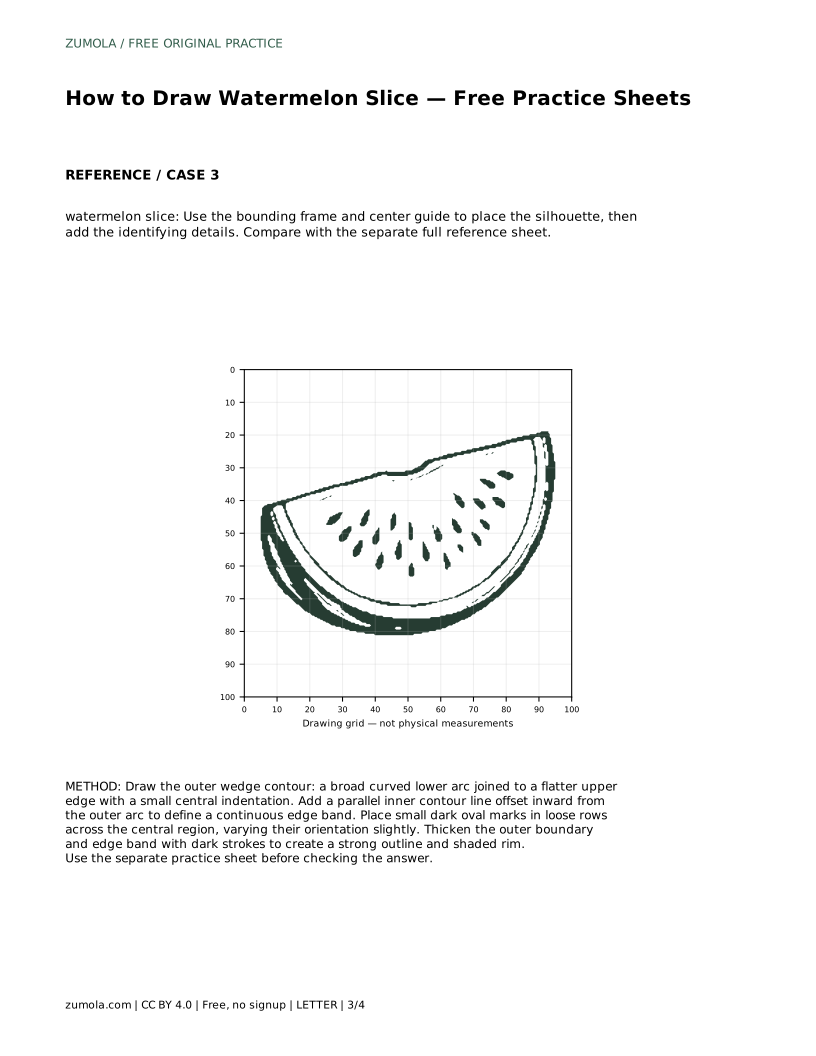
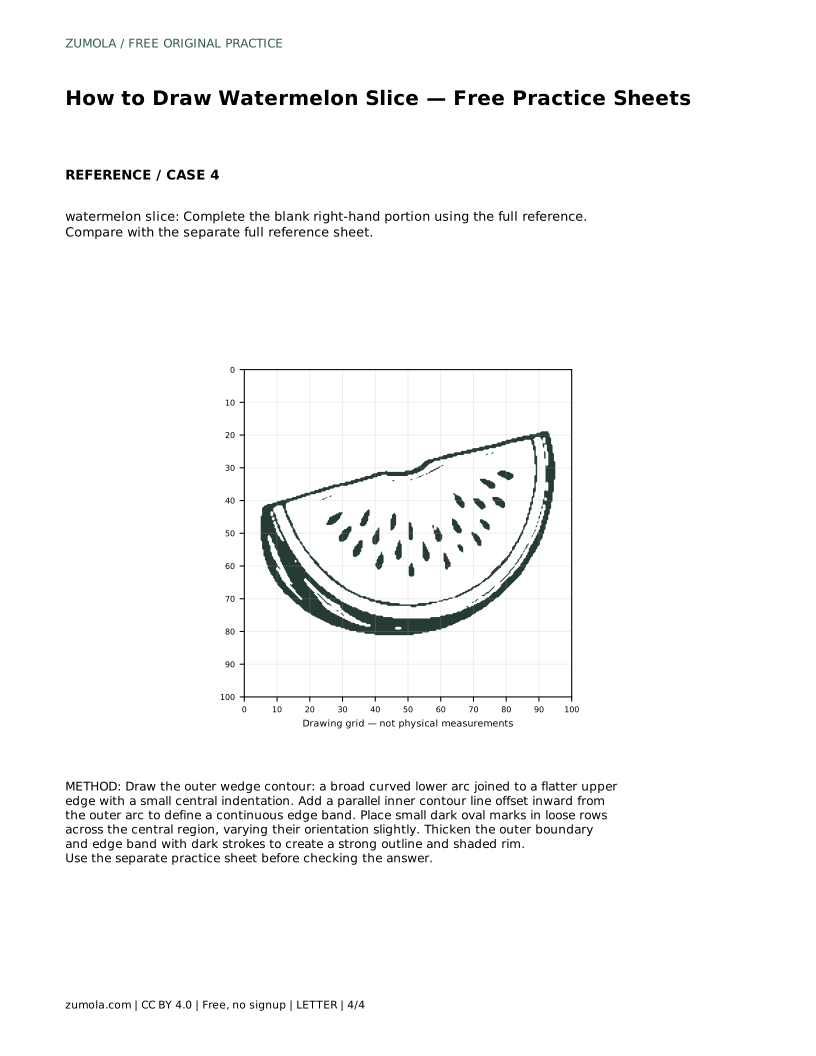
Drawing a watermelon slice is a manageable project because its shape is built from a few clear parts: a broad curved lower arc, a flatter upper edge with a small central notch, an inner band that follows the outer curve, and scattered dark seed marks. This page explains those parts in order and gives you a practical method you can repeat on the free practice sheets. The goal is not a pixel-perfect copy but a drawing that preserves the slice's recognizable proportions and features.
The watermelon slice is a wedge: a wide, rounded lower arc joined to a flatter upper edge. The upper edge usually has a small central indentation, which helps the slice read as a cut piece rather than a simple half-circle. Begin by placing the overall silhouette lightly. Think about the width-to-height ratio before adding detail; a slice that is too tall or too narrow will not match the reference's proportions.
Draw the lower arc as one smooth curve, then bring the two ends up to the flatter top edge. Add the small notch at the center of that top edge. Keep this first outline light so you can adjust it. The outer contour is the anchor for every later line, so check that the arc is broad and the top edge is comparatively flat.
Inside the outer contour, draw a second line that runs parallel to the lower and side edges. This inner boundary creates the pale rind band and separates it from the central flesh area. The band should be continuous and follow the outer arc's curvature, not cut across the slice. Its width can vary slightly, but it should stay visually consistent along the lower and side edges.
A common problem is letting the inner line drift toward the center or stop short at the top corners. Keep the offset roughly even as you draw. If the band becomes too wide, the central area shrinks and the seed rows have less room; if it becomes too narrow, the rind disappears. Compare the band's width with the reference before moving on.
The central area holds small dark oval or teardrop marks arranged in loose rows. These marks are not a rigid grid; they vary slightly in orientation and spacing. Begin with a few marks to establish the row direction, then add more while keeping the central area readable. Seeds near the inner band should not overlap it, and seeds should not crowd the top notch.
Vary the marks' angle a little so the rows feel natural rather than mechanical. Keep them small relative to the slice; oversized seeds change the scale of the drawing. If a mark lands too close to the inner band, erase it and shift it inward. The seed pattern is one of the slice's identifying features, so give it enough space to be seen.
Once the contour, inner band, and seeds are placed, thicken the outer boundary and the edge band with darker strokes. This creates a strong outline and a shaded rim that helps the slice read clearly. Darken the outer contour first, then the inner band, then the seed marks. Avoid darkening every line equally; the outer boundary and rim should carry more weight than the seed marks.
Check that the darkened lines still follow the original shapes. If the outer contour becomes uneven, redraw that section lightly and darken again. The finished drawing should preserve the wedge shape, the continuous inner band, and the scattered seed rows. Other drawings can be correct; assess the visible features and proportions rather than pixel-perfect matching.
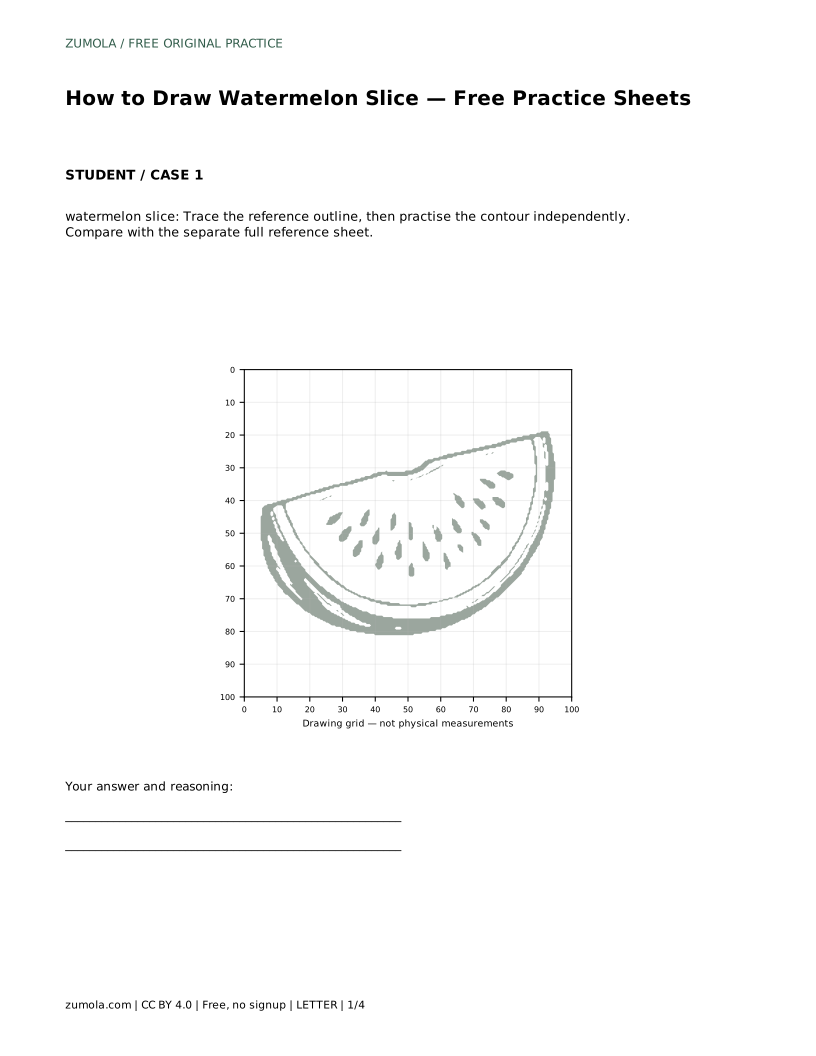
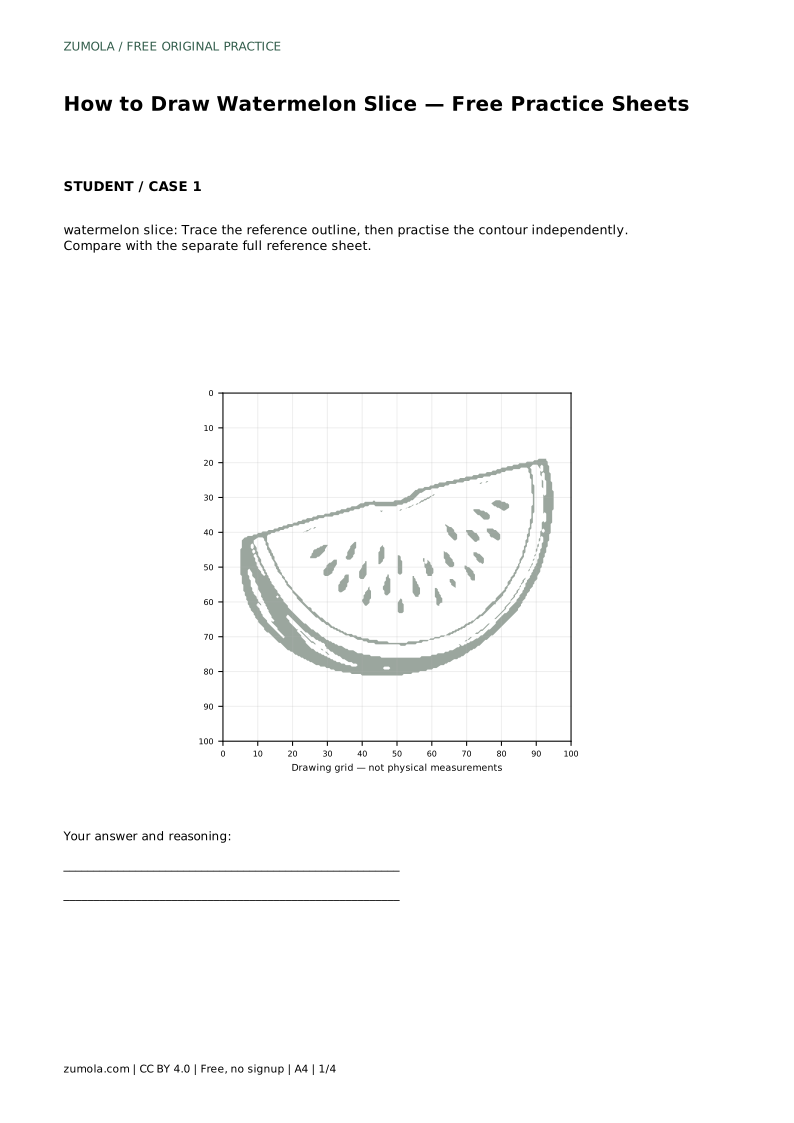
watermelon slice: Trace the reference outline, then practise the contour independently. Compare with the separate full reference sheet.
Example solution: preserve Wedge-shaped outer contour with a rounded lower arc and a flatter upper edge that has a small central notch., Concentric inner boundary line following the outer arc, creating a distinct band along the lower and side edges., Scattered small dark oval/teardrop marks arranged in rows within the central area.. Other drawings can be correct; assess the visible features and proportions rather than pixel-perfect matching. Draw the outer wedge contour: a broad curved lower arc joined to a flatter upper edge with a small central indentation. Add a parallel inner contour line offset inward from the outer arc to define a continuous edge band. Place small dark oval marks in loose rows across the central region, varying their orientation slightly. Thicken the outer boundary and edge band with dark strokes to create a strong outline and shaded rim.
No. Use the reference to check the wedge contour, the continuous inner band, and the scattered seed rows. Other drawings can be correct if those features and proportions are preserved.
Check the outer wedge contour first: a broad lower arc, a flatter upper edge, and a small central notch. Every later line depends on that shape.
Keep it roughly even along the lower and side edges and wide enough to read as a separate rim. Compare its width with the reference rather than using a fixed measurement.
All drawing practice · Free coordinate paper
Original resources · CC BY 4.0 · Free for personal and classroom use with attribution.