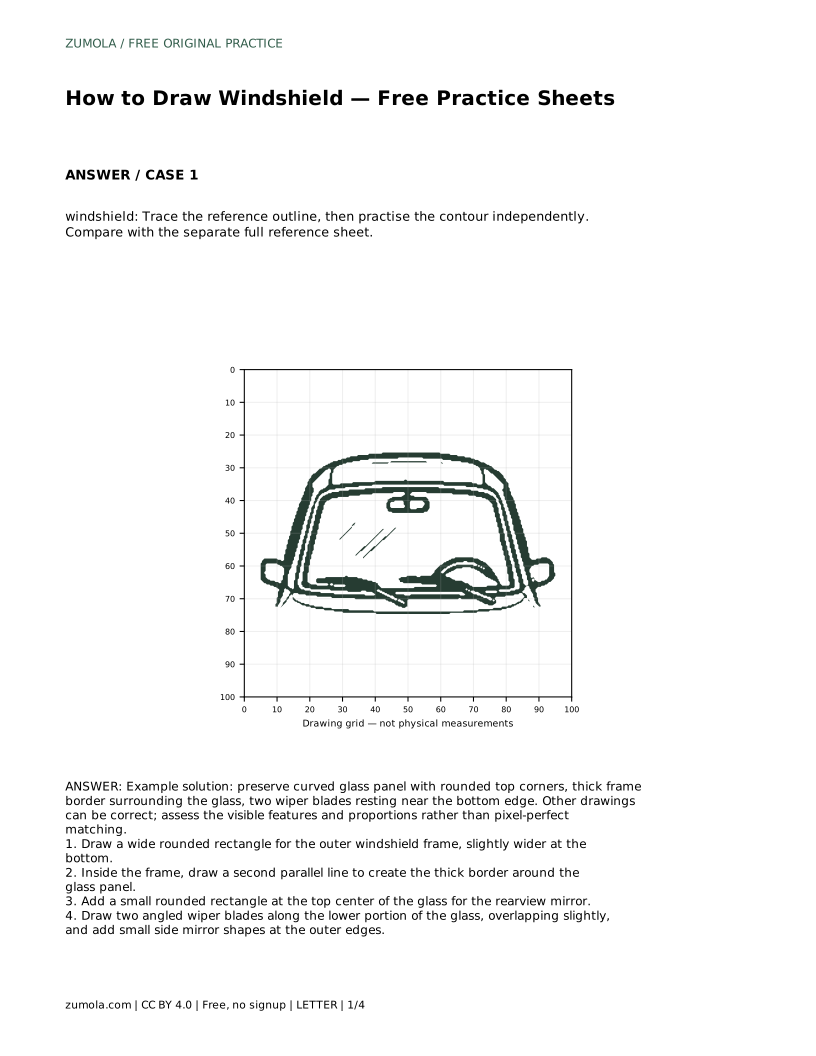
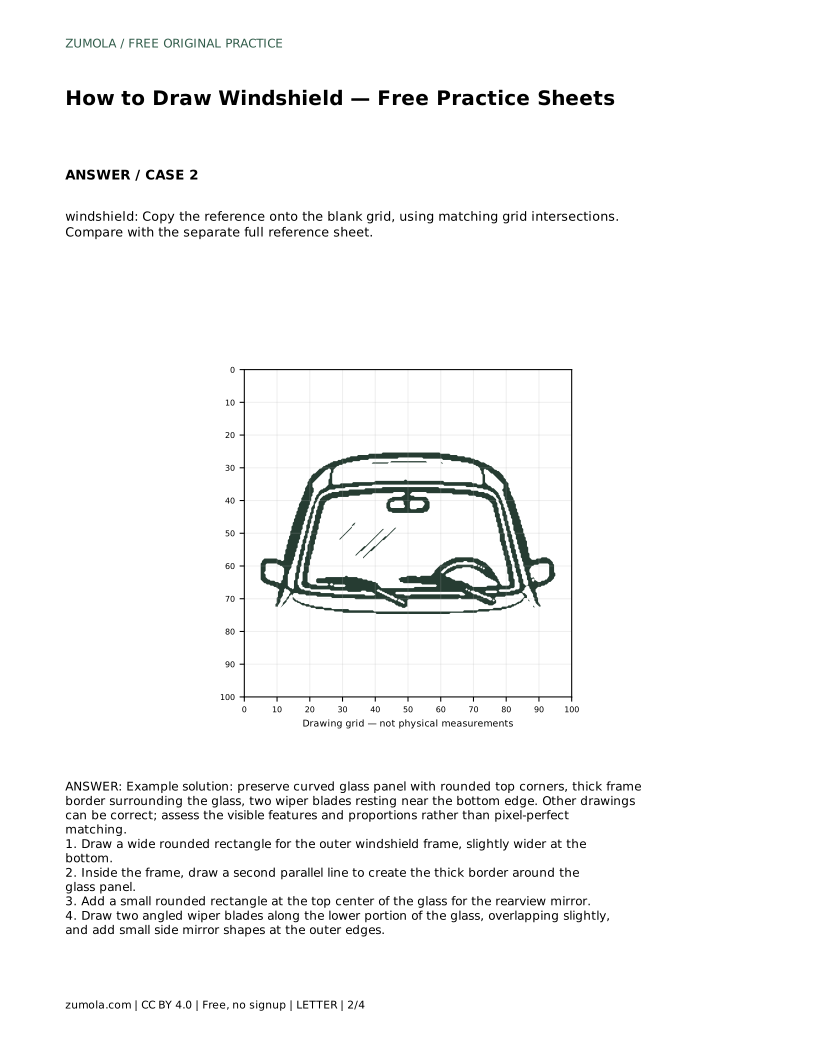
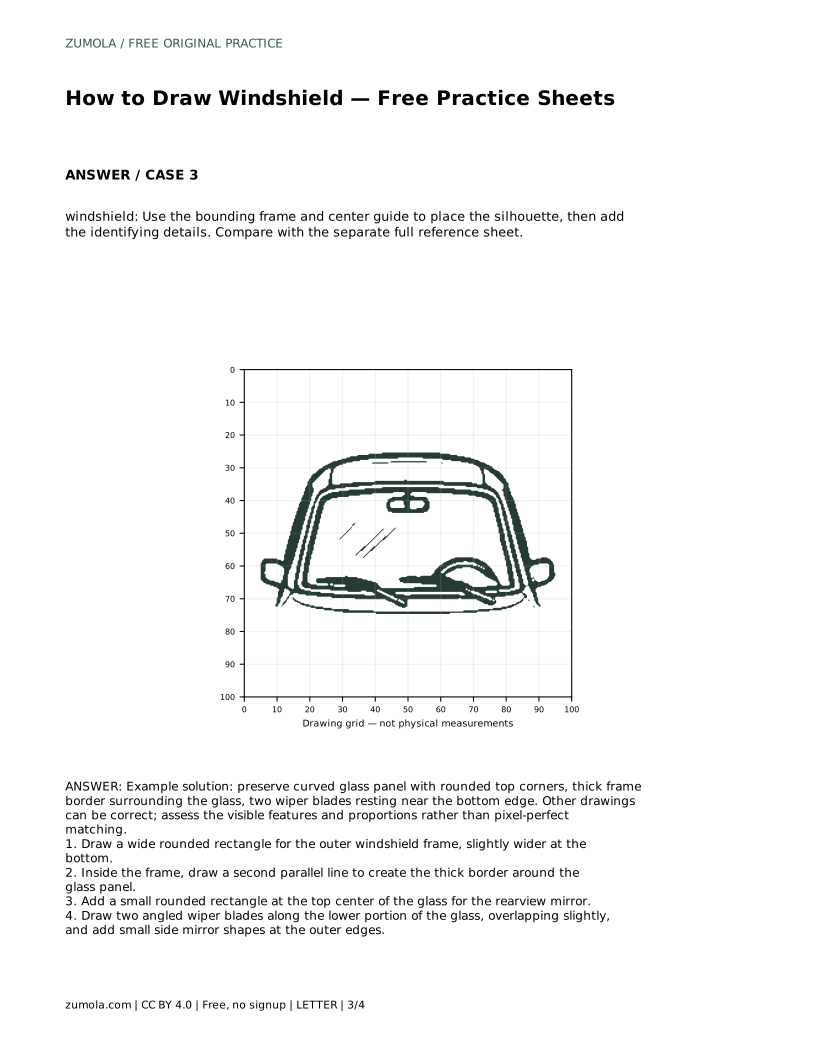
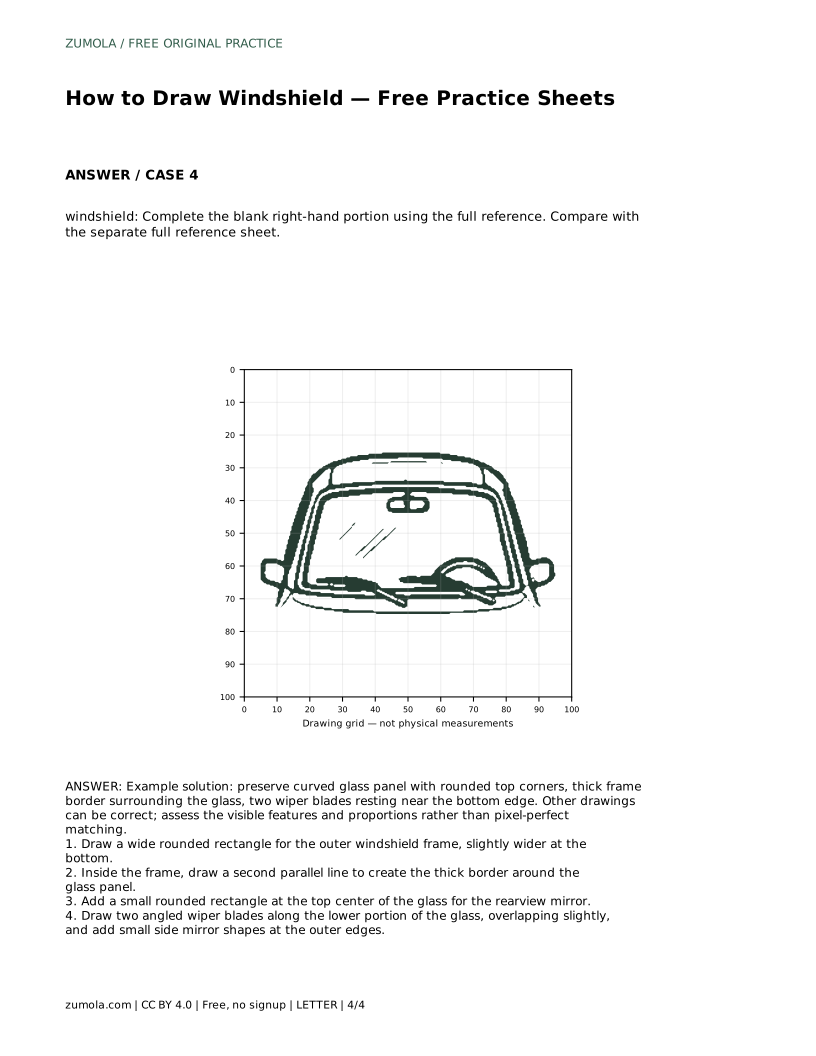
Reference diagrams
LETTER · Download PDF
A4 · Download PDF
Free original resources
Learn to draw a windshield with a rounded frame, thick glass border, rearview mirror and two wiper blades. Free practice sheets support tracing, grids and guided outlines.
Four original cases, with reference diagrams, practice sheets and worked answers. Everything is free; no signup required.
LETTER · Download PDF
A4 · Download PDF
LETTER · Download PDF
A4 · Download PDF
LETTER · Download PDF
A4 · Download PDF
Use A4 or US Letter to match your printer. Use the stated values and conditions to solve each exercise; diagrams are not physical measuring rulers.
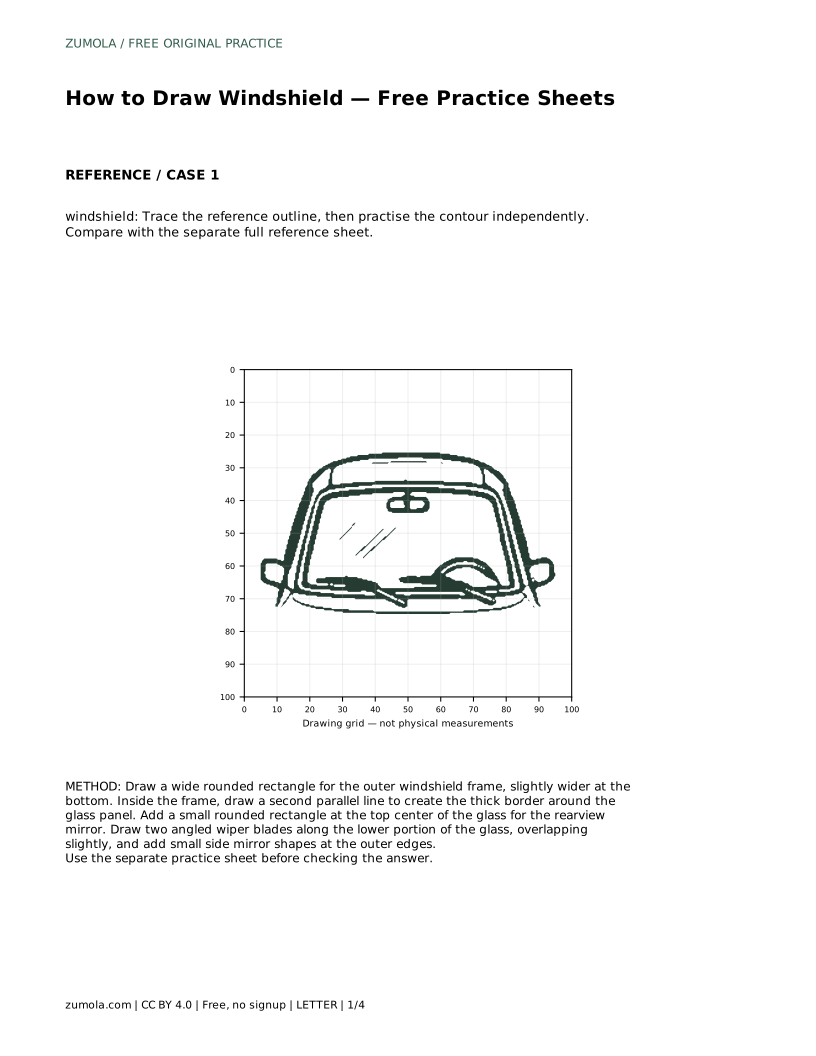
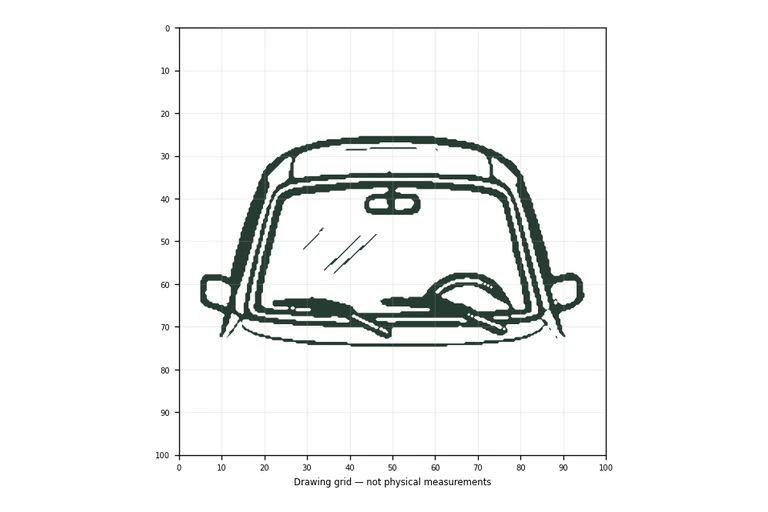
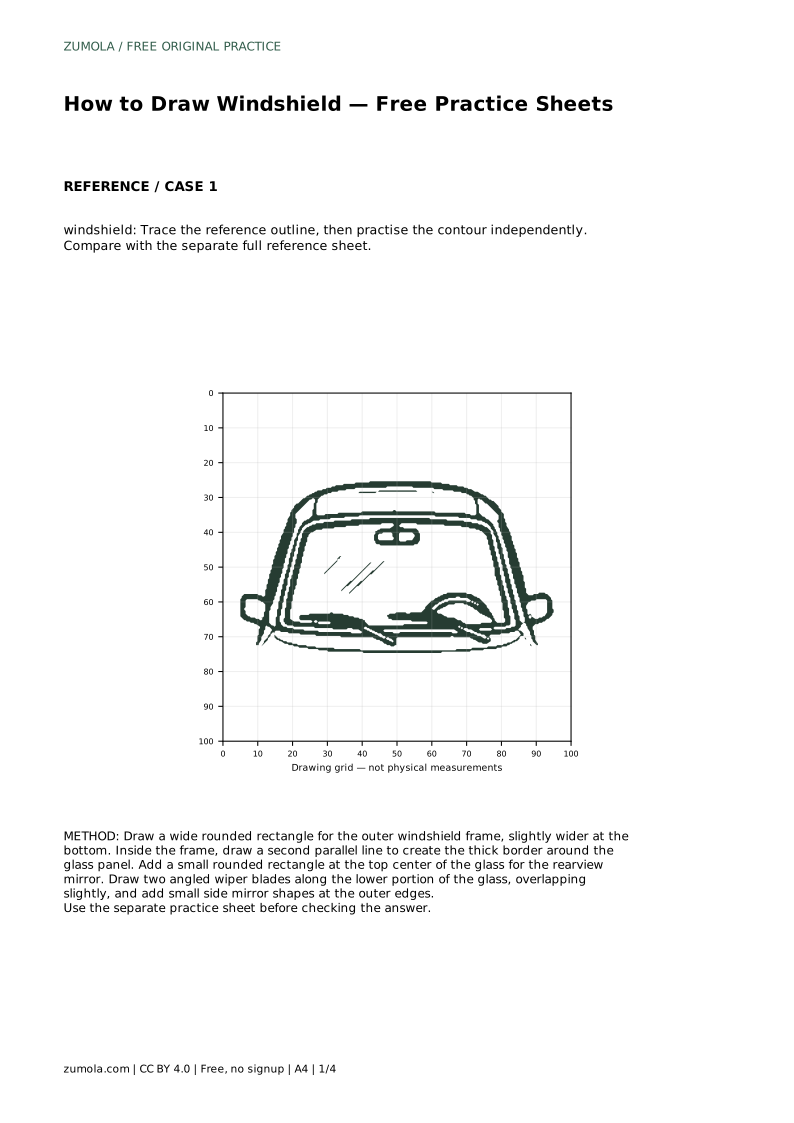
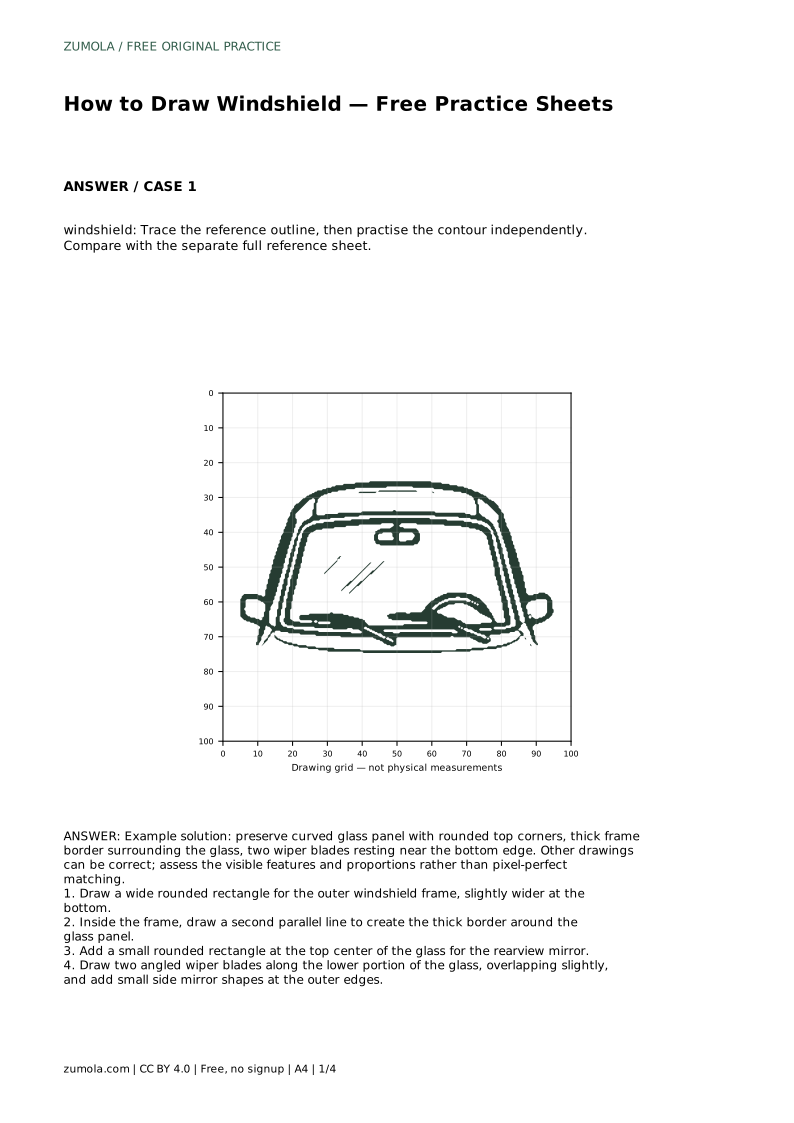
A windshield is mostly a shape problem: a wide glass panel with rounded top corners, held inside a thick frame, with a few identifying details. This page explains how to build that shape in order, from the outer frame to the wiper blades, so your drawing reads clearly as a windshield rather than a plain window. The free practice sheets let you trace a reference outline, copy it onto a grid, or complete a partly drawn version.
Begin with the largest shape, because every later detail depends on where the frame sits on the page. Draw a wide rounded rectangle for the outer windshield frame. Make it slightly wider at the bottom than at the top, and round the top corners more than the bottom ones. Keep the whole shape wider than it is tall; a windshield is a broad panel, not a square window.
Check the proportions before adding anything inside. The frame should occupy most of your drawing area, leaving a small margin around it. If the shape looks too tall, flatten it slightly; if the top corners look sharp, soften them. A light pencil line is easier to adjust than a heavy one.
Inside the outer frame, draw a second line that follows the same contour, staying a consistent distance from the first. This creates the thick border that surrounds the glass panel. Keep the gap even along the top, sides and bottom; an uneven border makes the frame look bent.
The space inside the second line is the glass. Leave it mostly empty so the panel reads as a single curved surface. If you want to suggest reflection, use one or two faint diagonal lines rather than filling the glass with shading, which can make the drawing look busy.
Place a small rounded rectangle at the top center of the glass for the rearview mirror. Keep it small relative to the panel; it is a detail, not a main shape. Its top edge should sit close to the inner frame line, not float in the middle of the glass.
Draw two angled wiper blades along the lower portion of the glass, overlapping slightly. Each blade is a thin line with a small pivot point at its base. Rest them near the bottom edge, angled toward one side, as they would sit when switched off. Finally, add small side mirror shapes at the outer edges of the frame if your reference includes them.
Compare your drawing with the separate full reference sheet. Other drawings can be correct; assess the visible features and proportions rather than pixel-perfect matching.
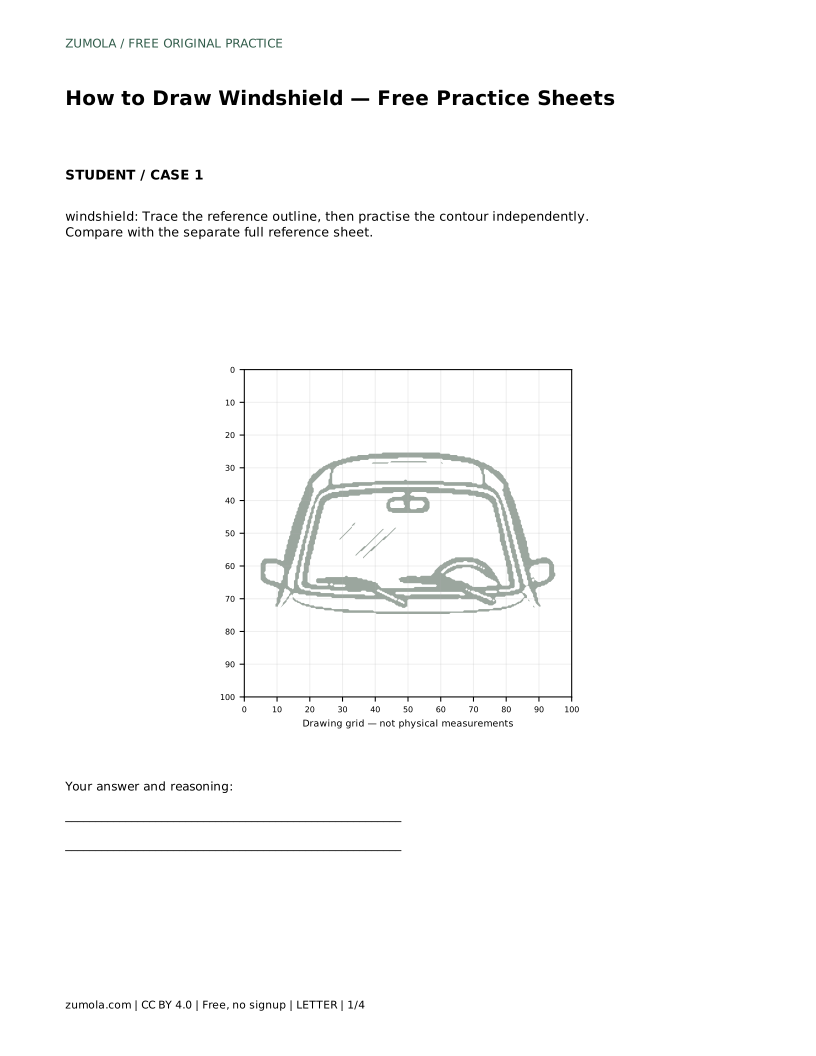
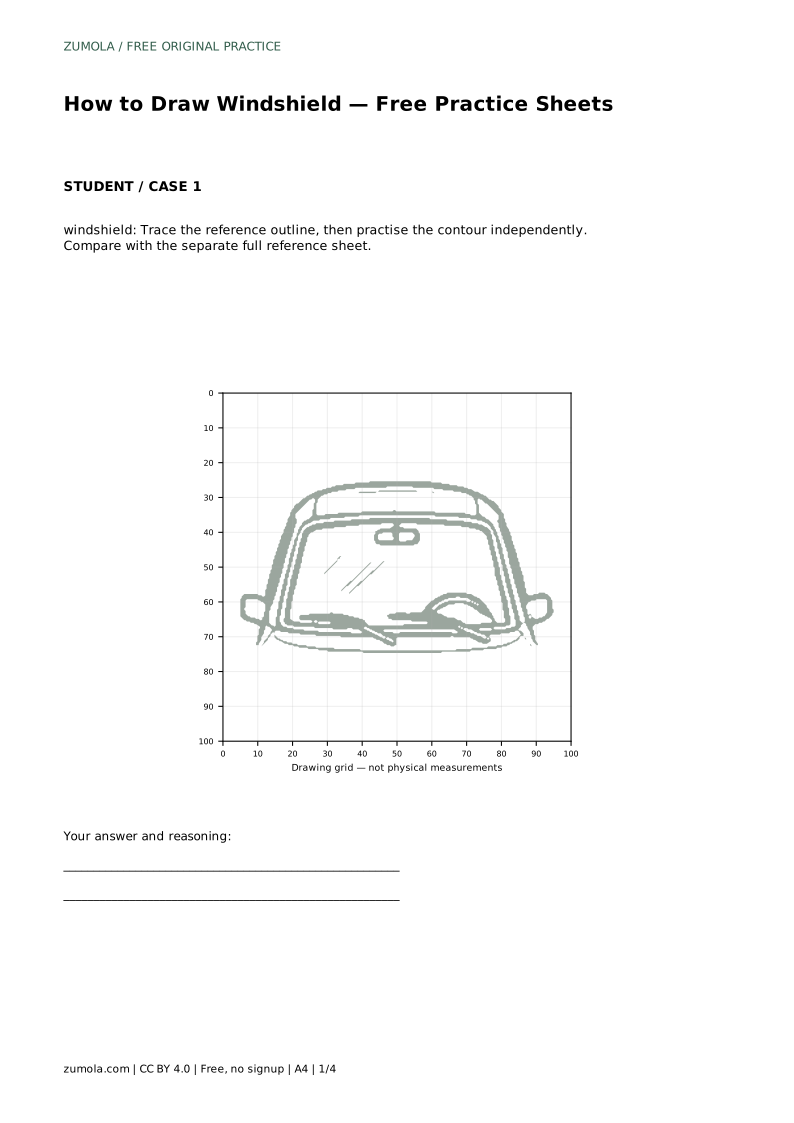
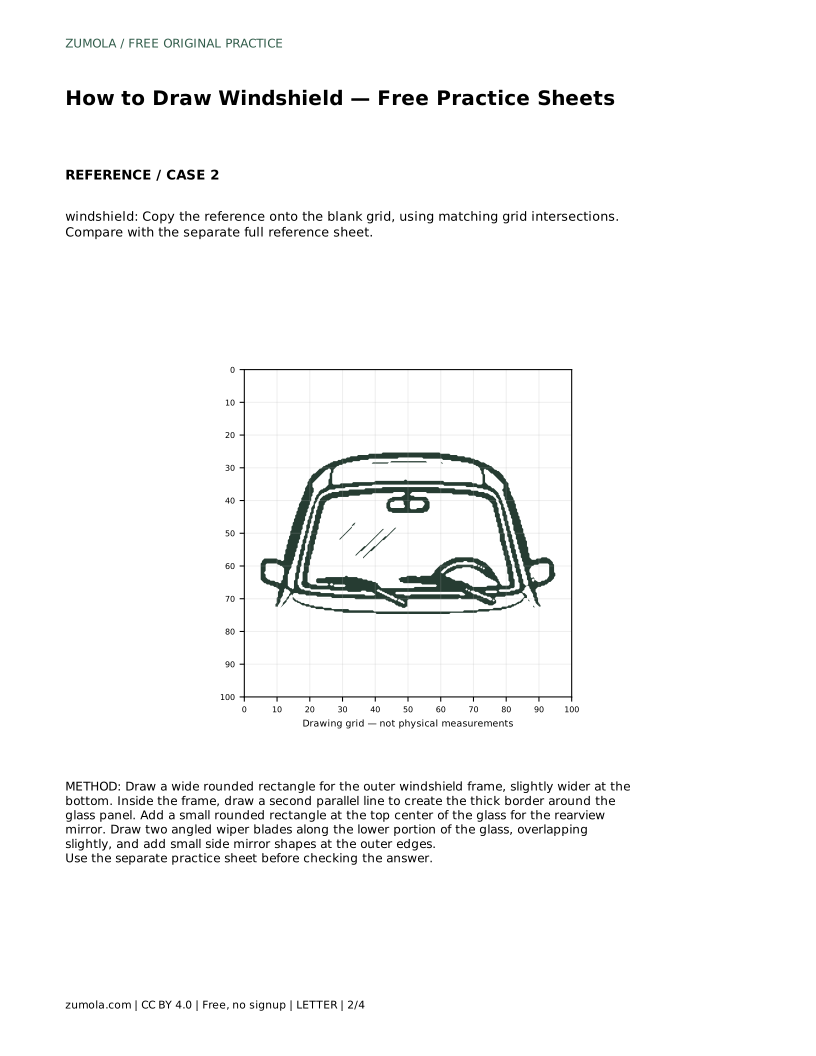
windshield: Trace the reference outline, then practise the contour independently. Compare with the separate full reference sheet.
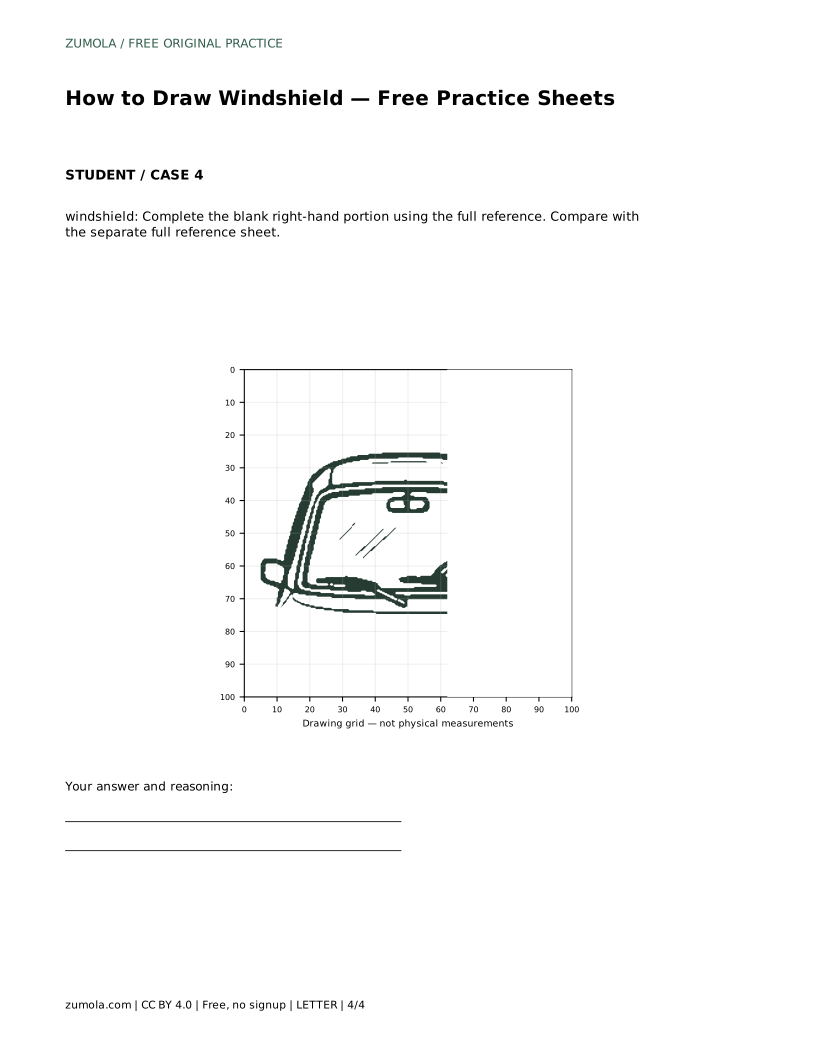
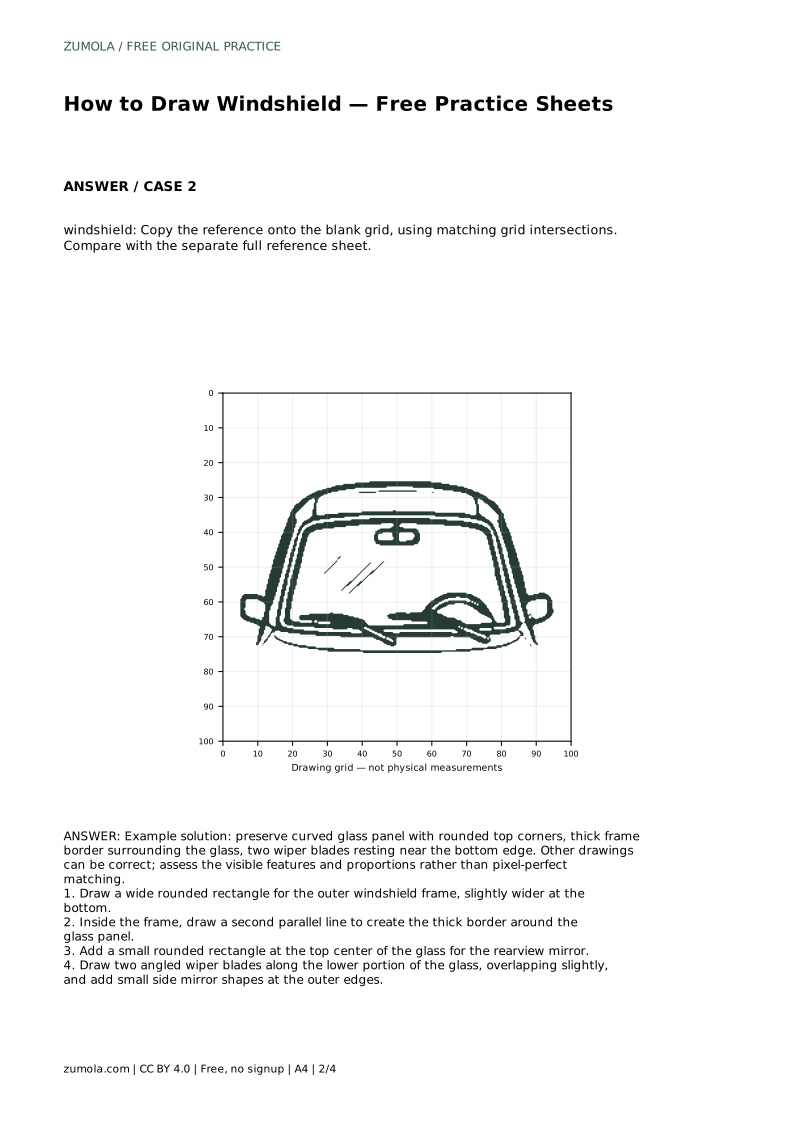
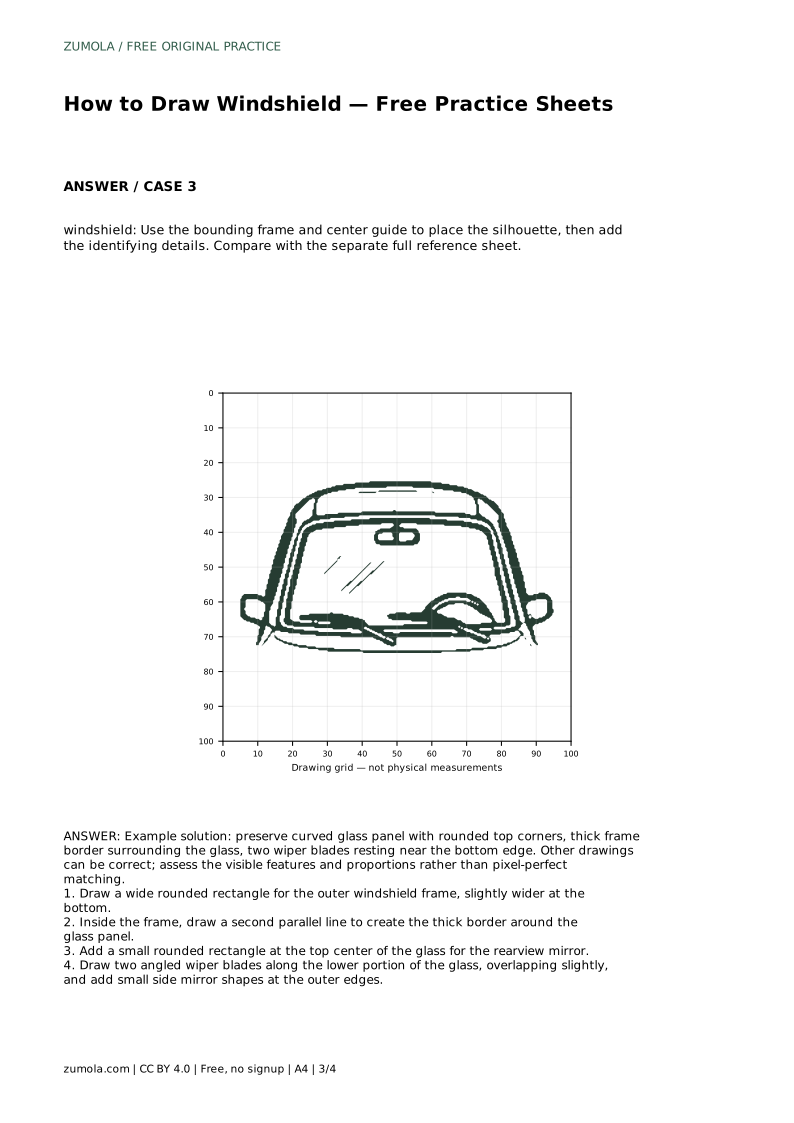
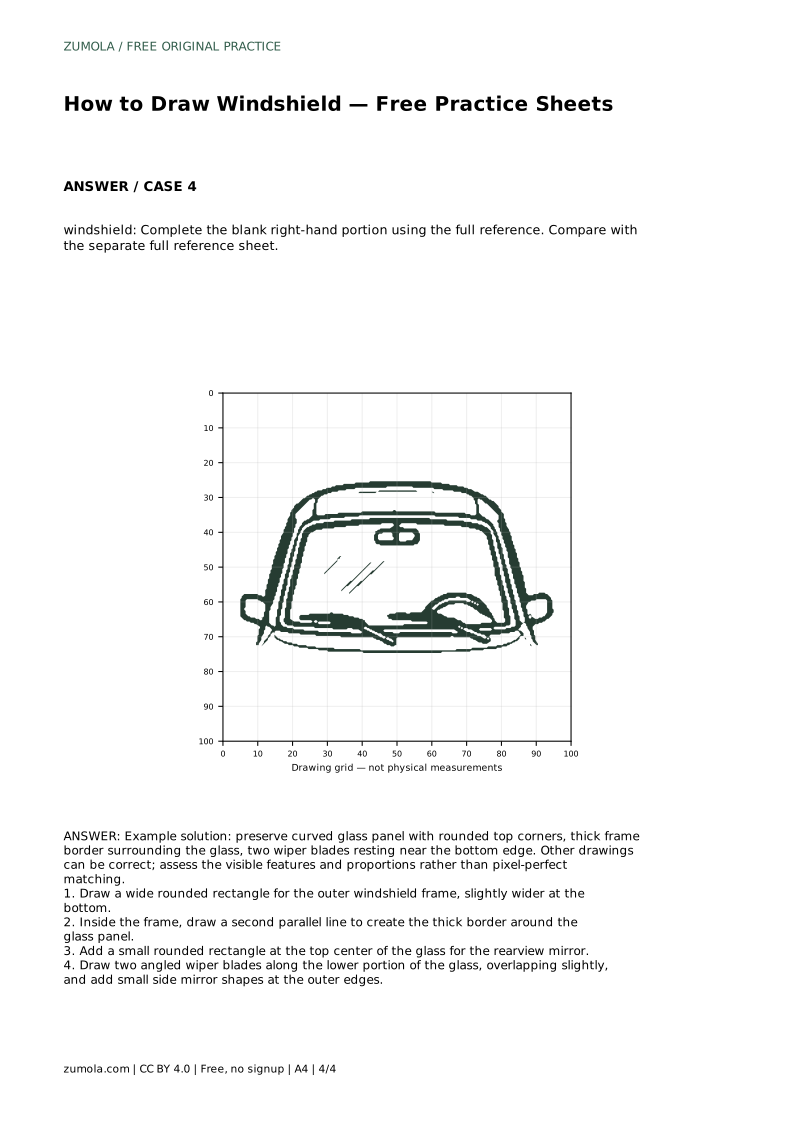
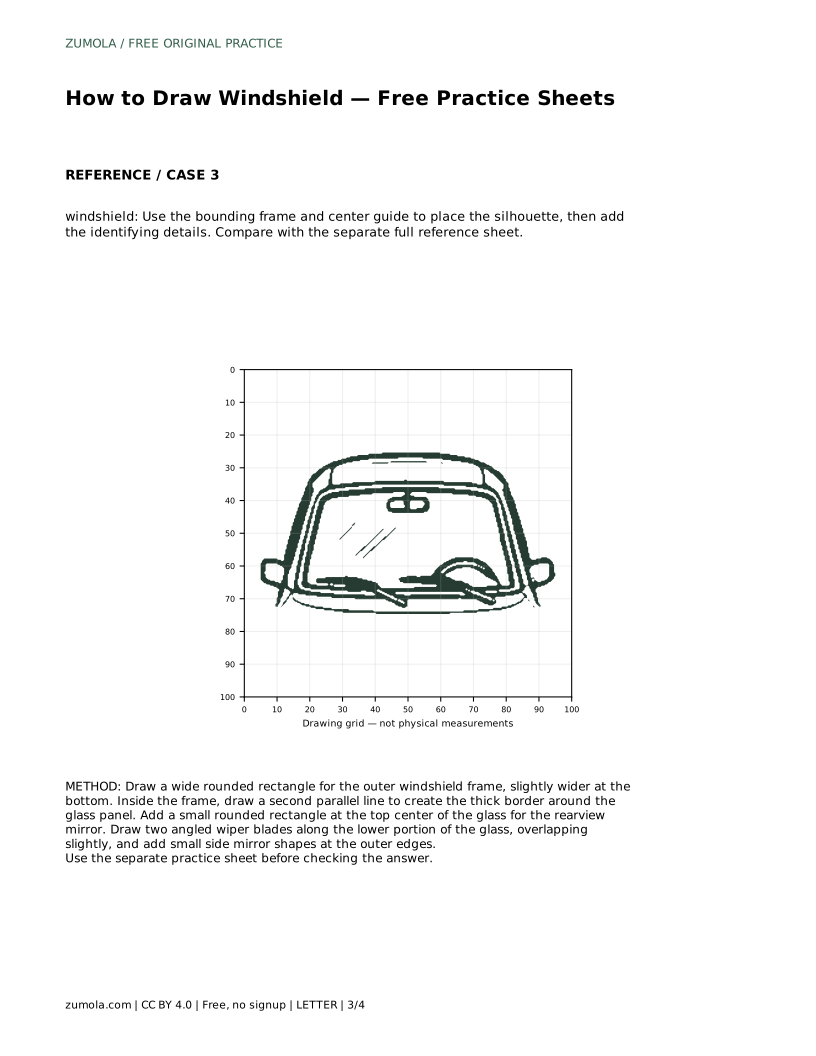
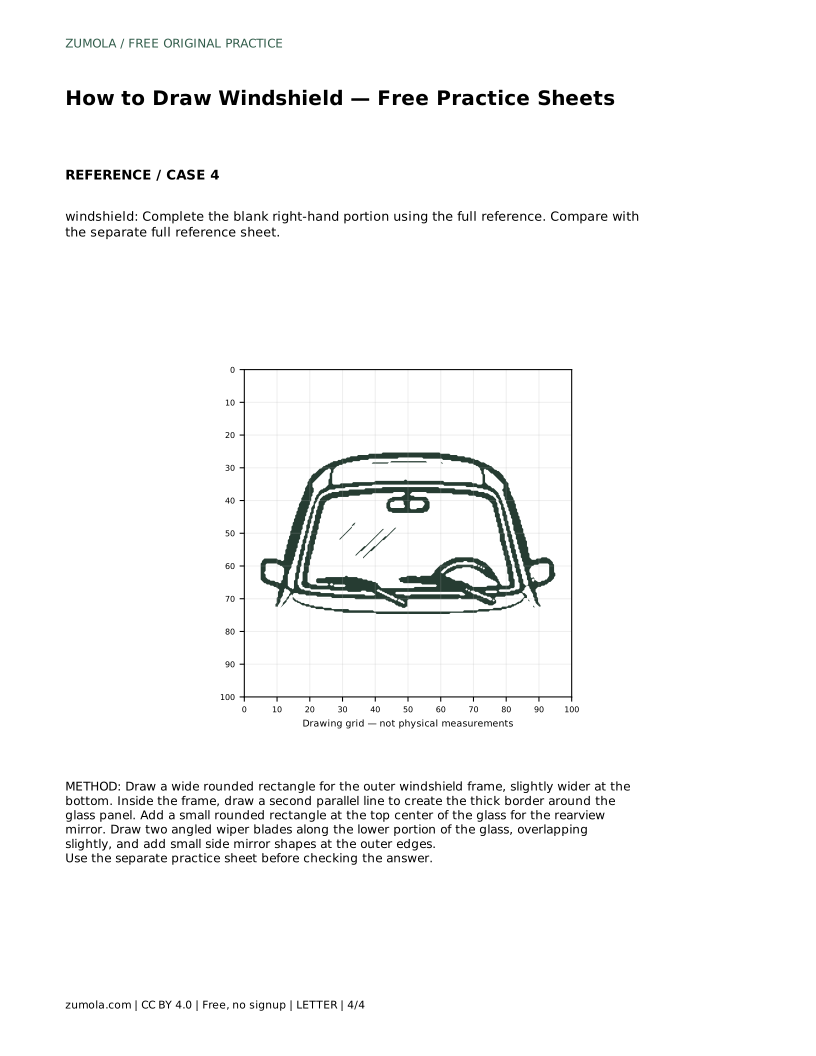
Example solution: preserve curved glass panel with rounded top corners, thick frame border surrounding the glass, two wiper blades resting near the bottom edge. Other drawings can be correct; assess the visible features and proportions rather than pixel-perfect matching. Draw a wide rounded rectangle for the outer windshield frame, slightly wider at the bottom. Inside the frame, draw a second parallel line to create the thick border around the glass panel. Add a small rounded rectangle at the top center of the glass for the rearview mirror. Draw two angled wiper blades along the lower portion of the glass, overlapping slightly, and add small side mirror shapes at the outer edges.
Make it clearly wider than tall. A broad panel with rounded top corners reads as a windshield; a square or tall shape reads as an ordinary window.
No. Leaving the glass mostly empty keeps the panel clear. One or two faint diagonal lines are enough to suggest a reflective surface.
That is acceptable. Check that the curved panel, thick border, rearview mirror and two wiper blades are all present and in sensible proportion, rather than matching every line.
All drawing practice · Free coordinate paper
Original resources · CC BY 4.0 · Free for personal and classroom use with attribution.