Reference diagrams
LETTER · Download PDF
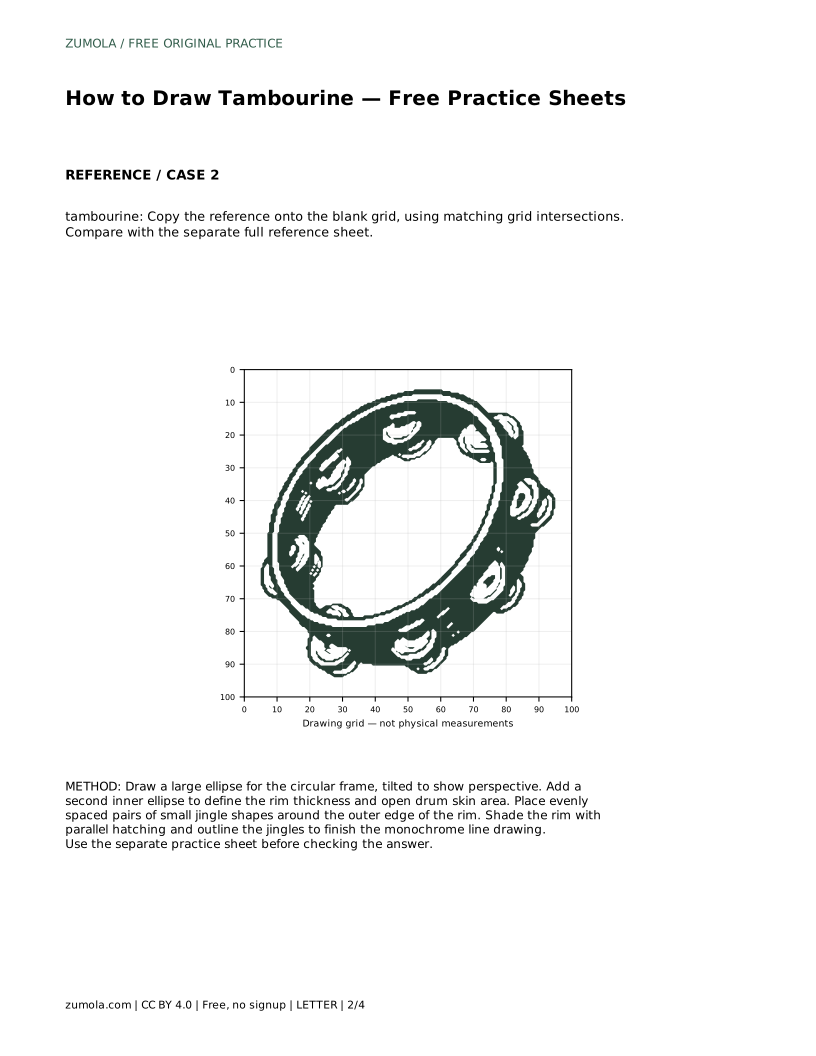
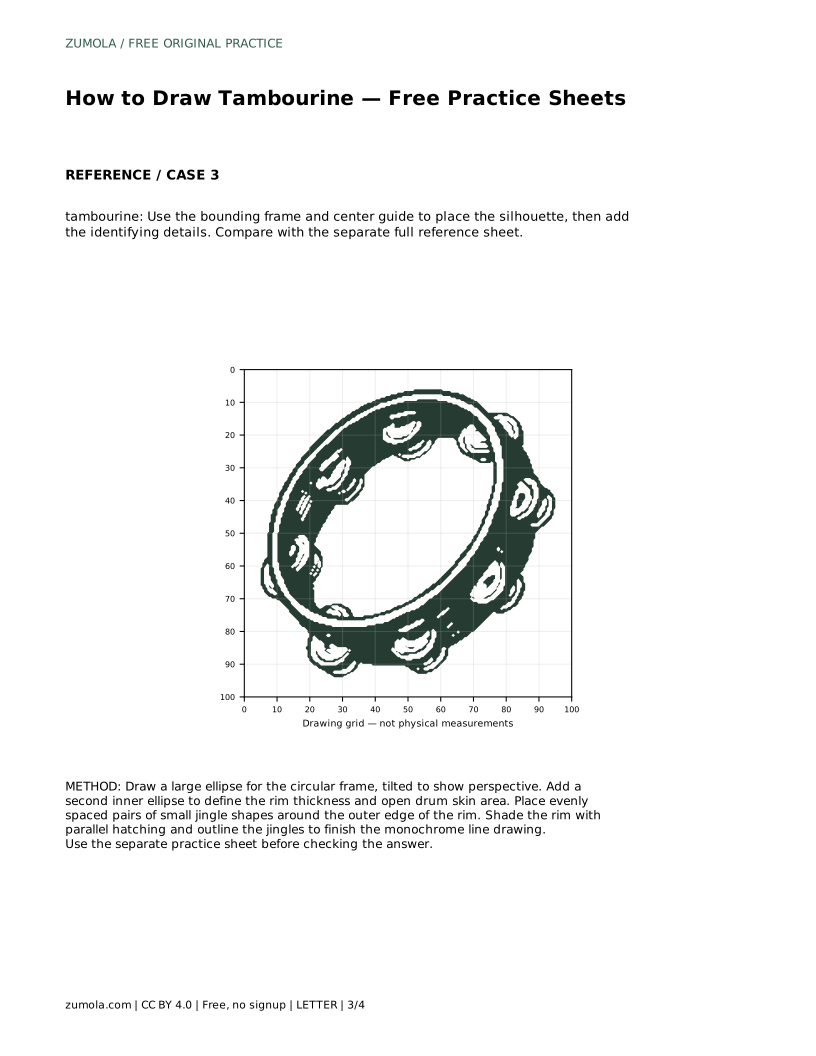
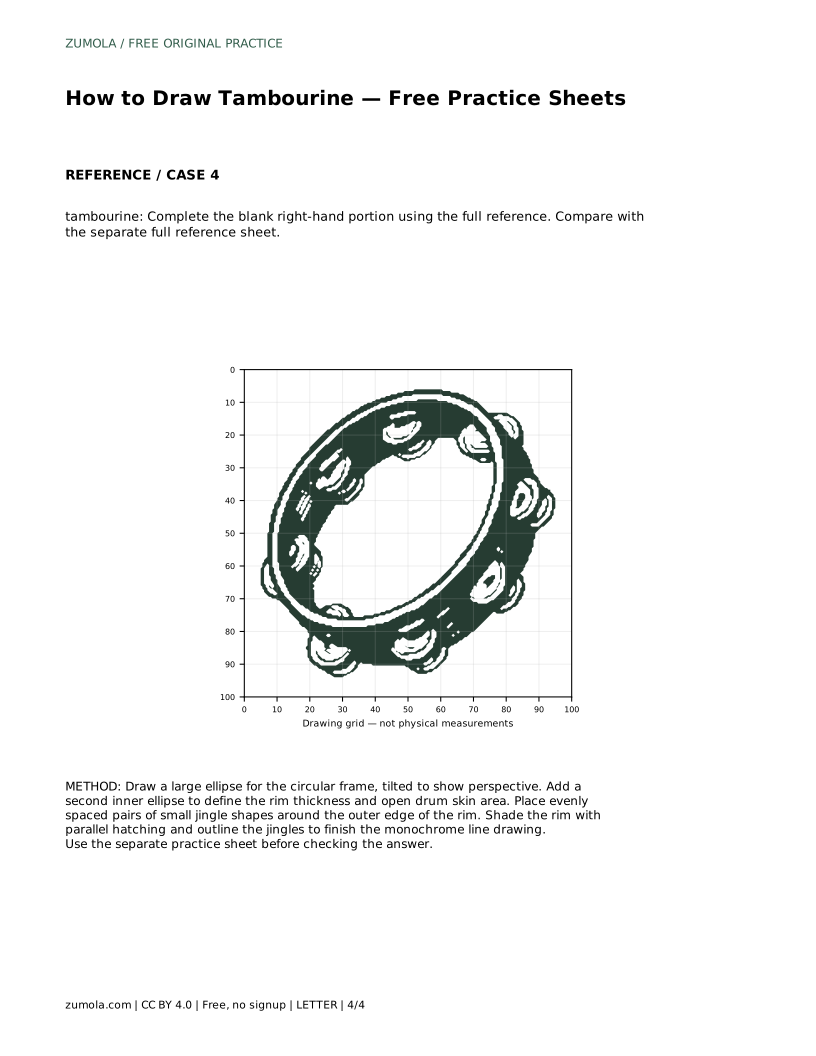
A4 · Download PDF
Free original resources
Learn to draw a tambourine with a tilted elliptical frame, inner rim, evenly spaced jingle pairs and parallel hatching. Includes a worked example and rubric.
Four original cases, with reference diagrams, practice sheets and worked answers. Everything is free; no signup required.
LETTER · Download PDF
A4 · Download PDF
LETTER · Download PDF
A4 · Download PDF
LETTER · Download PDF
A4 · Download PDF
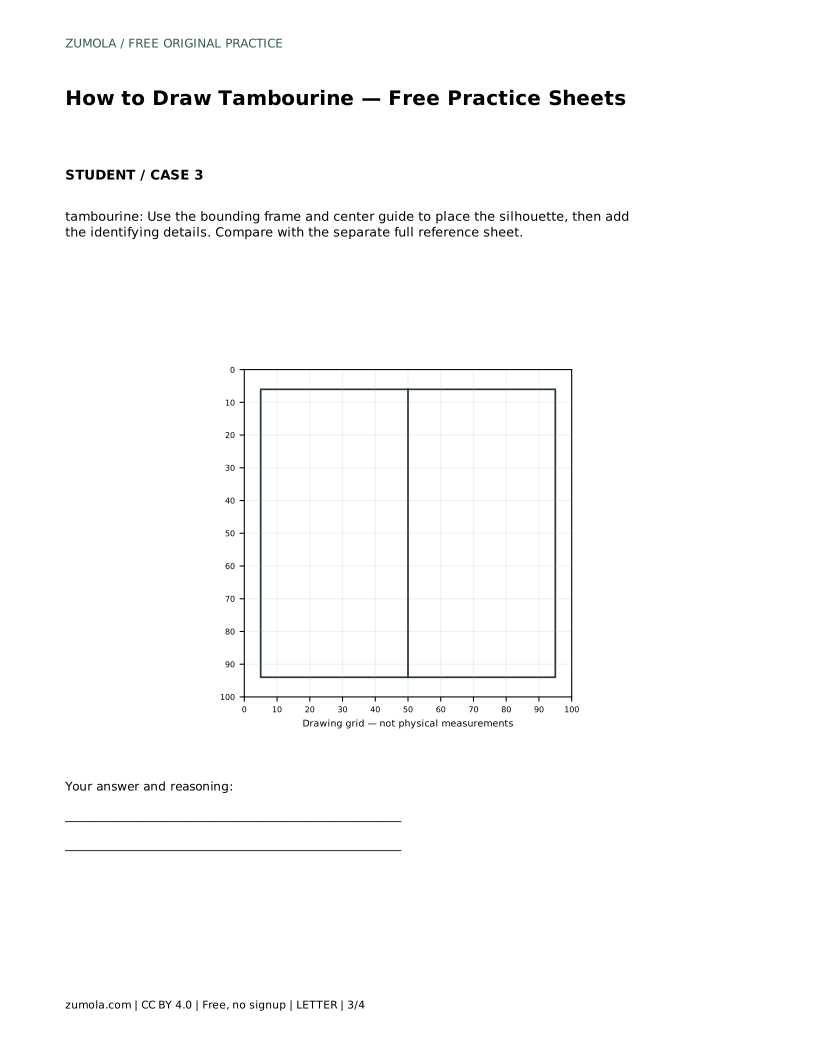
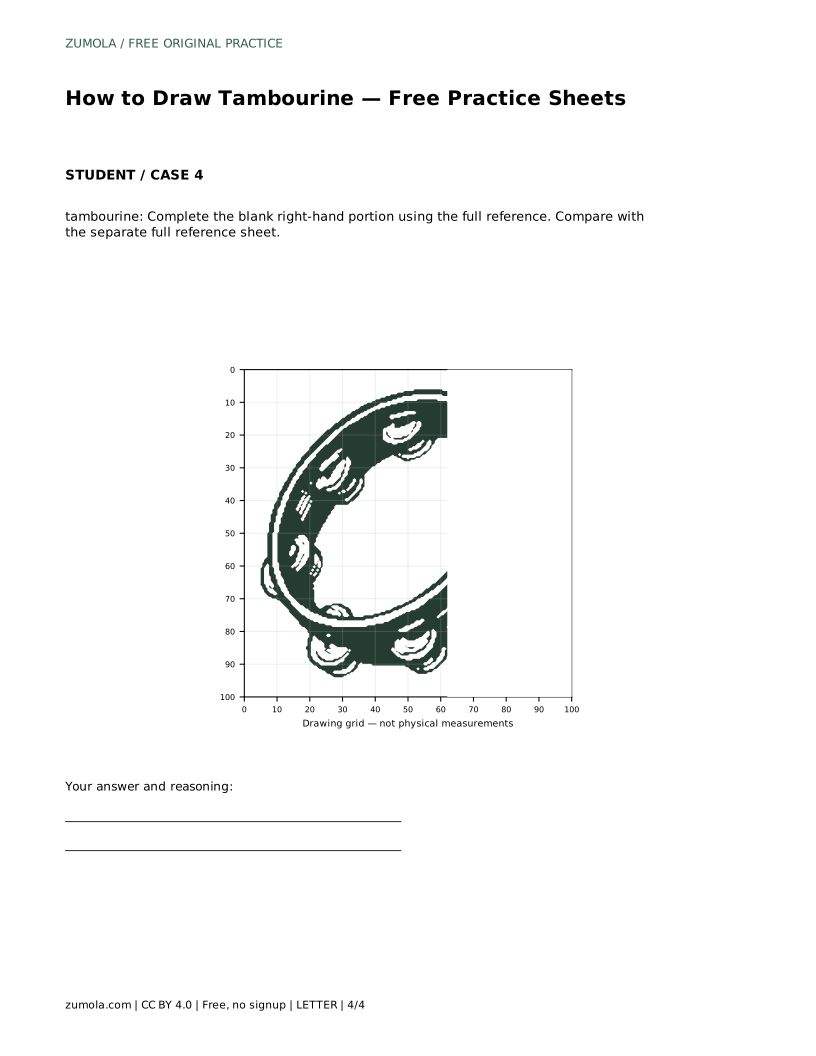
Use A4 or US Letter to match your printer. Use the stated values and conditions to solve each exercise; diagrams are not physical measuring rulers.
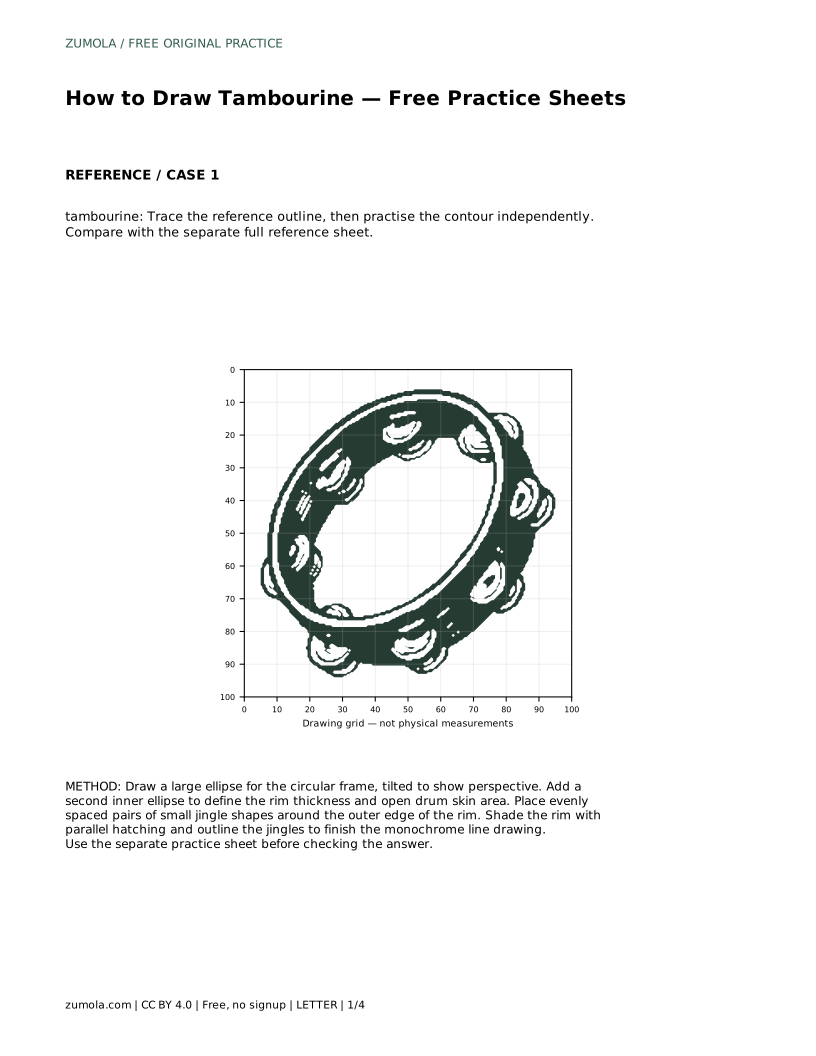
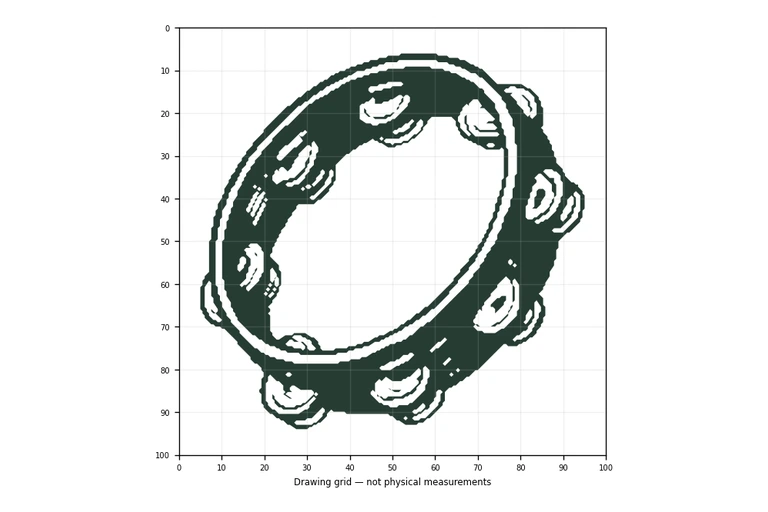
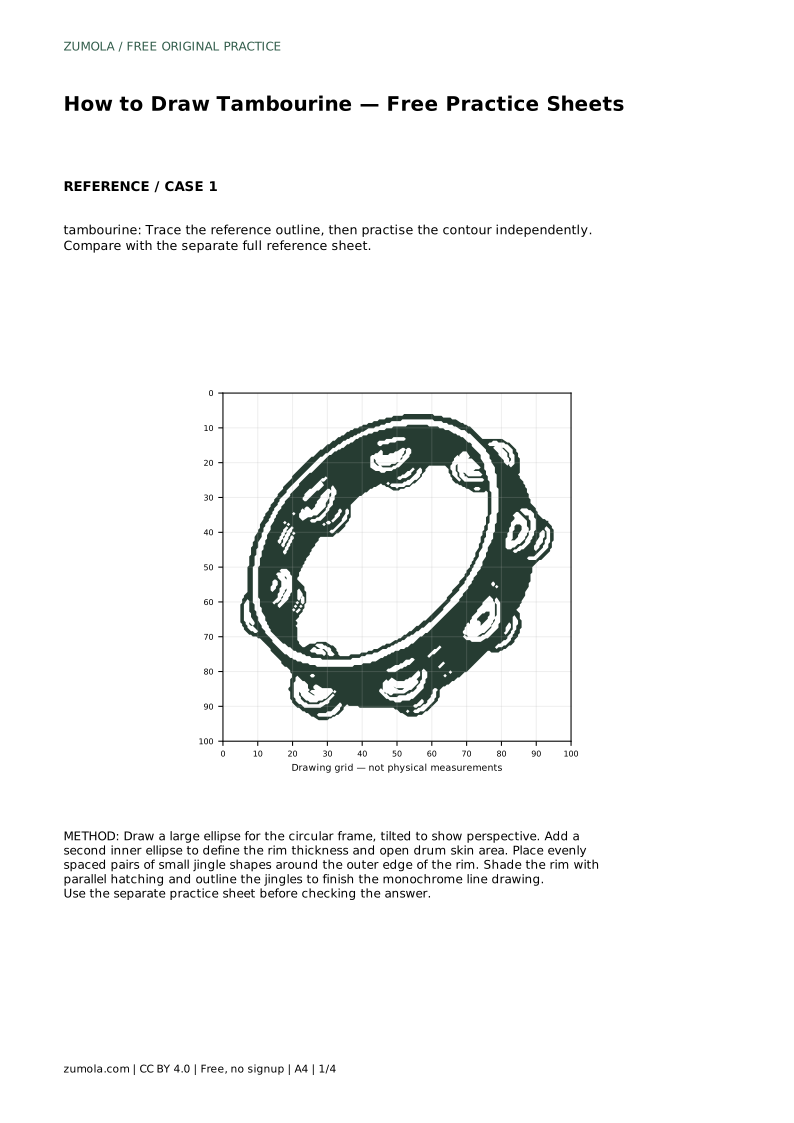
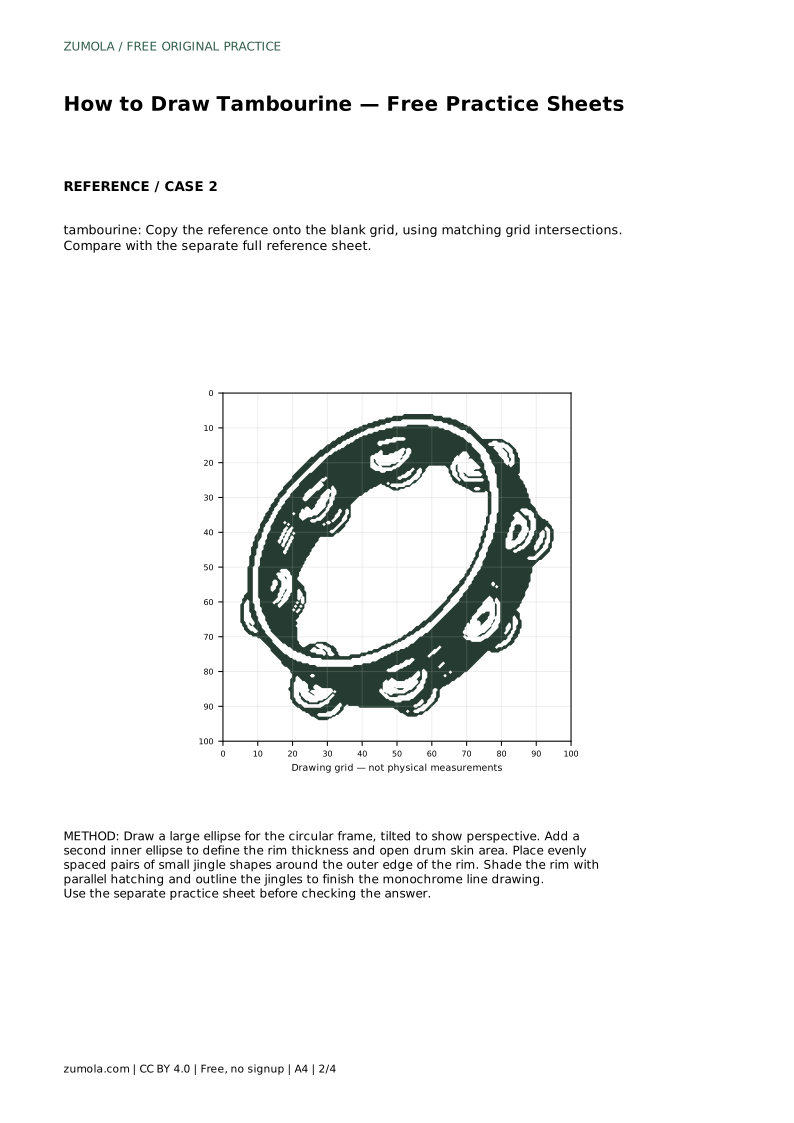
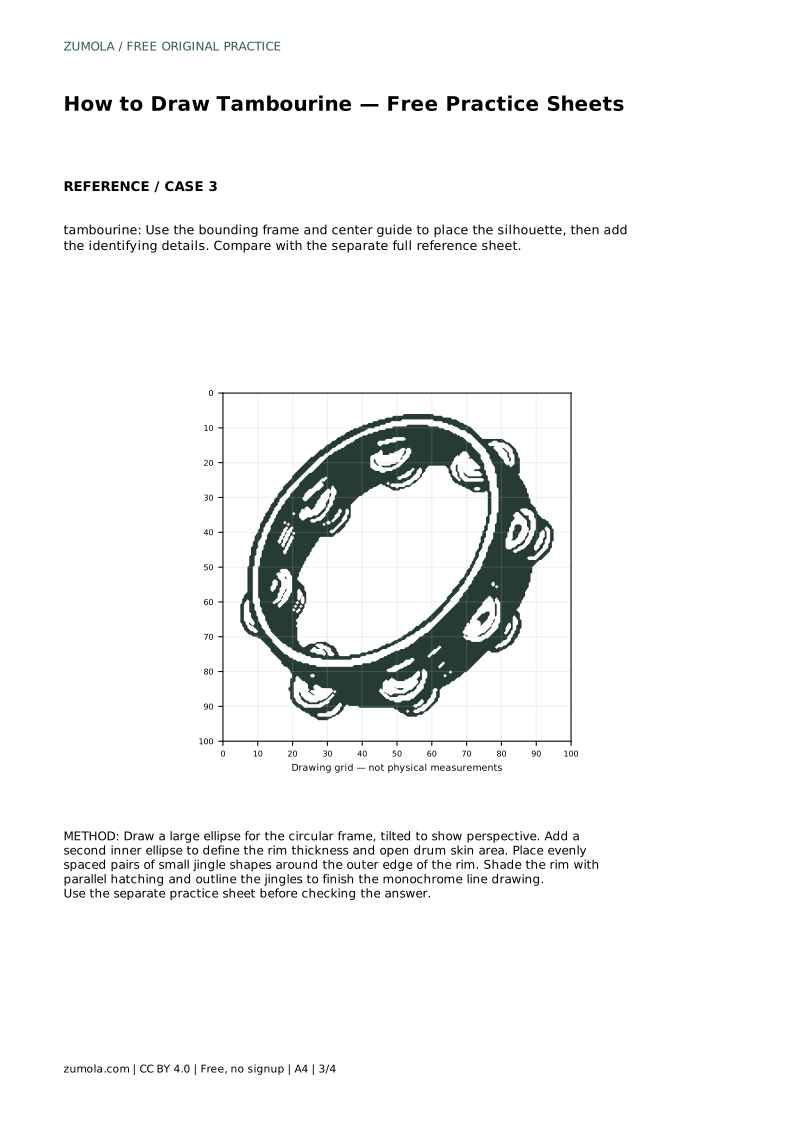
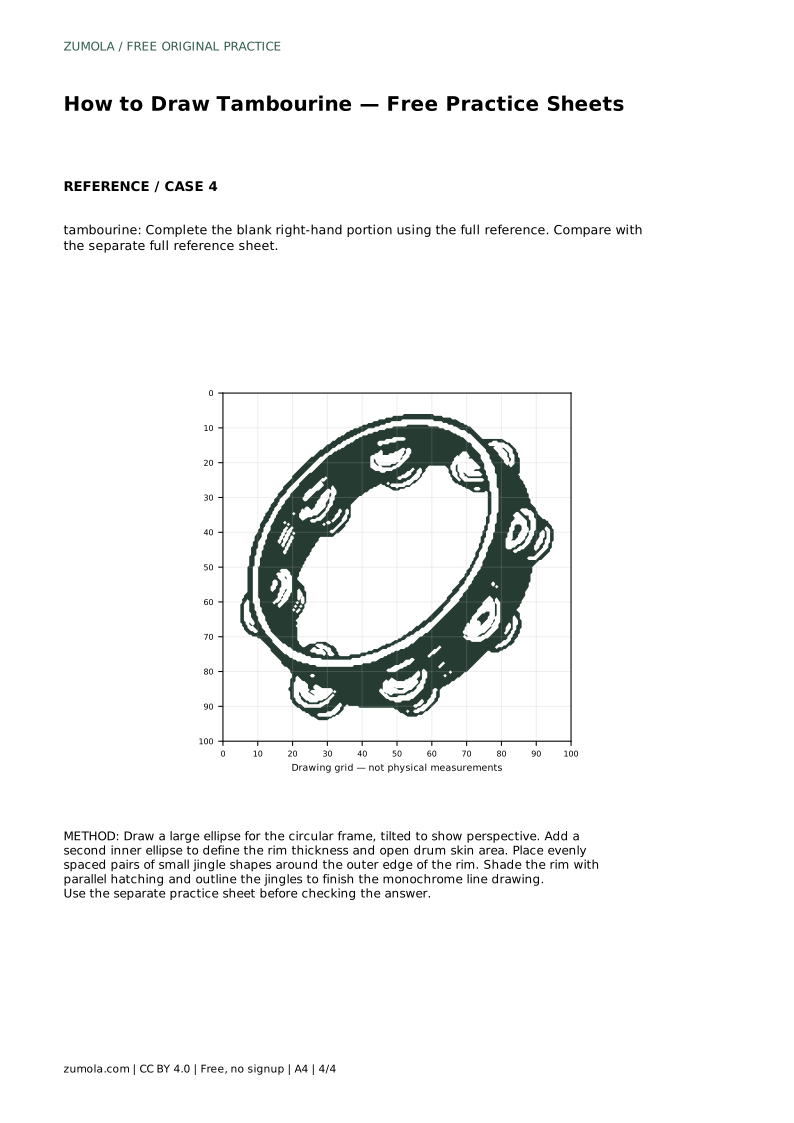
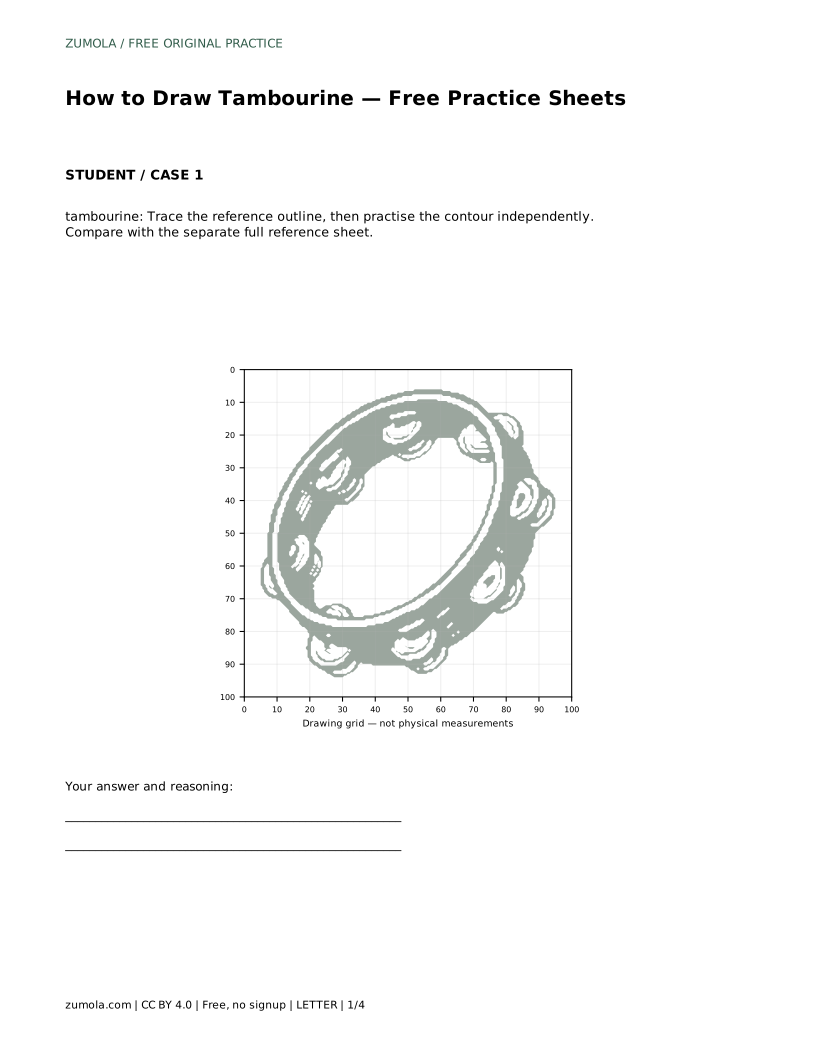
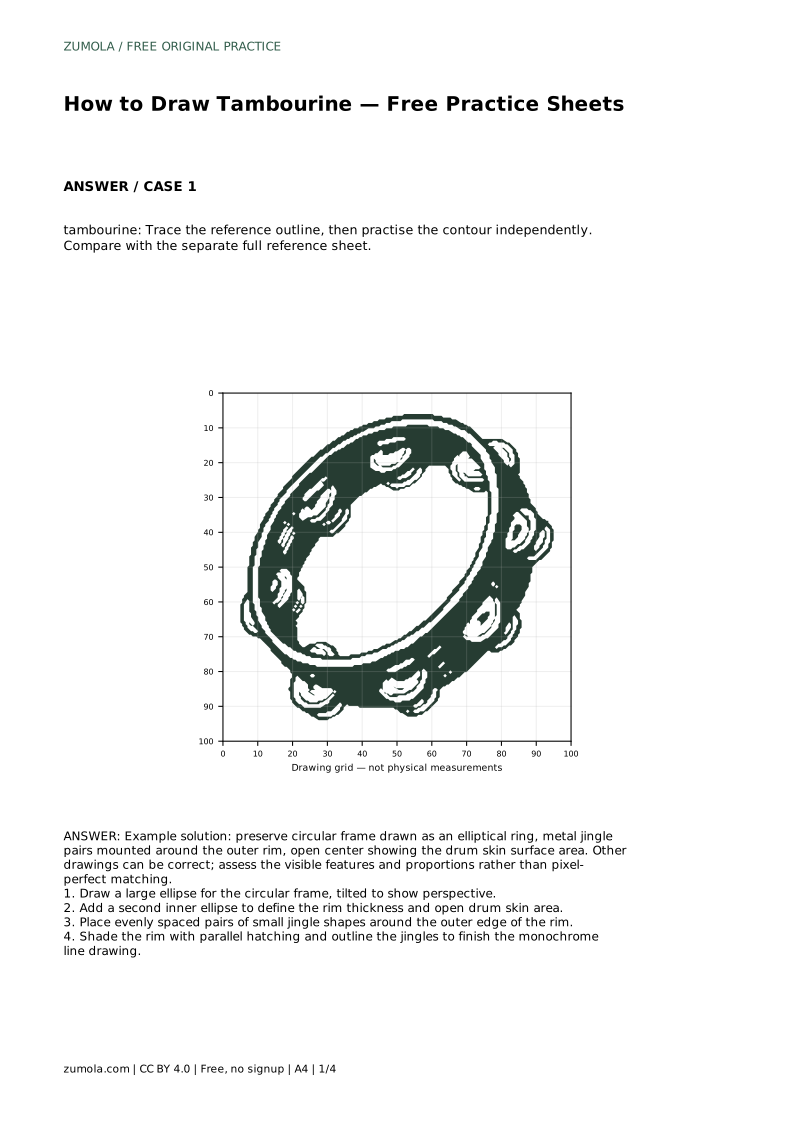
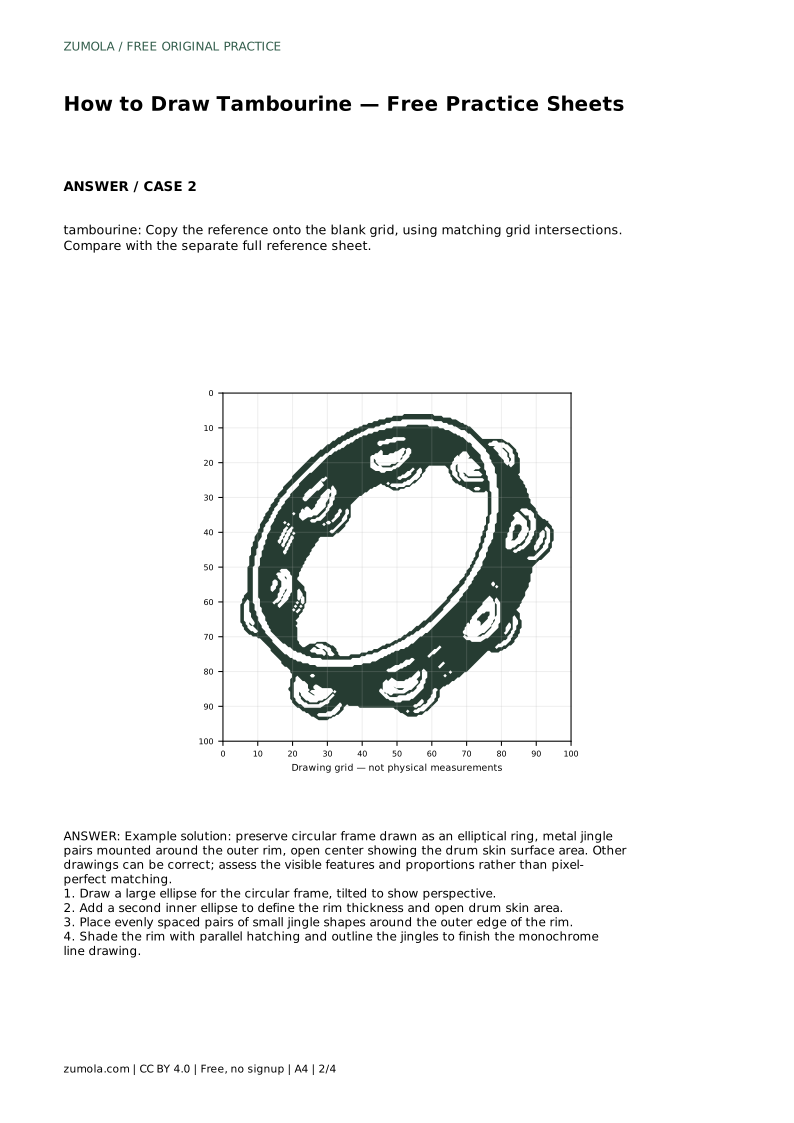
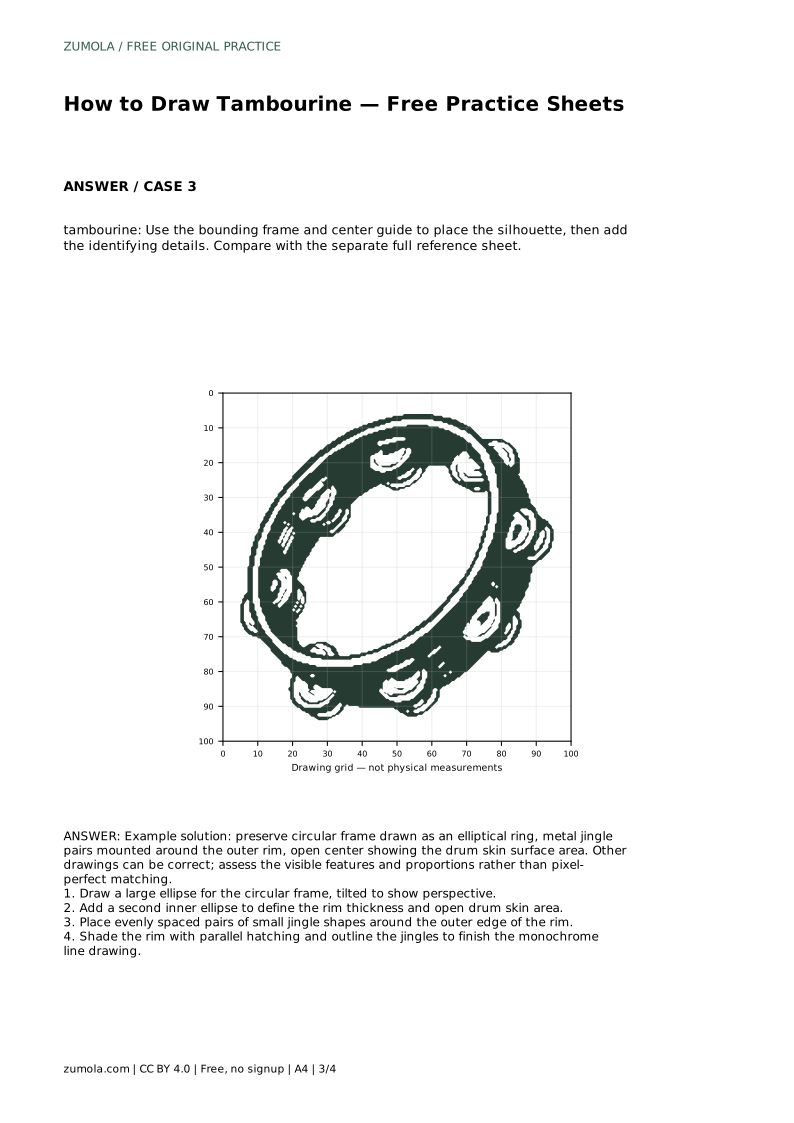
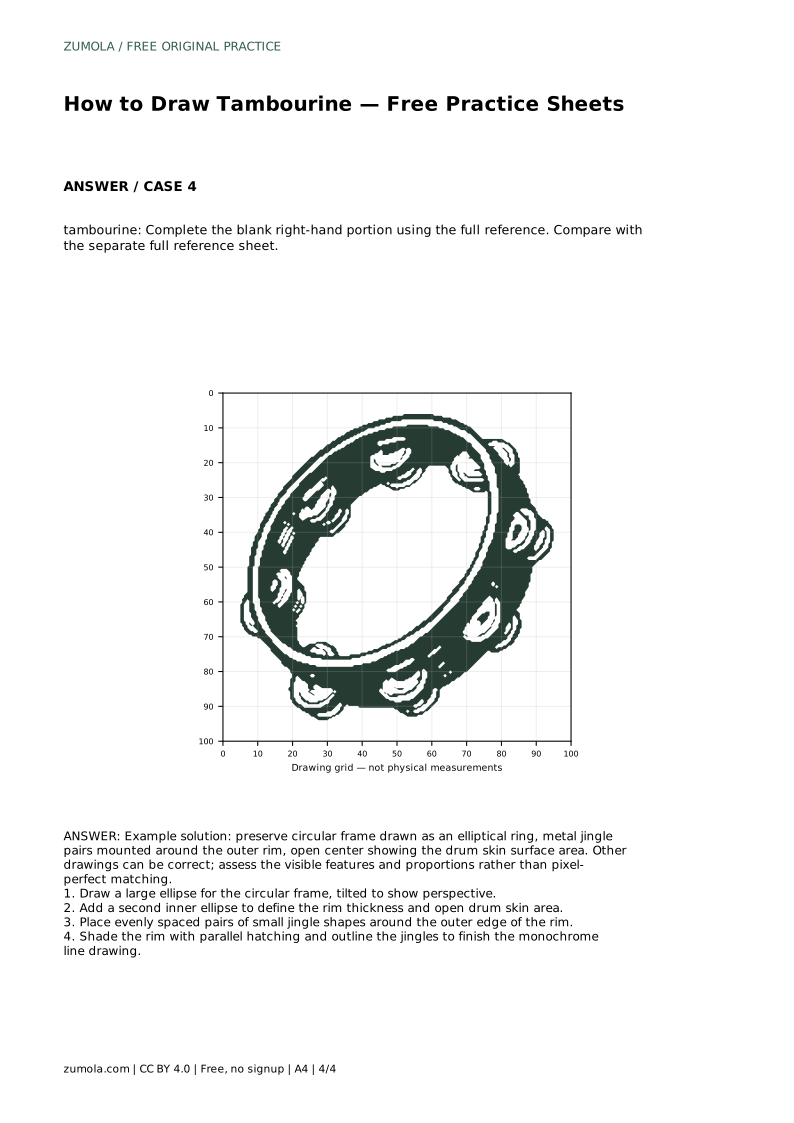
A tambourine drawing is mostly a lesson in seeing a circle in perspective. The round frame becomes an ellipse when tilted, and the jingles sit around the outer rim rather than across the open skin. This page walks through the contour in a clear order: outer ellipse, inner ellipse, jingle pairs, then shading. Use the practice sheets to trace, copy onto a grid, or complete a partial drawing, and judge your result by visible features and proportions rather than an exact match.
Treat the tambourine as a tilted disc, not a flat circle. Draw one large ellipse for the outer edge of the frame. Keep the curve smooth and continuous; a wobbly ellipse reads as a damaged instrument rather than a perspective effect. Decide the tilt before you commit, because the ellipse's width and height set the whole drawing.
Add a second ellipse inside the first to show the rim thickness. The gap between the two ellipses is the wooden or plastic frame, and the area inside the second ellipse is the open drum skin. Keep the gap fairly even all the way around. If the inner ellipse drifts toward one side, the rim will look uneven.
Jingles are mounted around the outer edge of the frame, not in the open center. Mark their positions before drawing any metal shapes. Space the pairs evenly around the rim, following the same elliptical curve as the frame. Even spacing matters more than identical jingle shapes; slight variation looks natural.
Draw each jingle as a small rounded shape, then add its partner beside it so the pairs read clearly. Keep the pairs small enough that the rim still looks like a rim. Outline each jingle so it separates from the frame, and leave the open skin area clear of metal details.
Use parallel hatching on the rim to suggest a curved surface. Keep the hatch lines close together and follow the direction of the rim rather than crossing it randomly. A little shading near the inner edge helps the frame look three-dimensional without turning the drawing into a heavy tonal study.
Finish by checking the whole contour. The outer ellipse should be continuous, the inner ellipse should sit concentrically, and the jingle pairs should follow the rim's curve. Erase stray construction marks and darken the final outlines. The result is a monochrome line drawing with clear identifying features.
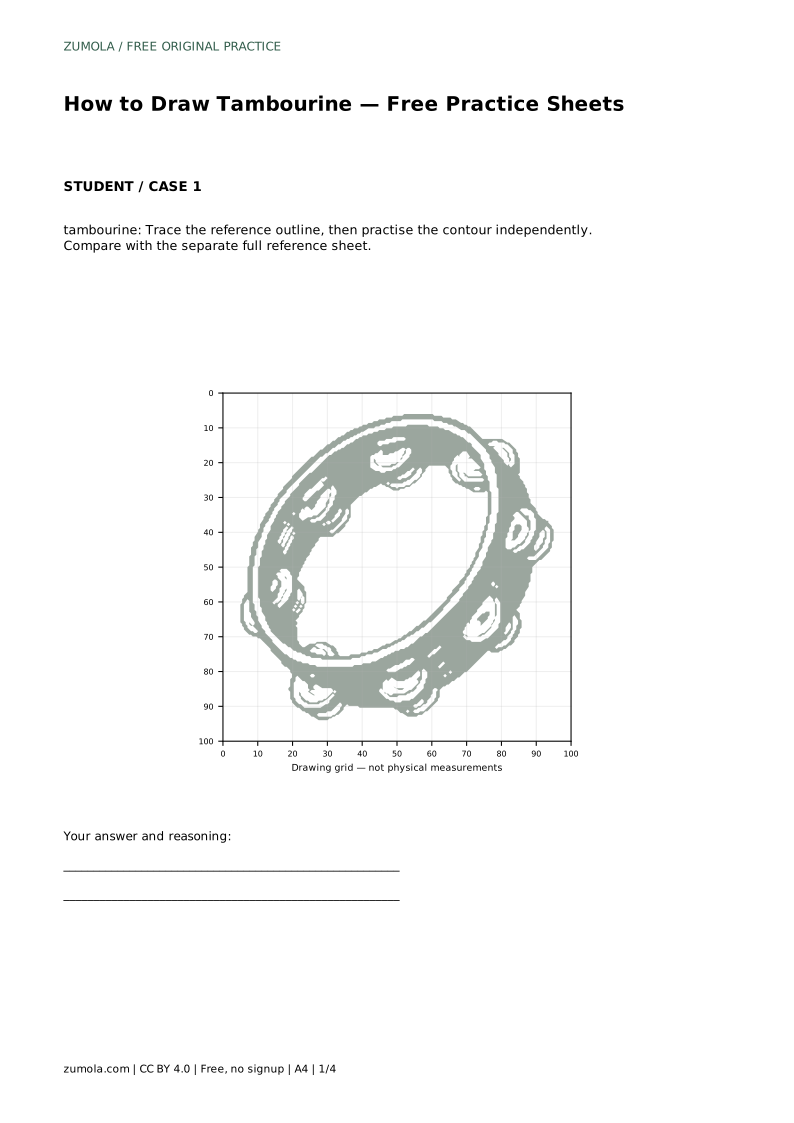
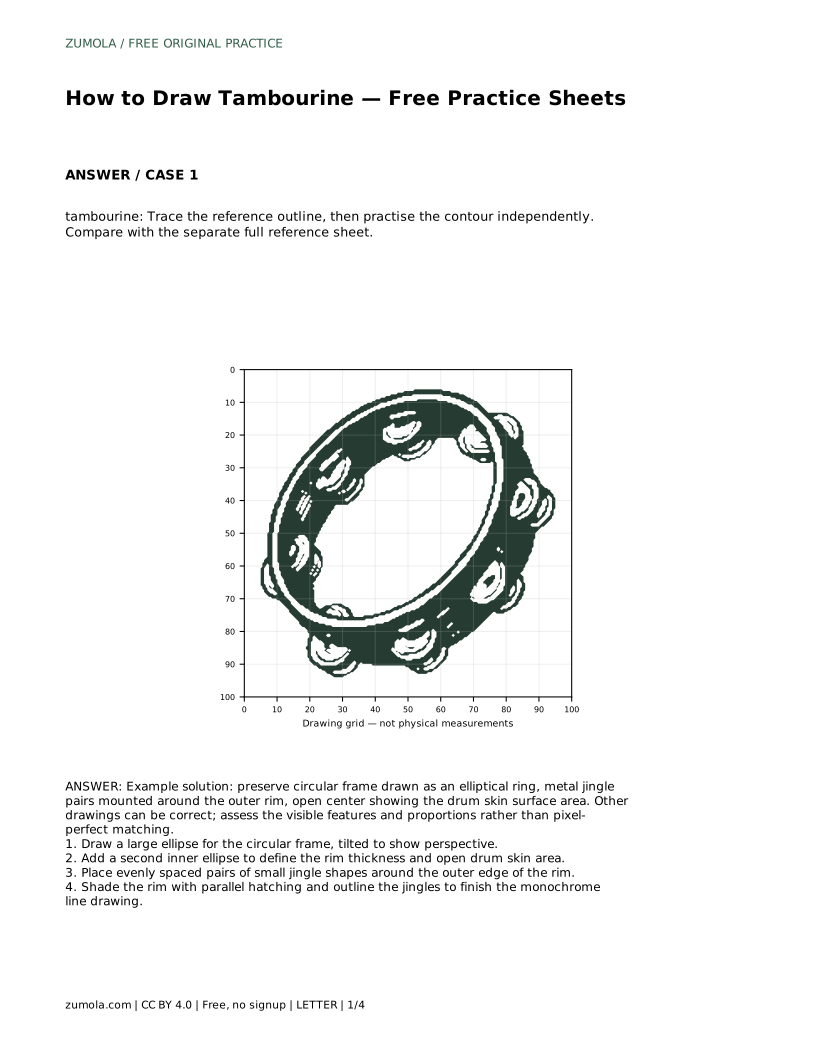
tambourine: Trace the reference outline, then practise the contour independently. Compare with the separate full reference sheet.
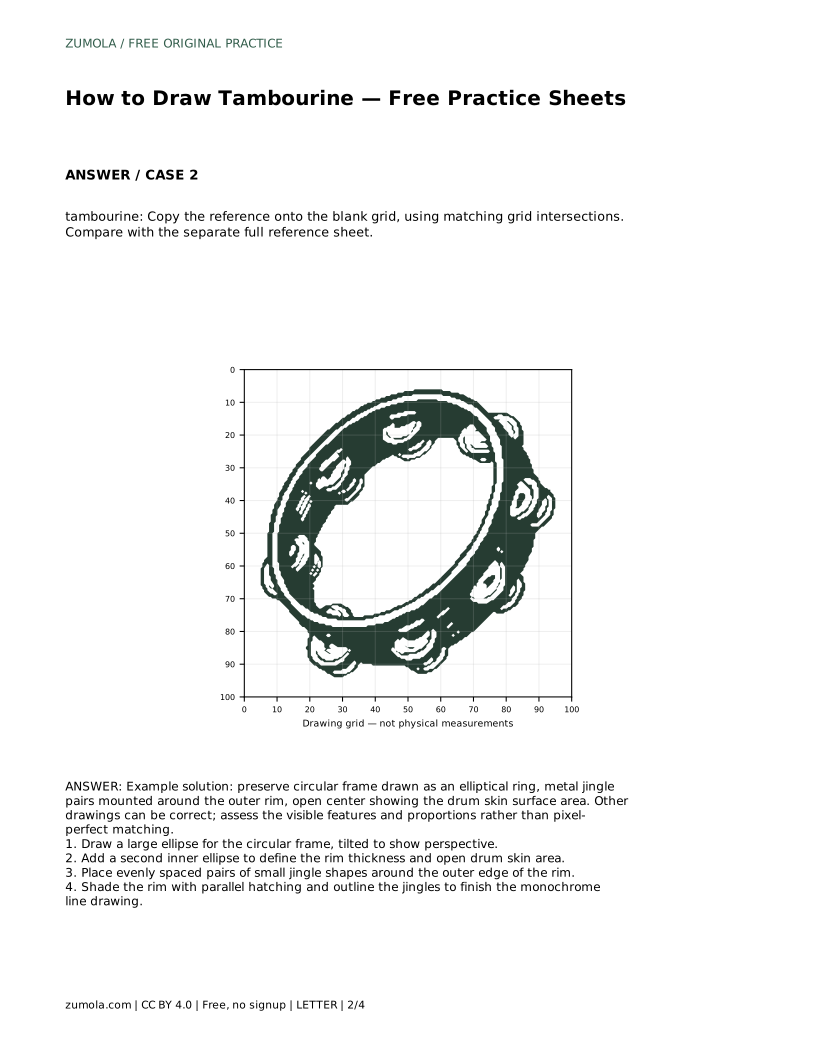
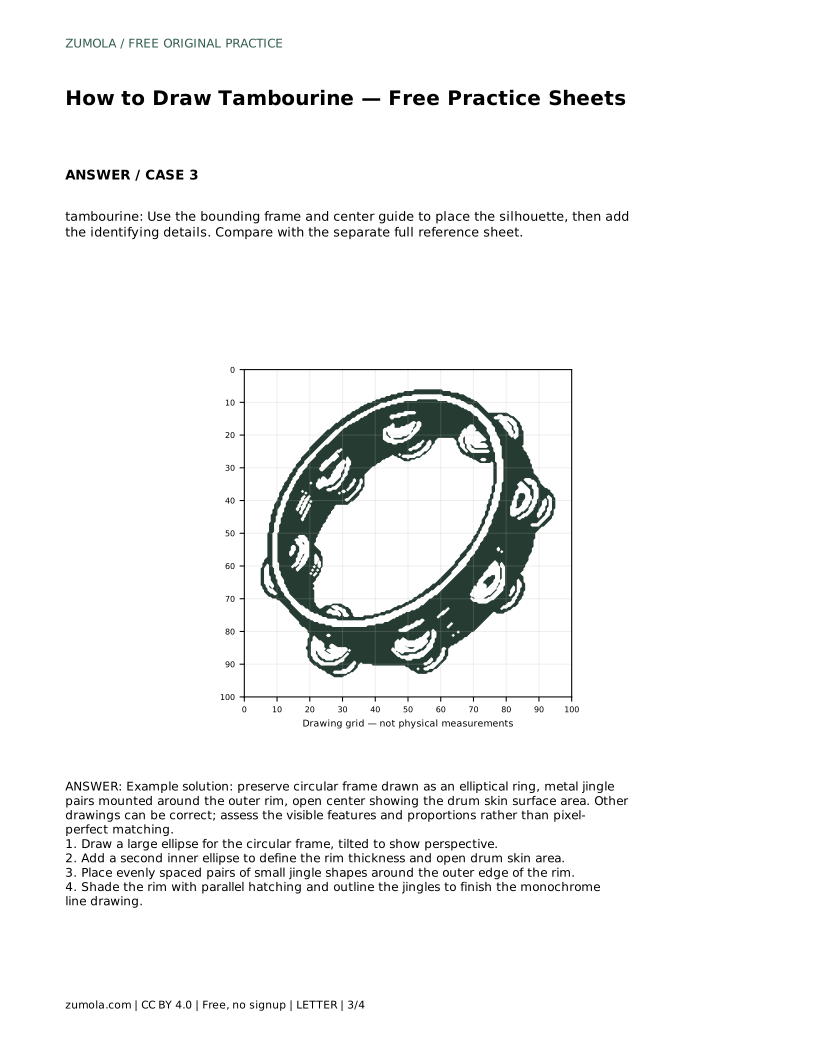
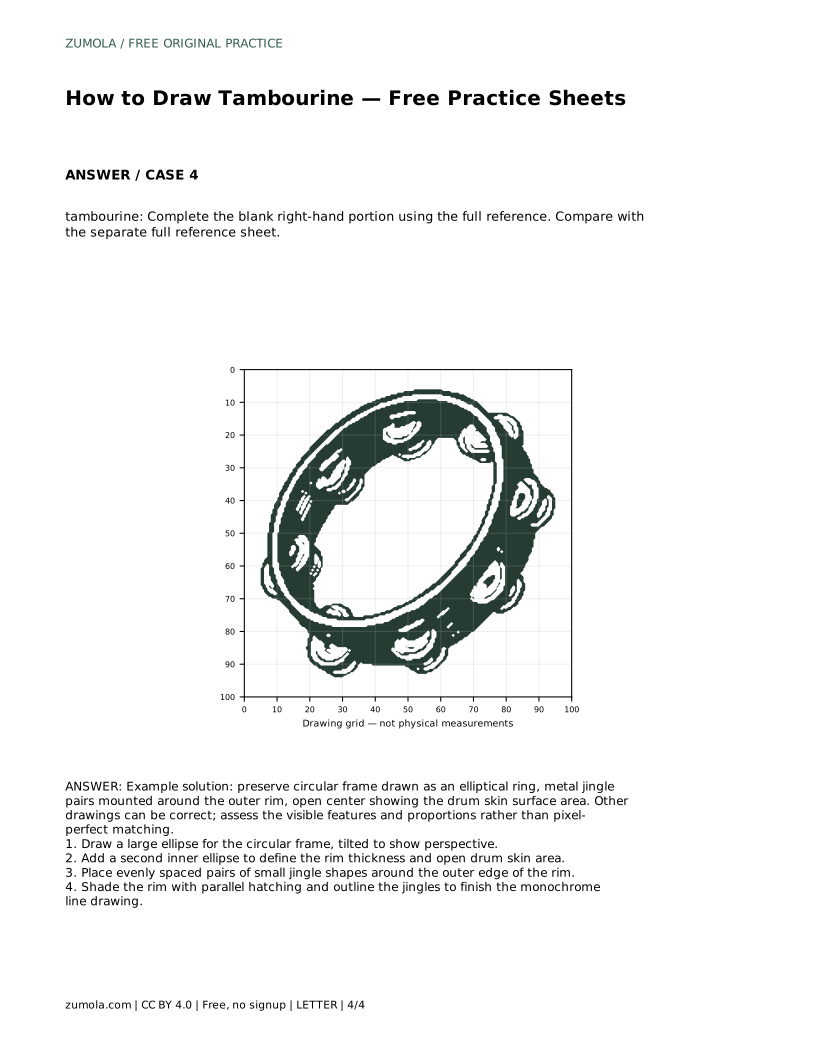
Example solution: preserve circular frame drawn as an elliptical ring, metal jingle pairs mounted around the outer rim, open center showing the drum skin surface area. Other drawings can be correct; assess the visible features and proportions rather than pixel-perfect matching. Draw a large ellipse for the circular frame, tilted to show perspective. Add a second inner ellipse to define the rim thickness and open drum skin area. Place evenly spaced pairs of small jingle shapes around the outer edge of the rim. Shade the rim with parallel hatching and outline the jingles to finish the monochrome line drawing.
Only when it is tilted. A tambourine seen face-on is a circle; a tilted one appears as an ellipse. Choose one view and keep it consistent.
There is no fixed number for a drawing exercise. Choose a count that spaces evenly around the rim and keeps each pair clearly visible.
Yes, but keep it light. The skin is the open center, so heavy shading there can make the tambourine look solid rather than hollow.
All drawing practice · Free coordinate paper
Original resources · CC BY 4.0 · Free for personal and classroom use with attribution.